Perfecting Your Thin Crust Pizza: A How-To Guide
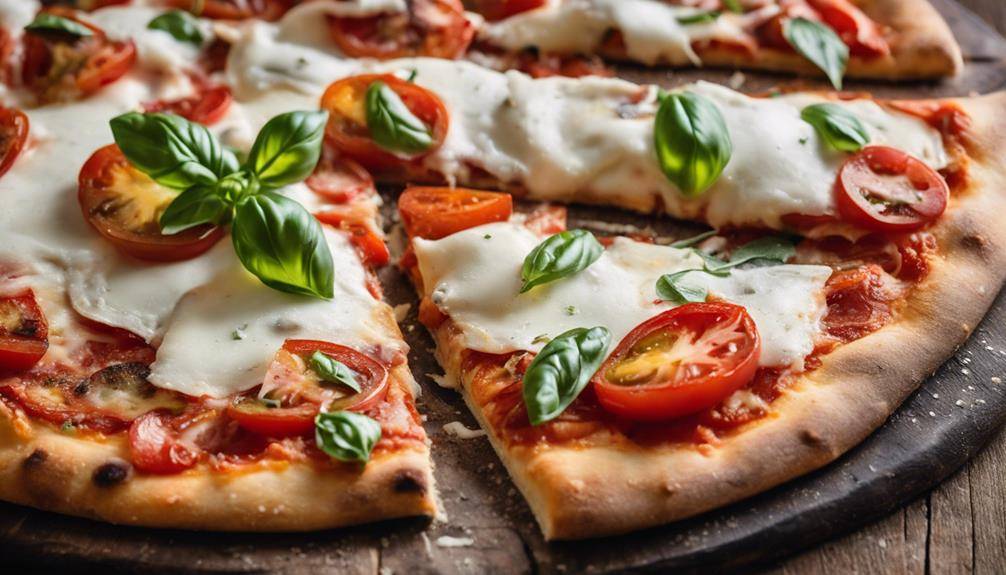
Your Thin Crust Pizza: A How-To Guide: To perfect your thin crust pizza, start with choosing the right flour, preferably a high-protein option for that ideal chewiness. Guarantee your dough hydration is around 60-65% for a crispy texture. Knead your dough well and allow it to ferment, enhancing its flavor and texture. Preheat your oven to a high temperature (around 475°F) and use a pizza stone for even baking. Roll your dough evenly to about 1/8 inch thick, then distribute your toppings wisely. This basic approach will lead you closer to pizza perfection; you'll discover more tricks and techniques just ahead.
Understanding Thin Crust Pizza
Click Here and Turn Every Masterpiece into a Showstopper!
Thin crust pizza is a delightful twist on the classic dish, known for its crispy base and minimalistic toppings. Its history traces back to the origins of pizza itself, which began in Naples, Italy, during the late 18th century. As you explore the history of pizza, you'll discover that different regions embraced and adapted the dish according to local tastes and ingredients.
In the U.S., thin crust pizza gained popularity, particularly in cities like Chicago and New York, each offering their unique spin. Chicago's thin crust is typically cut into squares, while New York's version is famous for its large, foldable slices. These regional variations showcase how thin crust pizza has evolved, reflecting the cultural influences and preferences of different communities.
When you think about thin crust pizza, consider the art of balancing flavors and textures. The crispy base allows the toppings to shine, making each bite a satisfying experience. You'll find that many people prefer this style for its lighter feel compared to thicker crusts, enabling them to enjoy more toppings without feeling overwhelmed.
Understanding thin crust pizza means appreciating its rich history and the regional variations that make it special. So, whether you're in the mood for a classic Margherita or something more adventurous, you're sure to find a thin crust pizza that suits your palate. Immerse yourself, and savor the delightful simplicity of this beloved dish!
Essential Ingredients Required
Creating the perfect thin crust pizza starts with selecting the right ingredients. Your choice of pizza sauce is vital; opt for a well-balanced sauce that complements your toppings without overpowering them. A classic tomato base works wonders, but don't shy away from experimenting with pesto or white sauce for unique flavor profiles.
Next, consider cheese varieties. Mozzarella is the go-to, but mixing in provolone, gouda, or even a sprinkle of parmesan can elevate your pie. Remember, the cheese should melt beautifully and complement your chosen toppings.
Speaking of toppings, the combinations are endless. From traditional pepperoni and mushrooms to gourmet options like arugula and truffle oil, think about how different toppings interact. Keep in mind the baking temperatures; high heat is necessary for achieving that crispy crust without burning your toppings.
You'll also want to think about crust variations. Whether you're going for a classic thin crust or a garlic-infused option, the right blend of flavors will enhance the overall experience. Equip yourself with essential kitchen tools, like a pizza stone or a peel, to guarantee even cooking.
For serving suggestions, think about side dishes that pair well, like a fresh salad or garlic knots. Don't forget to choose drink pairings that complement your pizza; a light beer or a crisp white wine often works well. With the right ingredients and thoughtful combinations, you're on your way to crafting the perfect thin crust pizza!
Choosing the Right Flour
When it comes to crafting the perfect thin crust pizza, the type of flour you choose plays an essential role. The right flour can greatly influence your crust's texture and flavor. You'll want to take into account flour types with varying protein content, as this affects gluten formation. Higher protein flours, like bread flour, create a chewier crust, while lower protein options, such as cake flour, yield a more delicate texture.
Hydration levels are another important factor. Flours with higher protein content usually absorb more water, which can help create a crispier crust. Experimenting with flour blends can also be advantageous, mixing all-purpose flour with bread flour for a balanced approach that combines chewiness with tenderness.
Don't overlook specialty flours, such as semolina or tipo "00" flour, which can add unique flavors and textures. If you're keen on organic options, many local sources offer high-quality organic flours that can elevate your pizza-making experience.
For those needing gluten-free alternatives, there are various options available, like almond flour or rice flour. However, keep in mind that gluten-free flours often require additional binding agents to mimic the texture of traditional flours.
Ultimately, the choice of flour will shape your pizza's character, so don't hesitate to explore different types and blends. Your perfect thin crust pizza awaits, and the right flour is the first step in your delicious journey!
Perfecting the Dough Recipe
Now that you've chosen the right flour, it's time to focus on perfecting your dough recipe. Start by considering dough hydration, which is vital for achieving the right texture. A hydration level between 60-65% usually works well for thin crust pizza. Next, activate your yeast properly; dissolve it in warm water and let it sit for about 5-10 minutes until bubbly. This step is essential for a good rise.
When it comes to seasoning options, don't skimp on salt. It not only enhances flavor but also strengthens the dough. You can also experiment with herbs or garlic powder for added depth. As you mix the ingredients, choose a method that suits your style, whether it's hand mixing or using a stand mixer.
After mixing, allow for resting periods. This helps gluten develop, resulting in a better dough texture. Also, remember to control the fermentation temperature; a cooler environment will slow fermentation, allowing for more complex flavors. Consider dough aging in the refrigerator for a day or two—this enhances flavor variations considerably.
For dough storage, if you're not using it right away, shape it into balls and refrigerate or freeze. Just remember to let it come to room temperature before stretching. Mastering these elements will set you on the path to creating the perfect thin crust pizza that's both flavorful and satisfying.
Kneading Techniques for Dough
When it comes to thin crust pizza, kneading your dough properly is essential for gluten development, which gives your crust that perfect chewy texture. You can choose between hand kneading and using a machine, each with its own benefits. Let's explore how these techniques impact your dough and ultimately your pizza.
Importance of Gluten Development
Gluten development is essential for achieving that perfect thin crust pizza, and mastering kneading techniques can make all the difference. When you knead the dough, you're activating the proteins in the flour, which work to create a strong gluten structure. This structure is what gives your crust its characteristic chewiness and allows it to hold up under toppings.
To develop gluten effectively, you'll want to focus on a few key techniques. Start by mixing your ingredients until they come together, then knead the dough with your palms, pushing it away and folding it back over itself. This process helps align the gluten strands, enhancing dough elasticity. You should knead for about 8-10 minutes, or until the dough is smooth and elastic to the touch.
Keep an eye on the dough's texture; it should spring back when poked. If it feels too sticky, don't hesitate to add a bit more flour, but avoid overdoing it, as too much can hinder gluten development. Remember, well-developed gluten is your secret weapon for that crispy, yet tender, thin crust that'll impress your family and friends!
Hand Kneading Vs. Machine
Perfecting your thin crust pizza starts with the right kneading technique, whether you choose to do it by hand or with a machine. Hand kneading allows you to connect with your dough, giving you the chance to feel its texture and elasticity. As you knead, you can easily adjust the moisture content or add more flour if necessary. This tactile approach helps you develop a deeper understanding of your dough, ensuring the perfect consistency for your crust.
On the other hand, machine mixing can save you time and effort, especially if you're making larger batches. A stand mixer can efficiently knead your dough to the right smoothness and elasticity without tiring your arms. However, it may lack the personal touch that comes with hand kneading, which can result in a slightly different texture.
Ultimately, the choice between hand kneading and machine mixing depends on your preference and the amount of time you want to spend. Experiment with both techniques to see which one produces the thin crust pizza you crave. Whichever you choose, the key is to achieve that ideal balance of gluten development for the perfect crust.
Fermentation and Rising Time
Fermentation is key to revealing the flavors in your thin crust pizza dough. You'll want to create ideal rising conditions to let the yeast work its magic, developing a light and airy texture. Timing plays an essential role here, so pay attention to how long you let your dough rest for the best flavor enhancement.
Importance of Fermentation
The dough's rise is essential for achieving that delightful thin crust pizza texture you crave. Fermentation plays a huge role in this process, driving yeast activity that creates gas bubbles, which help your dough rise. By controlling the fermentation duration and temperature, you can enhance both the dough texture and flavor complexity.
Different yeast strains contribute unique characteristics, so experimenting with them can yield exciting results. If you're using sourdough, for instance, you'll get that distinct sourdough flavor alongside a chewy texture, making your pizza stand out. The benefits of fermentation extend beyond just rising; it also promotes aroma development, enriching the overall sensory experience of your pizza.
Utilizing varied fermentation methods can also affect the final product. A longer fermentation time at cooler temperatures can lead to more pronounced flavors and a better crumb structure. Conversely, a shorter, warmer fermentation can speed up the process, but may sacrifice some flavor. Ultimately, understanding the importance of fermentation will elevate your thin crust pizza, ensuring it's not just a meal, but a delightful experience. So, don't rush it—let that dough rise and develop to perfection!
Ideal Rising Conditions
For achieving the best rise in your thin crust pizza dough, it is crucial to create the right conditions during fermentation. Start by focusing on temperature control; an ideal range is between 75°F to 80°F. Warmer temperatures can boost yeast activity, but too much heat might lead to over-proofing. Next, pay attention to humidity levels. A slightly humid environment helps maintain dough elasticity, allowing it to stretch without tearing.
Utilize proofing techniques like covering your dough with a damp cloth or placing it in a turned-off oven with a bowl of hot water. This method creates a stable environment, promoting excellent rising duration. Keep in mind that environmental factors like drafts or direct sunlight can negatively affect your dough.
Incorporating resting periods during the kneading process can also enhance dough elasticity. Allow your dough to relax for 10-15 minutes between kneading sessions. This practice helps avoid tough, unyielding dough. By controlling these factors, you'll create the perfect environment for your dough to rise beautifully, setting the stage for a delicious thin crust pizza that's light and crispy.
Timing for Flavor Development
Achieving the right timing for flavor development is key to enhancing your thin crust pizza. You can greatly elevate your pizza's taste by mastering fermentation and rising times. Begin by allowing your dough to rest, which enhances yeast activity. This rest period gives the yeast time to produce fermentation flavors that contribute to the overall flavor profiles of your crust.
Temperature impacts yeast performance, so keep your dough in a warm environment for best results. Experiment with timing techniques, like cold fermentation, which can develop deeper flavors over several days. Don't rush; give your dough the time it needs to reach its peak.
As the dough rises, you'll notice improvements in crust aroma and texture. When you finally roll it out, the ingredient synergy becomes evident; the flavors meld beautifully, enhancing seasoning enhancements like herbs or spices you might add.
During baking, monitor the baking duration closely. A well-timed bake brings out that perfect crunch, while underbaking can hinder flavor development. By paying attention to these elements, you'll create a thin crust pizza that's not just good but truly exceptional.
Preparing Your Work Surface
Creating the perfect thin crust pizza starts with a well-prepared work surface. To guarantee your pizza-making experience is seamless, you need to prioritize cleanliness and organization. Start by clearing your area of any clutter. A tidy workspace not only enhances your focus but also prevents cross-contamination.
Next, consider your surface materials. A clean countertop, preferably made of wood or marble, works best for dough preparation. These surfaces allow for easy kneading and rolling without sticking. Once you've selected your workspace, use these cleaning tips: wipe down the surface with warm, soapy water, and follow up with a disinfectant spray. This guarantees that any lingering bacteria from previous cooking sessions are eliminated.
Now, let's talk about workspace organization. Gather all your prep tools before you plunge into making your pizza. You'll need a mixing bowl, a rolling pin, measuring cups, and a bench scraper. Having everything within arm's reach can save you time and frustration.
Don't forget to have your ingredients handy as well. Measure out your flour, water, yeast, and salt beforehand. This prep not only streamlines the process but also helps you keep track of your ingredients.
Rolling Out the Dough
When rolling out your thin crust pizza dough, choosing the right flour is key to achieving the perfect texture. You'll want to aim for an ideal dough thickness that allows for a crispy yet chewy bite. Using proper techniques for even rolling will guarantee your pizza cooks uniformly and tastes fantastic.
Choosing the Right Flour
The foundation of a great thin crust pizza lies in the flour you choose, as it directly affects the texture and flavor of the dough. When selecting flour types, consider those with higher protein percentages, like bread flour, which typically has around 12-14% protein. This boosts gluten content, giving your crust that desirable chewiness. If you prefer a lighter texture, you might explore specialty flours like 00 flour, commonly used in Italian pizzas.
Hydration levels are significant, too. A higher hydration dough can yield a slightly airier crust, while lower hydration results in a denser texture. Don't hesitate to experiment with blending flours—mixing all-purpose flour with a bit of whole wheat can enhance flavor and nutrition without sacrificing texture.
If you're leaning towards organic options, look for flours that are certified organic. Proper flour storage is essential to maintain freshness; keep your flour in a cool, dark place in an airtight container. With these tips in mind, you're well on your way to choosing the right flour for that perfect thin crust pizza.
Ideal Dough Thickness
Achieving the perfect thin crust pizza depends largely on the ideal dough thickness. To hit that sweet spot, aim for a thickness of about 1/8 inch. This allows for a crispy exterior while keeping the interior chewy and flavorful. Before rolling out your dough, verify it has the right dough hydration; this will make it more pliable and easier to stretch.
When you start rolling, use gentle pressure and a light touch. Avoid pressing too hard, as this can lead to dense areas that won't cook evenly. Instead, focus on using even, consistent rolling techniques. Start from the center and work your way outwards. If the dough springs back, let it rest for a few minutes to relax the gluten before trying again.
A well-hydrated dough is your friend here, as it can stretch without tearing. If you notice any sticky spots, sprinkle a little flour on your work surface to prevent sticking. Remember, the goal isn't just a flat shape but a beautifully formed crust that will hold up your toppings. Mastering the ideal dough thickness will elevate your thin crust pizza to perfection!
Techniques for Even Rolling
Consistently rolling out your dough evenly is essential for a great thin crust pizza. To achieve this, focus on the dough elasticity first. Make certain your dough has rested at the right temperature; warmer dough is easier to work with. Choose a rolling pin that suits your style, whether it's a traditional wooden pin or a more modern silicone one.
When you start rolling, apply even pressure throughout. Use gentle, consistent strokes and rotate the dough to maintain pizza size and thickness uniformity. Pay attention to surface friction; dust the work surface with flour to reduce sticking, but avoid overdoing it, as too much flour can affect the dough's texture.
Ambient humidity can also impact your results, so adjust your rolling techniques accordingly. If it's humid, you may need to use a bit more flour to combat stickiness. Finally, remember to check the dough temperature; if it's too cold, it'll resist rolling, making it hard to maintain even pressure. By mastering these techniques, you'll guarantee a perfectly rolled dough ready for your delicious thin crust pizza.
Click Here and Turn Every Masterpiece into a Showstopper!
Creating the Ideal Shape
When you're crafting the perfect thin crust pizza, shaping the dough is key to achieving that ideal balance of crispiness and chewiness. Start by using proper dough handling techniques to guarantee your dough has the right elasticity. If your dough is too sticky, it won't hold its shape; too dry, and it'll crack. Use shaping tools like a rolling pin or your hands to create an even surface, maintaining a consistent thickness throughout.
Consider using pizza molds if you want a more uniform shape. These tools can help you achieve the desired diameter while also offering a guide for crust techniques. As you shape, think about edge styles. A raised edge can provide a delicious contrast to the flat center, while a completely flat edge can enhance the visual presentation of your toppings.
Pay careful attention to how you distribute toppings. An even spread not only guarantees a balanced flavor but also affects the crust aesthetics. Too many toppings in one spot could lead to a soggy center, while too few might leave the crust overly crispy.
Prepping Your Baking Surface
When it comes to baking thin crust pizza, the surface you choose is essential to achieving that perfect crispiness. You'll want to prepare it properly to guarantee your pizza slides on and off with ease. Let's explore how selecting the right surface and prepping it can enhance your pizza-making experience.
Selecting the Right Surface
To achieve the perfect thin crust pizza, selecting the right baking surface is essential. A good choice is a baking stone, which retains heat and promotes even cooking, giving you that desired crispiness. Confirm your oven type can accommodate the stone, as some models may not distribute heat evenly.
You'll also need a pizza peel for easy transferring of your pizza. Dust it with flour to prevent sticking, allowing for smooth movement from prep to oven. When it comes to temperature control, preheat your oven with the baking stone inside for at least 30 minutes to achieve ideal heat.
As you prepare your pizza, pay attention to ingredient ratios. A thin layer of sauce is key, as too much can make for a soggy crust. Select your cheese wisely; a low-moisture variety works best for a crisp finish. Distribute toppings evenly to avoid overloading one side, which can affect baking.
Preparing for Baking
Often, you'll find that properly prepping your baking surface is essential for achieving that perfect thin crust. Start by choosing the right pizza baking tools, like a pizza stone or a baking steel, which help distribute heat evenly. Preheat your oven to the maximum temperature, usually around 500°F (260°C). This high oven temperature is vital for a crispy crust.
Next, dust your baking surface with flour or cornmeal to prevent sticking. If you're using a pizza peel, make sure to sprinkle some on there too. Roll out your dough directly on a floured surface to the desired thickness, ensuring it stays light and airy. Once your dough is ready, transfer it onto the prepared baking surface carefully. If you're using a pizza stone, it should be preheated in the oven for at least 30 minutes to get it nice and hot.
Selecting Toppings Wisely
Selecting toppings for your thin crust pizza can make or break the dish, so it's crucial to choose wisely. Start with the sauce; consider sauce alternatives like pesto or a spicy harissa for a unique twist. Next, think about cheese combinations. Traditional mozzarella is great, but mixing in gorgonzola or goat cheese can elevate your pie.
When it comes to vegetable toppings, fresh seasonal ingredients can enhance flavor and texture. Try roasted bell peppers, zucchini, or even arugula for a peppery kick. Balance your veggies with meat options like prosciutto, spicy sausage, or grilled chicken for a hearty touch. If you're feeling adventurous, consider unique toppings like figs or truffle oil to impress your guests.
To really bring your pizza to life, don't forget herb enhancements. Fresh basil, oregano, or even a sprinkle of rosemary can make a significant difference. Flavor pairings matter, so consider how each topping interacts. For instance, pairing sweet caramelized onions with tangy goat cheese creates harmony.
For those who crave a bit of heat, spicy additions like jalapeños or red pepper flakes can pack a punch. Finally, gourmet choices like smoked salmon or burrata can transform an ordinary pizza into something extraordinary. Ultimately, the key is balance; choose toppings that complement each other while still allowing the thin crust to shine. With thoughtful selections, your pizza will be a masterpiece!
Baking Techniques Explained
Baking your thin crust pizza requires precision and attention to detail. First, you need to preheat your oven to a high baking temperature, ideally around 475°F to 500°F. This high heat is vital for achieving that crispy, golden crust you desire. If you have a pizza stone, place it in the oven during preheating; it helps distribute heat evenly and absorbs moisture, enhancing the crust's texture.
Next, consider oven placement. Position your pizza stone on the middle rack to guarantee even cooking. Once your oven reaches the desired temperature, it's time to bake. Carefully slide your assembled pizza onto the hot stone using a pizza peel or a baking sheet. The baking duration usually ranges from 10 to 15 minutes, depending on your oven and the thickness of your crust. Keep a close eye on it—when the edges start to brown and the cheese is bubbling, it's nearly done.
After baking, remove your pizza from the oven and let it rest briefly. Placing it on a cooling rack prevents moisture buildup, which can make the crust soggy. Allowing it to cool for a few minutes will make slicing easier and enhance the overall texture. By mastering these baking techniques, you'll set the stage for your perfect thin crust pizza. Enjoy the process, and savor the delicious results!
Achieving the Perfect Crunch
To achieve the perfect crunch on your thin crust pizza, focus on three key elements: the dough, the oven temperature, and the baking surface. First, let's talk about the dough. Aim for a dough hydration level around 60-65%. This balance helps create a crust texture that's both crispy and chewy. Knead it well and let it rest for ideal gluten development.
Next, consider the baking temperature. Preheat your oven to at least 475°F (245°C) or higher if possible. A hot oven is essential for achieving that desired crunch. Place your pizza stone or steel on the middle rack to guarantee even heat distribution. This way, you'll get a fantastic crust without burning the toppings.
When it comes to topping distribution, be mindful of your ingredient ratios. Avoid overloading with sauce, which can lead to soggy spots. Apply the sauce in a thin layer, then add cheese that melts beautifully. Use just the right amount—too much cheese can cause the crust to steam instead of crisp.
Serving and Enjoying Your Pizza
After mastering the art of achieving that perfect crunch, it's time to focus on how to serve and enjoy your thin crust pizza. Presentation matters, so take a moment to slice your pizza into even portion sizes. A well-cut pizza not only looks inviting but guarantees everyone gets a fair share. For a touch of flair, you can sprinkle some fresh herbs or drizzle a bit of olive oil over the top before serving.
Consider the serving temperature, as a warm pizza enhances the flavors. Ideally, serve it straight from the oven, but if that's not possible, keep it in a warm oven until you're ready. Pairing flavors is essential too; think about what toppings you've chosen and how they might harmonize with your pizza accompaniments. A fresh arugula salad or a side of garlic knots can elevate the dining experience.
When it comes to social gatherings, you can't go wrong with variety. Offer different pizzas with various toppings to cater to all taste preferences. This not only sparks conversation but also allows guests to explore flavor pairing options. Don't forget about beverage choices; a crisp white wine or a hoppy beer can complement the crust's texture and flavors beautifully.
Tips for Leftover Pizza
While you might think leftover thin crust pizza loses its charm, there are plenty of ways to revitalize those slices. To start, proper pizza storage is key. Wrap your leftovers tightly in aluminum foil or place them in an airtight container. This prevents the crust from becoming too soggy or hard as it sits in the fridge. Aim to eat your leftover pizza within three to four days for the best flavor and texture.
When it comes to reheating methods, you've got options. The oven is one of the best ways to bring back that crispy crust. Preheat your oven to 375°F (190°C) and place the pizza directly on the oven rack or on a baking sheet for 10-15 minutes. This method restores the crunch while heating evenly.
If you're short on time, the skillet method works wonders. Heat a non-stick skillet over medium heat, place your slice in, and cover it with a lid. This keeps the moisture in, allowing the cheese to melt while the crust gets crispy. In just about five to eight minutes, you'll have a deliciously reheated slice.
For a quick fix, the microwave is always an option, but you'll want to avoid a chewy crust. To combat this, place a cup of water in the microwave alongside your pizza. This keeps the crust from drying out, though it won't be as crispy.
With these tips, you'll never look at leftover pizza the same way again!
Click Here and Turn Every Masterpiece into a Showstopper!
Frequently Asked Questions: Your Thin Crust Pizza: A How-To Guide
Can I Use Gluten-Free Flour for Thin Crust Pizza?
Yes, you can use gluten-free flour for thin crust pizza! Experiment with different flour types like almond or rice flour for gluten-free options. Just remember to adjust your liquid ingredients to achieve the right dough consistency.
How Do I Store Leftover Pizza Properly?
To store leftover pizza properly, wrap it in foil or place it in an airtight container. Consider separating pizza storage techniques for different toppings, as moisture can affect the taste and texture of your leftover pizza toppings.
What Is the Best Way to Reheat Thin Crust Pizza?
To reheat thin crust pizza, use pizza reheating techniques like placing it in a preheated oven at 375°F. This guarantees a crispy crust while melting the cheese perfectly. You'll enjoy that fresh-out-of-the-oven taste again!
How Can I Make My Pizza More Flavorful?
To make your pizza more flavorful, experiment with herbs addition like basil or oregano. Additionally, choose a cheese selection that includes a mix of mozzarella and sharp cheddar for a rich, satisfying taste. Enjoy the difference!
Can I Freeze Thin Crust Pizza Dough?
Yes, you can freeze thin crust pizza dough. Just make sure to let it undergo dough fermentation before freezing. When you're ready, thaw it out, and you'll enjoy a perfectly thin, flavorful crust.

Conclusion
Now that you've mastered the art of thin crust pizza, it's time to enjoy the fruits of your labor. Remember to experiment with toppings and share your creations with friends and family. Each pizza is a canvas, so don't hesitate to get creative! And if you have leftovers, store them properly to keep that delicious crunch intact. With these tips, you're well on your way to becoming a thin crust pizza pro. Happy baking!