The Best Tips For Roasting Whole Turkey
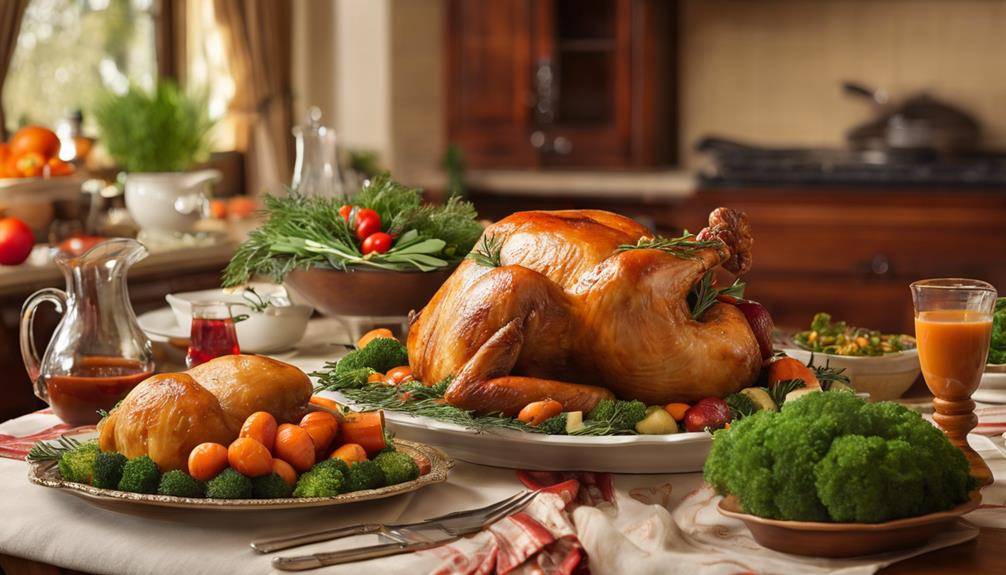
The Best Tips For Roasting Whole Turkey starts with choosing the right bird—opt for an organic or free-range option for better flavor. Thaw it safely in the fridge for at least 24 hours per 4-5 pounds. Brining your turkey boosts its juiciness; aim for a 12 to 24-hour soak in a flavorful liquid. Season it well, both inside and out, using fresh herbs and citrus. Cook at 350°F, targeting an internal temperature of 165°F. Remember to let it rest before carving. With these tips, your turkey will be a delicious centerpiece, and there’s so much more to explore.
Choosing the Right Turkey
When it comes to your turkey’s success, choosing the right bird is vital. You’ll want to take into account several factors, including organic vs. conventional options. While organic turkeys are often praised for their quality, conventional birds can still be tasty and budget-friendly. Take a moment to weigh which aligns with your values and budget.
Next, explore the benefits of free-range turkeys. These birds typically enjoy a more natural lifestyle, which can lead to better flavor and texture. If you can source local free-range options, you’re likely to find fresher meat, supporting local farmers and reducing your carbon footprint.
Size considerations also play a significant role. A general guideline is to allocate about 1 to 1.5 pounds per person. Depending on your guest list, you may need a smaller or larger bird, so keep your holiday timing in mind. Don’t forget to check the turkey breeds; some popular ones include Broad Breasted White and Heritage breeds, each offering distinct flavors and textures.
When purchasing, look for tips that help you make informed choices. Check for labels indicating the bird’s treatment and sourcing. If your budget’s tight, think about purchasing a frozen turkey, which can be a more economical option without sacrificing quality. By carefully evaluating these factors, you’re on your way to choosing the perfect turkey for your holiday feast.
Thawing Techniques
Thawing your turkey properly is essential to confirm it cooks evenly and safely. There are a few effective thawing methods you can use, depending on how much time you have before your big meal. The safest way is to thaw in the refrigerator. This method takes time—about 24 hours for every four to five pounds of turkey—but it keeps the turkey at a safe temperature throughout the process. Simply place the turkey on a tray to catch any juices and let it sit in the fridge until it’s fully thawed.
If you’re short on time, you can use the cold water thawing method. Submerge the turkey in its original packaging in cold water, changing the water every 30 minutes. This method requires about 30 minutes of thawing for every pound of turkey. Remember, though, this method has its thawing safety concerns, so you need to cook the turkey immediately after thawing.
Lastly, you can also thaw your turkey in the microwave if your microwave is large enough. Follow your microwave’s instructions, as thawing times can vary. Just like with the cold water method, be prepared to cook it right away.
Regardless of the method you choose, never thaw your turkey at room temperature. This can lead to bacterial growth, putting your meal—and your guests—at risk. By following these thawing techniques, you’ll confirm a delicious and safe turkey for your feast.
Brining for Flavor
Brining your turkey can elevate its flavor and juiciness, making it a standout dish at your celebration. The process involves soaking your turkey in a seasoned liquid, which allows it to absorb moisture and flavors. To create a flavorful brine, you can opt for an herb brine, incorporating fresh herbs like rosemary, thyme, and sage. These herbs not only add depth but also infuse the meat with a fragrant aroma that enhances every bite.
For an extra layer of flavor, consider adding a citrus infusion to your brine. Squeeze in some fresh lemon or orange juice, and toss in the zested peels. The acidity from the citrus will balance the richness of the turkey while providing a rejuvenating note. Combine these ingredients with water, salt, and sugar to create a well-rounded brine that will penetrate the meat, ensuring it’s flavorful throughout.
You’ll want to brine your turkey for at least 12 hours, but 24 hours is ideal for maximum flavor. Make sure to keep your turkey submerged in the brine, using a weight if necessary. After brining, rinse the turkey under cold water to remove excess salt, then pat it dry with paper towels. This step is essential, as it prevents the skin from becoming too salty and helps achieve that beautifully crispy skin when roasting.
Seasoning Tips
Seasoning your turkey is essential for enhancing its flavor and creating a memorable dish. Start by selecting your favorite herb blends, as they’ll serve as the backbone of your seasoning. A combination of rosemary, thyme, and sage works beautifully, but feel free to experiment with other herbs that you enjoy.
Next, consider the spice ratios. You want the spices to complement the turkey without overpowering it. A good rule of thumb is to use about one tablespoon of seasoning for every four pounds of turkey. This allows the flavors to permeate the meat while still letting the natural taste shine through.
Don’t forget to season both the inside and outside of the turkey. For the cavity, you can add fresh herbs, garlic, and a lemon or onion for added flavor. Rub the herb blend under the skin and all over the outer surface of the turkey to guarantee that every bite is packed with flavor.
If you’re short on time, pre-made seasoning blends can be a lifesaver. Just make sure to check the ingredient list for any added fillers or excessive salt.
Proper Cooking Temperature
Achieving the perfect roast turkey hinges on cooking it to the right temperature. You want to make certain your turkey reaches an internal temperature of at least 165°F (74°C). This temperature is vital for food safety, as it guarantees that any harmful bacteria are killed, making your meal safe to eat. Using a reliable meat thermometer is the best way to check this. Insert the thermometer into the thickest part of the thigh, without touching the bone, to get an accurate reading.
While the breast meat cooks slightly faster than the dark meat, it’s important to focus on the internal temperature of the entire bird. If your turkey is stuffed, remember that the stuffing must also reach 165°F to guarantee food safety. If you find that the turkey is browning too quickly on the outside, you can tent it loosely with aluminum foil to prevent burning while allowing the internal temperature to rise.
After your turkey reaches the desired temperature, let it rest for at least 20 to 30 minutes before carving. This resting period allows the juices to redistribute throughout the meat, resulting in a juicier and more flavorful turkey. By following these steps and monitoring the internal temperature closely, you’ll guarantee that your roast turkey is not only perfectly cooked but also safe to enjoy with family and friends. So, keep that thermometer handy and watch the magic happen!
Optimal Roasting Time
To roast your turkey perfectly, you need to take into account its weight and the appropriate cooking time. Following temperature guidelines guarantees it cooks evenly, while allowing for a proper resting period helps lock in those juices. Let’s explore how these factors come together for a deliciously roasted turkey.
Weight-Based Cooking Time
When planning your holiday feast, understanding weight-based cooking times is crucial for a perfectly roasted turkey. The cooking method you choose will greatly impact how long your turkey needs in the oven. Typically, you’ll want to allocate about 13 to 15 minutes per pound for a turkey cooked at 350°F.
For example, if you have a 12-pound turkey, expect it to take around 2.5 to 3 hours. On the other hand, larger turkeys, say 20 pounds, may take anywhere from 4 to 4.5 hours. Keep in mind that these times can vary based on your turkey size and whether it’s stuffed or unstuffed. A stuffed turkey typically requires a bit more time.
To make sure your turkey is cooked evenly, consider using a roasting rack, which allows hot air to circulate around the bird. This helps achieve that golden-brown skin and juicy meat you’re after. Remember, it’s better to check the turkey earlier than later; you can always cook it longer if needed. With these guidelines, you’ll be well on your way to serving a delicious turkey that’ll impress your guests!
Temperature Guidelines
For the best results in roasting your turkey, keeping an eye on the internal temperature is key. You want to verify it reaches a safe minimum of 165°F in the thickest part of the breast and thigh. This assures that any harmful bacteria are eliminated, making your turkey safe to eat.
Different cooking methods can impact roasting time. If you’re using a conventional oven, plan for about 13-15 minutes per pound at 325°F. However, if you choose to spatchcock your turkey or use an air fryer, cooking times may vary considerably, so always rely on your meat thermometer for accuracy.
Remember, the turkey will continue to cook slightly after you take it out of the oven due to residual heat. Consequently, you might consider pulling it out when the internal temperature hits around 160°F, letting it reach the desired doneness while resting.
Using a reliable meat thermometer is essential for achieving the perfect roast, regardless of the method you select. By following these temperature guidelines, you’ll serve a juicy, flavorful turkey that impresses everyone at your table.
Resting Period Importance
The resting period is essential for achieving a perfectly roasted turkey. After you take it out of the oven, let it rest for at least 20 to 30 minutes. This time allows the juices to redistribute throughout the meat, ensuring every bite is juicy and flavorful. If you cut into the turkey right away, you’ll lose those precious juices, leading to a dry result.
During the resting period, the turkey’s internal temperature continues to rise slightly, which can help kill any lingering bacteria. This is known as carryover cooking. However, be mindful of temperature effects—if you let it rest too long, it might become overcooked.
The resting benefits are significant. Not only does it enhance the turkey’s flavor and juiciness, but it also makes carving easier. You’ll find that the meat holds together better, giving you those beautiful slices that everyone loves.
Basting Strategies
As you prepare to roast your turkey, effective basting strategies can make all the difference in achieving a juicy, flavorful bird. Basting involves spooning or brushing the turkey with its own juices or other liquids throughout the cooking process. This not only keeps the meat moist but also enhances its flavor.
When it comes to basting frequency, aim to do it every 30 to 45 minutes. This interval strikes a good balance; you’ll be able to keep the turkey moist without excessively opening the oven door, which can affect the cooking temperature. Use a reliable meat thermometer to check for doneness instead of opening the oven too often.
For basting liquids, you’ve got plenty of options. The classic choice is the turkey’s own drippings mixed with a bit of broth or melted butter. You might also consider using a marinade or a mixture of herbs and spices for an extra flavor kick. If you’re feeling adventurous, add a splash of white wine or apple cider to your basting liquid for a unique twist.
Resting the Turkey
After you’ve finished basting and pulled your turkey from the oven, resting it properly is key to achieving a tender and juicy result. When you let the turkey rest, you’re allowing the juices to redistribute throughout the meat, enhancing its flavor and ensuring every bite is succulent. Aim for at least 20 to 30 minutes of resting time, depending on the size of your turkey. This isn’t just idle time; it’s essential for turkey hydration.
During roasting, the heat forces the juices toward the center of the turkey. If you carve it too soon, those juices will spill out, leaving your meat dry. By resting, the turkey gets a chance to reabsorb those flavorful juices, leading to a better flavor infusion.
To rest your turkey, place it on a cutting board or a platter, and tent it loosely with aluminum foil. This will help retain heat without steaming the skin, which you want to keep crispy. Avoid covering it too tightly, as that could trap moisture and make the skin soggy.
While your turkey rests, you can use this time to prepare your sides or make gravy. Just remember, patience is key! The longer you let it rest, the more delicious your turkey will be. So, resist the urge to plunge into it immediately, and enjoy the anticipation of that perfectly roasted turkey.
Carving Techniques
Mastering the art of carving your turkey can elevate your presentation and guarantee everyone gets a delicious serving. To start, you’ll want to invest in a good carving knife. A sharp, long blade will allow you to make clean cuts and create beautiful slices. Once your turkey has rested, place it on a carving board, making sure it’s stable and secure.
Begin by removing the legs. Grip the drumstick firmly and cut through the joint where it connects to the body. Repeat this process for the other leg. Next, move on to the wings. Find the joint, slice through, and detach each wing.
Now, turn your attention to the breast. Start by making a long, smooth cut along one side of the breastbone. Use your knife to slice downward, gently pulling the breast meat away from the bone. This technique helps retain juiciness and allows for more even slices. Continue carving until you’ve removed all the breast meat, then slice it into even pieces for easier serving.
For presentation ideas, arrange the carved turkey on a large platter. You can fan out the breast slices and place the legs and wings on the side. Garnish with fresh herbs or seasonal fruits to create an eye-catching display. Remember, practice makes perfect, so don’t get discouraged if it takes a few tries to master these carving techniques. With time, your skills will shine, impressing your guests and enhancing your holiday feast.
Serving Suggestions
Once you’ve successfully carved your turkey, it’s time to think about how to serve it. Start by choosing the right plating techniques; a beautifully arranged platter can elevate your meal. Place the turkey slices in a fan shape, and consider adding some garnish ideas like fresh herbs or citrus slices for a pop of color.
Next, focus on sauce pairings. A rich gravy or a tangy cranberry sauce can enhance the turkey’s flavor profiles. Don’t forget to offer a few side dishes that complement the main attraction. Think mashed potatoes, stuffing, or roasted vegetables—all favorites that balance the meal.
When it comes to wine selection, opt for a light-bodied red or a crisp white, depending on your guests’ preferences. Serving temperatures matter too; make sure your turkey is warm, ideally around 165°F, while side dishes are hot and fresh.
Once everyone’s enjoyed the feast, consider how to utilize any leftovers. You can create delicious leftover recipes like turkey soup, sandwiches, or casseroles. This way, the celebration continues even after the main event.
Frequently Asked Questions: The Best Tips For Roasting Whole Turkey
Can I Roast a Frozen Turkey Without Thawing It First?
You can roast a frozen turkey without thawing, but it’ll take considerably longer. Plan for about 50% more cooking time, ensuring it reaches the proper internal temperature for safety and deliciousness. Happy cooking!
What Type of Roasting Pan Is Best for a Whole Turkey?
When choosing a roasting pan, consider materials like stainless steel or non-stick for durability. Also, verify it’s large enough for your turkey size, allowing ample space for even cooking and easy handling during the process.
How Do I Know if My Turkey Is Fully Cooked?
You can tell your turkey’s fully cooked by checking its internal temperature; it should reach 165°F. Don’t forget to let it rest for at least 20 minutes after cooking to guarantee juicy meat.
Can I Stuff the Turkey Before Roasting It?
You can stuff the turkey before roasting, but turkey stuffing safety is vital. Confirm the stuffing reaches 165°F. If you’re concerned, consider using stuffing alternatives, like baking separately, to guarantee even cooking.
What Should I Do With Leftovers After Carving the Turkey?
After carving the turkey, store leftovers in airtight containers. Use turkey recipes like soups or sandwiches for delicious meals. Remember to refrigerate within two hours to keep everything fresh and safe for later enjoyment.
Conclusion
Roasting a whole turkey can be a rewarding experience that brings friends and family together. By choosing the right turkey, properly thawing it, and using brining and seasoning techniques, you’ll enhance its flavor. Remember to cook it at the right temperature, baste it for moisture, and let it rest before carving. With these tips in mind, you’re sure to impress your guests and create a memorable meal that everyone will enjoy. Happy roasting!


