Tips For Braising In A Dutch Oven
Tips For Braising In A Dutch Oven; When braising in a Dutch oven, choose tough cuts like chuck roast or short ribs that become tender over long cooking times. Preheat your oven to sear the meat, locking in flavors. Don’t skimp on seasoning; use salt and spices before browning. After searing, add aromatics like onions and garlic for depth. Use a flavorful liquid—think wine or broth—to cover the meat partially. Remember to monitor your cooking temperature and keep the lid on to retain moisture. Allow your dish to rest after cooking for the best texture. There’s so much more to explore about enhancing your braising game!
Choose the Right Cut
When it comes to braising in a Dutch oven, choosing the right cut of meat is essential for achieving that melt-in-your-mouth tenderness. The magic of braising methods lies in their ability to transform tougher cuts into succulent dishes. So, how do you make the right selection?
Start by considering the tougher cuts that benefit most from slow cooking. Cuts like chuck roast, brisket, and short ribs are ideal because their connective tissues break down beautifully during the braising process. In a cut comparison, these options not only have a rich flavor but also become incredibly tender when cooked low and slow in your Dutch oven.
On the other hand, lean cuts like chicken breast or pork tenderloin don’t hold up as well under prolonged cooking. While they might cook quickly, they can dry out and lose their flavor when subjected to a braising method. Instead, opt for chicken thighs or pork shoulder, which have enough fat and connective tissue to withstand the heat and moisture.
Don’t forget about lamb shanks or oxtails, either. They’re packed with flavor and become fork-tender after a few hours in the oven. Remember, the key to successful braising is patience and using the right cut. By making the right choice, you’ll guarantee that your dish not only tastes incredible but also has that desirable texture that comes from a perfectly braised piece of meat.
Preheat Your Dutch Oven
Once you’ve selected the perfect cut of meat, it’s time to preheat your Dutch oven to set the stage for a successful braise. Preheating your Dutch oven is essential because it helps you achieve the right oven temperature for searing and caramelizing your meat. Start by placing the empty Dutch oven on the stove over medium-high heat. Let it heat up for about five to ten minutes. You want it hot enough that a drop of water sizzles and evaporates quickly.
The benefits of preheating are significant. First, a properly heated Dutch oven creates a nice, even cooking surface, allowing for that golden-brown crust you’re aiming for. This step enhances the flavor profile of your dish and helps lock in moisture, ensuring your meat turns out tender and juicy. If you skip this step, you risk steaming your meat instead of searing it, which can lead to a less desirable texture and flavor.
Once your Dutch oven is preheated, you can add your fats—like oil or butter—and let them heat up before introducing your cut of meat. This will further aid in achieving that perfect sear. Remember, patience pays off in braising, so don’t rush this essential step. Preheating your Dutch oven sets the foundation for a delicious meal, making all the difference in the final result. Enjoy the process, and get ready to savor a wonderfully braised dish!
Seasoning the Meat
When seasoning your meat, choosing the right spices can make all the difference in flavor. Consider marinating to enhance the taste even further, letting those flavors soak in. Timing your seasoning is also key, as it can impact the overall outcome of your dish.
Choosing the Right Spice
Choosing the right spices is essential for elevating the flavor of your braised meat. When you think about seasoning, consider various spice blends that complement the cut of meat you’re using. For instance, a warm blend of cumin, coriander, and paprika can enhance the depth of beef, while a mix of herbs like thyme and rosemary works beautifully with lamb or chicken.
Understanding flavor profiles is key. If you’re aiming for a Mediterranean twist, use oregano, garlic, and lemon zest. For a more Asian-inspired dish, try ginger, star anise, and soy sauce. Don’t be afraid to experiment!
Before you start braising, season your meat generously with salt and your chosen spices. This creates a flavorful crust that locks in moisture. Remember, spices can lose their potency over time, so fresh is always best. Consider toasting whole spices before grinding them to release their essential oils, enhancing their flavors further.
Ultimately, the right spice blend will not only enhance your meat but will also create a delicious sauce that you’ll want to savor. Take your time choosing and mixing until you find the perfect balance!
Marinating for Enhanced Flavor
Marinating your meat is a powerful way to infuse it with flavor before braising. When you choose the right marinade types, you can dramatically enhance the taste of your dish. A good marinade typically combines an acid, like vinegar or citrus juice, with oils and various seasonings. This combination tenderizes the meat while adding depth to its flavor profile.
Consider the flavor profiles you want to achieve. For a Mediterranean twist, try a marinade with olive oil, lemon juice, garlic, and herbs like rosemary or thyme. If you’re leaning towards an Asian flavor, soy sauce, ginger, and sesame oil can work wonders. You can also explore bold, smoky marinades using ingredients like chipotle peppers or smoked paprika for a southwestern flair.
Don’t forget to let your meat soak in the marinade for at least a few hours, or ideally overnight. This time allows the flavors to penetrate deeply, ensuring that every bite is packed with deliciousness. Remember, the right marinade not only enhances flavor but can also transform an ordinary cut of meat into something extraordinary. Happy braising!
Timing of Seasoning
After marinating, seasoning the meat at the right moment can elevate your braising experience even further. You’ll want to achieve a perfect seasoning balance that enhances the natural flavors without overpowering them. Start by patting the meat dry to guarantee the seasoning adheres properly. This step is essential because moisture can dilute your spices.
As you sprinkle salt and pepper, think about layering flavors. You might consider adding garlic powder, onion powder, or herbs like thyme and rosemary. Each layer builds complexity, making your dish more aromatic and flavorful. If you’re using additional marinades or sauces, be mindful of their salt content to avoid over-seasoning.
Timing is key; season the meat just before searing it in the Dutch oven. This allows the seasoning to penetrate the surface while you develop that beautiful crust. Once seared, you can add more flavor by incorporating broth, wine, or additional herbs into the pot. Remember, the goal is to create a depth of flavor that makes each bite irresistible. With the right timing and technique, your braised dish will shine!
Searing for Flavor
Searing your meat before braising is an essential step that can elevate the dish’s flavor profile. When you heat your Dutch oven and add a bit of oil, you’ll want to listen for that satisfying sound of sizzling meat. This is where the magic begins. Searing creates a rich, caramelized crust on the surface of the meat, which not only locks in moisture but also adds depth to the overall flavor.
As you sear, aim for a golden-brown exterior. This isn’t just for aesthetics; it’s all about flavor enhancement. The Maillard reaction, which occurs when proteins and sugars in the meat react to heat, produces complex flavors that you can’t achieve through braising alone. Don’t rush this process. Give the meat enough time to develop that crust before turning it.
Once you’ve achieved that perfect sear, it’s important to remove the meat from the pot and set it aside. This step allows you to retain all those delicious brown bits, often referred to as fond, which will contribute even more to your dish’s flavor.
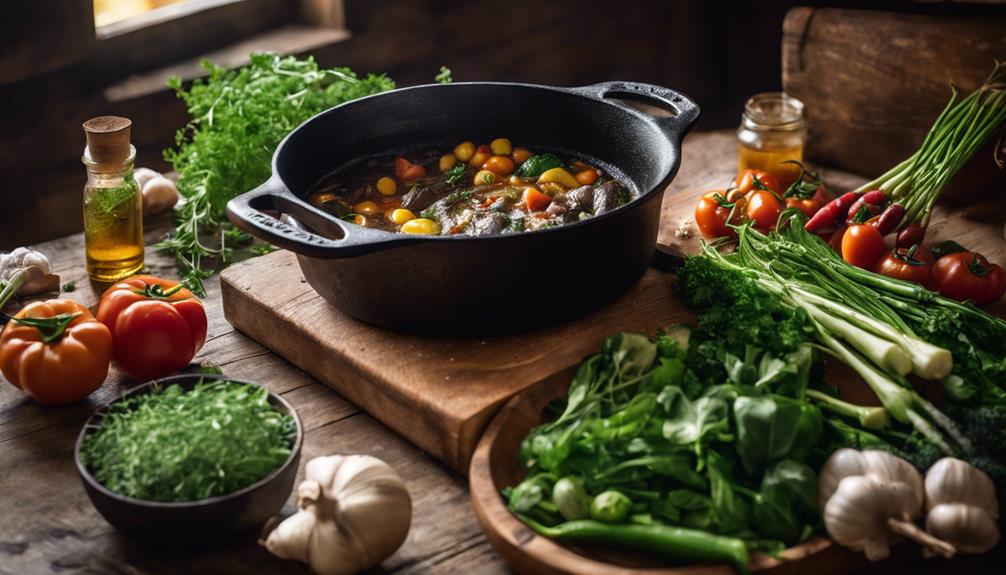
Adding Aromatics
When you’re ready to enhance your braising dish, choosing the right aromatics is key. Think about what flavors you want to bring out and when to add them for maximum impact. Timing can make all the difference in creating a rich, savory profile that elevates your meal.
Choosing the Right Aromatics
Selecting the right aromatics is essential for elevating the flavor of your braised dishes. Start by experimenting with various herb combinations like rosemary and thyme or parsley and dill, which can greatly enhance your flavor profile. Incorporate citrus infusions, such as lemon or orange zest, to add brightness that balances the richness of the dish.
Root vegetables, like carrots and parsnips, not only infuse sweetness but also contribute to a robust base. When it comes to onion varieties, consider using shallots for a milder taste or yellow onions for a more pronounced flavor. Don’t forget about the garlic types—roasted garlic will lend a creamy sweetness, while raw garlic adds a sharper bite.
To amplify the essence, use aromatic oils like olive oil or sesame oil as your cooking fat. Finally, always prioritize seasonal ingredients; they’re fresher and more vibrant, which can transform your braise. By thoughtfully selecting your aromatics, you’ll create a dish that’s rich, complex, and unforgettable.
Timing for Maximum Flavor
To release the full potential of your braised dishes, timing is essential when adding aromatics. Proper timing techniques can drastically enhance flavor development, transforming a good meal into a memorable one. Start by adding your aromatics, like onions and garlic, at the beginning of the cooking process. Sauté them until they’re soft and fragrant; this helps to create a flavorful base for your dish.
As your meat cooks, consider adding herbs and spices at different stages. For example, delicate herbs like parsley or basil should be added towards the end of cooking to preserve their bright flavors. On the other hand, sturdier herbs like rosemary or thyme can be added earlier, allowing their essence to meld with the dish over time.
Don’t forget about the impact of acidity! A splash of vinegar or citrus juice added near the end can elevate your dish, balancing richness with brightness. By mastering these timing techniques, you’ll guarantee that each component of your dish contributes to a harmonious blend of flavors, creating a braised masterpiece worthy of any table. Happy braising!
Selecting Braising Liquid
Choosing the right braising liquid can make all the difference in your dish’s flavor and texture. Start by considering your protein; certain meats pair better with specific wine pairings. For example, red wine works beautifully with beef, while white wine complements chicken. Broth types also play an essential role; beef, chicken, or vegetable broth can enhance your dish’s depth.
Don’t forget about acidic components—adding a splash of vinegar or citrus juice can brighten flavors and help tenderize the meat. Aim for a flavor balance in your liquid. If you’re using a rich broth, you might want to lighten it with some acidic elements.
Think about liquid ratios too. Typically, you want enough liquid to cover about one-third to half of your meat. This guarantees even cooking and still allows for a flavorful reduction later. Herb infusions can elevate your braising liquid. Toss in fresh herbs like thyme or rosemary to add layers of flavor.
Regional variations can inspire your choice of liquid. For instance, if you’re making a classic French dish, consider using a dark beer or red wine, while a Mediterranean dish might benefit from white wine and a touch of olive oil. Finally, vegetable additions like onions, carrots, or garlic can enhance the broth’s flavor profile, making your final dish even more delicious. By thoughtfully selecting your braising liquid, you set the foundation for a memorable meal.
Control the Temperature
Controlling the temperature is essential for achieving perfectly braised meat. Whether you’re using a conventional oven, a convection oven, or even an electric Dutch oven, understanding how your chosen oven type operates can make all the difference. Each oven functions differently, impacting how heat circulates and how evenly the temperature is maintained. You’ll want to preheat your oven adequately to guarantee consistent cooking throughout the process.
When it comes to heat sources, be mindful of how they affect your Dutch oven. Gas stovetops provide instant heat control, allowing you to quickly adjust the flame as necessary. On the other hand, electric stovetops might require a bit more patience, as they take longer to heat up and cool down. Whichever heat source you use, aim for a steady simmer rather than a rolling boil. Too much heat can toughen your meat, leading to disappointing results.
Keep an eye on the internal temperature of your braising liquid as well. Ideally, it should maintain a range between 180°F and 200°F. If your oven has a thermostat, use it to monitor the temperature accurately. Investing in an oven thermometer can also help, as it gives you a precise reading, guaranteeing you’re cooking at the right temperature. Remember, patience is key in braising, so maintain an even temperature and let the magic happen. Your perfectly tender meat will be worth the effort!
Covering for Moisture
Maintaining the right temperature is only part of the braising equation; covering your Dutch oven plays an essential role in guaranteeing moisture retention. When you cover your pot, you create a sealed environment that traps steam and prevents the precious moisture from escaping. This steam is vital, as it helps break down tougher cuts of meat and enhances flavor throughout the cooking process.
There are different lid types to take into account, and each has its benefits. A tight-fitting lid is ideal for maximum moisture retention, as it minimizes the amount of steam that escapes. If your Dutch oven comes with a heavy lid, that’s even better, as it can help keep the heat consistent and contribute to even cooking. On the flip side, if you’re using a lid that doesn’t seal well, you might find yourself losing valuable liquid, which can lead to dryness in your dish.
Another option is to use a piece of parchment paper or aluminum foil between the pot and the lid. This can create an additional barrier, trapping steam more effectively and enhancing moisture retention. Whatever lid type you choose, always check periodically to verify there’s enough liquid in your pot. If you notice it getting low, add a splash of broth or water to maintain that moisture balance. Covering your Dutch oven properly is key to achieving that tender, flavorful result you’re aiming for in your braised dishes.
Cooking Time Considerations
Timing is essential in the art of braising, as it directly impacts the dish’s tenderness and flavor. When considering braising times, you’ll need to factor in the meat thickness and the specific cut you’re using. Thicker cuts generally require longer cooking times, allowing the connective tissues to break down and enhance tenderness.
Keep in mind that your cooking environment can also affect braising. If you’re at a higher altitude, you might need to adjust cooking times and temperatures, as lower air pressure can alter how heat is transferred. Similarly, temperature adjustments during cooking can help manage the braising process. If you notice the cooking liquid is bubbling too vigorously, you might want to lower the heat to encourage slow cooking, which promotes better flavor development.
Don’t forget about recipe variations; different ingredients can influence how long you need to braise. For instance, adding acidic components like tomatoes or wine can change the dynamics of the dish, potentially shortening the required cooking time.
As you braise, remember that the goal is to achieve that perfect balance of tenderness and rich flavor. Monitoring the cooking process closely and making necessary adjustments will guarantee that you end up with a delicious meal. By paying attention to these cooking time considerations, you’ll master the art of braising in no time.
Testing for Doneness
When you’re braising, knowing when your dish is done is essential. Look out for visual cues like tenderness and color changes, and don’t forget to use a thermometer for precise temperature checks. These techniques will guarantee your meal is perfectly cooked every time.
Visual Cues to Observe
You’ll often find that visual cues are your best allies in testing for doneness while braising in a Dutch oven. One of the first things to notice is color changes. For meats, look for a rich, deep brown exterior that indicates a good sear and caramelization. If you’re braising vegetables, they should appear vibrant and slightly softened, signaling they’re nearing doneness.
Next, pay attention to texture variations. As the food cooks, it should become tender and easy to pierce with a fork. For meats, you’ll want to see the fibers starting to break apart. If you can pull the meat apart easily, you know it’s ready to serve.
Another visual cue to observe is the liquid. It should be bubbling gently, which indicates a steady simmer. If it’s boiling too vigorously, it can lead to tough results.
Temperature Testing Techniques
To guarantee your dish is perfectly cooked while braising in a Dutch oven, mastering temperature testing techniques is vital. One of the most reliable methods is using an internal thermometer. This tool allows you to check the internal temperature of your meat without losing too much heat from the pot. Aim for the recommended temperatures specific to the type of protein you’re cooking; for instance, beef should reach around 195°F for ideal tenderness.
When using an internal thermometer, insert it into the thickest part of the meat, avoiding bones, as they can give false readings. If you don’t have an internal thermometer, consider using temperature probes that can monitor the temperature remotely. These probes can alert you when your dish reaches the desired temperature, so you don’t need to keep lifting the lid.
Always remember that cooking times can vary based on the size and type of meat, so it’s important to rely on temperature rather than just time. When your dish reaches the perfect internal temperature, let it rest for a few minutes before serving. This allows the juices to redistribute, resulting in a more flavorful and moist dish.
Resting the Meat
Why is resting the meat a crucial step in the braising process? Resting allows the juices within the meat to redistribute, ensuring each bite is tender and flavorful. When you pull the meat from the pot, it’s still cooking due to residual heat. If you slice it too soon, those flavorful juices will run out, leaving you with dry meat.
To achieve ideal resting, you should use effective resting techniques. After removing the meat from the Dutch oven, place it on a cutting board or a warm plate. Cover it loosely with aluminum foil to keep it warm while allowing some steam to escape. This prevents the meat from becoming soggy, which can happen if it’s tightly wrapped.
Rest for at least 10 to 20 minutes, depending on the size of the cut. Larger cuts, like a beef chuck roast, benefit from longer resting periods, while smaller pieces, like chicken thighs, need less time. During this period, you can prepare your sauce or side dishes, making the most of your time.
Thickening the Sauce
Now that your meat has rested, it’s time to thicken that delicious sauce. You can use flour or cornstarch to create a rich texture, or simply reduce the liquid to concentrate the flavors. Let’s explore these methods to elevate your dish!
Using Flour or Cornstarch
Thickening the sauce is an essential step in braising, transforming a thin liquid into a rich, velvety finish that enhances the dish’s overall flavor. You can achieve this using various flour types or cornstarch alternatives, depending on your preference and dietary needs.
If you opt for flour, all-purpose flour is the most common choice, but you might also consider whole wheat or even a gluten-free flour blend if you’re avoiding gluten. To use flour, create a roux by cooking it in a bit of fat before adding it to your sauce, which helps eliminate any raw flour taste.
Cornstarch is another great thickening technique, particularly if you’re looking for a gluten-free option. Mix cornstarch with a little cold water to form a slurry, then stir it into your sauce. This method thickens quickly, so be sure to monitor the sauce consistency closely as it cooks.
Experiment with these options to find what works best for your dish. Whether you’re using flour or cornstarch, the goal is to achieve that perfect, luscious sauce that elevates your braised meal.
Reducing Liquid for Concentration
After you’ve thickened your sauce with flour or cornstarch, reducing the liquid is another effective way to concentrate flavors and achieve that rich, satisfying consistency. Start by simmering your sauce over medium heat in the Dutch oven to help evaporate excess liquid. Be sure to stir occasionally, preventing the sauce from sticking or burning on the bottom.
Different liquid types, like broth, wine, or vinegar, can all intensify the depth of your dish, so choose wisely based on your recipe. As the liquid reduces, the flavors will concentrate, creating a more robust taste. You’ll notice the sauce thickening naturally as it cooks down, enhancing the overall flavor balance.
Keep an eye on the texture; once it coats the back of a spoon, you know you’re getting close. If you find the sauce too thick, you can always add a splash of liquid to adjust it. Remember, patience is key—allowing the sauce to reduce properly will elevate your dish, bringing out those delicious, layered flavors that make braising so rewarding. Enjoy the process and savor the results!
Serving Suggestions
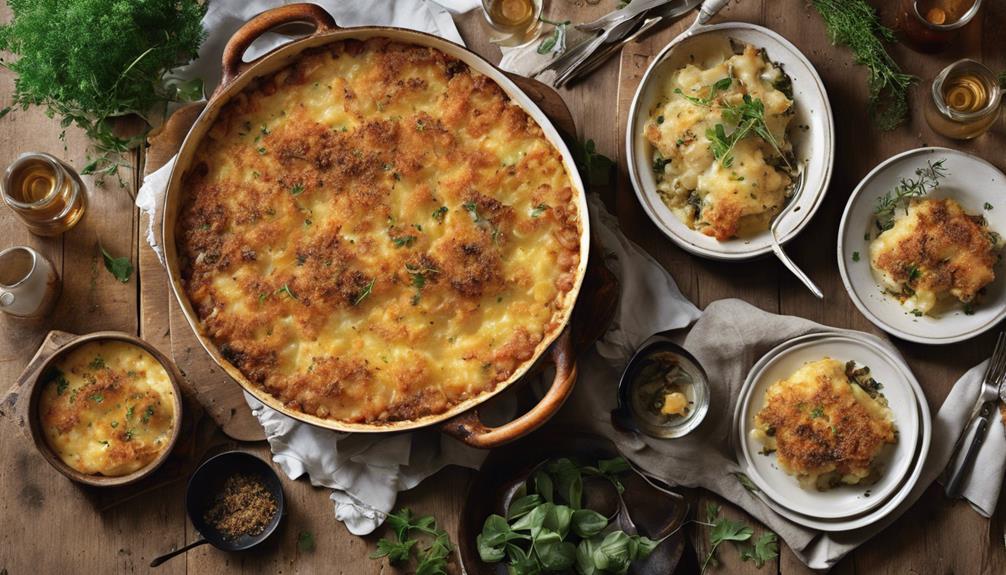
When you’re ready to serve your braised dish, consider pairing it with complementary sides that enhance its rich flavors. Think about classic side dishes like creamy mashed potatoes, polenta, or roasted vegetables. These options not only balance the dish but also contribute to a well-rounded meal. If you’re going for a rustic presentation, serve everything family style. This approach encourages sharing and makes the meal feel more inviting.
Pay attention to portion sizes when plating your dish. You want to guarantee everyone gets enough without overwhelming the plate. Use serving utensils that match the vibe of your meal—wooden spoons for a homey look or sleek stainless steel for a more modern feel. Garnish options like fresh herbs, citrus zest, or a drizzle of high-quality olive oil can elevate your dish’s appearance and flavor profile.
As for serving temperatures, remember that braised dishes are often best enjoyed warm, but you can serve some components at room temperature to add variety. Don’t forget the wine pairings, as a well-chosen bottle can elevate the entire dining experience. Whether you choose a robust red or a crisp white, make sure it complements the dish’s flavors.
Cleaning Your Dutch Oven
Once the meal is done and everyone’s satisfied, it’s time to tackle the cleanup of your Dutch oven. Start by letting it cool down a bit; you don’t want to burn your hands. Once it’s cool enough to handle, you can choose the right cleaning method. If you’ve got stuck-on food, fill the pot with hot water and let it soak for a bit. This helps loosen any stubborn bits without too much scrubbing.
When cleaning, opt for non-abrasive cleaning tools. Avoiding scratches is essential for keeping your Dutch oven in top shape. A soft sponge or cloth works wonders, and you can use a little baking soda for tougher stains. Just make sure to avoid steel wool or harsh scouring pads. They can leave scratches that compromise the pot’s seasoning and overall integrity.
If you’ve used a cast iron Dutch oven, remember to dry it thoroughly after washing. Leaving moisture can lead to rust, which is the last thing you want. To prevent this, you can place it on low heat for a few minutes to evaporate any remaining water. Once it’s dry, consider applying a light coat of oil to maintain its seasoning.
Experimenting With Flavors
Experimenting with flavors in your Dutch oven can elevate your culinary creations to new heights. By mixing and matching different flavor profiles, you can transform simple dishes into extraordinary meals that wow your family and friends. Start by thinking about the ingredient combinations you want to use. Consider the base of your dish—whether it’s meat, vegetables, or legumes—and pair it with complementary herbs and spices to enhance the overall taste.
Don’t shy away from bold flavors. For instance, if you’re braising beef, try incorporating smoked paprika or chipotle for a smoky kick. Alternatively, a splash of balsamic vinegar can provide a tangy depth that balances richer ingredients. You might also explore global cuisines; adding cumin and coriander can give your dish a Middle Eastern flair, while ginger and soy sauce can bring an Asian twist.
Another great way to experiment is with liquids. Instead of just using water or broth, consider wine, beer, or even fruit juices. Each liquid adds its unique flavor profile that can make your dish stand out. Remember to taste as you go. Adjusting seasonings during the cooking process allows you to strike the perfect balance and discover unexpected combinations.
Lastly, don’t forget about finishing touches like fresh herbs or citrus zest. They can brighten up the final dish and provide a lovely contrast to the deep flavors developed during braising. Enjoy the creative process, and let your taste buds guide you!
Tips For Braising In A Dutch Oven; Frequently Asked Questions
Can I Braise Without a Dutch Oven?
Yes, you can braise without a Dutch oven! Consider using a heavy pot or slow cooker instead. Both offer effective braising alternatives, allowing you to explore different cooking techniques while achieving tender, flavorful results.
What Types of Meat Are Best for Braising?
When braising, you’ll want to choose tougher cuts like beef cuts, pork shoulder, or lamb shanks. They tenderize beautifully in low heat with a flavorful braising liquid, resulting in deliciously rich dishes.
How Do I Know When My Braise Is Done?
To know when your braise is done, use doneness indicators like fork-tender texture and internal temperature. Master these braise techniques, and you’ll guarantee your meat is perfectly cooked and bursting with flavor every time.
Can I Braise Vegetables Alongside the Meat?
Yes, you can braise vegetables alongside the meat. Just use proper vegetable preparation techniques, cutting them into uniform sizes. This guarantees even cooking and enhances flavors, making your dish delicious and satisfying. Enjoy the harmony!
What Side Dishes Pair Well With Braised Meals?
When you’re enjoying braised meals, consider pairing them with braised greens for a vibrant side. Creamy polenta also complements the rich flavors beautifully, creating a comforting and satisfying dining experience you won’t forget.

Conclusion
Braising in a Dutch oven is a fantastic way to create tender, flavorful dishes. By choosing the right cut of meat, preheating your pot, and adding aromatics, you’ll elevate your cooking game. Don’t forget to thicken your sauce for that perfect finish, and get creative with flavors to suit your taste. Enjoy your delicious meal, and remember that cleaning your Dutch oven properly will keep it in great shape for all your future culinary adventures!