How To Restore A Rusty Cast Iron Skillet
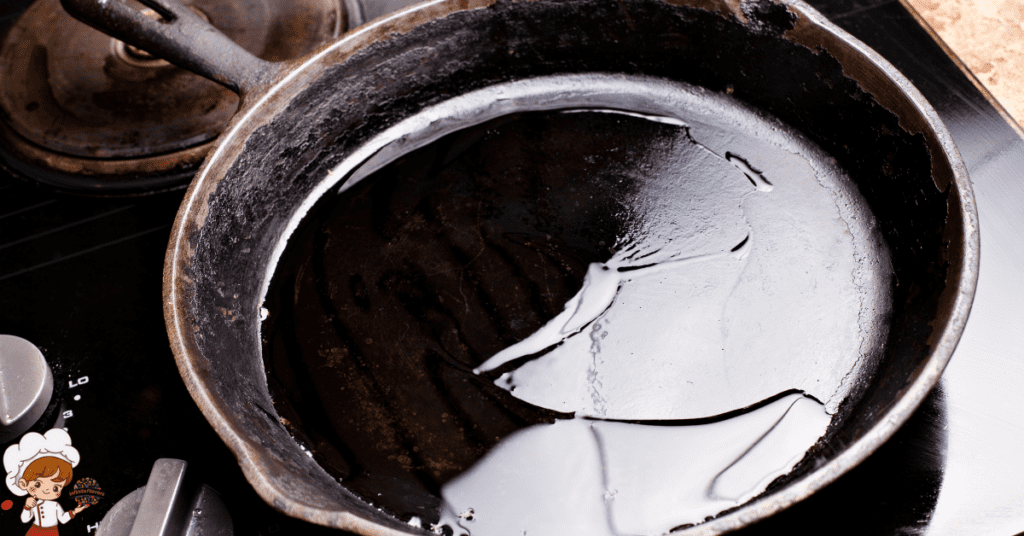
How To Restore A Rusty Cast Iron Skillet; To restore a rusty cast iron skillet, start by evaluating the rust damage. Gather sturdy cleaning supplies like steel wool, coarse salt, and a vinegar solution. Scrub the rust away using firm, circular motions and inspect the skillet to verify no rust remains. Rinse with hot water and dry it immediately to prevent moisture buildup. After drying, apply a thin layer of oil, then bake it upside down in a preheated oven to create a durable non-stick finish. Maintaining your skillet regularly will prevent future rust. Curious about tips for keeping your skillet in peak condition?
Assessing the Damage
Before you begin the restoration process, take a close look at your skillet to assess the extent of the rust damage. This initial rust assessment is essential, as it determines the approach you’ll take for restoration. Inspect the surface carefully. Are there just small patches of rust, or is it widespread? If the rust is minimal, you might only need some scrubbing. However, significant rust covering large areas may require more intensive treatment.
During your damage evaluation, pay attention to the skillet’s overall condition. Check for pitting or flaking, which indicates deeper corrosion. If the metal feels rough or crumbly, that’s a sign that the skillet needs more than just a quick clean. Also, examine the handle and any other parts for signs of rust or weakness.
Don’t forget to look at the interior cooking surface. If there’s rust there, it could affect your food’s flavor and safety. Take note of any areas that seem discolored or uneven, as this can impact how the skillet performs after restoration.
Once you’ve completed your assessment, you’ll have a clear idea of what materials and techniques you’ll need for the job. Understanding the severity of the rust damage will help guide your restoration efforts and guarantee you achieve the best results possible. You’re now ready to move forward with confidence in your restoration journey.
Gathering Your Supplies
Before you start restoring your skillet, you’ll need to gather some essential supplies. Make sure you have the right cleaning tools, protective gear, and suitable cleaning agents on hand. This preparation will make the process smoother and more efficient.
Essential Cleaning Tools
To effectively restore your rusty cast iron skillet, you’ll need a few essential cleaning tools at your disposal. First, gather some sturdy cleaning brushes. These are perfect for tackling tough rust spots and getting into the crevices of your skillet. Look for brushes with stiff bristles that can withstand aggressive scrubbing.
Next, invest in a set of scrubbing pads. Choose pads that are abrasive enough to remove the rust but gentle enough not to damage the cast iron surface. Nylon or copper scrubbing pads work well for this task; they’ll help you strip away old seasoning and rust without scratching the skillet.
Additionally, having a good supply of coarse salt on hand can aid in the scrubbing process. The salt acts as a natural abrasive, helping to lift off rust and debris when combined with your scrubbing tools.
Protective Gear Needed
What protective gear should you gather to keep yourself safe while restoring your rusty cast iron skillet? First and foremost, you’ll need a pair of protective gloves. Opt for durable, heat-resistant gloves to shield your hands from any sharp edges, abrasive materials, or harsh cleaning agents you may encounter during the restoration process. This will help prevent cuts or chemical burns, ensuring your hands stay safe.
Next, grab a pair of safety goggles. Protecting your eyes is essential, especially when you’re working with rust or any cleaning agents that might splatter. Safety goggles will keep your eyes shielded from dust, debris, or irritants, allowing you to focus on the task without worrying about potential hazards.
Lastly, consider wearing a dust mask or respirator if you’re dealing with significant rust or using strong cleaning agents. This extra layer of protection will help you avoid inhaling any harmful particles.
Cleaning Agents Options
You’ll need a few effective cleaning agents to tackle the rust on your cast iron skillet. Start with a vinegar solution, which is excellent for breaking down rust. Mix equal parts of white vinegar and water in a bowl, then soak the skillet for about 30 minutes. After soaking, scrub the rust with a non-abrasive pad.
Next, consider using baking soda. It’s a gentle abrasive that can help remove any remaining rust. Create a paste by mixing baking soda with a little water, apply it to the rusty areas, and scrub gently.
Lemon juice is another great option. Its acidity not only helps dissolve rust but also leaves a fresh scent. Apply lemon juice directly to the rusted spots and let it sit for about 10 minutes before scrubbing.
If the rust persists, you might need a commercial rust remover designed specifically for cast iron. Always follow the manufacturer’s instructions and verify the product is safe for cookware.
Gather these cleaning agents, and you’ll be well-equipped to restore your skillet to its former glory. Happy cleaning!
Removing Rust With Abrasives
When tackling rust on your cast iron skillet, using abrasives like steel wool or a scrub pad can effectively strip away the corrosion. These abrasive materials are powerful tools in your rust removal arsenal. Start by selecting the right abrasive; fine steel wool works well for light rust, while a more coarse pad can help with tougher patches.
Before you begin, make sure to wear gloves to protect your hands from both the rust and the abrasives. You’ll also want to work in a well-ventilated area, as the rust particles can become airborne.
Begin by dampening your skillet with water. This helps the abrasive materials work more effectively and reduces the chance of scratching the surface. Apply your chosen abrasive directly to the rusty areas, using firm pressure and a circular motion. Be patient; you might need to repeat this process several times, especially with stubborn rust.
For added effectiveness, you can mix in some coarse salt with the abrasive. This combination enhances the rust removal technique by acting as a mild abrasive itself, helping to lift the rust away. After working on the affected areas, rinse the skillet with warm water to remove any debris and loosened rust particles.
Once you’ve successfully removed the rust, you’re on the right track to restoring your skillet. Just remember, the goal is to achieve a smooth surface free of corrosion before moving on to the next steps in the restoration process.
Cleaning the Skillet Thoroughly
How can you confirm your cast iron skillet is completely clean after removing the rust? First, you need to use effective cleaning techniques that guarantee all remnants of rust and debris are eliminated. Start by scrubbing the entire skillet with a mixture of coarse salt and a bit of water to create a paste. This abrasive method not only helps in cleaning but also works wonders at removing any leftover particles from the rust removal process. Use a stiff brush or a non-metal scrubber to apply this paste, focusing on any stubborn spots.
After this initial scrub, it’s time to rinse the skillet. While you want to wash away all the salt and debris, avoid using soap as it can strip the seasoning from your skillet. Instead, rinse it under hot water, using your brush to dislodge any remaining particles.
Once you’ve rinsed thoroughly, inspect the skillet for any spots you might have missed. If you find any, repeat the scrubbing process. Confirming your skillet is entirely clean is essential not just for cooking but also for rust prevention in the future. A clean surface is less likely to attract moisture, which can lead to rust formation.
Rinsing and Drying Properly
After confirming your skillet is completely clean, it’s important to rinse and dry it properly to prevent any moisture from causing new rust. Start with rinsing techniques. Use hot water to rinse away any soap or debris left on the skillet. Avoid soaking it, as prolonged exposure to water can lead to rust. If necessary, use a non-abrasive sponge or cloth to guarantee all residues are removed. After rinsing, inspect the skillet for any remaining rust or particles.
Next, focus on drying methods. The key here is to eliminate any moisture completely. You can place the skillet on a stovetop over low heat for a few minutes. This gentle heat will help evaporate any leftover water. Alternatively, you can use a clean, dry towel to wipe down the skillet thoroughly. Make sure to get into all the nooks and crannies, especially around the handle and the base.
Once the skillet feels dry, allow it to cool slightly before storing it. If you’re in a humid environment, consider applying a thin layer of oil immediately after drying to create a protective barrier against moisture. Remember, the goal is to keep your cast iron skillet in prime condition so it can last for generations. By mastering these rinsing techniques and drying methods, you’ll greatly reduce the risk of rust and maintain the skillet’s integrity.
Seasoning Your Skillet
Now that your skillet is clean and dry, it’s time to season it for a non-stick finish. You’ll want to choose the right oil and use the proper heating technique to create that perfect layer. Let’s explore how these steps can enhance your cooking experience.
Selecting the Right Oil
Which oil will best enhance your skillet’s seasoning and withstand high heat is essential for restoring your cast iron. When selecting an oil, consider oil types like flaxseed, grapeseed, or canola oil. Flaxseed oil is highly praised for its polymerization properties, creating a tough, non-stick layer. Grapeseed oil has a high smoke point, making it ideal for high-temperature cooking. Canola oil is another versatile option, offering good performance and availability.
For effective oil application, start with a clean, dry skillet. Use a paper towel to apply a thin layer of your chosen oil, ensuring you cover the entire surface, including the sides and handle. Avoid using too much oil, as excess can lead to a sticky finish. After applying the oil, wipe away any drips or puddles, leaving a smooth, even coating.
Remember that seasoning is a process; the more you use your skillet, the better the seasoning will develop over time. With the right oil, you’ll not only restore your cast iron skillet but also improve its cooking performance and longevity.
Proper Heating Technique
To properly season your skillet, it’s crucial to heat it evenly, allowing the oil to bond with the iron and create a durable non-stick surface. Start by choosing the right heating method. You can use an oven, stovetop, or even a grill. If you opt for the oven, preheat it to around 450°F (232°C). Place your skillet upside down on the middle rack to catch any excess oil drips.
For stovetop seasoning, use medium heat and gradually increase it to avoid scorching the oil. Always keep an eye on temperature control; you don’t want your oil to smoke excessively, as this can ruin the seasoning process. Once your skillet reaches the desired temperature, apply a thin layer of your selected oil using a paper towel, making sure it covers every surface evenly.
After applying the oil, let it heat for about an hour, allowing the oil to polymerize and form that non-stick layer. When the time’s up, turn off the heat and let your skillet cool down slowly in the oven or on the stovetop. This method guarantees that your cast iron skillet is well-seasoned and ready for cooking!
Applying Oil Evenly
When applying oil, make sure you cover the entire surface of the skillet evenly to create a protective layer and prevent future rust. Start by choosing an oil with a high smoke point, like flaxseed or grapeseed oil. These oils not only protect the skillet but also enhance its non-stick properties.
Use a clean, lint-free cloth or paper towel to apply the oil. This is one of the best oil application techniques. Pour a small amount of oil onto the cloth, then rub it over the skillet’s interior and exterior. Make sure to reach the edges and the handle, as these areas are just as susceptible to rust.
For effective oil absorption methods, let the skillet sit for a few minutes after application. This allows the oil to penetrate the cast iron’s porous surface. If you notice any excess oil pooling in the bottom, wipe it away with a clean cloth. Too much oil can lead to a sticky residue, which isn’t ideal for cooking.
Once you’ve applied the oil evenly, you’ll create a smooth, shiny surface that’ll help protect your skillet from moisture. Remember, the goal is to guarantee a thin, even layer without any drips or puddles. Taking the time to properly apply oil will not only extend the life of your skillet but also improve its cooking performance. With these steps, you’ll be well on your way to restoring your rusty cast iron skillet to its former glory.
Baking for a Durable Finish
Baking your cast iron skillet after applying oil is essential for achieving a strong, lasting finish. You’ll need to pay attention to the right temperature and duration to guarantee the oil bonds properly. Let’s go over the best practices to make your skillet ready for years of use.
Importance of Baking Oil
Using the right baking oil is essential for creating a durable, non-stick finish on your restored cast iron skillet. Different oil types can yield varying results, so it’s important to choose wisely. For instance, flaxseed oil is highly recommended due to its high smoke point and ability to polymerize, forming a hard, protective layer. Other great options include grapeseed oil and canola oil, both of which offer excellent oil benefits, including enhancing the skillet’s seasoning and preventing rust.
When you apply your chosen oil, make sure you use a thin, even layer to avoid a sticky finish. Too much oil can lead to a gummy surface, which defeats the purpose of restoring your skillet. By selecting the right oil type and applying it correctly, you’ll create a robust, long-lasting non-stick surface that can withstand years of cooking.
Temperature and Duration Tips
Choosing the right temperature and duration for baking your cast iron skillet is vital to achieving a durable, non-stick finish after applying your oil. For best results, preheat your oven to a temperature between 450°F and 500°F. This high heat guarantees that the oil polymerizes correctly, creating a strong bond with the skillet’s surface.
When it comes to duration guidelines, you’ll want to bake your skillet for about one hour. This allows ample time for the oil to fully cure. However, if your skillet has heavy rust or damage, consider extending this time to 1.5 hours.
Remember to place the skillet upside down on the oven rack to prevent excess oil from pooling inside. You can place a baking sheet on the rack below to catch any drips. After the baking time is complete, turn off the oven and let the skillet cool inside. This gradual cooling process helps to solidify the finish.
Maintaining temperature control during the baking process is essential, as fluctuations can affect the quality of the finish. Stick to these tips, and you’ll be rewarded with a beautifully restored skillet!
Regular Maintenance Tips
To keep your cast iron skillet in top shape, regularly season it after each use and clean it properly to prevent rust. After cooking, let the skillet cool slightly, then wash it with hot water and a stiff brush. Avoid using soap, as it can strip the seasoning. If food is stuck, use coarse salt as a scrubber. Once clean, dry the skillet completely to prevent moisture buildup.
Next, apply a thin layer of cooking oil to the interior surface while the skillet is still warm. This not only maintains the seasoning but also acts as a preventative measure against rust. Make it a habit to check your skillet routinely for any signs of rust or damage. If you notice any spots, address them immediately to prevent further deterioration.
Store your skillet in a dry place, ideally with a paper towel inside to absorb any moisture. This small step can go a long way in protecting your cookware. If stacking with other pots or pans, place a cloth between them to avoid scratches.
Troubleshooting Common Issues
Even with regular maintenance, you might encounter some common issues with your cast iron skillet that require troubleshooting. One of the most frustrating problems is persistent rust. If you notice spots appearing despite your best efforts, revisit your rust prevention techniques. Verify you’re drying the skillet immediately after washing and applying a thin layer of oil to create a protective barrier.
Another issue you might face is food sticking to the surface. This often happens when the skillet isn’t seasoned properly. To fix this, you’ll want to re-season your skillet. Start by scrubbing it with a non-metal brush and mild soap to remove any residue. Rinse and dry thoroughly, then apply a thin layer of oil and bake it upside down in the oven at a high temperature for an hour. This process helps restore its non-stick surface.
You might also notice uneven cooking or hot spots. This could be due to improper heating. Preheat your skillet gradually and use medium heat rather than high. It’s also helpful to rotate the skillet occasionally during cooking to achieve even heat distribution.
Frequently Asked Questions: How To Restore A Rusty Cast Iron Skillet
Can I Use a Rusty Skillet for Cooking Before Restoration?
You shouldn’t cook with a rusty skillet due to safety concerns. Rust can contaminate your food, leading to health issues. It’s best to restore it first, ensuring a safe and enjoyable cooking experience.
How Often Should I Season My Cast Iron Skillet?
You should season your cast iron skillet every few uses, especially after cooking acidic foods. Consistent seasoning frequency is key for ideal cast iron care, ensuring a non-stick surface and preventing rust. Keep it well-maintained!
What Types of Oil Are Best for Seasoning?
When seasoning your skillet, choose oils with high smoke points like flaxseed, grapeseed, or canola. These seasoning oils create a durable layer, preventing sticking and enhancing flavor without burning at high temperatures.
Is It Safe to Use Metal Utensils on Cast Iron?
Yes, it’s safe to use metal utensils on cast iron, but you should be cautious. Proper cast iron care means avoiding excessive scratching, which can damage the seasoning. Always handle your cookware gently to maintain its integrity.
Can I Restore a Skillet With Deep Pitting or Damage?
You can attempt to restore a skillet with deep pitting, but results vary. Using specific restoration techniques, like sanding and seasoning, might help, though severe damage could compromise the skillet’s functionality and lifespan.

Conclusion
Restoring your rusty cast iron skillet isn’t just about removing rust; it’s about reviving a kitchen essential. With the right supplies and techniques, you can bring your skillet back to life, ensuring it’s ready for countless meals. Remember to maintain it regularly to prevent rust from returning. Enjoy the process, and soon you’ll be cooking with a beautifully seasoned skillet that’ll serve you well for years to come. Happy cooking!