How To Bake Gluten-Free Bread
How To Bake Gluten-Free Bread; Imagine embarking on a culinary adventure where the familiar becomes extraordinary, and the possibilities are as endless as the rising dough in your hands. Baking gluten-free bread is like navigating uncharted waters, where the traditional rules of baking are challenged, and new techniques must be mastered. But fear not, for within these pages lies the key to unlocking the secrets of creating delicious, gluten-free bread that rivals its gluten-filled counterparts. So, gather your ingredients, don your apron, and prepare to embark on a journey that will tantalize your taste buds and leave you craving for more.
Choose the Right Gluten-Free Flour Blend
To ensure the best results in your gluten-free bread, it is essential to carefully select the right flour blend. When it comes to gluten-free baking, traditional wheat flour is not an option. However, there are plenty of gluten-free flour alternatives available that can yield delicious and satisfying results.
One of the most popular gluten-free flour alternatives is a blend of rice flour, tapioca starch, and potato starch. This blend provides a good balance of texture and flavor for your bread. Rice flour is a staple in gluten-free baking as it adds structure and lightness. Tapioca starch helps to bind the ingredients together and gives the bread a chewy texture. Potato starch, on the other hand, contributes to a moist and tender crumb.
When choosing a gluten-free flour blend, it is important to read the labels carefully. Look for blends that are specifically labeled as gluten-free to ensure they meet your dietary needs. Additionally, pay attention to the ingredients list and avoid blends that contain additives or preservatives.
To achieve successful gluten-free baking, it is also important to understand that different flour blends may require different liquid ratios. Gluten-free flours tend to absorb more liquid than traditional wheat flour, so you may need to adjust the amount of liquid in your recipe. Start by adding a little less liquid than the recipe calls for, and gradually increase if needed.
Gather Your Ingredients and Equipment
Gather all of the necessary ingredients and equipment for baking your gluten-free bread. To start, you’ll need to choose the right flour blend. When it comes to gluten-free baking, finding the perfect flour blend is crucial. Look for a blend that contains a combination of gluten-free flours, such as rice flour, tapioca flour, and potato starch. This will help mimic the texture and flavor of traditional bread.
In addition to your flour blend, you’ll need other essential ingredients like yeast, salt, sugar, and xanthan gum. Yeast is crucial for achieving a light and airy texture in your bread, while salt and sugar add flavor. Xanthan gum is a binder that helps give structure to your gluten-free dough.
Now, let’s talk about the equipment you’ll need. A stand mixer with a dough hook attachment is ideal for kneading your gluten-free bread dough. It takes the hard work out of kneading and ensures that your dough is well mixed and evenly kneaded. If you don’t have a stand mixer, you can also knead the dough by hand, but it may take a bit more effort.
When it comes to shaping the dough, make sure to lightly grease your hands and work surface to prevent sticking. Gluten-free dough can be sticky, so this step is essential. To shape your bread, gently pat the dough into a rectangle and then roll it tightly into a log. You can also shape it into a round loaf or use a bread tin for a more uniform shape.
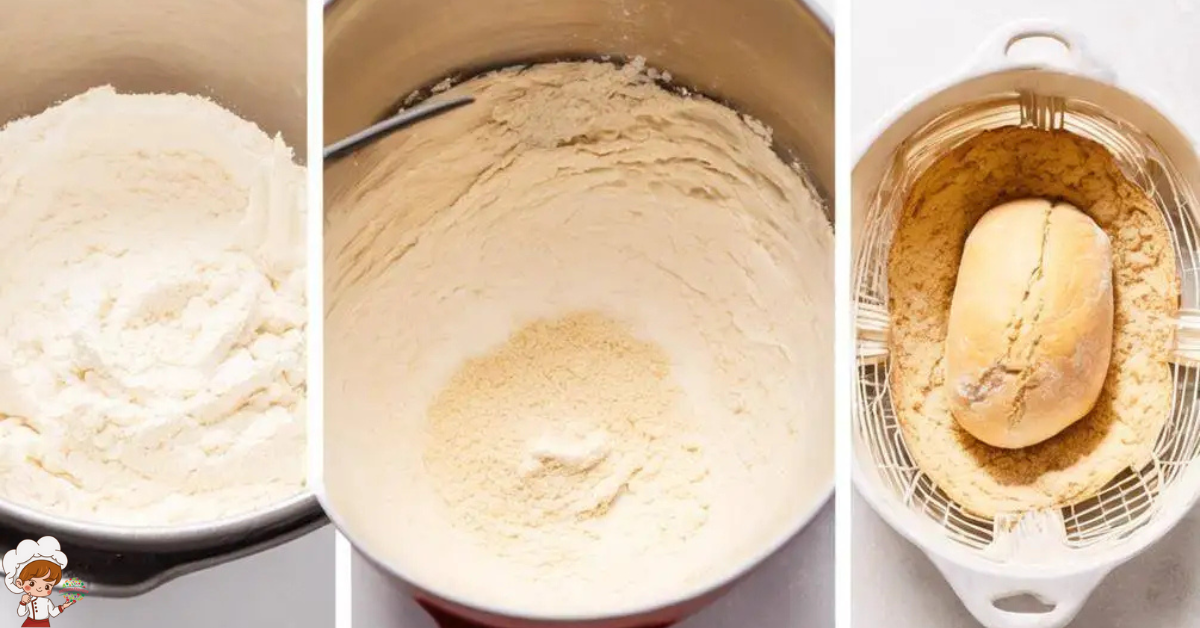
Mix the Dry Ingredients
Now that you have gathered all of your necessary ingredients and equipment, it’s time to move on to the next step: mixing the dry ingredients for your gluten-free bread. When it comes to gluten-free bread recipes, using alternative flours for baking is essential. These flours, such as rice flour, almond flour, or chickpea flour, provide structure and texture to the bread while being free of gluten.
To begin, you will need to measure out the dry ingredients according to your recipe. Be sure to use a kitchen scale for accuracy, as gluten-free flours can have different weights and densities compared to traditional wheat flour. Once you have measured out the required amounts, it’s time to mix them together.
In a large mixing bowl, combine the alternative flours with other dry ingredients such as xanthan gum, salt, and any additional flavorings or spices. Whisk the ingredients together until they are well combined. This will ensure that all the dry ingredients are evenly distributed throughout the bread dough.
When mixing the dry ingredients, it’s important to remember that gluten-free breads require more moisture than their gluten-containing counterparts. This helps to compensate for the lack of gluten, which provides structure and elasticity. So, don’t be surprised if the dough appears slightly wetter than you’re used to.
Once the dry ingredients are mixed, you can proceed to the next step of your gluten-free bread recipe. Mixing the dry ingredients thoroughly ensures that your bread will have a consistent texture and rise properly. So, take your time and make sure everything is well combined before moving on.
Prepare the Wet Ingredients
Begin by combining the wet ingredients to create the perfect texture and flavor for your gluten-free bread. When it comes to gluten-free baking, using alternative wet ingredients is crucial to achieve the desired results. Traditional recipes often call for ingredients like milk, butter, and eggs, which are not suitable for those following a gluten-free diet. However, there are plenty of alternatives that can be used to make your bread moist and delicious.
One common mistake in preparing wet ingredients is using too much liquid. It’s important to follow the recipe precisely and measure the ingredients accurately. Adding too much liquid can result in a dense and gummy texture, which is definitely not what you want in your gluten-free bread. Another mistake is not allowing enough time for the wet ingredients to properly combine. Take the time to thoroughly mix the wet ingredients together, ensuring that they are well incorporated before adding them to the dry ingredients.
When it comes to wet ingredient alternatives, there are several options to choose from. Instead of regular milk, you can use non-dairy alternatives like almond milk, coconut milk, or rice milk. These options will add moisture to your bread without compromising the texture or flavor. Butter can be replaced with dairy-free margarine or coconut oil, both of which will provide a rich and creamy texture. Eggs can be substituted with applesauce, mashed bananas, or even chia seeds mixed with water. These alternatives will bind the ingredients together and add moisture to your gluten-free bread.
Combine the Wet and Dry Ingredients
To create a perfectly blended gluten-free bread dough, combine the wet and dry ingredients together, ensuring they are thoroughly mixed. The ratio of wet to dry ingredients is crucial in gluten-free bread baking. It is important to achieve the right balance to ensure a moist and tender texture. The general rule of thumb is to use a higher ratio of wet ingredients to dry ingredients. This helps compensate for the lack of gluten, which typically provides structure and moisture retention in traditional bread recipes.
When combining the wet and dry ingredients, start by adding the wet ingredients to a large mixing bowl. This can include liquids like water, milk, or dairy-free alternatives, as well as eggs or other binders. Slowly incorporate the dry ingredients, such as gluten-free flour blends, xanthan gum or psyllium husk, salt, and any additional flavorings or additives. Use a spatula or a wooden spoon to gently stir the mixture until all the ingredients are evenly combined.
One common troubleshooting tip is to avoid overmixing the dough. Gluten-free bread dough is more delicate and can become dense and gummy if overworked. Mix until all the ingredients are just combined, being careful not to overdo it.
Another common issue with gluten-free bread is a dry and crumbly texture. To prevent this, make sure to measure the wet and dry ingredients accurately. Using a kitchen scale is recommended for precise measurements. Additionally, consider adding ingredients like honey, olive oil, or applesauce to increase the moisture content of the dough.
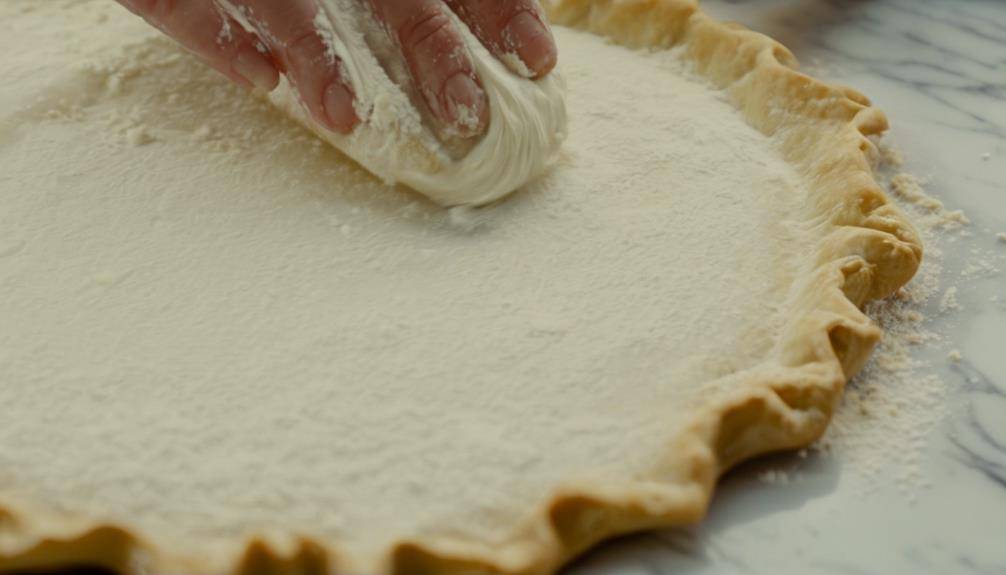
Knead and Shape the Dough
Gently and skillfully work the dough to develop its structure and create the desired shape for your gluten-free bread. Kneading is an essential step in bread-making, even for gluten-free recipes. While gluten-free dough may differ in texture and elasticity, proper kneading techniques will help you achieve a light and airy loaf. Here are some shaping tips to ensure your gluten-free bread turns out beautifully.
When kneading gluten-free dough, it’s important to be gentle. Unlike dough with gluten, which benefits from vigorous kneading to develop elasticity, gluten-free dough requires a delicate touch. Use the heel of your hand to slowly push the dough away from you, then fold it back onto itself. Repeat this process, turning the dough as you go, until it becomes smooth and elastic.
To prevent the dough from sticking to your hands, lightly dust your work surface with gluten-free flour or use oiled hands. Be mindful not to add too much flour, as this can result in a dense and dry loaf. The dough should be slightly sticky but manageable.
Once the dough is kneaded, shape it into the desired form. For a traditional loaf, gently roll the dough into a log and place it seam-side down in a greased bread pan. You can also shape the dough into rolls or baguettes by dividing it and forming each piece into the desired shape.
When shaping gluten-free dough, do not overwork it. Avoid excessive handling, as this can cause the dough to become dense. Instead, focus on gently shaping the dough into the desired form while ensuring it maintains its lightness.
Let the Dough Rise
Now it’s time to let your gluten-free bread dough rise. To achieve optimal rising conditions, make sure to place your dough in a warm and draft-free area. The timing and temperature are crucial, so keep an eye on the dough and wait until it has doubled in size.
Optimal Rising Conditions
For optimal rising conditions, allow the gluten-free dough to rest in a warm place until it doubles in size. The ideal temperature for the dough to rise is around 80°F (27°C). This warm environment helps activate the yeast, allowing the dough to rise properly. The length of rising can vary depending on different factors such as the recipe, room temperature, and the yeast used.
Typically, gluten-free dough takes longer to rise compared to regular dough, so be patient. It may take anywhere from 1 to 2 hours for the dough to double in size. Keep an eye on it and check periodically to ensure it doesn’t overproof. Remember, a warm and cozy spot will help your gluten-free bread dough reach its full rising potential.
Timing and Temperature
To achieve optimal rising conditions, ensure that you let the gluten-free dough rest in a warm environment until it doubles in size. The optimal rising temperature for gluten-free bread is around 80°F to 85°F (27°C to 29°C). You can achieve this temperature by preheating your oven to the lowest setting for a few minutes, then turning it off and placing the dough inside.
Another option is to use a proofing box or a warm spot in your kitchen. If the dough is not rising properly, it could be due to a low rising temperature. Troubleshooting rising issues also involves making sure your yeast is fresh and active, and allowing enough time for the dough to rise. By following these tips, you can ensure that your gluten-free bread rises perfectly and results in a delicious loaf.
Bake and Enjoy!
Now that your dough has risen, it’s time for the exciting part: baking and enjoying your gluten-free bread! To bake your bread, you’ll need a few key ingredients like gluten-free flour, yeast, and water. Simply follow the baking instructions provided, and soon you’ll have a delicious loaf of gluten-free bread to enjoy!
Ingredients Needed
Begin by gathering all the necessary ingredients to bake and enjoy your gluten-free bread. When it comes to gluten-free bread recipes, there are a variety of options to choose from. The key is to find the best gluten-free bread brands that suit your taste and dietary needs. Start with the basics: gluten-free flour, such as rice flour or almond flour, which will serve as the base for your bread.
You’ll also need baking powder, salt, and sugar to enhance the flavor. Don’t forget the yeast, which will help the bread rise. To add moisture, opt for ingredients like eggs, milk, or dairy-free alternatives. Finally, consider additional flavorings like herbs, spices, or seeds to give your gluten-free bread a unique twist. With these ingredients in hand, you’re ready to embark on your gluten-free bread baking journey.
Baking Instructions
Get ready to dive into the delicious process of baking gluten-free bread and savoring the results! Now that you have gathered all the necessary ingredients, it’s time to start baking. Follow these baking instructions to ensure a successful outcome.
First, preheat your oven to the designated temperature mentioned in your recipe. This is crucial for proper baking. Next, grease your bread pan with oil or butter to prevent sticking. Then, carefully pour the bread dough into the pan, ensuring it is evenly distributed. Smooth the top with a spatula for a nice, even loaf.
Place the pan in the preheated oven and set the timer according to your recipe. While baking, resist the temptation to open the oven door as it can cause the bread to collapse. Instead, rely on the timer to determine when your bread is ready.
Once the timer goes off, carefully remove the bread from the oven using oven mitts. Gently tap the bottom of the loaf to check for a hollow sound, indicating it is fully baked. If the bread needs more time, place it back in the oven for a few more minutes.
Allow the bread to cool in the pan for about 10 minutes before transferring it to a wire rack. This will prevent it from becoming soggy. Let it cool completely before slicing and enjoying.
Baking Tips: To achieve a lighter texture, use a mix of gluten-free flours such as rice flour, almond flour, and tapioca flour. Additionally, adding xanthan gum can help improve the structure of the bread. Lastly, make sure to accurately measure all ingredients for consistent results.
Troubleshooting Problems: If your bread turns out too dense, it may be due to using too much flour or not enough leavening agents. Experiment with adjusting the amount of flour and baking powder in your recipe. If your bread collapses in the middle, it may be underbaked. Extend the baking time and ensure the bread is fully cooked before removing it from the oven.
Follow these baking instructions, utilize the baking tips, and troubleshoot any problems that arise, and you’ll soon be enjoying a slice of delicious gluten-free bread.

Frequently Asked Questions
How Long Does It Take for the Gluten-Free Bread Dough to Rise?
It takes about 1-2 hours for gluten-free bread dough to rise. The rising time can vary depending on the temperature and humidity of your kitchen, so keep an eye on it.
Can I Substitute Regular Flour With Gluten-Free Flour in Other Bread Recipes?
Yes, you can substitute regular flour with gluten-free flour in other bread recipes. Just make sure to use the appropriate amount and follow the recipe instructions to ensure the best results. Happy baking!
Can I Use a Bread Machine to Bake Gluten-Free Bread?
Yes, you can use a bread machine to bake gluten-free bread. It’s a convenient option. However, if you don’t have a bread machine, there are still tips and tricks to bake gluten-free bread without one.
How Long Does Gluten-Free Bread Stay Fresh?
Gluten-free bread stays fresh for around 3-5 days, but proper storage can extend its shelf life. To keep it fresh longer, store it in an airtight container or bag, and consider freezing slices for later use.
Can I Freeze Gluten-Free Bread for Later Use?
Yes, you can freeze gluten-free bread for later use. It’s a great way to extend its shelf life. Make sure to wrap it tightly in plastic wrap or a freezer bag to prevent freezer burn. Some of the best gluten-free bread brands that freeze well are Udi’s and Canyon Bakehouse.
Conclusion
Now that you know the steps to bake gluten-free bread, you can enjoy delicious homemade bread without the worry of gluten. By following the right flour blend, gathering your ingredients and equipment, and properly mixing and shaping the dough, you can create a tasty loaf that everyone can enjoy. So go ahead and give it a try, and savor the satisfaction of baking your own gluten-free bread.