Step-by-Step Guide: Baking Gluten-Free Bread You Will Love
Want to master the art of baking gluten-free bread? Look no further! This step-by-step guide will help you achieve gluten-free bread success without any fuss. You’ll learn all the tips and tricks for creating delicious loaves that are light, fluffy, and full of flavor. From choosing the right gluten-free flour blend to properly measuring your ingredients, we’ve got you covered. We’ll even show you how to test for doneness and store your bread properly, so it stays fresh for longer. So, whether you’re new to gluten-free baking or looking to improve your skills, this guide is here to make your bread-baking journey a breeze. Let’s get started!
Bake with Style—Click Here For Our Collection and Start Creating
Gather Your Ingredients
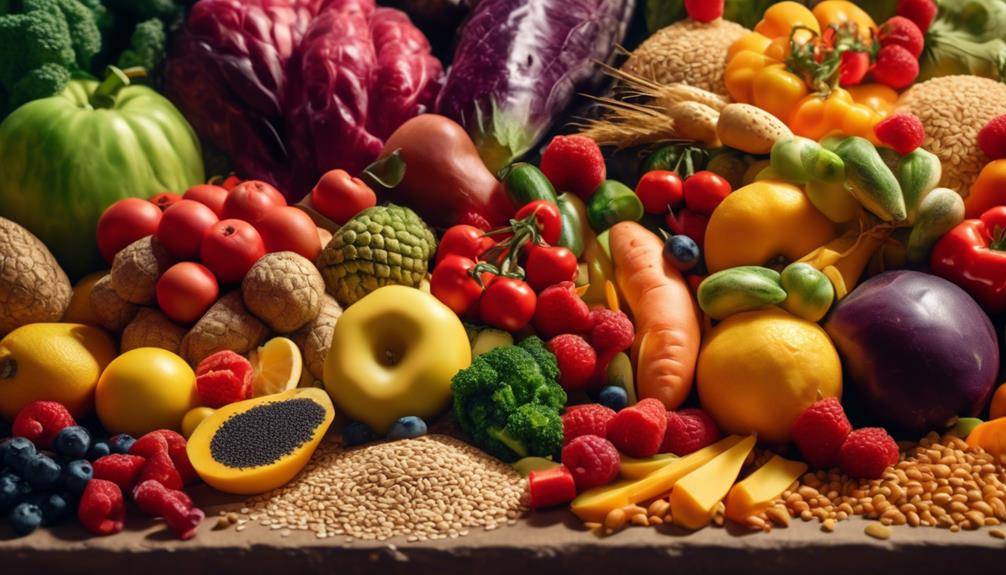
First, gather all of your ingredients for baking gluten-free bread. When it comes to gluten-free baking, it’s important to choose the right alternatives for a successful loaf. Start with a gluten-free flour blend, such as a combination of rice flour, tapioca starch, and potato starch. These flours mimic the texture and structure of wheat flour, ensuring a light and fluffy bread.
Next, gather your wet ingredients. Replace traditional dairy milk with a non-dairy alternative like almond milk or coconut milk. These options add moisture and flavor to your bread, without the risk of gluten contamination. Don’t forget the eggs, as they provide structure and help bind the ingredients together. If you have an egg allergy, you can use flaxseed meal or applesauce as a substitute.
Now it’s time to add the extra ingredients that will enhance the flavor and texture of your gluten-free bread. Consider adding xanthan gum, which acts as a binder and replaces the gluten found in wheat flour. This will give your bread a better rise and prevent it from becoming crumbly. You can also add a pinch of salt for flavor and yeast for a nice rise.
When troubleshooting common baking mistakes, it’s crucial to measure your ingredients accurately. Use measuring cups and spoons specifically designed for gluten-free baking, as they ensure precision. Also, be mindful of your oven temperature and baking time. Gluten-free bread tends to bake faster, so keep an eye on it to avoid overcooking.
Bake with Style—Click Here For Our Collection and Start Creating
Choose the Right Gluten-Free Flour Blend
To choose the right gluten-free flour blend for successful bread baking, you should opt for a combination of rice flour, tapioca starch, and potato starch. These three ingredients work together to create a gluten-free flour blend that closely mimics the texture and structure of traditional wheat flour. Here’s why each of these ingredients is important:
- Rice flour: Rice flour is a versatile gluten-free flour that adds lightness and tenderness to the bread. It has a mild flavor and a fine texture, making it a great base for gluten-free baking.
- Tapioca starch: Tapioca starch, also known as tapioca flour, is derived from the cassava root. It helps improve the chewiness of the bread and adds a slightly sweet flavor. Tapioca starch also helps bind the ingredients together, giving the bread a better texture.
- Potato starch: Potato starch is made by extracting the starch from potatoes and is a great gluten-free thickening agent. It adds moisture to the bread, making it softer and more tender. Potato starch also helps improve the rise and structure of the bread.
- Understanding gluten-free flour substitutes: When choosing alternative flours for gluten-free baking, it’s important to understand the different properties of each flour. Some other gluten-free flours that can be used in combination with the rice flour, tapioca starch, and potato starch blend include sorghum flour, almond flour, and coconut flour. Each flour has its own unique taste and texture, so experimenting with different combinations can help you achieve the desired results.
Measure Your Ingredients Accurately
To ensure accurate measurements, use measuring cups and spoons when preparing your gluten-free bread dough. Precise measurements are crucial when it comes to baking gluten-free bread. Even the slightest deviation can have a significant impact on the final outcome of your loaf. Therefore, it is essential to pay close attention to the measurements of each ingredient.
One of the most common mistakes in measuring ingredients is using the wrong measuring tools. Eyeballing or estimating the quantities might seem convenient, but it can lead to inconsistencies in your dough. Using measuring cups and spoons specifically designed for dry and liquid ingredients will help you achieve the desired results. These tools are calibrated to provide accurate measurements, ensuring that you add the right amount of each ingredient.
Another mistake to avoid is packing your measuring cups with flour or other dry ingredients. This can cause an excess amount of these ingredients in your dough, resulting in a dry and dense loaf. Instead, lightly spoon the flour into the measuring cup and level it off with a straight edge. This method ensures that you get the correct amount of flour without compacting it.
When measuring liquids, place your measuring cup on a flat surface and pour the liquid to the indicated line. Avoid holding the cup in your hand, as it can cause the cup to tilt and lead to inaccurate measurements.
Bake with Style—Click Here For Our Collection and Start Creating
Mix the Dough Thoroughly
To mix the gluten-free bread dough thoroughly, start by incorporating all the ingredients together until a smooth and cohesive texture is achieved. Proper mixing is crucial to ensure that all the wet and dry ingredients are evenly distributed throughout the dough, resulting in a well-balanced loaf of bread. Here are some thorough mixing techniques to help you achieve the best results:
- Begin by combining the dry ingredients in a large mixing bowl. This usually includes gluten-free flour, xanthan gum (if not already included in the flour mix), yeast, sugar, and salt. Whisk them together to evenly distribute the ingredients.
- In a separate bowl, whisk together the wet ingredients, such as warm water, oil, and eggs. Make sure they are well combined before adding them to the dry ingredients.
- Slowly pour the wet ingredients into the dry ingredients, stirring constantly. Use a wooden spoon or a stand mixer with a dough hook attachment to incorporate the ingredients thoroughly. Continue mixing until a sticky dough forms.
- Once the dough has come together, it’s time to knead it. Dust your work surface with gluten-free flour and turn the dough out onto it. Knead the dough for a few minutes, using the heel of your hand to push the dough away from you and then folding it back over itself. Repeat this process until the dough is smooth and elastic.
Let the Dough Rise Properly
Now that your dough is mixed thoroughly, it’s time to let it rise properly. There are a few key points to keep in mind for successful rising. First, create ideal conditions by finding a warm spot in your kitchen, free from drafts. Second, pay attention to the time and temperature requirements specified in your recipe. And finally, remember the importance of patience – allowing your dough enough time to rise will result in a lighter, fluffier gluten-free bread. So, let’s dive in and learn how to let your dough rise properly!
Bake with Style—Click Here For Our Collection and Start Creating
Ideal Rising Conditions
For the dough to rise properly, you need to let it rise in ideal conditions. Here are some key factors to consider:
- Ideal Temperature: The yeast in the dough is activated by warm temperatures. Aim for a temperature between 75°F and 85°F (24°C and 29°C) for the best rise. Too hot, and the yeast will become sluggish. Too cold, and the rise will be slow or nonexistent.
- Yeast Activation: Before incorporating the yeast into the dough, it needs to be activated. Dissolve the yeast in warm water (around 110°F or 43°C) with a pinch of sugar. Let it sit for 5-10 minutes until it becomes frothy. This step ensures that the yeast is alive and ready to work its magic.
- Covering the Dough: To create a warm and moist environment for the dough, cover it with a damp kitchen towel or plastic wrap. This helps to prevent the dough from drying out and promotes a better rise.
- Avoid Drafts: When letting the dough rise, make sure to place it in a draft-free area. Drafts can cause uneven rising and affect the texture of the bread.

Time and Temperature
For optimal rising, you’ll want to ensure that you give your gluten-free dough enough time at the right temperature. The ideal oven settings for gluten-free bread are slightly different from regular bread. Preheat your oven to 375°F (190°C) for most gluten-free bread recipes. This temperature allows the bread to rise properly without browning too quickly. However, it’s important to note that every oven is different, so you may need to adjust the temperature slightly. If your bread is browning too quickly, you can cover it loosely with aluminum foil to prevent further browning. On the other hand, if your bread is not browning enough, you can increase the temperature slightly. Troubleshooting common baking issues will help you achieve the perfect loaf every time.
Bake with Style—Click Here For Our Collection and Start Creating
Importance of Patience
To ensure proper rising, it is essential to allow the gluten-free dough to rise patiently. Patience plays a crucial role in the baking process, especially when it comes to gluten-free bread. Here are the benefits of practicing patience in baking and how it leads to better gluten-free bread results:
- Improved texture: Allowing the dough to rise properly gives the bread a lighter and fluffier texture, creating a more enjoyable eating experience.
- Enhanced flavor development: Patience allows the flavors to develop fully, resulting in a more flavorful and delicious bread.
- Better structure: Giving the dough enough time to rise allows it to develop a stronger gluten-free structure, leading to a better shape and crumb.
- Increased digestibility: Proper rising breaks down complex carbohydrates, making the bread easier to digest.
Shape the Dough Into a Loaf
Shape the dough into a loaf by gently rolling it and tucking the ends under. This step is crucial in creating a well-formed gluten-free bread that looks just as appealing as its gluten-filled counterpart. Shaping techniques for gluten-free bread differ slightly from regular bread, but with a little practice, you’ll be able to achieve a perfect loaf every time.
To begin, place the dough on a lightly floured surface. If the dough is too sticky, lightly dust your hands with flour to prevent it from sticking. Gently roll the dough into a log shape, about the length of your loaf pan. As you roll, tuck the ends under to create a smooth and seamless appearance. Remember to handle the dough with care, as gluten-free bread tends to be more delicate.
Next, transfer the shaped dough to a greased or parchment-lined loaf pan. Smooth out any wrinkles or creases on the surface by gently pressing down with your fingertips. This will help create an even rise and a beautiful crust.
Now, it’s time to let the dough rest and rise. Cover the loaf pan with a clean kitchen towel or plastic wrap and place it in a warm, draft-free area. Allow the dough to rise until it has doubled in size. This can take anywhere from 30 minutes to an hour, depending on the recipe and the temperature of your kitchen.
While the dough is rising, preheat your oven to the recommended temperature. This is an important step for achieving a perfect crust on your gluten-free bread. The high heat will help create a beautiful golden-brown exterior that is both crispy and chewy.
Once the dough has risen, carefully place the loaf pan in the preheated oven and bake according to the recipe’s instructions. Keep an eye on the bread as it bakes, and if it starts to brown too quickly, tent it with aluminum foil to prevent burning.
After baking, remove the loaf from the oven and let it cool in the pan for a few minutes. Then, transfer it to a wire rack to cool completely before slicing. This will help the bread retain its shape and prevent it from becoming gummy.
Bake with Style—Click Here For Our Collection and Start Creating
Bake at the Right Temperature and Time
Now that you’ve shaped your gluten-free bread dough into a beautiful loaf, it’s time to bake it to perfection. The right temperature is crucial for achieving a golden brown crust and a moist, tender interior. Considerations like oven calibration, pan size, and altitude can affect baking time, so it’s important to nail down the timing to avoid under or overbaking. With the right temperature and timing, you’ll be able to achieve that perfect doneness and enjoy a delicious gluten-free bread that rivals its gluten-filled counterparts.
Optimal Baking Temperature
Start by preheating your oven to the recommended temperature for gluten-free bread baking. This step is crucial as it ensures that your bread bakes evenly and achieves the desired texture. Here are some key points to consider when it comes to the optimal baking temperature for gluten-free bread:
- Follow the recipe: Different gluten-free bread recipes may have varying recommended baking temperatures. Always refer to the recipe instructions for the specific temperature.
- Use an oven thermometer: Ovens can sometimes be inaccurate, so it’s a good idea to invest in an oven thermometer to ensure that the temperature is precise.
- Avoid opening the oven door: Opening the oven door can cause the temperature to fluctuate, leading to uneven baking. Try to resist the temptation and only open the door when necessary.
- Troubleshoot common baking temperature issues: If you notice that your bread is browning too quickly or not browning at all, you may need to adjust the temperature slightly. Experimentation may be required to find the sweet spot for your specific oven.
Timing Considerations for Baking
You should ensure that you bake your gluten-free bread at the right temperature and for the correct amount of time. Timing is crucial when it comes to baking, and it can greatly affect the final outcome of your bread. To achieve the perfect loaf, it is important to have precise control over the baking time and temperature.
Firstly, you need to follow the recipe instructions carefully. Gluten-free bread often requires a longer baking time compared to regular bread. This is because the absence of gluten makes it more challenging for the bread to rise and develop its structure. Be patient and allow the bread to bake for the full recommended time to ensure it is fully cooked and has a good texture.
Additionally, temperature control is key. Preheat your oven to the specified temperature before placing the bread inside. This ensures that the bread bakes evenly and rises properly. Keep an eye on the bread while it bakes and adjust the temperature if necessary to prevent over or under baking.
Bake with Style—Click Here For Our Collection and Start Creating
Achieving Perfect Doneness
Are you wondering how to ensure that your gluten-free bread is baked to perfection, with the right temperature and timing? Achieving perfect doneness can be a challenge when baking gluten-free bread, but with the right techniques, you can overcome common issues and troubleshoot any problems that may arise. Here are some tips to help you achieve that perfect bake:
- Use an oven thermometer: Ovens can often be inaccurate, so it’s essential to use an oven thermometer to ensure that the temperature is correct.
- Follow the recipe instructions: Gluten-free bread recipes may have specific baking times and temperatures. Make sure to follow these instructions carefully.
- Check for doneness with a toothpick: Insert a toothpick into the center of the bread. If it comes out clean or with a few moist crumbs, your bread is done.
- Allow the bread to cool before slicing: Gluten-free bread needs time to set after baking. Let it cool completely before slicing to avoid a gummy texture.
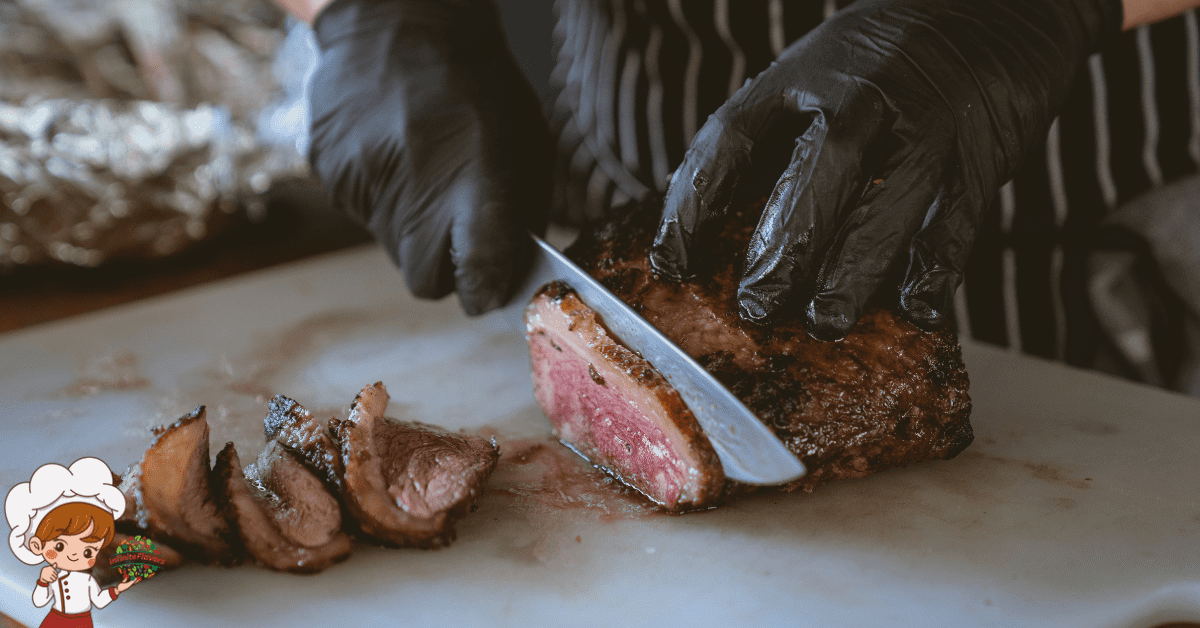
Use the Toothpick Test to Check for Doneness
To ensure your gluten-free bread is fully baked, insert a toothpick into the center of the loaf and check for any uncooked batter or sticky residue. This simple test will help you determine if your bread is ready to be taken out of the oven or if it needs a little more time to bake. The toothpick should come out clean and dry, indicating that your bread is cooked all the way through.
While the toothpick test is the most reliable way to check for doneness, there are a few alternative methods you can try if you don’t have a toothpick on hand. One method is tapping the bottom of the loaf with your fingers. If it sounds hollow, it’s a good sign that the bread is fully baked. Another method is using a food thermometer to check the internal temperature of the bread. For gluten-free bread, the temperature should reach around 200°F (93°C).
To prevent your bread from being undercooked, it’s important to follow the recipe instructions carefully. Make sure to preheat your oven to the specified temperature and allow it to fully heat up before placing your bread inside. Avoid opening the oven door too frequently as this can disrupt the baking process and result in unevenly cooked bread.
Additionally, be mindful of the size and shape of your bread pan. Using a pan that is too large or too small can affect the baking time and result in undercooked bread. It’s also a good idea to rotate the pan halfway through the baking time to ensure even browning and baking.
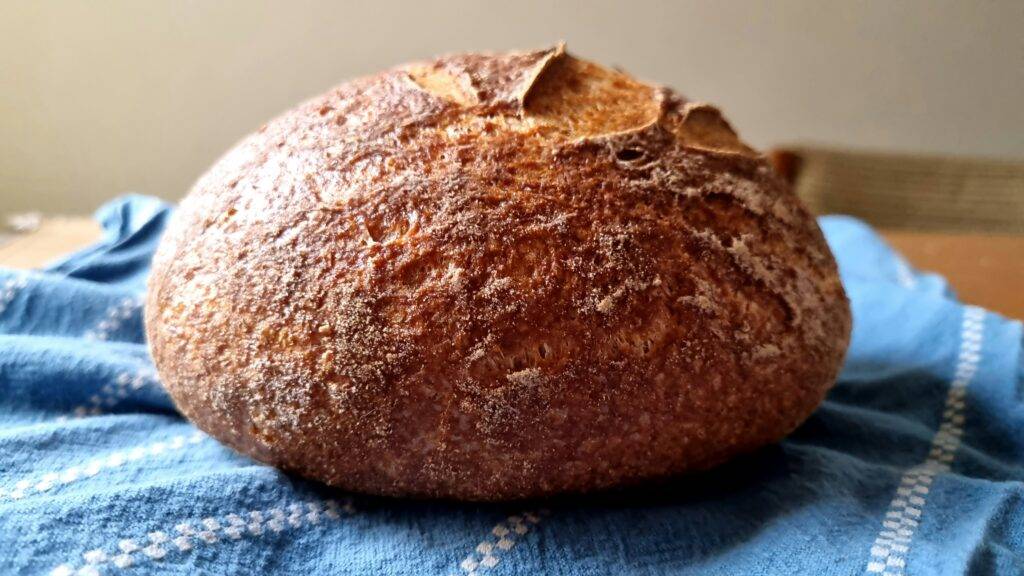
Allow the Bread to Cool Before Slicing
To ensure optimal texture and prevent crumbling, allow the gluten-free bread to cool completely before slicing. Proper cooling is essential for gluten-free bread because it needs time to set and firm up. Slicing the bread too soon can result in a gummy texture and make it difficult to achieve clean, even slices. Here are some tips for slicing gluten-free bread:
- Wait for it to cool: Give the bread at least an hour to cool down before attempting to slice it. This allows the bread to fully set and ensures a better texture.
- Use a serrated knife: Gluten-free bread can be more delicate and crumbly compared to traditional bread, so using a serrated knife can help you achieve clean cuts without squishing or tearing the bread.
- Gently saw through the bread: Instead of applying pressure, gently saw through the bread with a back-and-forth motion. This will help prevent the bread from crumbling or squishing.
- Wrap and store properly: Once you’ve sliced the bread, make sure to wrap the remaining loaf tightly in plastic wrap or store it in an airtight container. This will help maintain its freshness and prevent it from drying out.
Proper cooling is crucial for gluten-free bread because it allows the bread to set and develop its desired texture. By following these tips, you can ensure that your gluten-free bread stays intact and slices beautifully. So, exercise a little patience and let your bread cool completely before diving in with your knife.
Bake with Style—Click Here For Our Collection and Start Creating
Store the Bread Properly
Properly store your gluten-free bread to maintain its freshness and prevent it from drying out. After spending time and effort baking a delicious loaf of gluten-free bread, the last thing you want is for it to become stale and unappetizing. By following a few simple steps, you can ensure that your bread stays fresh and enjoyable for longer.
To begin, make sure your bread is completely cooled before storing it. If you put warm bread in a sealed container, it can create condensation, leading to a soggy texture. Once your bread has cooled, wrap it tightly in plastic wrap or place it in a resealable plastic bag. This will help to prevent air from reaching the bread and causing it to dry out.
Next, find a cool and dry place to store your bread. Avoid leaving it on the countertop or in direct sunlight, as this can speed up the staleness process. Instead, consider storing your bread in the refrigerator. The cool temperature will help to maintain its freshness for a longer period.
If you plan to eat your bread within a few days, storing it at room temperature is acceptable. However, if you want to enjoy your gluten-free bread over a longer period, freezing is the best option. Slice your bread before freezing and place the slices in a freezer-safe bag. This allows you to easily thaw individual slices as needed, preventing the entire loaf from defrosting at once.
Experiment With Flavors and Add-Ins
Enhance your gluten-free bread by exploring different flavors and incorporating various add-ins. Experimenting with different flavors can elevate the taste of your bread and make it more exciting to eat. Similarly, trying unique add-ins can add texture, flavor, and visual appeal to your gluten-free bread. Here are some ideas to get you started:
- Herbs and Spices: Add a burst of flavor to your bread by incorporating herbs and spices. Try adding rosemary, thyme, or basil for a savory twist. For a hint of warmth and spice, consider cinnamon, nutmeg, or cardamom.
- Seeds and Nuts: Adding seeds and nuts to your gluten-free bread can provide a delightful crunch and a boost of nutrition. Experiment with flaxseeds, chia seeds, sunflower seeds, or chopped almonds, walnuts, or pecans.
- Dried Fruits: To add a touch of sweetness and chewiness, consider adding dried fruits to your bread dough. Try chopped dried cranberries, raisins, apricots, or dates. They can lend a natural sweetness and a burst of flavor.
- Cheeses and Onions: For a savory twist, incorporate cheese and onions into your gluten-free bread. Cheddar, Parmesan, or feta cheese can add a rich and tangy flavor, while caramelized onions can lend a subtle sweetness.
Remember to experiment with different flavors and add-ins in moderation, as too much can overpower the taste of your bread. Start by adding a small amount and adjust according to your preference. Get creative and have fun exploring different combinations to create your own unique gluten-free bread masterpiece.
Bake with Style—Click Here For Our Collection and Start Creating
Gluten-Free Bread; Frequently Asked Questions
Can I Substitute Regular Flour for Gluten-Free Flour in This Recipe?
Yes, you can substitute regular flour for gluten-free flour in this recipe. However, using gluten-free flour has its benefits, like being easier to digest and suitable for those with gluten intolerance. There are also alternative flours you can use for gluten-free bread.
How Long Should I Let the Dough Rise For?
Let the dough rise for about 1-2 hours, or until it has doubled in size. This allows the yeast to activate and gives the bread its fluffy texture. Patience is key!
What if I Don’t Have a Loaf Pan? Can I Shape the Dough Into Another Form?
If you don’t have a loaf pan, no worries! You can get creative with alternative shaping techniques for baking gluten-free bread. Shape the dough into rolls, baguettes, or even a free-form round loaf. The possibilities are endless!
Can I Freeze the Bread for Later Use?
Yes, you can freeze gluten-free bread for later use. It’s a great option if you want to keep it fresh. Just make sure to wrap it tightly in plastic wrap or place it in an airtight container before freezing.
How Can I Prevent the Bread From Becoming Too Dry?
To prevent your bread from becoming too dry, make sure to use ingredients that help retain moisture, like eggs or yogurt. Also, don’t overbake the bread and store it properly in an airtight container.
Conclusion
Congratulations! You now have all the tools and knowledge you need to bake delicious gluten-free bread successfully. By following these step-by-step instructions, you can create bread that is just as tasty and satisfying as its gluten-filled counterpart. So gather your ingredients, choose the right flour blend, measure accurately, mix thoroughly, let it rise, check for doneness, cool, store properly, and don’t forget to experiment with flavors and add-ins. Get ready to enjoy your homemade gluten-free bread, and impress your friends and family with your baking skills!