Why Isn’t Baking Scones as Easy as Pie?

Ever tried making scones and ended up with a crumbly mess instead of a fluffy treat? Don’t worry, you’re not alone. Baking scones can be tricky, even for seasoned bakers. But fear not, because this step-by-step guide is here to help you conquer the art of scone-making. From choosing the right flour to achieving the perfect bake time, this guide will walk you through each crucial step in a simple and straightforward manner. So put on your apron, preheat that oven, and get ready to create some mouthwatering scones that will impress everyone at your next brunch or tea party. Let’s dive in and make baking scones as easy as pie!
Bake with Style—Click Here For Our Collection and Start Creating
Choosing the Right Flour
When baking scones, start by selecting the appropriate type of flour for the recipe. Choosing the right flour is crucial to achieving the perfect texture and flavor in your scones. Traditional scones are typically made with all-purpose flour, which offers a good balance of protein and starch. This helps create a tender and crumbly texture. However, if you want to experiment with different flavors and textures, you can also consider using alternative flours.
One popular alternative flour option for scones is whole wheat flour. It adds a nuttier flavor and a denser texture to your scones, making them more filling and nutritious. Just keep in mind that whole wheat flour has a higher protein content, which can result in a slightly tougher texture. To combat this, you can mix whole wheat flour with all-purpose flour to strike a balance between flavor and texture.
Another alternative flour to consider is almond flour. Made from ground almonds, almond flour adds a subtle nutty taste and a delicate crumb to your scones. It is also gluten-free, making it a great option for those with gluten sensitivities or dietary restrictions. However, almond flour has a higher fat content, so it may affect the overall structure of your scones. To compensate for this, you can combine almond flour with a small amount of all-purpose flour or use a binding agent like xanthan gum.
Bake with Style—Click Here For Our Collection and Start Creating
Understanding the Role of Fat
To continue achieving the desired texture and flavor in your scones, it’s important to understand the role of fat. Fat plays a crucial role in the baking process, as it contributes to the tenderness and richness of the final product. The fat content in scones helps create a delicate crumb and adds moisture, making them more enjoyable to eat.
When it comes to choosing the right fat for your scones, there are different types to consider. Butter is a popular choice due to its rich flavor and creamy texture. It adds depth and richness to the scones, making them more indulgent. However, butter has a lower melting point, which can lead to a flatter and spread-out scone. If you prefer a lighter texture, you can opt for vegetable shortening or lard. These fats have a higher melting point, resulting in a flakier texture.
Another option is using a combination of fats. Mixing butter with another type of fat, such as vegetable shortening or cream cheese, can give your scones the best of both worlds. The butter adds flavor and richness, while the other fat contributes to a flakier texture. Experimenting with different fat combinations can help you achieve the perfect balance of flavor and texture in your scones.
It’s important to note that the temperature of the fat also plays a significant role in the outcome of your scones. Using cold fat, such as chilled butter or shortening, is essential. The cold fat creates pockets of steam during baking, resulting in a flaky texture. Mixing the fat into the dry ingredients until it resembles coarse crumbs ensures that the fat is evenly distributed, leading to a consistent texture throughout the scones.
Understanding the role of fat in baking scones is essential for achieving the desired texture and flavor. Experiment with different types of fat and their combinations to find the perfect balance for your scones. So go ahead, get creative, and enjoy the delicious results of your baking endeavors.
Bake with Style—Click Here For Our Collection and Start Creating
Mastering the Art of Cutting Butter
To master the art of cutting butter, you need to understand the importance of butter temperature, different cutting techniques, and how they affect the final texture of your baked goods. Start by ensuring that your butter is at the right temperature – too soft and it will blend too much, too cold and it will be difficult to incorporate. Experiment with various cutting techniques like using a pastry blender, two knives, or your fingertips to find what works best for you. Ultimately, mastering the art of cutting butter will help you achieve the desired flakiness and tenderness in your scones and other baked treats.
Butter Temperature Importance
Mastering the art of cutting butter is crucial to achieving the perfect texture and consistency in your baked scones. However, it’s not just about the technique; the temperature of the butter also plays a significant role. The butter temperature impacts the overall outcome of your scones, especially when it comes to achieving a flaky texture.
When making scones, it is important to use cold butter. The cold temperature of the butter creates steam when it melts during baking. This steam creates pockets of air in the dough, resulting in a light and flaky texture. If the butter is too warm, it will melt too quickly, resulting in a denser and less flaky scone.
To ensure the butter is at the correct temperature, start by refrigerating it for at least 30 minutes before use. You can also freeze the butter and grate it into the dry ingredients for easier incorporation. By maintaining the proper butter temperature, you will be on your way to baking scones with a delightful flaky texture.
Different Cutting Techniques
You can achieve the perfect texture and consistency in your baked scones by mastering different cutting techniques for the butter. The way you cut the butter into the dry ingredients can greatly affect the final outcome of your scones. For traditional scones, where you want a crumbly texture, it is best to use a pastry cutter or two knives to cut the cold butter into small pea-sized pieces.
This will create pockets of butter throughout the dough, resulting in a tender and flaky scone. If you prefer a more uniform and tender texture, such as for cream scones, you can use a food processor to pulse the butter into the dry ingredients until it resembles coarse breadcrumbs. Remember, the cutting technique you choose will depend on personal preference and the desired outcome for different scone flavors and scone accompaniments.
Bake with Style—Click Here For Our Collection and Start Creating
Achieving Desired Texture
To achieve the desired texture in your scones, continue by perfecting the art of cutting the butter into the dry ingredients. This step is crucial in creating light and flaky scones. The goal is to evenly distribute small pieces of butter throughout the dough, which will create pockets of steam during baking, resulting in a tender and delicate texture. Start by using cold butter and cutting it into small cubes. Add the butter to the dry ingredients and use a pastry cutter or your fingertips to work the butter into the flour until it resembles coarse crumbs. Be careful not to overmix, as this can lead to tough scones.
Once you have achieved the desired texture, you can proceed with the remaining steps, such as incorporating the liquid ingredients and shaping the dough. By mastering the art of cutting butter, you are one step closer to achieving the perfect bake time and enjoying the best scones you’ve ever made.
Incorporating the Liquid Ingredients
Now that you’ve mastered the art of cutting butter, it’s time to move on to incorporating the liquid ingredients into your scone dough. Understanding the proper ratios of liquid ingredients is key to achieving the perfect texture and flavor. Mixing techniques for liquids, such as gently folding or stirring, can also make a difference in the final outcome of your scones. And finally, be aware of common mistakes, like overmixing or using the wrong temperature of liquid, that can affect the overall success of your scones.
Bake with Style—Click Here For Our Collection and Start Creating
Liquid Ingredient Ratios
Achieving the right balance of liquid ingredients is crucial when incorporating them into your scone dough. The liquid ingredient ratios play a significant role in achieving the desired texture of your scones. Here are three important factors to consider:
- Moisture content: The amount of liquid you add to your dough will determine how moist or dry your scones turn out. Too little liquid can result in dry and crumbly scones, while too much can make them heavy and dense. It’s important to follow the recipe’s instructions carefully and adjust the liquid accordingly.
- Type of liquid: Different liquids can affect the texture of your scones differently. For example, using heavy cream will result in a richer and more tender texture, while buttermilk can make them lighter and fluffier. Consider the desired outcome and choose the appropriate liquid accordingly.
- Incorporating the liquid: When adding the liquid to your dry ingredients, it’s important to do it gradually. Start by adding a small amount and mix it gently until the dough comes together. Adding too much liquid at once can make the dough too sticky and difficult to work with.
Mixing Techniques for Liquids
When incorporating the liquid ingredients into your scone dough, it is essential to use a gentle mixing technique to ensure optimal texture and consistency. To begin, start by pouring the liquid ingredients into a separate bowl. This can include milk, cream, eggs, or any other liquid flavorings you wish to incorporate. Gradually add the wet ingredients to the dry mixture, stirring gently with a wooden spoon or spatula.
Avoid overmixing, as this can lead to tough and dense scones. If you want to incorporate flavors such as chocolate chips, dried fruit, or spices, fold them in gently after the wet and dry ingredients are combined. Troubleshooting common issues during this stage includes adjusting the liquid quantity if the dough is too dry or adding more flour if the dough is too sticky. By following these mixing techniques, you will create light, fluffy, and delicious scones every time.
Common Mistakes With Liquids
Are you unsure of how to properly incorporate the liquid ingredients when making scones? Don’t worry, it’s a common challenge in baking. To help you avoid mistakes and achieve perfect scones every time, here are three key tips to keep in mind:
- Accurate liquid measurement: When it comes to baking, precision is key. Use a liquid measuring cup for accurate measurements. Fill it to the appropriate line and ensure the cup is level for consistency in your scone dough.
- Avoid common baking substitutions: While substitutions can be tempting, they can affect the texture and taste of your scones. Stick to the recipe and avoid replacing liquid ingredients unless the recipe specifically allows for it.
- Gradual incorporation: When adding the liquid ingredients to your dry mixture, do it gradually. Pour a little at a time and mix gently with a fork or spatula until the dough just comes together. Overmixing can lead to tough scones.
Avoiding Overmixing the Dough
Mix the dough for scones gently to avoid overmixing. Overmixing can have consequences on the final outcome of your scones. When you overmix the dough, you develop the gluten in the flour, resulting in a denser and tougher texture. The scones may lose their light and flaky quality, which is a characteristic we all love.
To avoid overmixing, start by using a light hand when combining the ingredients. Use a wooden spoon or a rubber spatula instead of an electric mixer. Mix the dry ingredients together in a large bowl, then cut in the cold butter until the mixture resembles coarse crumbs. Be careful not to overwork the butter into the flour, as this can lead to a tougher texture.
Next, add the liquid ingredients, such as buttermilk or cream, to the dry mixture. Gently fold the ingredients together just until the dough comes together. It’s important to stop mixing as soon as the dough reaches a consistent and cohesive texture. Overmixing at this stage can result in a tough and dry scone.
If you’re adding any additional ingredients like fruits or chocolate chips, fold them in gently after the dough has come together. Again, avoid excessive mixing to maintain the desired texture.
Bake with Style—Click Here For Our Collection and Start Creating
Shaping and Cutting the Scones
Now that you have successfully mixed the dough, it’s time to move on to shaping and cutting the scones. There are two main methods to consider: the flour method and the biscuit method. The flour method involves rolling out the dough and using a round cutter to create uniform scones, while the biscuit method requires gently patting the dough into a circle and cutting it into wedges. The size and shape of your scones will depend on your personal preference, but keep in mind that larger scones may take longer to bake.
Flour Vs Biscuit Method
To shape and cut your scones, begin by gently kneading the dough with your hands. This step is crucial in achieving the right consistency of flour for your scones. The flour should be incorporated into the dough just enough to form a cohesive mixture, but be careful not to overwork it, as this can lead to tough scones. Once you have achieved the desired flour consistency, you can choose between two methods for shaping and cutting your scones: the drop method or the biscuit method.
- Drop Method: Scoop spoonfuls of dough onto a baking sheet, leaving some space between each scone. This method results in a more rustic-looking scone with a softer texture.
- Biscuit Method: Roll out the dough to a thickness of about 1 inch and use a biscuit cutter to cut out individual scones. This method produces more uniform scones with a flakier texture.
- Alternative Shapes: If you prefer a different shape, you can also form the dough into a rectangle and cut it into triangles, or use a cookie cutter to create fun shapes.
Remember to handle the dough as little as possible to keep the scones light and tender.
Scone Size and Shape
Shape and cut your scones using the desired size and shape by following these simple steps. When it comes to scone size, there are various options to choose from. You can make mini scones for a bite-sized treat, or larger scones for a heartier portion. The size of your scones will affect their baking time, so keep that in mind. To shape your scones, gently pat the dough into a circle or square shape on a floured surface. Use a sharp knife or a biscuit cutter to cut out your scones. Alternatively, you can shape the dough into a rectangle and cut it into triangles. Experiment with different shaping techniques to create visually appealing scones that suit your preferences.
Bake with Style—Click Here For Our Collection and Start Creating
The Importance of Properly Preheating the Oven
Preheating the oven properly is crucial for achieving perfectly baked scones. It may seem like a small detail, but getting the oven to the right temperature before baking can make a significant difference in the outcome of your scones. Here are three important tips to ensure that your oven is preheated correctly:
- Give it enough time: Preheating an oven can take anywhere from 10 to 20 minutes, depending on the model and type. It’s essential to be patient and allow the oven to reach the desired temperature before placing your scones inside. Rushing this step can lead to uneven baking and undercooked scones.
- Use an oven thermometer: Oven temperature can sometimes be inaccurate, causing your baked goods to turn out less than perfect. To troubleshoot oven temperature issues, it’s a good idea to invest in an oven thermometer. This handy tool will help you determine if your oven is heating to the correct temperature, allowing you to make any necessary adjustments.
- Avoid opening the oven frequently: Every time you open the oven door, you let out a significant amount of heat, causing the oven temperature to fluctuate. This can result in uneven baking and affect the rise and texture of your scones. To maintain a consistent temperature, resist the temptation to check on your scones too often. Use the oven light or rely on the suggested baking time to determine when they are ready.
Achieving the Perfect Bake Time
Once you have properly preheated your oven, it’s time to focus on achieving the perfect bake time for your scones. Achieving consistent results when it comes to baking scones is all about finding the right balance between cooking them long enough to ensure they are fully baked, but not so long that they become dry and overdone. It may take a bit of trial and error to find the ideal bake time for your specific recipe, but with a few key tips, you can achieve delicious, perfectly baked scones every time.
To start, it’s important to follow the recipe instructions closely. Baking times can vary depending on the size and shape of the scones, as well as the specific ingredients used. Pay attention to any suggested bake times provided in the recipe and use them as a starting point.
If your scones are consistently undercooked or doughy in the center, try increasing the bake time by a few minutes. On the other hand, if your scones are consistently dry or overcooked, try decreasing the bake time slightly. Keep in mind that every oven is different, so you may need to adjust the bake time to account for any variations in temperature.
Additionally, consider the color of your scones as an indicator of their doneness. A golden, slightly browned exterior is a good sign that the scones are fully baked. However, be careful not to rely solely on color, as some recipes may result in lighter or darker scones depending on the ingredients used.
Bake with Style—Click Here For Our Collection and Start Creating
Allowing the Scones to Cool Properly
To ensure the best results with your baked scones, it is crucial to allow them to cool properly after removing them from the oven. The cooling time is an essential step in the baking process that often gets overlooked. Here are three reasons why proper cooling is important:
- Prevent Overcooking: During the baking process, the scones continue to cook even after they are taken out of the oven. By allowing them to cool on a wire rack for about 10-15 minutes, you prevent them from overcooking and becoming dry. This brief cooling period allows the residual heat to distribute evenly throughout the scones, ensuring a moist and tender texture.
- Enhance Flavor Development: Proper cooling time also allows the flavors of the scones to develop fully. As the scones cool, the flavors meld together, making them more pronounced and delicious. Rushing this process by cutting into the scones too soon can result in a loss of flavor complexity.
- Scone Storage: Allowing the scones to cool completely is crucial before storing them. If stored while still warm, moisture can build up in the container and make the scones soggy. It is best to let them cool to room temperature before transferring them to an airtight container. This way, they can be stored for up to two days without compromising their texture and taste.
Adding a Delicious Glaze or Topping
To enhance the taste and presentation of your scones, here’s how you can add a delicious glaze or topping. Adding a glaze or topping to your scones can take them to the next level of deliciousness. There are various glaze options and creative toppings that you can use to make your scones even more enticing.
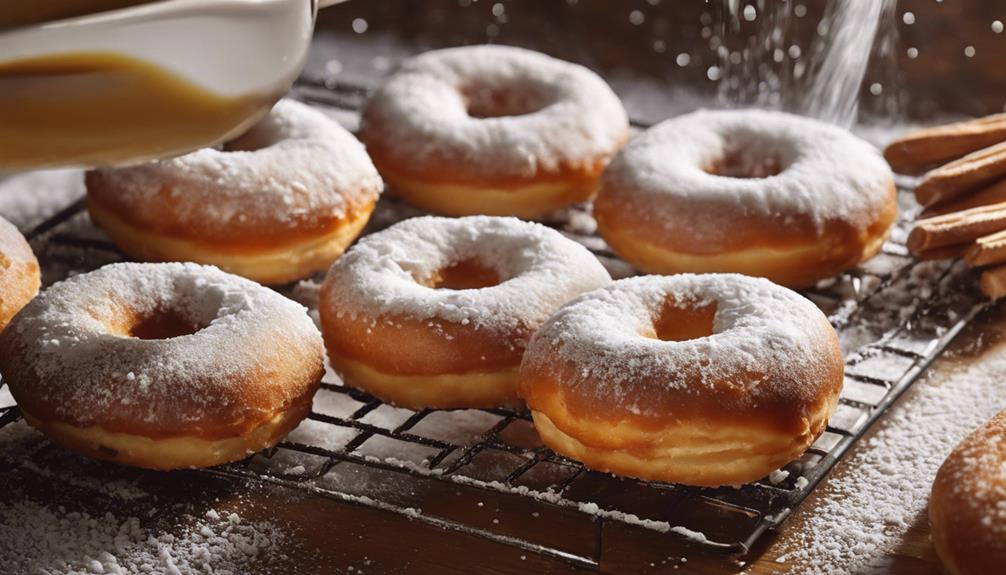
One popular glaze option for scones is a simple powdered sugar glaze. To make this glaze, mix powdered sugar with a little milk or water until you achieve a smooth, pourable consistency. Drizzle the glaze over the cooled scones, allowing it to drip down the sides. You can also add flavor to the glaze by incorporating a small amount of vanilla or citrus zest.
If you want to add a bit of crunch to your scones, consider using a streusel topping. To make a streusel topping, combine flour, sugar, and cold butter until crumbly. Sprinkle the streusel over the scones before baking, and it will add a delightful texture and flavor.
For a more decadent option, try a cream cheese glaze. Beat softened cream cheese with powdered sugar and a little milk until smooth. This creamy glaze adds richness and tanginess to your scones.
If you want to get creative, consider experimenting with different toppings. You could sprinkle sliced almonds, chopped nuts, or even mini chocolate chips on top of your scones before baking. The possibilities are endless, so don’t be afraid to let your imagination run wild.
Adding a delicious glaze or topping to your scones not only enhances their taste but also makes them look visually appealing. So go ahead and try out different glaze options and get creative with your toppings to make your scones truly irresistible.
Frequently Asked Questions
Can I Use a Gluten-Free Flour Substitute for Baking Scones?
Yes, you can use a gluten-free flour substitute for baking scones. Some popular alternatives include almond flour, rice flour, or a gluten-free baking mix. To ensure success, follow tips for successful gluten-free scones.
How Do I Know if the Butter Is Properly Incorporated Into the Flour Mixture?
To know if the butter is properly mixed into the flour, look for a crumbly texture resembling coarse sand. Use your fingers to rub the butter and flour together until fully incorporated.
Can I Use a Different Type of Fat, Like Vegetable Oil, Instead of Butter?
You can use alternative fats like vegetable oil instead of butter, but it may impact the texture of your scones. Butter provides a rich and flaky texture, while oil can make them denser. Experiment to find the taste and texture you prefer.
How Do I Prevent the Scones From Spreading Too Much During Baking?
To prevent scones from spreading too much during baking and achieve fluffier results, make sure your butter is cold, handle the dough gently, and place the scones close together on the baking sheet.
What Are Some Creative Glaze or Topping Ideas for Scones?
To add a creative touch to your scones, try unique glaze ideas like lemon lavender or maple bacon. For toppings, experiment with combinations like strawberry and balsamic reduction or blueberry and almond crumble.
Conclusion
In conclusion, baking scones may not be as easy as pie, but with the right techniques and understanding of the ingredients, anyone can master the art of creating delicious scones. By choosing the right flour, mastering the cutting of butter, and avoiding overmixing, you can achieve the perfect texture and flavor. Properly preheating the oven and allowing the scones to cool properly are also crucial steps. Finally, adding a delicious glaze or topping can elevate your scones to a whole new level of yumminess. Happy baking!


