14 Effective Tips for Grilling the Best BBQ Ribs Perfectly
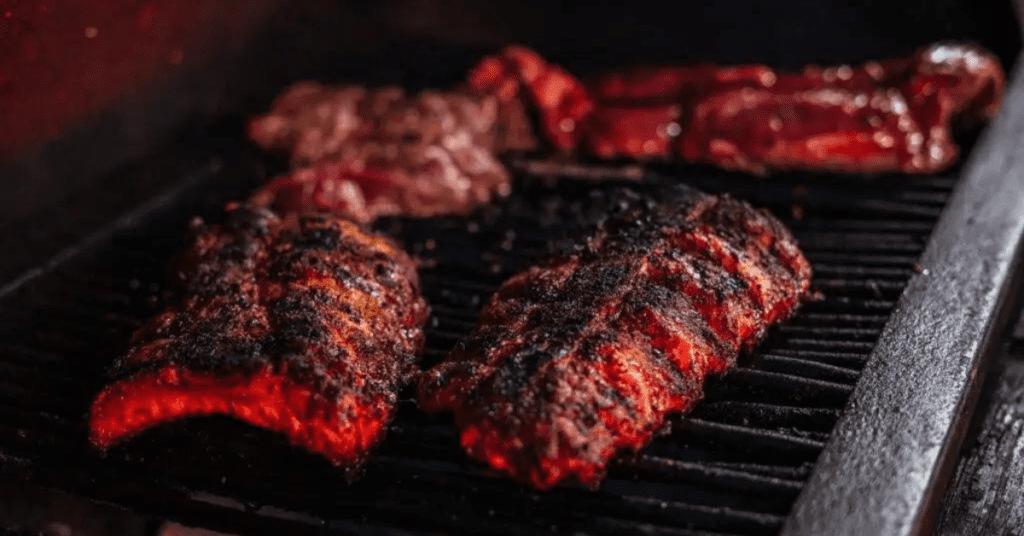
Want to become a master griller of BBQ Ribs? Look no further! This guide has got you covered with 14 effective tips to achieve rib perfection on your grill. From selecting the right ribs to experimenting with different sauces and rubs, you’ll learn all the secrets to make your ribs the talk of the town. Don’t worry about the nitty-gritty details, we’ll guide you through removing the membrane, seasoning just right, and using indirect heat for that mouthwatering tenderness. Plus, we’ll show you how to monitor the internal temperature and let your ribs rest before serving. So, get ready to impress your friends and family with the most delicious and perfectly grilled BBQ ribs they’ve ever tasted!
Choose the Right Ribs
To ensure your BBQ ribs turn out perfectly, start by choosing the ribs that are best suited for grilling. When it comes to selecting the right type of ribs, you have a few options to consider. The most common types are baby back ribs and spare ribs. Baby back ribs, also known as loin ribs, are smaller and leaner, making them a great choice if you prefer a more tender and delicate texture. On the other hand, spare ribs, also called side ribs, are larger and meatier, providing a rich and flavorful experience.
When choosing ribs, it’s essential to look for ones that have a good amount of meat on them. Avoid ribs that are overly fatty or have excessive amounts of connective tissue. Look for ribs with a nice marbling of fat, as this will help keep the meat moist and juicy during the grilling process.
Once you have chosen the right type of ribs, the next step is to remove the membrane. This thin, shiny layer can be found on the bone side of the ribs and can make them tough and chewy if left intact. To remove the membrane, gently slide a butter knife or your fingers under it and lift it up. Once you have a good grip, peel it off in one smooth motion. Removing the membrane will allow the flavors from your marinade or rub to penetrate the meat and result in a more tender and delicious final product.
Remove the Membrane
Start by gently sliding a butter knife or your fingers under the membrane on the bone side of the ribs and lift it up. Removing the membrane from your ribs is an important step to ensure tender and flavorful meat. The membrane, also known as the silver skin, is a tough and chewy layer that covers the bone side of the ribs. It can prevent the flavors from penetrating the meat and make it difficult to achieve a nice, crispy bark. Here are some tips for removing the membrane and the best tools to use.
Firstly, using a butter knife or your fingers allows you to get a good grip on the membrane. Gently slide the knife or your fingers between the membrane and the bones, starting from one end of the rack. Lift it up and loosen it from the meat. Be careful not to tear the membrane, as it can be quite delicate.
Another tool that can be helpful is a pair of pliers. Once you have loosened the membrane, grab a corner of it with the pliers and slowly peel it back. The pliers provide a firm grip, making it easier to remove the entire membrane in one piece.
For those who prefer an even simpler method, there are specialized rib membrane removers available in the market. These tools are designed specifically for this task and make the process even easier. They usually have a curved shape that allows you to easily slide under the membrane and lift it up.
Regardless of the tool you choose, the key is to be patient and take your time. Removing the membrane may require some practice, but it is well worth the effort. Once the membrane is removed, your ribs will be ready for seasoning and grilling, ensuring a delicious and tender result.
Season Generously
When it comes to grilling BBQ ribs, seasoning generously is key to achieving delicious and flavorful results. Marinades play an important role in enhancing the taste and tenderness of the meat, so be sure to choose one that complements the flavors you desire. From classic combinations like garlic, paprika, and brown sugar to more adventurous options like honey mustard or chipotle lime, there are endless possibilities to explore when it comes to seasoning your ribs. So go ahead and get creative with your seasonings, and don’t be afraid to experiment until you find the perfect flavor profile for your BBQ ribs.
Importance of Marinades
- To ensure flavorful and tender BBQ ribs, generously season your meat with marinades. Marinades are a vital component in the grilling process as they not only add flavor but also help in tenderizing the meat. Here are some important reasons why marinades are essential for achieving the perfect ribs:
- Flavor Infusion: Marinades are an excellent way to infuse your meat with a burst of flavors. By marinating your ribs, you allow the flavors from the marinade to penetrate deep into the meat, resulting in a more flavorful and delicious end product.
- Tenderization: Marinades contain acidic ingredients like vinegar or citrus juices that help to break down the tough fibers in the meat. This process of tenderization results in ribs that are juicy and tender.
- Moisture Retention: Marinades containing oil or other liquid ingredients help to lock in the moisture in the meat during the grilling process. This ensures that your ribs remain moist and succulent, preventing them from drying out.
- Enhancing Color: Certain ingredients in marinades, such as soy sauce or Worcestershire sauce, can contribute to the beautiful caramelization and browning of the meat when cooked. This adds an appetizing color to your BBQ ribs.
- Customization: Marinades offer endless possibilities for customization. You can experiment with different combinations of herbs, spices, and liquids to create a marinade that suits your taste preferences.
Recommended Seasoning Combinations
To enhance the flavor of your BBQ ribs, generously season your meat with recommended seasoning combinations. Experimenting with dry rubs can elevate the taste of your ribs to a whole new level. A classic dry rub consists of a combination of salt, pepper, paprika, garlic powder, and brown sugar. This blend provides a perfect balance of savory and sweet flavors.
If you want to add a little heat, you can incorporate cayenne pepper or chili powder into the mix. Another option is to try different types of wood chips when grilling your ribs. Wood chips such as hickory, apple, or mesquite can infuse your meat with a unique smoky flavor. So, don’t be afraid to get creative with your seasoning combinations and wood chip choices to achieve mouthwatering BBQ ribs.
Preheat the Grill
Before you begin grilling your BBQ ribs, it is crucial to preheat your grill to the optimal temperature. Preheating ensures that the ribs cook evenly and develop a delicious char on the outside. Additionally, preheating your grill saves you time as it allows the ribs to cook more efficiently.
Optimal Grill Temperature
Achieving the ideal temperature for grilling your BBQ ribs is crucial to ensure a perfectly cooked and flavorful meal. Here are some tips to help you achieve the optimal grill temperature:
- Preheat your grill: Before placing your ribs on the grill, make sure to preheat it to the desired temperature. This will ensure even cooking and prevent the ribs from sticking to the grates.
- Use a thermometer: Invest in a good quality meat thermometer to accurately measure the temperature of your grill. This will help you determine when it’s ready for grilling.
- Indirect heat method: For tender and juicy ribs, use the indirect heat method. This involves placing the ribs away from the direct flame, allowing them to cook slowly and evenly.
- Maintain consistent temperature: Keep an eye on the grill temperature throughout the cooking process. Adjust the heat as needed to maintain the desired temperature.
- Optimal cooking time: Depending on the size and thickness of your ribs, the optimal cooking time may vary. Use a recipe or cooking chart to determine the appropriate cooking time for your specific ribs.
Importance of Preheating
Ensure optimal grilling results by preheating your grill before cooking your BBQ ribs. Preheating your grill is an important step that should not be overlooked. By preheating, you allow the grill to reach the desired temperature before placing the ribs on it. This ensures that the ribs cook evenly and develop a deliciously charred exterior while remaining tender and juicy on the inside.
There are several benefits to preheating your grill. Firstly, preheating helps to kill any bacteria or germs that may be present on the grates. It also helps to prevent the ribs from sticking to the grill, as the heat helps to create a non-stick surface. Additionally, preheating allows for better heat distribution, ensuring that the ribs cook evenly and avoiding any hot or cold spots.
To preheat your grill, start by cleaning the grates and removing any debris. Then, turn on the grill and set it to the desired temperature. Close the lid and allow the grill to heat up for about 10-15 minutes. This will give it enough time to reach the desired temperature and ensure that the ribs cook evenly.
Time-Saving Technique
To save time when grilling BBQ ribs, start by preheating your grill. This time-saving technique is one of the essential grilling hacks you need to know. By preheating your grill, you ensure that it reaches the optimal cooking temperature before placing the ribs on the grates. Here are five reasons why preheating is a time-saving technique you should always follow:
- Even Cooking: Preheating allows the heat to distribute evenly across the grill, ensuring that your ribs cook uniformly.
- Reduced Cooking Time: A preheated grill means your ribs will start cooking immediately, reducing overall cooking time.
- Crispier Exterior: Preheating helps sear the surface of the ribs, giving them that delicious crispy exterior.
- Faster Searing: A hot grill achieves a faster sear, locking in juices and flavors.
- Avoid Food Sticking: Preheating helps prevent the ribs from sticking to the grates, saving you time and frustration.
Use Indirect Heat
For optimal results when grilling BBQ ribs, employ the method of utilizing indirect heat. Indirect grilling is a technique that involves cooking the ribs away from the direct heat source. This method allows for a slower, more controlled cooking process, resulting in tender and juicy ribs.
To achieve indirect grilling, you’ll need a grill with two heat zones. One zone will be the direct heat zone, where the heat source is located, and the other zone will be the indirect heat zone, where the ribs will be placed. This can be achieved by using a gas grill with multiple burners or by arranging the coals in a charcoal grill.
Temperature control techniques are crucial when using indirect heat. You want to maintain a consistent temperature throughout the cooking process. This can be done by adjusting the heat source and using a grill thermometer to monitor the temperature.
Start by preheating the grill to the desired temperature, usually around 225-250°F (107-121°C). Once the grill is hot, place the ribs on the indirect heat zone, bone side down. Close the lid and let the ribs cook slowly for several hours, allowing the flavors to develop and the meat to become tender.
During the cooking process, resist the temptation to constantly check on the ribs. Every time you open the grill, you release heat and extend the cooking time. Trust in the indirect heat method and let the ribs cook undisturbed.
Using indirect heat when grilling BBQ ribs is a foolproof way to achieve perfect results every time. The slow and controlled cooking process ensures that the ribs are cooked evenly and retain their moisture. So, fire up the grill, set up the heat zones, and get ready to enjoy some deliciously tender and flavorful ribs.
Control the Temperature
To ensure perfectly grilled BBQ ribs, it is crucial to have control over the temperature. This involves employing heat management techniques, understanding optimal cooking temperatures, and utilizing temperature control methods. By mastering these aspects, you can achieve deliciously tender and flavorful ribs that are cooked to perfection.
Heat Management Techniques
Control the temperature of your grill by adjusting the vents and using a thermometer to ensure perfectly grilled BBQ ribs. Proper heat management is crucial for achieving tender and juicy ribs with a delicious smoky flavor. Here are some heat management techniques to help you master the art of grilling ribs:
- Heat distribution: Arrange your charcoal or gas burners to create indirect heat zones. This allows for slow and even cooking, preventing the ribs from drying out or burning.
- Charcoal vs. gas: Charcoal grills provide intense heat and a distinct smoky flavor, while gas grills offer convenience and precise temperature control. Choose the grill that suits your preference and cooking style.
- Preheating: Preheat your grill for at least 15 minutes before cooking to ensure that it reaches the desired temperature.
- Vent control: Adjust the vents on your grill to regulate the airflow and maintain a consistent temperature. Open the vents for more heat and close them for less heat.
- Thermometer usage: Use a meat thermometer to monitor the internal temperature of the ribs. This helps you cook them to perfection, ensuring they are safe to eat and tender.
Optimal Cooking Temperatures
Achieving tender and juicy BBQ ribs requires careful attention to temperature management throughout the cooking process. To ensure optimal cooking temperatures, it is crucial to employ effective temperature control methods. One such method is indirect grilling, where the heat source is placed on one side of the grill, allowing for indirect heat to cook the ribs slowly and evenly.
This technique prevents the ribs from becoming tough or dry. Another technique is the 3-2-1 method, which involves cooking the ribs for 3 hours unwrapped, then wrapping them in foil and cooking for an additional 2 hours, before finishing them off unwrapped for 1 final hour. This method helps to maintain a consistent temperature and ensures that the ribs are perfectly cooked. By utilizing these optimal cooking techniques and temperature control methods, you can achieve BBQ ribs that are flavorful, tender, and succulent.
Temperature Control Methods
By carefully managing the temperature, you can ensure perfectly grilled BBQ ribs. Temperature control is crucial in achieving tender, juicy ribs with a smoky flavor. Here are some effective methods to help you monitor and regulate the heat while grilling:
- Use a grill thermometer: Invest in a good quality thermometer to accurately measure the temperature of your grill. This will ensure that you are cooking at the desired temperature.
- Create different heat zones: Divide your grill into two zones, one with direct heat and the other with indirect heat. This allows you to sear the ribs over high heat and then move them to a cooler area for slow cooking.
- Adjust the air vents: The air vents on your grill can be used to control the airflow and heat. Opening the vents will increase the heat, while closing them will lower the temperature.
- Use a water pan: Placing a water pan in the grill helps regulate the temperature by adding moisture and creating a more stable cooking environment.
- Monitor the grill consistently: Keep an eye on the temperature throughout the grilling process, making adjustments as needed to maintain a steady heat.
Add Smoke for Flavor
Enhance the flavor of your BBQ ribs by adding smoke. Smoking your ribs not only adds a delicious smoky taste but also infuses them with a rich aroma that will have your guests begging for more. To achieve the perfect smoke infusion, you will need to use wood chips specifically designed for grilling. These wood chips come in various flavors, such as hickory, mesquite, apple, and cherry, each adding its own unique taste profile to your ribs.
To start, soak the wood chips in water for about 30 minutes before grilling. This will prevent them from burning too quickly and produce a steady stream of smoke. Once the wood chips have soaked, drain them and place them in a smoker box or wrap them in aluminum foil, poking holes to allow the smoke to escape. You can place the smoker box directly on the grill grates or on top of the charcoal if you are using a charcoal grill. If you are using a gas grill, place the smoker box over the burners.
Preheat your grill to a temperature of around 225°F to 250°F. Once the grill is heated, place your ribs on the opposite side of the grill from the smoker box to allow the smoke to circulate around them. Close the lid and let the ribs smoke for several hours, maintaining a consistent temperature throughout the cooking process.
Use a Drip Pan
When grilling BBQ ribs, using a drip pan is essential for catching grease and juices that may otherwise cause flare-ups and burning. By placing a drip pan underneath the ribs, you can prevent the meat from charring and maintain a more even cooking temperature. Additionally, the drip pan helps to enhance the smoky flavor by collecting the drippings, allowing them to evaporate and infuse the ribs with a delicious smokiness.
Catching Grease and Juices
To prevent grease and juices from dripping onto your grill and causing flare-ups, use a drip pan while grilling BBQ ribs. A drip pan is a simple yet effective tool that catches all the grease and juices that drip from the ribs as they cook. Here are five reasons why using a drip pan is essential for grilling BBQ ribs:
- Preventing grease fires: The grease and juices that drip onto the hot coals can cause flare-ups and potentially lead to a grease fire. Using a drip pan prevents this from happening, ensuring a safer grilling experience.
- Maintaining grill cleanliness: The drip pan collects all the drippings, preventing them from accumulating on the grill grates and causing a mess. This makes cleaning up after grilling much easier.
- Preserving the flavor: By catching the drippings, you can use them to baste the ribs or make a delicious sauce later on. This helps to enhance the flavor and juiciness of the ribs.
- Ensuring even cooking: The drip pan helps to regulate the temperature inside the grill by preventing flare-ups. This ensures that the ribs cook evenly and avoid burning or charring.
- Using a meat thermometer: With the drip pan in place, it’s easier to use a meat thermometer to check the internal temperature of the ribs. This ensures that they are cooked to perfection, without overcooking or undercooking.
Prevents Flare-Ups and Burning
By using a drip pan, you can effectively prevent flare-ups and burning while grilling your BBQ ribs. Flare-ups occur when the fat and juices from the ribs drip onto the hot coals or burners, causing flames to shoot up and potentially char your meat.
To avoid this, place a drip pan beneath the ribs to catch the grease and juices as they render. This simple yet effective technique not only prevents flare-ups but also helps to maintain a consistent temperature and prevents the ribs from burning. The drip pan should be filled with water or a liquid of your choice to create steam and add moisture to the cooking environment. This will keep your ribs juicy and tender while ensuring they cook evenly. Remember to check the drip pan regularly and refill it as needed to maintain a moist cooking environment. By employing this flare-up prevention technique, you can confidently grill perfect BBQ ribs every time.
Enhances Smoky Flavor
To enhance the smoky flavor of your BBQ ribs, place a smoke-enhancing material such as wood chips or chunks in the drip pan. This simple technique allows for smoke infusion during the grilling process, adding a delicious depth of flavor to your ribs. Here are some tips to help you enhance the smoky flavor even further:
- Wood Chip Selection: Choose hardwood chips like hickory, mesquite, or applewood for a distinct smoky flavor.
- Soaking the Wood Chips: Soak the wood chips in water for at least 30 minutes before using them. This helps them smolder and produce more smoke.
- Placement of the Drip Pan: Position the drip pan directly under the grill grates to catch any drippings and prevent flare-ups.
- Adding Moisture: Place water or a flavored liquid, such as apple juice or beer, in the drip pan to create steam and enhance the smoky flavor.
- Monitoring the Smoke: Keep an eye on the smoke level throughout the grilling process, adding more wood chips as necessary to maintain a steady infusion of smoky goodness.
Baste With Sauce
Brush the ribs with sauce throughout the grilling process to enhance their flavor and keep them moist. Basting the ribs with sauce not only adds a burst of flavor but also helps to seal in the juices, resulting in tender and succulent meat. The sauce acts as a barrier, preventing the ribs from drying out and infusing them with a delicious smoky goodness.
To achieve the perfect smoke infusion, it is important to choose the right sauce. Opt for a sauce that complements the flavors of the ribs and enhances their natural smokiness. Whether you prefer a tangy vinegar-based sauce or a sweet and sticky barbecue sauce, make sure it pairs well with the meat.
When it comes to sauce application techniques, there are a few options to consider. One popular method is to brush the sauce onto the ribs at regular intervals while they are grilling. This allows the sauce to gradually build up layers of flavor and creates a beautiful glaze on the surface of the meat. Another technique is to marinate the ribs in the sauce prior to grilling, ensuring that the flavors penetrate the meat and infuse it from within.
As you baste the ribs with sauce, be mindful of the temperature of your grill. If the heat is too high, the sugars in the sauce can burn and create a bitter taste. Adjust the heat accordingly to prevent any unwanted charring.
Wrap in Foil for Tenderness
For optimal tenderness, wrap the BBQ ribs in foil during the grilling process. This technique helps to lock in moisture and create a tender, fall-off-the-bone texture that will have your guests coming back for more. Wrapping the ribs in foil also allows for a more controlled cooking environment, ensuring that the meat cooks evenly and stays juicy.
Here are five reasons why wrapping ribs in foil can enhance your grilling experience:
- Retains Moisture: Wrapping the ribs in foil helps to trap in the natural juices of the meat, preventing them from evaporating during the cooking process. This results in moist and succulent ribs that are bursting with flavor.
- Tenderizes the Meat: The foil acts as a barrier, allowing the ribs to steam in their own juices. This gentle cooking method helps to break down the tough connective tissues, resulting in tender and melt-in-your-mouth ribs.
- Infuses Flavor: When wrapped in foil, the ribs are enveloped in a smoky, flavor-rich environment. The foil captures the smoky essence from the grill, infusing it into the meat. This creates a delicious, smoky flavor that is sure to satisfy your taste buds.
- Reduces Cooking Time: Wrapping the ribs in foil speeds up the cooking process by creating a more efficient heat transfer. The foil acts as an insulator, trapping the heat around the ribs and cooking them faster. This means you can enjoy your perfectly tender ribs in less time.
- Prevents Burning: Wrapping the ribs in foil protects them from direct heat, reducing the risk of burning. This allows you to achieve a beautiful caramelized crust without the fear of charred or dried-out ribs.
Monitor the Internal Temperature
Now that you have wrapped your BBQ ribs in foil for tenderness, it is important to monitor the internal temperature for perfectly cooked ribs. Properly monitoring the internal temperature ensures that your ribs are cooked to a safe temperature while also achieving the desired doneness. There are several monitoring techniques you can use to ensure your ribs are cooked to perfection.
The first monitoring technique is using a meat thermometer. Insert the thermometer into the thickest part of the meat, making sure not to touch the bone. This will give you an accurate reading of the internal temperature. For pork ribs, the desired internal temperature is around 145°F (63°C) for medium-rare and 160°F (71°C) for medium.
Another monitoring technique is the “bend test.” Using tongs, pick up the rack of ribs from one end. If the ribs bend easily and the meat starts to separate from the bone, they are likely done. However, if the meat is still tough and does not easily separate, they need more time on the grill.
Additionally, you can use the “toothpick test” to check the doneness of your ribs. Insert a toothpick into the meat between the bones. If it slides in and out with little resistance, the ribs are done. However, if there is still some resistance or the meat feels tough, they need more time to cook.
Rest Before Serving
Let your BBQ ribs rest for at least 10 minutes before serving to allow the juices to redistribute and the meat to become even more tender. Resting time is a crucial step in the grilling process as it allows the flavors to fully develop and ensures a juicy and succulent final result. Here are some serving suggestions to consider after letting your ribs rest:
- Sauce or no sauce: Decide whether you want to serve your ribs with or without sauce. If you choose to add sauce, brush it on during the last few minutes of grilling to prevent it from burning. Alternatively, you can serve the sauce on the side, allowing your guests to customize their ribs to their liking.
- Slicing or pulling: Determine whether you prefer to slice your ribs into individual portions or pull the meat off the bone. Slicing creates neat and uniform pieces, while pulling results in a more rustic and tender texture. Consider your guests’ preferences and the overall presentation you want to achieve.
- Accompaniments: Think about the sides you want to serve alongside your BBQ ribs. Classic options include coleslaw, cornbread, baked beans, and potato salad. These sides complement the smoky flavors of the ribs and provide a well-rounded meal.
- Garnishes: Enhance the visual appeal of your ribs by adding some garnishes. Fresh herbs like parsley or cilantro can add a pop of color, while a sprinkle of sesame seeds or chopped scallions can add a touch of elegance.
- Serving platter: Choose a suitable platter to present your BBQ ribs. Opt for a large platter that can accommodate the full rack, or individual plates for each guest. Consider using a wooden cutting board or a decorative serving dish to elevate the overall dining experience.
Slice and Serve
To serve your BBQ ribs, carefully slice them into individual portions. The way you slice your ribs can greatly affect the overall presentation and enjoyment of the dish. Here are some slice techniques and serving suggestions to help you make the most of your perfectly grilled ribs.
Firstly, it is important to have a sharp knife for slicing. A dull knife can tear the meat and make it look unappetizing. Use a long, thin-bladed knife to easily cut through the meat and bones. Start by cutting between the bones to separate the individual ribs. This will make it easier to portion out the ribs and give each person a fair share.
When it comes to serving the ribs, you have a few options. One popular method is to serve the ribs as a whole rack and let your guests slice their own portions. This can be a fun and interactive way to enjoy the meal. Alternatively, you can pre-slice the ribs into smaller portions before serving. This is a great option if you have a large group or if you want to ensure even portions.
For a more elegant presentation, you can arrange the sliced ribs on a platter and garnish them with fresh herbs or a drizzle of BBQ sauce. This will not only add visual appeal but also enhance the flavors of the dish. Remember to provide plenty of napkins or wet wipes for your guests, as eating ribs can be a messy affair.
Experiment With Different Sauces and Rubs
Enhance the flavor of your BBQ ribs by experimenting with different sauces and rubs. Adding the right combination of sauces and rubs can take your ribs from ordinary to extraordinary. Here are some tips to help you explore the world of BBQ sauces and rubs:
- Different types of BBQ sauces to try: There are various types of BBQ sauces available in the market, each with its unique flavor profile. Try different styles such as Kansas City, Memphis, Carolina, or Texas BBQ sauce. Kansas City sauce is rich and sweet, while Carolina sauce has a tangy and vinegar-based taste. Memphis sauce is known for its bold and smoky flavors, and Texas sauce is all about the spicy kick.
- Tips for creating your own rubs: Creating your own rub is a great way to customize the flavor of your ribs. Start with a base of salt and pepper, and then experiment with different spices and herbs to find your perfect blend. Consider adding ingredients like paprika, garlic powder, onion powder, cayenne pepper, and brown sugar to create a well-balanced rub. Don’t be afraid to get creative and adjust the ratios to suit your taste.
- Pairing sauces and rubs: When experimenting with sauces and rubs, it’s essential to consider how they complement each other. For example, if you’re using a sweet and tangy BBQ sauce, pair it with a savory rub to balance out the flavors. On the other hand, if you’re using a spicy rub, a milder sauce can help cool down the heat. Play around with different combinations until you find the perfect harmony.
- Marinating vs. glazing: Another way to incorporate sauces is by marinating or glazing your ribs. Marinating involves soaking the meat in a sauce or rub mixture for several hours or overnight to infuse flavor. Glazing, on the other hand, refers to applying a sauce during the last few minutes of grilling to add a glossy finish and enhance the taste.
- Balancing flavors: Keep in mind that the flavors of the sauces and rubs should enhance the taste of the meat, not overpower it. Be mindful of the balance between sweetness, tanginess, spiciness, and smokiness. Taste as you go and adjust accordingly to achieve a well-rounded flavor profile.
BBQ Ribs; Frequently Asked Questions
How Long Should I Preheat the Grill Before Grilling Ribs?
You should preheat the grill before grilling ribs to ensure proper cooking. By preheating the grill to the recommended temperature, you create a hot and even cooking surface that will help cook the ribs to perfection.
Should I Remove the Membrane From Both Sides of the Ribs?
Yes, you should remove the membrane from both sides of the ribs. This helps to tenderize the meat and allows the flavors of the rub and sauce to penetrate better.
Can I Use a Gas Grill Instead of Charcoal for Grilling Ribs?
Yes, you can use a gas grill instead of charcoal for grilling ribs. The gas vs. charcoal debate has been ongoing, but using a gas grill offers convenience, precise temperature control, and a quicker cooking time.
What Is the Ideal Internal Temperature for Perfectly Cooked Ribs?
To achieve perfectly cooked ribs, it’s important to know the ideal internal temperature. This ensures the right doneness level. Keep in mind that the ideal internal temperature for ribs is around 190-205°F.
How Long Should I Let the Ribs Rest Before Serving?
You should let the ribs rest for at least 10 minutes before serving. This allows the juices to redistribute and the meat to become more tender. Serve the ribs at a temperature of around 145°F for maximum flavor.
Conclusion
In conclusion, by following these 14 effective tips for grilling BBQ ribs, you can achieve perfectly cooked and flavorful ribs every time. From choosing the right ribs and removing the membrane, to seasoning generously and using indirect heat, these steps ensure tender and delicious results. Don’t forget to monitor the internal temperature, rest before serving, and experiment with different sauces and rubs to personalize your BBQ ribs. With these techniques, you’ll become a grilling expert and impress your guests with mouthwatering ribs.


