The Best Beginner’s Guide to Bread Baking Basics
Bread Baking Basics; Are you ready to embark on a delicious journey into the world of bread baking? Look no further than the Absolute Beginner’s Guide to Bread Baking Basics. This comprehensive guide will equip you with all the knowledge and skills you need to create mouthwatering homemade bread from scratch. From choosing the perfect flour to understanding the role of yeast, each step is explained in simple, easy-to-follow instructions. You’ll learn the art of mixing and kneading the dough, the importance of proofing, and even how to shape and score your loaf for that professional touch. With troubleshooting tips, flavor variations, and storage techniques, this guide has everything you need to become a bread baking master. Let’s get started!
Choosing the Right Flour
To choose the right flour for bread baking, you will need to consider factors such as protein content, type of wheat, and intended use. When it comes to gluten-free options and alternative flours, there are plenty of choices available to cater to various dietary needs and preferences.
Gluten-free options have become increasingly popular in recent years, as more people are diagnosed with gluten sensitivities or choose to follow a gluten-free diet. When looking for gluten-free flours, it’s essential to choose those made from alternative grains such as rice, corn, or buckwheat. These flours lack the protein structure necessary for bread baking, so it’s often necessary to combine them with other ingredients like xanthan gum or tapioca starch to achieve a similar texture and rise.
In addition to gluten-free options, there are also alternative flours made from different types of wheat or grains. These flours can add unique flavors and textures to your bread. For example, whole wheat flour is made from grinding whole wheat kernels, providing a nutty flavor and a denser texture. Rye flour, on the other hand, adds a distinct tanginess to bread. Other alternative flours include spelt, barley, and oat flour, each with its own characteristics and benefits.
When choosing the right flour for your bread, it’s crucial to consider the intended use. Different flours have different protein contents, which directly affect the gluten formation and the texture of the final product. High-protein flours, such as bread flour or high-gluten flour, are ideal for making chewy and crusty bread. On the other hand, low-protein flours like cake flour are better suited for delicate pastries and cakes.

Understanding the Role of Yeast
Understanding the importance of yeast is key to successful bread baking. Yeast is a microorganism that plays a crucial role in the fermentation process, which is what gives bread its delicious flavor and texture. Here are some key points to help you understand the role of yeast in bread baking:
- Yeast is responsible for the fermentation process in bread dough. It converts sugars into carbon dioxide gas and alcohol, which causes the dough to rise.
- There are different types of yeast available, including active dry yeast, instant yeast, and fresh yeast. Each type has its own characteristics and requirements for activation.
- Active dry yeast is the most commonly used type of yeast. It needs to be dissolved in warm water before being added to the dough. It has a longer shelf life and is more suitable for long fermentation processes.
- Instant yeast, also known as rapid-rise yeast, does not require activation and can be added directly to the dry ingredients. It is more convenient and produces faster results, making it a popular choice for home bakers.
- Fresh yeast, also known as cake yeast, is composed of live yeast cells and is perishable. It needs to be crumbled and dissolved in water before use. It provides excellent fermentation and is often used in professional bakeries.
Understanding the role of yeast in bread baking is essential for achieving the perfect loaf. By choosing the right type of yeast and understanding how it contributes to fermentation, you can create delicious homemade bread that will impress your family and friends. So, don’t underestimate the power of yeast in your bread baking journey!
Mixing and Kneading the Dough
Now, let’s dive into the process of mixing and kneading the dough. This step is crucial in bread baking as it helps develop gluten, which gives the bread its structure and chewiness. To begin, gather all your ingredients and equipment. In a large mixing bowl, combine the flour, yeast, salt, and any other dry ingredients. Use a whisk or a fork to evenly distribute the ingredients.
Once the dry ingredients are mixed, it’s time to add the wet ingredients. This usually includes water, but sometimes recipes call for milk, eggs, or other liquids. Slowly pour the wet ingredients into the dry mixture while stirring with a wooden spoon or a dough whisk. Continue to mix until a shaggy dough forms.
Now comes the fun part – kneading the dough. This process helps develop gluten and creates a smooth, elastic texture. There are various kneading techniques you can use, but the most common one is the push-fold-turn method. Start by pushing the dough away from you with the heel of your hand. Fold the dough in half, then give it a quarter turn. Repeat this process, adding a little flour if the dough becomes too sticky, until the dough is smooth and no longer sticky.
Pay attention to the dough consistency throughout the kneading process. It should feel slightly tacky but not sticky. If the dough feels too dry, add a little water. If it feels too wet, add a little flour. The goal is to achieve a dough that is soft, smooth, and elastic.
The Importance of Proofing
Now that you’ve mixed and kneaded the dough, it’s time to understand the importance of proofing. Proofing is a crucial step in bread baking that enhances the flavor, improves the texture, and ensures a proper rise. During proofing, the yeast ferments the dough, creating carbon dioxide which gives the bread its light and airy structure. So, don’t skip this step – it’s what takes your bread from ordinary to extraordinary.
Proofing Enhances Flavor
To enhance the flavor of your bread, you need to let it proof properly. Proofing is an essential step in bread baking that not only ensures the dough rises, but also enhances its flavor and overall quality. Here’s why proofing is so important:
- Enhancing Aroma: During proofing, the yeast ferments the dough, releasing carbon dioxide. This process creates air pockets and gives the bread its light and airy texture. It also produces aromatic compounds that contribute to the bread’s delicious smell and taste.
- Extending Shelf Life: Proper proofing allows the dough to develop a stronger gluten structure, resulting in a bread that stays fresher for longer. The gluten helps retain moisture, preventing the bread from becoming dry and stale too quickly.
- Improved Digestibility: The fermentation process during proofing breaks down complex carbohydrates, making them easier to digest. This can benefit individuals with gluten sensitivities or digestive issues.
- Flavor Development: As the dough proofs, the yeast produces enzymes that break down the starches and proteins in the flour. This enzymatic activity enhances the flavor profile of the bread, resulting in a more complex and delicious taste.
Proofing Improves Texture
Proper proofing is crucial for achieving a desirable texture in your bread. When you proof your dough, you allow it to undergo a final rise, which improves the crumb structure of the bread. This step is essential because it gives the yeast enough time to ferment the dough properly.
The yeast feeds on the sugars in the dough, producing carbon dioxide gas as a byproduct. This gas gets trapped in the gluten network, creating air pockets and giving the bread its light and airy texture. If you rush the proofing process, you risk ending up with a dense and heavy loaf. On the other hand, if you give your dough enough time to proof, you will be rewarded with a loaf that has a soft and tender crumb. So, be patient and resist the temptation to skip this important step in bread baking.
Proofing Ensures Proper Rise
To ensure a proper rise in your bread, it is crucial that you understand the importance of proofing. Proofing is the final fermentation stage before baking, where the dough is left to rise and develop its flavor. Here are some key points to consider:
- Proper yeast activation: Proofing allows the yeast to wake up and start producing carbon dioxide, which creates those beautiful air pockets in your bread.
- Temperature: The ideal temperature for proofing is around 75°F (24°C). Too cold, and the yeast will be sluggish; too hot, and it will ferment too quickly, resulting in a dense loaf.
- Time: Proofing time varies depending on the recipe and temperature. It can range from 1-2 hours for a regular loaf to overnight for slow fermentation.
- Humidity: Higher humidity helps prevent the dough from drying out, resulting in a softer, more tender crumb.
Understanding these factors affecting proofing time and results will help you achieve the perfect rise and texture in your homemade bread.
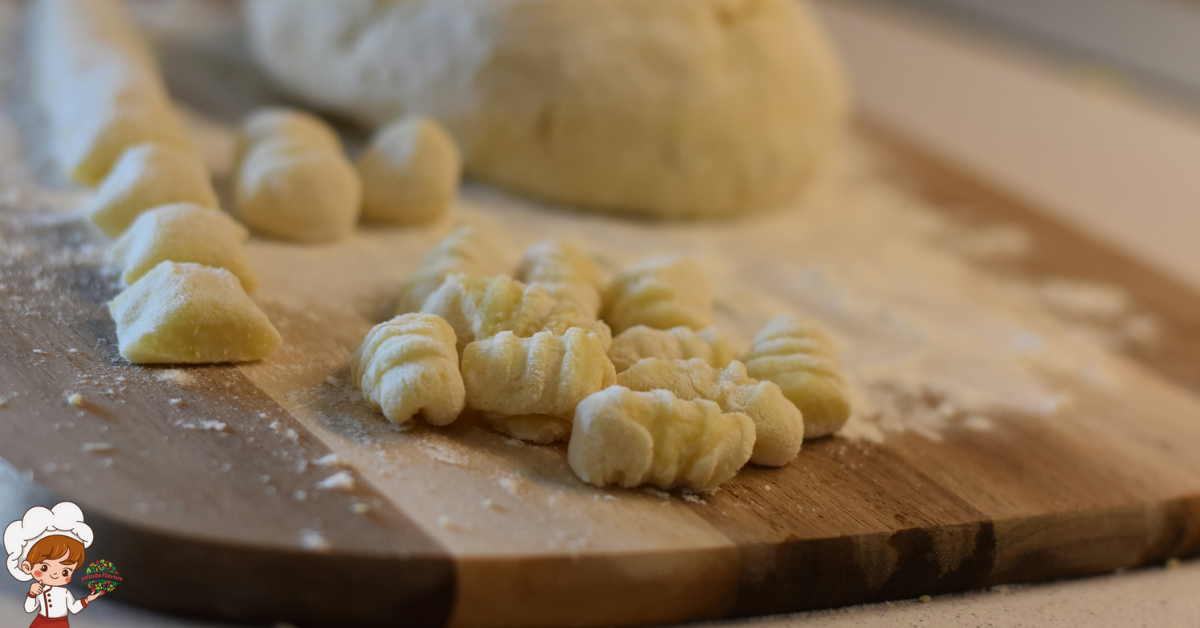
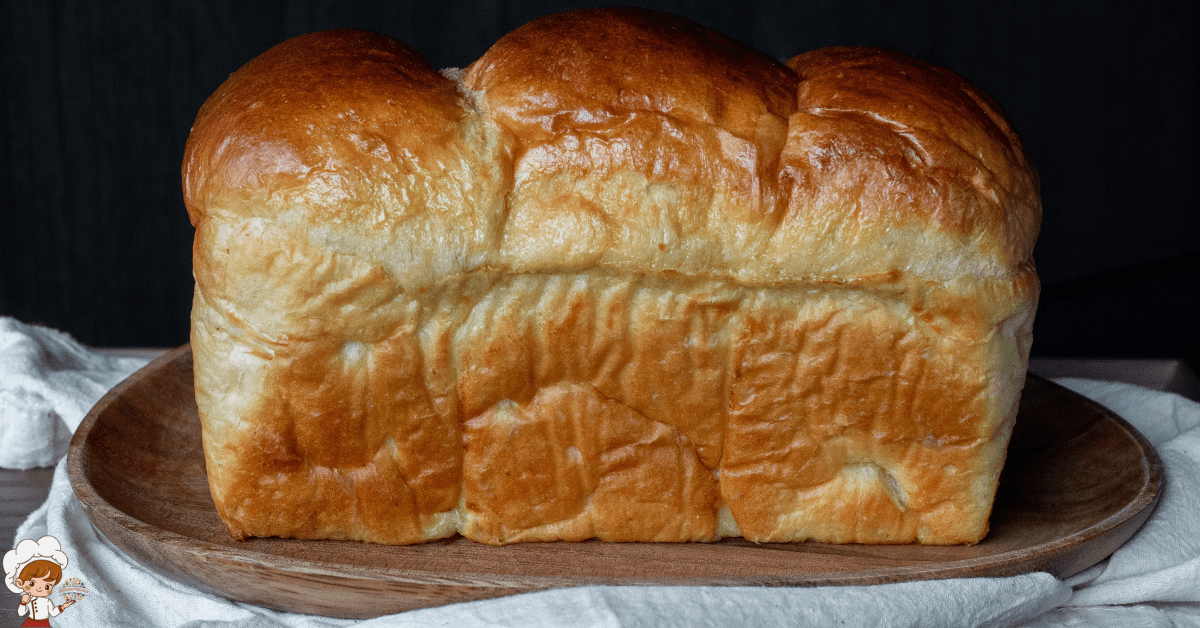
Shaping and Scoring the Loaf
Start by gently shaping the dough into a round ball. After proofing, your dough is now ready to be shaped into a loaf. Loaf shaping techniques may vary depending on the type of bread you are making, but the basic principles remain the same. To shape your loaf, begin by gently pressing the dough down to release any trapped air. Then, fold the top edge of the dough towards the center and press it down firmly. Repeat this process with the bottom edge, and then repeat again with the left and right edges. This will help create tension on the surface of the dough, giving your loaf a nice shape and structure.
Once your loaf is shaped, it’s time to score the dough. Scoring patterns not only enhance the appearance of your bread, but they also serve a functional purpose. When bread bakes, it expands in the oven. By scoring the dough, you are creating weak points that allow the bread to expand in a controlled manner. This prevents the bread from bursting open during baking.
To score your loaf, use a sharp knife or a bread lame. Make shallow cuts on the surface of the dough, being careful not to deflate the loaf. Some common scoring patterns include a diagonal slash, a tic-tac-toe pattern, or a simple single line down the center. Experiment with different patterns to create unique designs on your bread.
Shaping and scoring are important steps in bread baking that contribute to the final outcome of your loaf. With practice, you will become more confident in your techniques and develop your own personal style. So don’t be afraid to get creative and have fun with it!
Baking Techniques and Temperatures
When it comes to baking bread, understanding the right techniques and temperatures is crucial. Firstly, knowing the ideal oven temperature is key to achieving a perfectly baked loaf. Secondly, preheating your oven is essential to ensure even heat distribution and proper rise. Lastly, familiarize yourself with different baking techniques such as steam baking or Dutch oven baking to achieve different textures and crusts.
Ideal Oven Temperature
Achieve optimal results by preheating your oven to the ideal temperature for baking bread. The temperature you set your oven at can greatly affect the outcome of your bread. Here are some important points to remember when it comes to oven temperature and troubleshooting common bread baking mistakes:
- Preheat your oven: Make sure to preheat your oven thoroughly before placing your bread dough inside. This allows for even baking and a nicely risen loaf.
- Use an oven thermometer: Ovens can often be inaccurate when it comes to temperature. Use an oven thermometer to ensure you are baking at the correct temperature.
- Follow the recipe: Different bread recipes may require different oven temperatures. Always follow the recipe instructions for the best results.
- Adjust if needed: If you find that your bread is consistently under or over-baked, you may need to adjust the oven temperature accordingly.
Importance of Preheating
To ensure optimal results when baking bread, it is crucial to understand the importance of preheating your oven. Preheating refers to the process of heating your oven to the desired temperature before placing your dough inside. Preheating has several benefits that directly affect the quality of your bread.
Firstly, preheating allows for even heat distribution throughout the oven, ensuring that your bread bakes evenly. This helps in achieving a uniform crust formation, giving your bread a desirable golden-brown color and a crispy texture. Additionally, preheating helps in activating the yeast in your dough, resulting in better rising and a lighter, fluffier loaf. So, before you start baking, make sure to preheat your oven to the recommended temperature for the best results.
Different Baking Techniques
Now let’s delve into the different baking techniques and temperatures you can use to perfect your bread. Here are some methods and alternatives to consider:
- Sourdough Techniques: Sourdough bread is made using a natural fermentation process that involves a sourdough starter. This technique adds a distinct tangy flavor and creates a chewy texture in the bread.
- Gluten-Free Alternatives: For those with gluten sensitivities or dietary restrictions, there are various gluten-free flours and ingredients available. These alternatives can be used to make delicious and satisfying gluten-free breads.
- Different Baking Temperatures: The temperature at which you bake your bread can greatly affect the final product. Higher temperatures result in a crispier crust and a lighter, airier texture, while lower temperatures yield a denser, chewier loaf.
- Experimentation: Don’t be afraid to try new techniques and temperatures to find what works best for you. Baking bread is a journey of discovery, and it’s all about finding your own unique style and taste.
Troubleshooting Common Bread Baking Mistakes
If you are experiencing common bread baking mistakes, such as dense loaves or burnt crusts, there are simple solutions to help you troubleshoot and improve your results. Baking bread can be a delicate process, but with the right techniques, you can easily overcome these challenges.
One of the most common mistakes is using expired yeast or not activating it properly. To ensure your yeast is active, dissolve it in warm water with a pinch of sugar. If it doesn’t bubble within a few minutes, it may be time to replace it. Another mistake is not giving the dough enough time to rise. Yeast needs warmth and time to work its magic, so make sure to let the dough rise in a warm environment until it doubles in size.
Dense loaves can also be caused by using too much flour or not kneading the dough enough. When measuring flour, use a spoon to scoop it into the measuring cup and level it off with a knife. Too much flour can make the dough too dry, resulting in a dense loaf. Kneading the dough is crucial to develop gluten, which gives bread its structure. Make sure to knead the dough until it becomes smooth and elastic.
Burnt crusts can be avoided by adjusting the oven temperature. If your bread is browning too quickly, lower the temperature slightly and cover the loaf with aluminum foil. Additionally, using a baking stone or preheating a baking sheet can help distribute heat evenly and prevent burning.
Adding Flavors and Fillings to Your Bread
When exploring the realm of adding flavors and fillings to your bread, creativity becomes your greatest ally. By incorporating flavorful add-ins and creative fillings, you can take your homemade bread to a whole new level of deliciousness. Here are some ideas to inspire your culinary adventures:
- Herbs and Spices: Experiment with adding dried herbs and spices to your dough. Rosemary, thyme, garlic, and cinnamon are just a few examples that can infuse your bread with aromatic and savory flavors.
- Nuts and Seeds: Toasted almonds, walnuts, sunflower seeds, or pumpkin seeds can provide a delightful crunch and nutty taste to your bread. Consider kneading them into the dough or sprinkling them on top for added texture.
- Cheese: From sharp cheddar to creamy goat cheese, adding cheese to your bread can create a rich and savory experience. Fold shredded cheese into the dough or create a cheese-filled swirl for a gooey surprise.
- Sweet Fillings: For a touch of sweetness, get creative with fillings like chocolate chips, dried fruits, or even a swirl of homemade jam. These additions can transform your bread into a delightful treat for breakfast or dessert.
Remember, when adding flavors and fillings to your bread, it’s important to consider the moisture content and adjust the recipe accordingly. These flavorful add-ins can add moisture to the dough, so you may need to slightly increase the amount of flour or adjust the baking time.
Don’t be afraid to let your imagination run wild and experiment with different combinations. The beauty of baking bread is that it allows you to personalize each loaf to your own taste. So go ahead, embrace your creativity, and enjoy the mouthwatering results of your flavorful bread creations.
Storage and Preservation Tips
To ensure the freshness and longevity of your flavorful bread creations, follow these storage and preservation tips. Properly storing bread is essential in preventing mold and maintaining its taste and texture. After baking your bread, allow it to cool completely before storing it. This will prevent condensation from forming inside the storage container, which can lead to mold growth. Once cooled, wrap the bread tightly in plastic wrap or place it in a sealed plastic bag. This will help to preserve its moisture and prevent it from becoming stale. If you prefer a crustier bread, you can leave it unwrapped, but be sure to store it in a paper bag to allow for air circulation.
When it comes to choosing a storage location, keep your bread away from direct sunlight and heat sources. These factors can accelerate the staling process. Instead, find a cool, dry place, such as a pantry or bread box, for storing your bread. Avoid storing bread in the refrigerator, as this can actually make it go stale faster.
If you find that you have more bread than you can consume within a few days, consider freezing it. Freezing bread is a great way to extend its shelf life. Slice the bread before freezing, and then place the slices in a freezer-safe bag or container. When you’re ready to enjoy the bread, simply remove the desired number of slices and thaw them at room temperature or toast them for a crispy texture.
Exploring Different Bread Recipes and Variations
Now, let’s dive into the exciting world of bread baking by exploring a variety of delicious bread recipes and creative variations. Whether you’re a seasoned baker looking to expand your repertoire or a beginner eager to try something new, there’s no shortage of options to explore. Here are some ideas to get you started:
- Exploring Sourdough Variations: Sourdough bread is known for its tangy flavor and chewy texture. Why not take it a step further and experiment with different types of sourdough? Try adding herbs like rosemary or thyme to the dough for a savory twist. Or, for a touch of sweetness, consider incorporating dried fruits or even chocolate chips. The possibilities are endless when it comes to sourdough variations.
- Experimenting with Gluten-Free Recipes: If you or someone you know follows a gluten-free diet, don’t worry – you can still enjoy the pleasure of homemade bread. There are numerous gluten-free flours and grains available, such as almond flour, rice flour, or quinoa flour. Try substituting these ingredients in your favorite bread recipes, or find specific gluten-free recipes to try. From hearty multigrain loaves to soft and fluffy dinner rolls, gluten-free bread can be just as delicious as its traditional counterpart.
- Getting Adventurous with Flavors: Bread doesn’t have to be plain and ordinary. Get creative by adding different flavors and ingredients to your dough. How about a sun-dried tomato and basil bread? Or maybe a cinnamon swirl loaf for a sweet treat? Don’t be afraid to think outside the box and experiment with unique combinations. The results may surprise you!
- Exploring International Bread Recipes: Bread is a staple in many cultures around the world, and each country has its own unique bread recipes. Take a culinary journey by trying your hand at making baguettes, naan bread, or even traditional Irish soda bread. Embrace the flavors and techniques of different cultures and expand your bread baking repertoire.
Bread Baking Basics; Frequently Asked Questions
How Long Should I Let the Dough Rise Before Baking?
You should let the dough rise before baking for a specific amount of time, depending on various factors such as room temperature, yeast activity, and desired texture.
Can I Use All-Purpose Flour Instead of Bread Flour?
You can use all-purpose flour instead of bread flour for bread baking, but the results may differ. Bread flour has a higher protein content, which gives bread a better structure and texture. However, with some adjustments and tips, you can still achieve successful bread baking using all-purpose flour.
What Is the Best Way to Know if the Bread Is Fully Baked?
To know if your bread is fully baked, there are a few key signs to look for. The crust should be golden brown, the bread should sound hollow when tapped, and the internal temperature should be around 190-200°F.
How Can I Prevent My Bread From Becoming Too Dense?
To prevent your bread from becoming too dense, there are a few troubleshooting tips you can try. Common mistakes include using too much flour, not kneading the dough enough, or not allowing enough time for the dough to rise properly.
Can I Use Instant Yeast Instead of Active Dry Yeast in Bread Baking?
Yes, you can use instant yeast instead of active dry yeast in bread baking. Instant yeast doesn’t need to be activated in warm water. Store yeast in an airtight container in the fridge to keep it fresh and effective.
Conclusion
So there you have it, the absolute beginner’s guide to bread baking basics! With this knowledge, you can confidently embark on your bread baking journey. Remember to choose the right flour, understand the role of yeast, mix and knead the dough properly, and give it enough time to proof. Don’t forget to shape and score your loaf, troubleshoot any mistakes, and experiment with flavors and fillings. With practice, you’ll become a master bread baker in no time. Enjoy the delicious results and happy baking!