How To: Deep Frying Doughnuts At Home
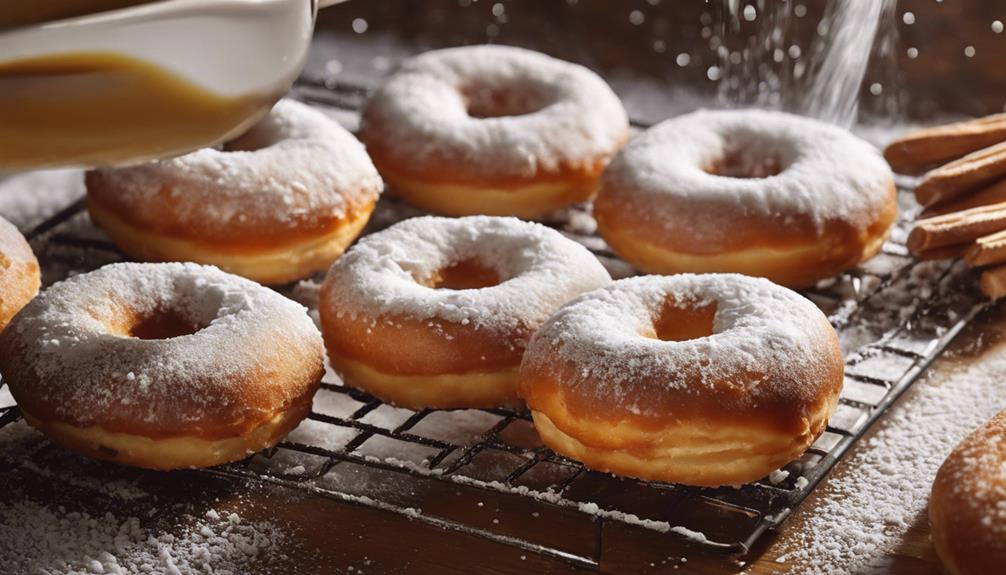
Deep Frying Doughnuts At Home; You can easily deep fry delicious doughnuts at home with the right ingredients and techniques. Start with all-purpose or bread flour, sugar, yeast, milk, and butter to create the dough. Knead it until smooth, then let it rise until doubled in size. Once ready, heat oil in a deep fryer or heavy pot to 350°F to 375°F. Carefully lower the doughnuts into the hot oil using a slotted spoon and fry until golden brown. Drain them on paper towels and feel free to glaze or top them as you like. There’s plenty more to explore, including creative flavor variations and storage tips!
Essential Ingredients for Doughnuts
When it comes to making delicious doughnuts at home, having the right ingredients is essential. You’ll want to start with high-quality flour, which forms the base of your doughnut. All-purpose flour works well, but if you’re aiming for a lighter texture, consider bread flour due to its higher gluten content. Next, don’t forget about sugar; it not only sweetens but also contributes to the doughnut’s structure. Granulated sugar is the go-to, but brown sugar can add a lovely depth of flavor.
Next up, yeast is vital for that perfect rise. Choosing active dry yeast or instant yeast can make a significant difference in your doughnut’s texture. Milk adds moisture and richness, while eggs bind everything together and contribute to a tender crumb. And of course, you’ll need butter or oil for flavor and to keep your doughnuts moist.
As you gather these ingredients, remember the doughnut’s rich history and cultural significance. Originating in various forms around the world, doughnuts have evolved into a beloved treat across cultures. From the classic ring-shaped doughnut to filled varieties, each bite can connect you to traditions and stories that span generations.
With the right ingredients, you’re not just making a snack; you’re participating in a culinary tradition that brings joy to many. So, stock your pantry wisely, and get ready to create something delicious in your kitchen!
Tools and Equipment Needed
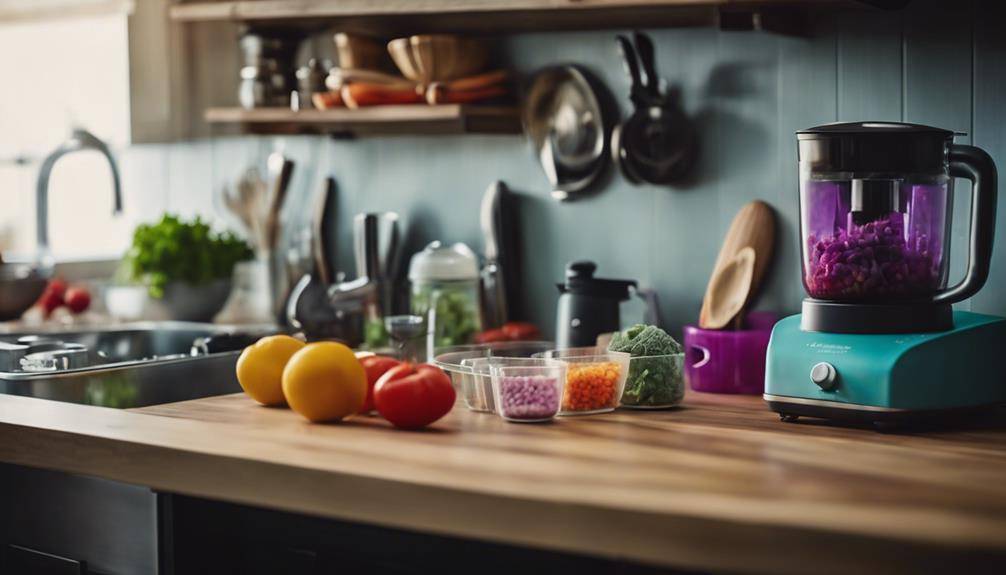
Gathering the right tools and equipment is vital for successfully deep frying doughnuts at home. First and foremost, you’ll need a deep fryer or a heavy pot that can hold enough oil for frying. A frying thermometer is critical for monitoring the oil temperature; you want it to stay around 350°F to 375°F for perfect doughnuts.
Next, grab a sturdy slotted spoon or a spider to safely lower and lift your doughnuts in and out of the hot oil. This will help you avoid splashes and burns. You’ll also need a cooling rack lined with paper towels to drain excess oil after frying.
A doughnut cutter is another must-have tool. It typically consists of two circular cutters—one for the outer ring and a smaller one for the hole in the center. This will give your doughnuts that classic shape and guarantee even cooking. If you don’t have a doughnut cutter, you can improvise with two different-sized round cookie cutters.
Preparing the Dough
To prepare the perfect dough for your doughnuts, you’ll need to gather the right ingredients, including flour, sugar, and yeast. Once you’ve mixed and kneaded the dough, it’s essential to allow it to rise properly for the best texture. This step can’t be rushed, so make sure you give it the time it needs.
Ingredients for Doughnuts
Creating delicious doughnuts at home starts with the right ingredients, so you’ll want to line everything up before you begin. To craft your doughnuts, you’ll need all-purpose flour, sugar, yeast, eggs, milk, butter, and a pinch of salt. Each ingredient plays an essential role in achieving that perfect texture and flavor.
Doughnut history reveals how these treats have evolved over centuries, with global variations influencing their ingredients and preparation methods. For instance, some cultures use spices like nutmeg or cinnamon, while others prefer rich additions like chocolate or fruit.
When selecting your ingredients, opt for fresh yeast for ideal rise and flavor. Whole milk and high-quality butter contribute to a richer dough. Don’t forget the sugar—it’s not just for sweetness; it helps with browning during frying.
Mixing and Kneading Dough
Once you’ve got all your ingredients ready, it’s time to mix and knead the dough to bring everything together. Start by combining your dry ingredients in a large bowl. Whisk them well, then create a well in the center for your wet ingredients. Gradually pour in the wet mixture, stirring with a wooden spoon until the dough begins to form.
Once it’s mostly combined, transfer the dough to a floured surface. This is where the magic happens—kneading! You’ll want to push, fold, and stretch the dough with your hands for about 8 to 10 minutes. The goal is to develop the dough’s elasticity. You’ll notice the dough texture change from sticky and rough to smooth and springy.
If it’s too sticky, sprinkle a little more flour as needed, but don’t overdo it; you want to maintain that perfect balance. Remember, the right dough consistency is key for fluffy doughnuts. Once you’ve achieved that smooth texture, you’re ready to let it rest and rise before frying. Happy frying!
Rising Time Importance
After you’ve kneaded the dough to the right consistency, allowing it to rise is crucial for achieving that light, airy texture in your doughnuts. This rising time promotes yeast activation, which is essential for fermentation. When the yeast activates, it produces carbon dioxide, causing the dough to expand. If you skip this step or rush it, your doughnuts will be dense and chewy instead of fluffy.
During the rising process, focus on creating the right environment. Keep the dough in a warm, draft-free area. This warmth helps the yeast thrive, enhancing dough elasticity as it stretches and rises. You’ll want to let it rise until it doubles in size, which usually takes about an hour. This step isn’t just a waiting game; it’s where the magic happens.
Once the dough has risen sufficiently, you can shape it into your desired doughnut form. Remember, the longer you let it rise, the better the texture will be. So, don’t rush this crucial step; it pays off when you sink your teeth into a perfectly light, airy doughnut. Enjoy the process, and your patience will be rewarded!
Kneading Techniques
When it comes to kneading dough for your homemade doughnuts, mastering the right techniques can make all the difference. Proper kneading not only develops the gluten but also guarantees your dough achieves the right consistency. You’ll want your dough to be smooth and elastic, not too sticky or dry.
Start by choosing your kneading method. The most common kneading methods include the traditional hand kneading and using a stand mixer with a dough hook. If you prefer hand kneading, flour your surface lightly to prevent sticking. Place your dough in the center and use the heel of your hand to push it away from you. Fold it back over itself, rotate it a quarter turn, and repeat. Keep kneading until the dough is smooth, which usually takes about 8-10 minutes.
If you opt for a stand mixer, attach the dough hook and mix on low speed. As the dough comes together, you can gradually increase the speed. Mix until the dough pulls away from the sides of the bowl and forms a ball. This method usually takes about 5-7 minutes, and it’s easier on your arms.
Regardless of the method you choose, check the dough consistency. It should be soft and slightly tacky but not overly sticky. If it sticks to your fingers excessively, incorporate a little more flour. Remember, effective kneading is key to achieving those light and fluffy doughnuts you crave!
Proofing the Dough
With your dough perfectly kneaded, the next step is proofing, which allows the yeast to activate and the dough to rise. This stage is essential for achieving that light and airy texture in your doughnuts. You’ll want to find a warm spot in your kitchen where the temperature is around 75°F to 80°F (24°C to 27°C). This warmth helps in yeast activation, ensuring your dough rises properly.
Before proofing, check your dough consistency. It should be smooth and elastic but not too sticky. If it feels a bit tacky, lightly dust your hands with flour to handle it better. Once you’re satisfied with the consistency, shape the dough into a ball and place it in a lightly greased bowl. Cover it with a clean kitchen towel or plastic wrap to keep it from drying out.
Let your dough rest for about one hour, or until it has doubled in size. During this time, the yeast will produce carbon dioxide, causing the dough to rise. You can check if it’s ready by gently pressing two fingers into the dough; if the indent remains, you’re good to go.
After proofing, your dough will be airy and full of flavor, ready for the next step in your doughnut-making adventure. Remember, patience is key here; skipping this step could lead to dense doughnuts that aren’t as enjoyable. So, give it the time it needs to rise!
Cutting Doughnut Shapes
Now that your dough has risen to perfection, it’s time to cut your doughnut shapes. Start by lightly flouring your work surface to prevent sticking. Grab your rolling pin and roll out the dough to about half an inch thick. This thickness is ideal for creating fluffy doughnuts that won’t lose their shape while frying.
Next, it’s time to choose your doughnut cutters. If you’re aiming for traditional ring doughnuts, use a round cutter with a smaller one for the hole. But don’t feel limited to just rings; you can explore various shape variations. Think about using star or heart-shaped cutters for a fun twist! Just remember to cut quickly and efficiently, as the dough can start to lose its elasticity if it sits out too long.
Once you’ve cut out your shapes, place them on a lightly floured baking sheet. Make sure to leave some space between each doughnut to allow for rising before frying. If you’ve got extra dough scraps, don’t toss them! Gather and re-roll them to create more doughnuts—though they might not be as perfectly shaped, they’ll taste just as delicious.
Heating the Oil
Heating the oil is a essential step that can make or break your doughnut-making experience. If you don’t get the oil temperature just right, your doughnuts might end up greasy or undercooked. Ideally, you want the oil to be around 350°F (175°C) when you start frying. To achieve this, use a deep-frying thermometer. It’ll help you monitor the temperature accurately, ensuring that your doughnuts cook evenly.
Before you heat the oil, make sure you’re following frying safety precautions. Always use a heavy-bottomed pot or a deep fryer to minimize the risk of oil splatter. Fill the pot with oil no more than halfway, allowing enough room for the oil to bubble when you add the doughnuts. It’s wise to keep a close eye on the oil during the heating process. If it starts smoking, it’s too hot—turn off the heat and let it cool down before trying again.
Once the oil reaches the right temperature, you’re ready to fry your doughnuts. Remember, maintaining the correct oil temperature is essential for achieving that golden-brown perfection. If the oil is too cool, your doughnuts will absorb more oil, leading to a greasy mess. On the other hand, if it’s too hot, they’ll burn on the outside while remaining raw inside. So, stay vigilant, check the temperature regularly, and get ready to enjoy some delicious homemade doughnuts!
Frying the Doughnuts
It’s time to drop those doughnuts into the hot oil and watch them transform into golden-brown delights. Before you begin, make certain you’ve shaped your doughnuts properly; whether you’re opting for classic rounds or fun shapes, uniformity helps them cook evenly.
When you’re ready, gently lower each doughnut into the hot oil, guaranteeing not to overcrowd the pot. This allows each piece to float freely, promoting even cooking and preventing them from sticking together. Use a slotted spoon or a spider strainer to handle them; this helps maintain your distance from the bubbling oil and keeps things safe.
As the doughnuts fry, pay attention to the sizzling sounds. This is a good indicator of how the frying is going. You’ll notice them puffing up and turning that perfect golden brown. Flip them halfway through using your slotted spoon to guarantee a consistent color on both sides. Generally, this takes about 2-3 minutes per side, depending on their thickness and the temperature of the oil.
If you want extra flavor, consider adding spices or flavored extracts to your dough before frying. Experimenting with different doughnut shapes can also yield unique textures and frying results, so don’t hesitate to get creative! Once they’re cooked to perfection, you’ll be amazed at how satisfying it is to see your homemade doughnuts ready for the next step. Enjoy the excitement of this delicious process!
Draining Excess Oil
Once your doughnuts are golden brown, it’s essential to drain the excess oil to keep them light and fluffy. You can use paper towels for quick absorption or a cooling rack to allow air circulation. Both methods help guarantee your treats are delicious without the greasy aftermath.
Proper Drainage Techniques
Proper drainage techniques are essential for achieving that perfect doughnut texture, free from excess oil. After frying your doughnuts at the right frying temperatures, you’ll want to focus on how to effectively drain them. Start by carefully removing each doughnut from the hot oil using a slotted spoon or spider. This allows excess oil to drip off while you transfer them.
Next, place the doughnuts on a cooling rack set over a baking sheet. This method helps air circulate around the doughnuts, preventing them from sitting in pooling oil. If you don’t have a cooling rack, you can also use a plate lined with parchment paper. Just be cautious, as the oil can quickly seep into the doughnuts, ruining that ideal texture.
Consider letting them sit for a minute or two before transferring them to their final resting place. This way, you guarantee that any remaining oil has a chance to drain away. Remember, the key to a delicious doughnut lies in that crispy outer layer without the greasiness. By mastering these drainage techniques, you’ll elevate your homemade doughnuts to a whole new level!
Using Paper Towels
Using paper towels is a straightforward and effective way to drain excess oil from your freshly fried doughnuts. Once you pull them out of the hot oil, let them sit for a moment to cool slightly. Then, place a few layers of paper towels on a plate or a wire rack. This frying technique helps absorb the oil quickly, ensuring your doughnuts don’t become greasy.
As you transfer each doughnut, gently set it on the paper towel. You’ll want to avoid stacking them too high, as this can trap steam and moisture, leading to sogginess. After a couple of minutes, you should notice the paper towels have soaked up a significant amount of oil. If you’re frying a large batch, consider replacing the paper towels as they become saturated; this keeps your doughnuts light and fluffy.
Cooling Rack Benefits
A cooling rack is an excellent tool for draining excess oil from your doughnuts after frying. When you place your freshly fried doughnuts on a cooling rack, the design allows for effective cooling techniques. The elevated surface keeps them off the counter, letting excess oil drip away quickly.
One of the major airflow benefits of using a cooling rack is that it promotes even cooling. Unlike paper towels, which can trap steam and moisture, a cooling rack allows air to circulate around your doughnuts. This circulation helps maintain their crisp exterior, preventing them from becoming soggy.
Additionally, the draining process on a cooling rack is faster and more efficient. As the oil seeps down, the doughnuts remain elevated, which means they won’t sit in excess oil and absorb it back into their structure. This results in lighter, fluffier treats that taste just right.
Incorporating a cooling rack into your doughnut-making routine enhances the quality of your finished product. So, ditch the paper towels and embrace the cooling rack for perfectly drained, delicious doughnuts every time you fry.
Glazing and Toppings
Transform your freshly fried doughnuts into a mouthwatering treat with the right glazes and toppings. Start by exploring various glaze varieties like classic vanilla, rich chocolate, or tangy lemon. Each adds a unique flavor enhancement, giving your doughnuts a personal touch. Once you’ve chosen a glaze, consider your topping combinations to elevate your creations.
Chocolate dips are always a crowd-pleaser, but don’t overlook fruit toppings like fresh strawberries or blueberries for a revitalizing twist. If you’re feeling adventurous, nut coatings can add a delightful crunch and depth to your doughnuts. Think crushed walnuts, almonds, or pecans, which provide satisfying texture contrasts against the soft dough.
For a fun visual appeal, sprinkles selection can bring color and cheer to your doughnuts. Choose from classic rainbow sprinkles or opt for themed ones based on holidays or special occasions. When it comes to icing methods, drizzle patterns or full-dip techniques can create stunning decoration techniques that impress your guests.
Don’t forget to experiment! Mixing and matching glazes with toppings will allow you to discover your favorite flavor combinations. Maybe you’ll find that a chocolate dip with crushed nuts and a sprinkle of sea salt becomes your go-to choice. Whatever you decide, the key is to let your creativity shine. Your doughnuts are a canvas—make them as delicious and visually appealing as possible!
Storing Leftover Doughnuts
After indulging in a batch of freshly made doughnuts, you might find yourself with a few leftovers that need proper care. Storing these treats correctly guarantees they stay delicious for days to come. First, let your doughnuts cool completely at room temperature. Avoid stacking them while they’re still warm, as this can create moisture and lead to sogginess.
Once cooled, you have a couple of options. If you plan to enjoy them within a day or two, simply place them in an airtight container at room temperature. This way, they’ll maintain their texture and flavor. However, if you want to save them for a longer period, freezing doughnuts is your best bet. Wrap each doughnut tightly in plastic wrap, then place them in a freezer-safe bag or container. This method prevents freezer burn and keeps your doughnuts fresh for up to three months.
When you’re ready to enjoy your frozen treats, you’ll need to use the right reheating methods. For best results, let the doughnuts thaw overnight in the fridge. Then, warm them in the oven at 350°F for about 5-10 minutes, or until heated through. Alternatively, you can microwave them for about 10-15 seconds, but be cautious not to overdo it, as this can lead to a chewy texture. With these storage tips, you’ll savor your homemade doughnuts even after the initial batch is gone!
Creative Flavor Variations
When it comes to flavoring your homemade doughnuts, the possibilities are endless. You can experiment with unique ingredient combinations like lavender and honey or chocolate and chili to surprise your taste buds. Don’t forget to draw inspiration from the seasons; pumpkin spice in the fall or fresh berries in the summer can elevate your creations.
Unique Ingredient Combinations
While classic doughnuts are always a hit, experimenting with unique ingredient combinations can elevate your homemade treats to a whole new level. Why not try adding unexpected spices like cardamom or cinnamon for a warm kick? You can also incorporate fruit infusions; think raspberry or mango, which add a revitalizing zing. For those looking for savory twists, consider blending cheese or bacon into your doughnut batter—trust us, it’s a game changer!
Chocolate pairings can also take your doughnuts up a notch. Pair dark chocolate with sea salt for a rich, indulgent flavor. Don’t forget to explore herbal blends, such as lavender or rosemary, to bring a unique aroma and taste to your treats. Nutty accents from almonds or hazelnuts can add a delightful crunch.
If you’re feeling adventurous, use exotic extracts like almond or rosewater to create a distinctive profile. For breakfast flavors, mix in maple syrup or oats for a hearty touch. You can even experiment with alternative sweeteners like honey or agave to create a guilt-free indulgence. With these creative ideas, you’ll impress everyone with your delicious, one-of-a-kind doughnuts!
Seasonal Flavor Inspirations
Seasonal flavor inspirations can transform your doughnut creations and keep them exciting throughout the year. As autumn rolls in, why not whip up a batch of pumpkin spice doughnuts? The warm spices combined with a fluffy texture will surely delight your taste buds. For a winter treat, try peppermint chocolate doughnuts that blend rich chocolate with invigorating peppermint for a festive twist.
As the leaves turn, apple cider doughnuts are a must-try. Infuse your dough with apple cider and top them with a cinnamon sugar coating for that cozy fall feeling. When the holidays arrive, gingerbread glaze can add a delightful kick to your doughnuts, making them perfect for family gatherings.
In spring, embrace the floral notes of chai latte doughnuts, which will awaken your senses with hints of cardamom and cinnamon. For a tropical vibe, consider filling your doughnuts with luscious coconut cream, offering a taste of paradise. During the summer, a berry compote filling makes for a revitalizing bite, bursting with fruity goodness. To satisfy savory cravings, don’t forget maple bacon doughnuts, where sweet meets salty in every delicious bite!
Frequently Asked Questions: Deep Frying Doughnuts At Home
Can I Bake Doughnuts Instead of Frying Them?
Yes, you can bake doughnuts instead of frying them! Check out some baked doughnut recipes online. You’ll find delicious alternatives, and you can experiment with alternative toppings to make them even more enjoyable. Enjoy your baking!
How Do I Know When the Oil Is Hot Enough?
To know if the oil’s hot enough, use a thermometer to check the oil temperature, aiming for around 350°F. Alternatively, drop a small piece of dough; if it sizzles, you’re ready! Follow these frying tips for success.
What Type of Flour Is Best for Doughnuts?
When choosing flour for doughnuts, you’ve got options. Cake flour yields a tender, soft texture, while bread flour gives a chewier bite. Experiment with both to find your perfect doughnut consistency and flavor!
How Can I Make Doughnuts Healthier?
To make doughnuts healthier, try replacing sugar with natural sweeteners like honey or maple syrup. You can also use yogurt instead of heavy creams, adding moisture and protein while reducing calories and fat. Enjoy your guilt-free treats!
What Should I Do if My Doughnuts Are Too Greasy?
If your doughnuts are too greasy, drain excess oil immediately after frying. Adjust temperature next time; too low can lead to excessive absorption. Monitor heat closely to achieve that perfect golden, less greasy result.
Conclusion
Now that you’ve mastered the art of deep frying doughnuts at home, you can enjoy fresh, warm treats whenever you like. Remember to experiment with different flavors and toppings to keep things exciting. Don’t forget to share your delicious creations with family and friends—they’ll appreciate your efforts! With practice, you’ll perfect your technique and impress everyone with your homemade doughnuts. So, roll up your sleeves and get frying; your taste buds are in for a treat!


