Your Guide to Direct Heat Grilling Techniques
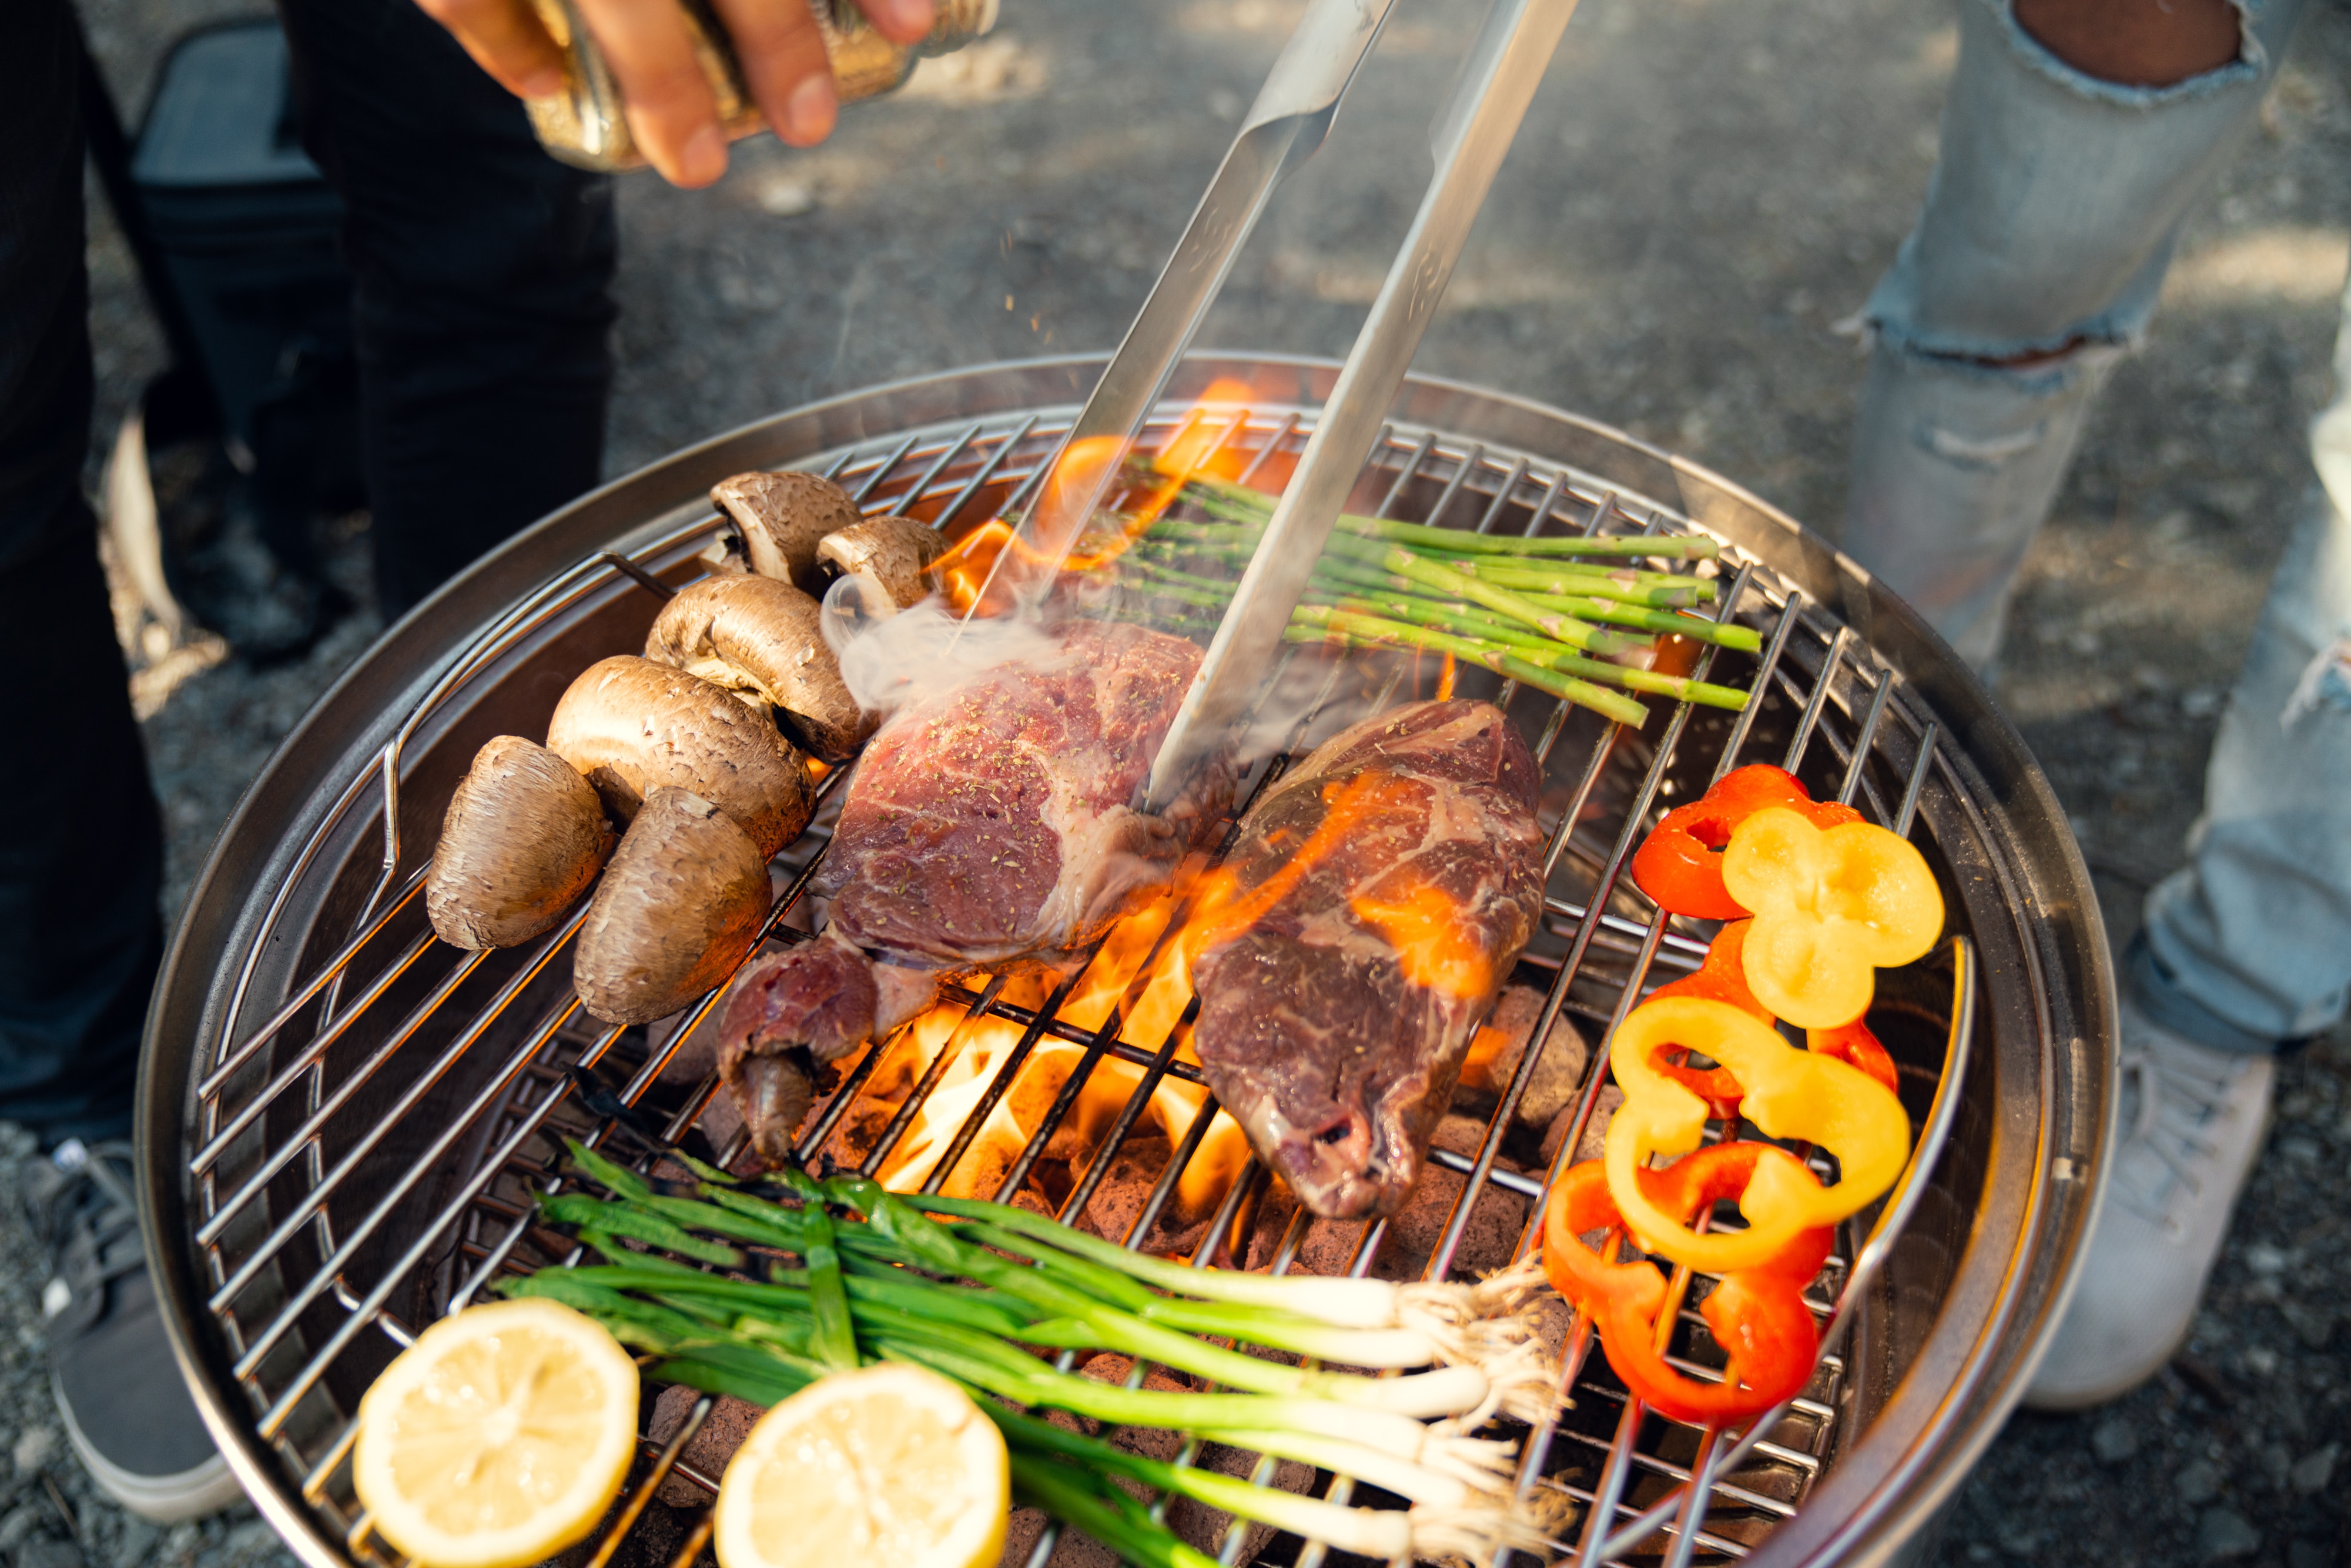
Direct Heat Grilling Techniques; So, you fancy yourself a master of the grill, huh? Well, get ready to take your grilling game to a whole new level with “Your Guide to Direct Heat Grilling Techniques.” Whether you’re a seasoned pro or a grilling newbie, this guide is here to help you achieve grilling perfection. No more guessing games or mediocre meals – we’re talking about mouthwatering, perfectly seared cuts of meat with those coveted grill marks. From choosing the right cuts to preparing your grill like a pro, we’ve got you covered. Get ready to impress your friends and family with your newfound grilling skills. Let’s fire up that grill and get cooking!
Benefits of Direct Heat Grilling
Enjoy the advantages of direct heat grilling for a quick and flavorful cooking experience. One of the key benefits of direct heat grilling is the ability to achieve mouthwatering grill marks on your food. There’s something visually appealing and appetizing about those beautifully seared lines on a perfectly grilled piece of meat or vegetables.
When you grill your food directly over the heat source, whether it’s charcoal or gas, the intense heat sears the surface of the food quickly, creating those coveted grill marks. These marks not only add an aesthetic appeal to your dishes but also enhance the flavor. The caramelization that occurs on the surface of the food as it cooks over direct heat adds a depth of flavor that is hard to achieve with other cooking methods.
Direct heat grilling also allows for faster cooking times. The high heat ensures that your food cooks quickly and evenly, resulting in a juicy and tender final product. Whether you’re grilling a steak, chicken breast, or even vegetables, direct heat grilling ensures that your food retains its natural moisture and doesn’t dry out.
Additionally, direct heat grilling provides greater control over the cooking process. You can easily adjust the heat levels by moving the food closer to or farther away from the heat source. This versatility allows you to achieve the perfect level of doneness, whether you prefer a medium-rare steak or well-charred vegetables.
Choosing the Right Cuts of Meat
When it comes to grilling, choosing the right cuts of meat is crucial to achieving a delicious and satisfying meal. Consider the tenderness factors of different cuts, such as marbling and muscle usage, to ensure a tender and juicy result. Additionally, understanding the flavor profiles of various cuts will help you select the perfect meat for your desired taste. Lastly, keep in mind that cooking times can vary depending on the thickness and type of meat, so it’s essential to take this into account for a perfectly cooked dish.
Meat Tenderness Factors
To ensure tender and succulent grilled meat, it is crucial that you select the right cuts of meat based on their tenderness factors. Here are four important factors to consider when choosing your cuts:
- Marbling: Look for cuts with visible marbling, which refers to the fat that is evenly distributed throughout the muscle. This intramuscular fat adds flavor, juiciness, and tenderness to the meat.
- Connective Tissue: Cuts with more connective tissue, such as brisket or short ribs, benefit from slow cooking methods like braising or smoking. The connective tissue breaks down over time, resulting in a tender and flavorful end result.
- Age: Older animals tend to have tougher meat due to increased connective tissue. For more tender cuts, choose meat from younger animals.
- Thickness: Thicker cuts tend to be more forgiving when it comes to cooking temperature. They allow for a longer cooking time, which helps break down the proteins and results in a more tender texture.
Flavor Profiles for Cuts
To ensure the best flavor profiles for your grilled meat, choose cuts of meat that complement your desired taste preferences. Different cuts of meat have distinct flavors and textures that can be enhanced or balanced with the right cooking techniques and flavor pairings. For example, if you prefer a rich and robust flavor, opt for cuts like ribeye or T-bone steak.
These cuts have a higher fat content, which adds flavor and juiciness when grilled over direct heat. On the other hand, if you prefer a milder taste, leaner cuts like chicken breasts or pork tenderloin can be marinated or seasoned with herbs and spices to infuse them with flavor. The key is to experiment with different cuts and cooking techniques to find the perfect combination that satisfies your taste buds.
Cooking Time Variances
To achieve optimal results when grilling, it is crucial to consider the cooking time variances of different cuts of meat. Cooking time adjustments are necessary to ensure that your meat is cooked to perfection, whether you prefer it rare, medium, or well-done. Here are four tips to help you choose the right cuts of meat and make the necessary cooking time adjustments:
- Thickness matters: Thicker cuts of meat will require longer cooking times, while thinner cuts will cook more quickly. Keep this in mind when planning your grilling session.
- Marinating techniques: Marinating your meat can help tenderize it and add flavor. However, it is important to take into account the marinade’s acidity level, as it can affect the cooking time. Acidic marinades can shorten the cooking time, so adjust accordingly.
- Consider the fat content: Fatty cuts of meat, like ribeye or marbled steak, will take longer to cook because the fat needs time to render and melt. Leaner cuts, like chicken breasts, will cook more quickly.
- Use a thermometer: To ensure your meat is cooked to the desired doneness, invest in a meat thermometer. This will help you accurately gauge the cooking time and prevent overcooking or undercooking.
Preparing the Grill for Direct Heat
To properly prepare your grill for direct heat, ensure that it is clean and preheated to the desired temperature. Grill maintenance is essential not only for optimal cooking but also for fire safety. Start by cleaning the grill grates thoroughly. Use a wire brush to remove any leftover residue from previous grilling sessions. This not only prevents cross-contamination of flavors but also helps to avoid flare-ups caused by grease buildup.
Next, check the burner tubes and make sure they are clear of any debris. Clogged burner tubes can result in uneven heat distribution, making it difficult to achieve perfectly grilled food. Use a pipe cleaner or a small brush to gently clean the burner tubes.
Once the grill is clean, it’s time to preheat it. Preheating is crucial to ensure even cooking and to sear the food properly. Turn on the burners to high and close the lid. Allow the grill to preheat for at least 10-15 minutes, or until the desired temperature is reached.
During the preheating process, always keep the lid closed to prevent any flare-ups. This will also help to build up heat inside the grill, creating a consistent cooking environment.
Before placing the food on the grill, use a long-handled brush to oil the grates. This prevents sticking and helps to achieve those beautiful grill marks. Simply dip a folded paper towel in cooking oil and, using tongs, rub it over the grates.
Mastering the Perfect Sear
Now that you’ve mastered the art of preparing the grill for direct heat, it’s time to focus on achieving the perfect sear. To do this, you’ll need to understand heat control techniques, such as adjusting the distance between the food and the flames, to achieve that delicious caramelized crust. Additionally, it’s important to know the recommended searing time for different cuts of meat, as this can greatly impact the final result. Lastly, selecting the best cuts for searing will ensure that your efforts are rewarded with tender and flavorful grilled dishes.
Heat Control Techniques
Achieve the perfect sear on your grilled meats by mastering heat control techniques. When grilling, it’s important to have proper heat distribution and temperature management to ensure that your meats are cooked to perfection. Here are four tips to help you achieve the ideal sear:
- Preheat your grill: Before placing your meat on the grill, make sure it is preheated to the desired temperature. This will ensure even heat distribution and prevent sticking.
- Use direct and indirect heat: Direct heat is great for searing the outside of your meat, while indirect heat is perfect for cooking the inside. Utilize both techniques to achieve a delicious, juicy result.
- Adjust the grill height: For a quick sear, lower the grill closer to the heat source. To slow-cook your meat, raise the grill higher. This way, you can control the intensity of the heat.
- Monitor the temperature: Invest in a good meat thermometer to accurately measure the internal temperature of your meat. This will help you achieve the desired level of doneness and prevent overcooking.
Searing Time Recommendations
For mastering the perfect sear, you’ll need to know the recommended searing times for different types of meat. The searing temperature and searing techniques play a crucial role in achieving that mouthwatering crust on your grilled meats. When it comes to steak, it is recommended to sear it for about 2-3 minutes per side for a rare to medium-rare doneness.
For pork chops, sear them for 3-4 minutes per side to ensure they are cooked through but still juicy. Chicken breasts should be seared for 5-6 minutes per side to reach an internal temperature of 165°F. Fish fillets, on the other hand, require a shorter searing time of 2-3 minutes per side as they cook quickly. By following these searing time recommendations, you’ll be able to master the art of the perfect sear every time.
Best Cuts for Searing
To master the perfect sear, it is important to know which cuts of meat are best suited for searing. When it comes to searing techniques, certain cuts of meat excel in achieving that delicious crust while maintaining a juicy interior. Here are four cuts of meat that are perfect for searing:
- Ribeye: Known for its marbling, the ribeye is a prime choice for searing. The fat melts during cooking, enhancing the flavor and creating a mouthwatering charred crust.
- Striploin: This cut, also known as New York strip, offers a nice balance of tenderness and flavor. It sears beautifully, resulting in a caramelized exterior and a juicy, medium-rare center.
- Tenderloin: Tenderloin, or filet mignon, is a lean cut that is incredibly tender. It sears quickly and evenly, producing a delicate crust and a buttery texture.
- Skirt steak: With its robust flavor, the skirt steak is perfect for searing. It cooks fast and benefits from a high heat sear, resulting in a flavorful, charred exterior and a juicy interior.
These cuts are versatile and can be used in various seared meat recipes, allowing you to create delicious and impressive dishes with ease.
Achieving Mouthwatering Grill Marks
Master the art of crosshatch grilling to create picture-perfect grill marks on your meats and vegetables. Achieving mouthwatering grill marks not only adds visual appeal to your dishes but also enhances the overall grilling experience. Whether you’re cooking a juicy steak, a succulent chicken breast, or even grilled vegetables, these grill marks techniques will take your grilling aesthetics to the next level.
To start, ensure that your grill grates are clean and preheated to high heat. This will help create those beautiful charred lines on your food. Once the grill is hot, oil the grates to prevent sticking. You can use a brush or a paper towel dipped in oil to lightly coat the grates.
When placing your meat or vegetables on the grill, be mindful of the direction you lay them. For crosshatch grill marks, start by laying your food diagonally across the grates. After a few minutes, use tongs to rotate the food 90 degrees to create the first set of grill marks. Flip the food and repeat the process on the other side.
The key to achieving deep, defined grill marks is to resist the urge to constantly move or flip your food. Allow it to cook undisturbed for a few minutes on each side, depending on the thickness of the food. This will give the grill marks time to develop and create that beautiful contrast of charred lines against the tender interior.
Tips for Successful Direct Heat Grilling
Once you have achieved mouthwatering grill marks, it’s time to shift your focus to the essential tips for successful direct heat grilling. Here are four tips to help you master the art of grilling over direct heat.
- Grill Temperature Control: One of the most important aspects of direct heat grilling is maintaining the right temperature. It’s crucial to preheat your grill for at least 10-15 minutes before cooking to ensure even heat distribution. Use the lid to trap the heat and regulate the temperature. Adjust the burner knobs or charcoal placement to control the heat intensity. Remember, high heat is perfect for searing, while medium heat is ideal for cooking thicker cuts of meat.
- Use Grilling Accessories: To enhance your grilling experience, invest in some essential grilling accessories. A good pair of long-handled tongs is a must-have for flipping and moving food on the grill. A spatula with a wide, sturdy blade is perfect for flipping delicate fish or burgers. Grill brushes and scrapers help keep your grates clean and prevent sticking. And don’t forget about a meat thermometer to ensure your food is cooked to perfection.
- Properly Oil the Grill Grates: To prevent your food from sticking to the grill grates, it’s important to properly oil them before cooking. Use a brush or folded paper towel dipped in vegetable oil to lightly coat the grates. This will create a non-stick surface and help give your food those beautiful grill marks.
- Keep a Close Eye on Your Food: Direct heat grilling requires constant attention to prevent overcooking or burning. Stay near the grill and keep an eye on your food at all times. Flip your food only once, using tongs or a spatula. Avoid pressing down on the food as it can squeeze out the juices. Use a timer or watch to keep track of cooking times and ensure your food is perfectly cooked.
Frequently Asked Questions
How Do I Prevent Flare-Ups While Grilling With Direct Heat?
To prevent flare-ups while grilling with direct heat, you need to manage the heat carefully. Keep a close eye on your grill, adjusting the flames as needed. Avoid dripping marinades or fatty meats onto the flames, as this can cause flare-ups.
What Is the Best Way to Clean a Grill After Using Direct Heat Grilling Techniques?
After grilling with direct heat, the best way to clean your grill is by following these grill maintenance tips. Use a wire brush to scrape off any leftover food and debris, then wipe down the grates with a damp cloth.
Can I Use Direct Heat Grilling for Vegetables and Fruits?
Using direct heat grilling for vegetables and fruits has its pros and cons. It can add a smoky flavor and caramelization, but be careful not to overcook. Tips for optimal flavor include marinating, using a grill basket, and adjusting cooking times.
Are There Any Safety Precautions I Should Take When Grilling With Direct Heat?
When grilling with direct heat, it’s important to prioritize safety and prevent flare-ups. Keep a close eye on the grill, use long-handled tools, and have a fire extinguisher nearby.
Can I Use Direct Heat Grilling for Cooking Delicate Cuts of Meat, Such as Fish or Poultry?
Yes, you can use direct heat grilling for cooking delicate cuts of meat like fish or poultry. It’s one of the best cooking techniques for these cuts, but there are also alternative grilling methods you can explore.
Conclusion
In conclusion, direct heat grilling is an excellent technique to achieve that mouthwatering sear and grill marks on your meat. By choosing the right cuts of meat, preparing the grill properly, and mastering the perfect sear, you can create a delicious meal that will leave your taste buds wanting more. Follow these tips and techniques to become a grilling pro and impress your friends and family with your culinary skills. Happy grilling!


