How To Gratinate Food In A Grill
How To Gratinate Food In A Grill; Gratinating food on a grill is easy and rewarding. Start by preheating your grill to medium-high (375°F to 450°F). Prepare your ingredients, ensuring they’re thinly sliced for even cooking. Layer them in a grill-safe dish, sprinkling cheese and breadcrumbs for that signature crisp. Season well with herbs and spices, and consider using foil or a grilling basket for delicate items. Keep an eye on your dish, cooking for about 15 to 25 minutes, adjusting as needed to avoid burning. Once you see a golden-brown crust, you’re ready to serve. There’s plenty more to help you perfect this technique.
Understanding Gratinating Techniques
When you want to elevate your dishes with a deliciously crispy top, understanding gratinating techniques is crucial. Gratins are all about achieving that perfect balance of texture and flavor enhancement. You can transform simple ingredients into something extraordinary by mastering these techniques.
Start by choosing the right base for your gratin. Vegetables, pasta, or even meats work wonderfully. Make sure your base is cooked or partially cooked; this allows for even heating and prevents sogginess. Once your base is set, layer on your chosen cheese or breadcrumb topping. Cheese adds creamy richness, while breadcrumbs contribute a satisfying crunch.
Next, consider seasoning. A sprinkle of herbs, spices, or even a hint of garlic can elevate the flavors. Don’t skimp on the seasoning; it’s critical for depth. For added flavor enhancement, you might drizzle a bit of olive oil or melted butter over the top before grilling. This helps to achieve that golden-brown crust everyone craves.
When it’s time to grill, keep an eye on your dish. You want to make sure the heat is distributed evenly. If your grill has a lid, use it to trap heat and promote even cooking. A quick blast of high heat will give you that lovely crispy top while maintaining the moistness of the base underneath.
Choosing the Right Grill
Selecting the right grill can make a significant difference in your gratinating results. When you’re deciding between gas versus charcoal, take into account your cooking style and preferences. Gas grills heat up quickly and offer precise temperature control, making it easier to achieve that perfect gratin crust without worrying about flare-ups. If you enjoy the smoky flavor and traditional grilling experience, charcoal grills could be your best bet. They take a bit longer to heat, but the depth of flavor they impart is often worth the wait.
Another factor to reflect on is the size and portability of your grill. If you’re grilling at home, a larger model with ample cooking space might suit you best. However, if you plan on taking your grilling adventures on the road, look into portable grill options. These compact grills can easily fit in your car, allowing you to gratinate your favorite dishes wherever you go, whether at a park or a campsite.
Don’t forget to take into account the grill’s construction and materials. A well-built grill not only guarantees durability but also helps maintain consistent temperatures, essential for successful gratination. Whichever type you choose, make sure it’s equipped to handle the high heat necessary for that golden, bubbling finish. Ultimately, your choice should align with your cooking habits and personal taste, guaranteeing you achieve delicious results every time you gratinate your food.
Essential Tools and Equipment
To achieve the perfect gratin crust, you’ll need a few essential tools and equipment that make the process smooth and efficient. First and foremost, invest in a sturdy grill with a lid that offers good heat retention. A grill thermometer is also vital; it helps you monitor the temperature for even cooking.
You’ll want a grill-safe baking dish or a cast-iron skillet. These materials can withstand high heat and help create that beautiful, crispy texture you’re after. Don’t forget a pair of long-handled tongs to safely maneuver your dish on and off the grill, ensuring you practice proper grill safety at all times.
For the ingredients, a good set of kitchen knives makes chopping and prepping easier. A cutting board is also necessary for a clean workspace. As you prepare your gratin, make sure you have proper ingredient storage containers to keep your components fresh and organized. Airtight containers can help prolong the life of your ingredients, so you won’t have any surprises while grilling.
Lastly, consider a heat-resistant spatula to help serve your dish once it’s finished. With these tools in hand, you’ll be well-equipped to create a delicious gratin that impresses your guests while ensuring safety and efficiency throughout the process.
Preparing Your Ingredients
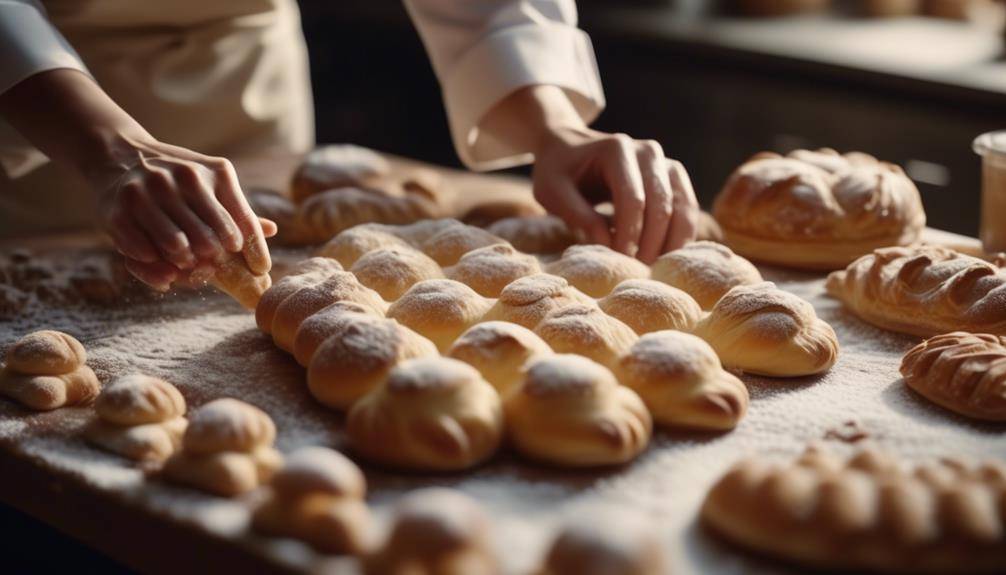
To get the best results when gratinating, you should start with fresh ingredients that pack flavor. Make sure to cut them evenly and thinly so they cook uniformly under the grill’s heat. Don’t forget to season them well; this enhances their natural taste and sets the stage for a delicious finish.
Choose Fresh Ingredients
Fresh ingredients are essential for achieving the best results when gratinating food on a grill. Start by selecting seasonal vegetables, as they’re not only tastier but also more nutritious. Head to your local farmer’s market or grocery store to find the freshest options available. Look for vibrant colors and firm textures, which signal peak freshness.
Next, consider incorporating fresh herb varieties. Herbs like basil, thyme, and parsley can elevate your dishes, adding depth and flavor. When you use fresh herbs, you’ll notice a significant difference compared to dried ones. Chop them finely and mix them in with your vegetables or sprinkle them on top before grilling.
When you choose fresh ingredients, you create a solid foundation for gratination. The natural flavors of seasonal vegetables will shine through, and the addition of fresh herbs will enhance those tastes beautifully. Make it a habit to prioritize freshness, and you’ll be rewarded with a delicious meal. Remember, the quality of your ingredients directly impacts the overall flavor of your gratinated dishes, so don’t skip this crucial step! Happy grilling!
Cut Evenly and Thin
When preparing your ingredients for gratination, cutting them evenly and thinly guarantees they cook uniformly on the grill. This step is vital because uneven pieces can lead to some parts being overcooked while others remain undercooked. To achieve this, focus on honing your knife skills. A sharp knife is essential; it’ll help you slice through ingredients smoothly and with precision.
Use various slicing techniques to confirm your pieces are uniform. For instance, try the julienne method for vegetables like zucchini or carrots. This technique involves cutting them into thin matchstick shapes, allowing for quick cooking and even gratination. For meats, aim for thin, even cuts that will absorb flavors better and cook faster on the grill.
If you’re working with cheese, slice it thinly as well. Thin layers melt more easily, creating that perfect, gooey texture we all love in gratinated dishes. Remember, practice makes perfect, so don’t hesitate to refine your slicing techniques. By mastering these skills, you’ll elevate your gratination game and impress your guests with beautifully cooked dishes.
Season for Flavor
After slicing your ingredients evenly and thin, it’s time to enhance their natural flavors through seasoning. Start by considering your seasoning variations; from classic salt and pepper to more adventurous spice blends, the options are endless. A light sprinkle of sea salt can elevate vegetables, while a dash of smoked paprika adds depth to proteins.
Don’t forget about flavor pairings! Think about the ingredients you’re working with—zesty citrus works well with seafood, while earthy herbs like rosemary complement roasted meats. Olive oil can serve as a base for many seasoning combinations, bringing everything together seamlessly.
If you’re grill gratinating cheese, consider pairing it with garlic and fresh herbs for an aromatic kick. For a sweet touch, a drizzle of honey over grilled fruits can create a delightful contrast.
Seasoning for Maximum Flavor
To make your gratinated dishes burst with flavor, you need to focus on the right seasoning ingredients. Timing is essential; adding spices at the right moment can enhance their impact. Plus, mastering techniques for even distribution guarantees every bite is delicious.
Essential Seasoning Ingredients
Seasoning is the secret ingredient that transforms your grilled dishes from ordinary to extraordinary. To maximize flavor, you’ll want to explore various spice combinations and herb blends that can elevate your cooking. Start with a solid base of salt and pepper, which complements almost any dish. From there, experiment with spices like smoked paprika, cumin, or garlic powder to add depth and warmth.
Don’t shy away from blending your favorite herbs, either. Fresh herbs like rosemary, thyme, or basil can bring an aromatic freshness that elevates grilled proteins and vegetables alike. You might create a zesty herb blend by mixing parsley, oregano, and lemon zest, perfect for drizzling over grilled fish.
For a kick, consider adding crushed red pepper flakes or a dash of cayenne to your spice combinations. This not only enhances the flavor but also adds a delightful heat that many love. Remember, the key is to taste as you go, adjusting your seasoning to find that perfect balance. With the right essential seasoning ingredients, your grilled creations will surely impress everyone at your next cookout!
Timing for Optimal Flavor
Understanding when to apply your seasonings can greatly enhance the flavor of your grilled dishes. Timing is essential, especially when it comes to achieving those rich gratin flavors that make your food irresistible. For meats, season them about 30 minutes before grilling. This allows the flavors to penetrate, ensuring a delicious depth when cooked. If you’re working with vegetables, sprinkling salt just before grilling can help draw out moisture and intensify their natural taste.
For dishes that require a longer cooking time, consider using timing techniques like applying a rub early on and adding fresh herbs or finishing salts just before serving. This layering of flavors can create a more complex taste profile that elevates your meal.
When you’re gratinating, remember to season your topping just before placing it under the grill for that perfect, crispy finish. Don’t rush the process—allowing your seasonings to meld will noticeably enhance the overall experience. By mastering the timing of your seasonings, you’ll reveal a world of savory possibilities that will keep everyone coming back for more.
Techniques for Even Distribution
When it comes to achieving maximum flavor, even distribution of seasonings is key. You want every bite to burst with deliciousness, and using proper gratin techniques will help you achieve that. Start by measuring your spices and herbs, ensuring you’ve got the right balance. Mix them in a bowl before applying them to your food. This way, you’ll avoid clumping and guarantee an even coating.
Next, consider the method of application. Using your hands is often the best choice for even distribution. Rub the seasoning into the food, ensuring it penetrates the surface. If you prefer a lighter touch, a shaker can work well too, but make sure it’s designed for fine spices to avoid overloading any single area.
For flavor enhancement, don’t forget to season on both sides. If you’re grilling vegetables or proteins, give them a light drizzle of oil before seasoning. This helps the spices adhere better and enhances their flavors during cooking. Finally, let your seasoned food rest for a few minutes before grilling. This allows the flavors to meld, ensuring a more delicious and evenly flavored gratin dish.
Layering for Optimal Gratin
To achieve the perfect gratin, focus on layering your ingredients thoughtfully. Start by considering layer thickness; aim for uniformity. Too thick, and your gratin may not cook evenly. Aim for about half an inch to one inch per layer, ensuring each component can meld together while still retaining its unique flavor.
Next, think about ingredient order. Begin with sturdier items like potatoes or root vegetables as your base. They’ll provide a solid foundation and absorb flavors beautifully. Follow with softer ingredients like mushrooms or sautéed greens, which will cook faster and add moisture. If you’re adding proteins, layer them in the middle to allow their juices to permeate the surrounding ingredients.
Don’t forget to sprinkle cheese or breadcrumbs between layers for that signature gratin crust. A fine layer of cheese on each level will create a gooey texture, while breadcrumbs provide crunch. Adding herbs and seasonings in between layers will enhance the overall flavor profile, so don’t skimp on these.
Managing Grill Temperature
Getting the grill temperature just right is essential for achieving a beautifully gratinated dish. You need to focus on temperature control to guarantee that your food cooks evenly and develops that perfect golden crust. Start by preheating your grill to a medium-high temperature, around 375°F to 425°F. This range allows for ideal cooking without burning the top layer of your gratin.
During grill maintenance, check your burners and make sure they’re functioning properly. Clean any residue that could affect the heat distribution. Use a grill thermometer to monitor the internal temperature accurately. If you don’t have one, you can also do a quick hand test: hold your hand about six inches above the grill grates. For medium-high heat, you should be able to hold it there for 4 to 5 seconds.
Once you’ve reached the desired temperature, you can adjust the heat as needed. If things start to look too brown too quickly, lower the heat or move the dish to a cooler part of the grill. Remember that different grills might behave differently, so be attentive and ready to make adjustments.
Keep an eye on your food to avoid any surprises. A well-managed grill temperature not only enhances the gratin’s flavor but also guarantees a delightful texture. So, maintain that control, and you’ll impress everyone with your perfectly gratinated dish!
Using Foil and Grilling Baskets
When you’re grilling, choosing the right foil can make a big difference in how your food turns out. Grilling baskets also offer great benefits, from preventing small items from falling through the grates to allowing even cooking. Let’s explore how these tools can enhance your gratination process.
Choosing the Right Foil
Choosing the right foil can make a significant difference in achieving that perfect gratinated dish on the grill. When you’re grilling, aluminum foil is often your best bet, but not all foils are created equal. Heavy-duty foil offers extra strength and durability, making it ideal for high-heat grilling. If you’re worried about sticking, non-stick foil can be a game changer, allowing for easy food release without leaving a mess behind.
Always opt for grill-safe foil, which can withstand the high temperatures without melting or warping. If you’re looking for foil alternatives, consider using grilling baskets or even banana leaves, which can add unique flavors while being environmentally friendly.
When it comes to foil techniques, guarantee you wrap your food loosely to allow for heat circulation, helping achieve that coveted gratin texture. Don’t forget about proper foil storage; keep it in a cool, dry place to maintain its integrity. By choosing the right foil and using it wisely, you can elevate your grilling game and enjoy perfectly gratinated dishes every time.
Benefits of Grilling Baskets
Grilling baskets offer several advantages that can take your outdoor cooking to the next level. They enhance grilling efficiency by allowing you to cook multiple items at once without worrying about them falling through the grates. You can toss veggies, seafood, or even smaller cuts of meat into the basket, making it easy to achieve even cooking.
Using grilling baskets also provides a significant flavor enhancement. By allowing smoke to circulate around your food, you’ll get that delicious grilled taste that’s hard to beat. When you use a basket, you can experiment with marinades and spices without the mess, as everything stays contained.
Another benefit is the reduced clean-up time. Since the basket holds your food, you won’t have to scrub the grill grates as much after cooking. Plus, if you line the basket with foil, you can minimize sticking and make cleaning even easier.
Incorporating grilling baskets into your outdoor cooking routine can elevate your meals, making it simpler and more enjoyable to grill. So, grab a grilling basket and get ready to enjoy flavorful, perfectly cooked dishes!
Timing Your Cooking Perfectly
Achieving the perfect gratin requires precise timing, as the balance between achieving a golden crust and avoiding overcooked ingredients can be delicate. To get it right, you need to pay close attention to the grill temperature and the specific cooking techniques you use.
Start by preheating your grill to a medium-high temperature, typically around 375°F to 450°F. This range is ideal for melting cheese and browning your dish without burning it. Once your grill reaches the desired temperature, you can begin to place your gratin dish directly on the cooking grate.
Timing is key when you’re grilling. You’ll want to monitor your food closely, turning it if necessary to guarantee even cooking. Generally, a gratin will take about 15 to 25 minutes, depending on the thickness of the ingredients and the type of dish you’re making. Use a timer to keep track, but also rely on your senses. If you notice the ingredients bubbling and the cheese starting to melt, you’re likely on the right track.
To avoid overcooking, consider using indirect heat. This technique allows your dish to cook more evenly without the risk of burning. If you notice the top is browning too quickly, you can move it to a cooler part of the grill or cover it with aluminum foil to slow down the cooking process. Remember, perfect timing will elevate your grilled gratin to a whole new level!
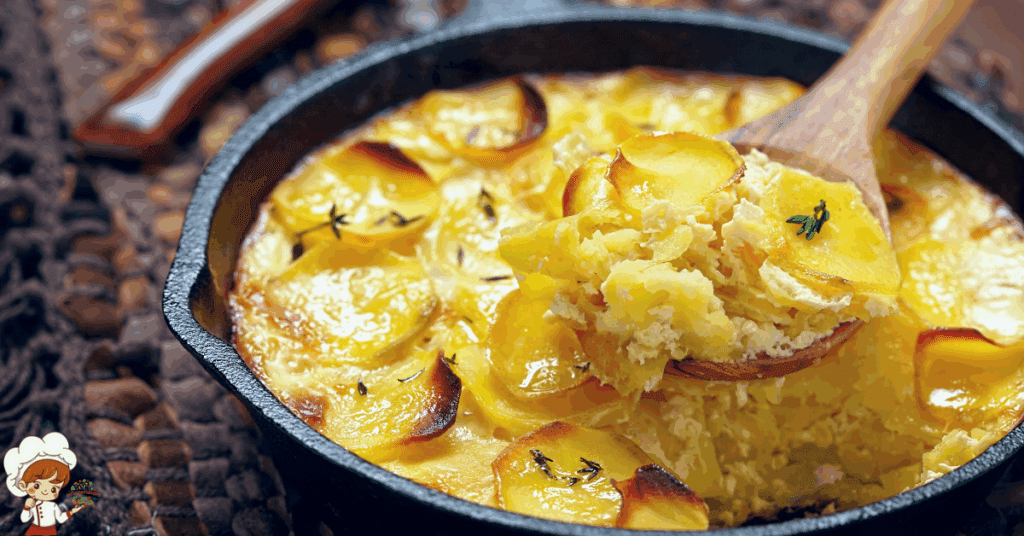
Achieving the Perfect Crust
The right crust can elevate your gratin from good to unforgettable. To achieve that perfect crust, focus on creating a crispy texture that complements the dish’s flavors. Start by selecting the right toppings—think breadcrumbs, cheese, or a combination of both. For an ideal flavor balance, consider using a mix of cheeses with varying aging profiles. A sharp cheese like aged cheddar brings depth, while a milder cheese can add creaminess.
Before you apply your topping, guarantee the base is well-seasoned and cooked through. This step is essential; an undercooked base can lead to a soggy crust. Once you’ve seasoned your base, layer on your chosen toppings generously but evenly. You want to guarantee every bite has that delightful crunch, so don’t skimp on the coating.
When it comes to grilling, the heat source is key. Use indirect heat to cook the gratin, allowing the toppings to brown slowly without burning. Keep an eye on the grill, as the cooking time can vary. You’re looking for a golden-brown color that signals the crust is ready. If you find that the top isn’t browning as you’d like, you can move it closer to direct heat for a few moments, but stay vigilant to prevent charring.
Serving and Enjoying Your Dish
After pulling your gratin from the grill, the next step is serving it to your guests. The way you plate your dish can elevate the dining experience, so pay attention to your plating presentation. Start by using a wide, shallow bowl or plate that allows the layers of your gratin to shine. Carefully scoop out portions, ensuring you include some of that golden crust on top.
To enhance the visual appeal, consider adding a fresh herb garnish, like chopped parsley or thyme, which will also contribute a burst of color. This simple touch can make a big difference in how your dish is perceived.
Now, let’s talk about flavor pairings. Your gratin likely has rich, creamy elements, so balance it with lighter sides. A crisp green salad or grilled vegetables can provide a revitalizing contrast. If your gratin features ingredients like cheese and potatoes, a zesty vinaigrette will complement the flavors beautifully.
As your guests dig in, encourage them to savor each bite. Share the inspiration behind your dish and any unique ingredients you’ve used. This not only enhances the meal but also fosters a sense of connection among everyone at the table.
Frequently Asked Questions: How To Gratinate Food In A Grill
Can I Gratinate Frozen Foods on the Grill?
You can’t directly gratinate frozen food on the grill; it needs to thaw first. Once thawed, use effective grill techniques like indirect heat and high temperature to achieve that delicious, crispy topping you want.
What Type of Cheese Works Best for Gratinating?
When choosing cheese varieties for gratinating, opt for Gruyère, mozzarella, or cheddar. These melt beautifully and complement various dishes. Experiment with different grilling techniques to achieve that perfect golden-brown crust you desire. Enjoy your delicious results!
How Can I Avoid Burning My Gratin?
To avoid burning your gratin, use proper gratin techniques and monitor grilling temperatures closely. Keep the heat moderate, and rotate the dish regularly, ensuring even cooking and a perfectly golden, bubbly topping without charred edges.
Is It Safe to Use Glass Dishes on the Grill?
Using glass dishes on the grill can be risky. If you’re considering it, make certain you understand glass dish safety and monitor grill temperature considerations closely to prevent cracking or breaking from extreme heat.
Can I Gratinate Desserts on the Grill?
Yes, you can gratinate desserts on the grill! Just place your dessert under high heat, allowing the caramelized toppings to develop perfectly. Keep an eye on it to prevent burning and enjoy the delicious results!

Conclusion
Gratinating food on a grill can elevate your meals to a whole new level. By mastering the techniques and using the right tools, you’ll create deliciously crispy, golden toppings that impress everyone at the table. Remember to choose fresh ingredients, season well, and keep an eye on your cooking times for the best results. Now it’s time to fire up your grill, experiment with flavors, and enjoy the scrumptious dishes you’ve created. Happy grilling!