History And How To Make Canning Tomatoes For Beginners
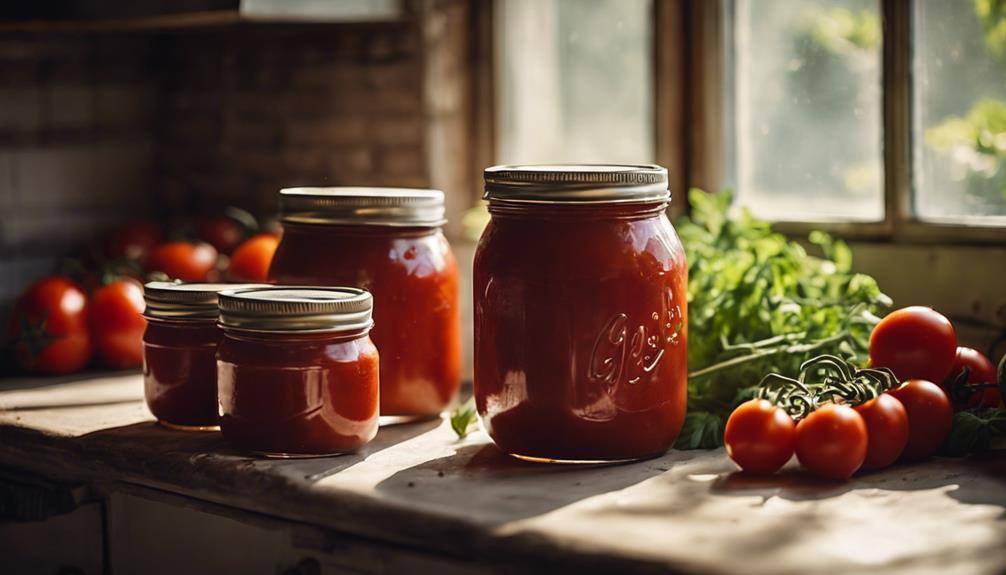
How To Make Canning Tomatoes is a time-honored practice rooted in the early 19th century when Nicolas Appert developed the technique to preserve food during wars. As a beginner, start by gathering your supplies like jars, lids, and a canner. Choose meaty varieties like Roma for the best results. Wash, blanch, and peel the tomatoes before filling sterilized jars, leaving some headspace. Process them using a water bath or pressure canner. Remember to store your jars in a cool, dark place to guarantee quality. Stick around, and you’ll uncover essential tips and techniques for perfecting your canning skills!
Don’t Miss Out—Click Here To Get Your Canning Essentials Now
The Origins of Canning
Canning, a method that preserves food for long periods, originated in the early 19th century as a practical solution to feed soldiers and civilians during times of war. The canning history traces back to 1809 when French inventor Nicolas Appert developed the technique. He discovered that heating food in sealed containers could prevent spoilage, providing a reliable way to store food. This innovation became essential during the Napoleonic Wars as armies needed a sustainable food supply.
You might wonder why this method gained so much popularity. Before canning, food preservation relied on drying, salting, or pickling, which often altered the taste and texture of the food. Canning offered a more effective way to retain flavors and nutrients while extending shelf life. As news of this revolutionary process spread, it transformed how people viewed food preservation. By the mid-19th century, canning factories sprouted up, producing a variety of preserved goods.
As you explore the roots of canning, you’ll appreciate how it laid the groundwork for modern food preservation techniques. Today, canning is more than just a means of survival; it’s a way to enjoy seasonal produce year-round. You can take pride in continuing this tradition, knowing that you’re part of a long history of food preservation that has evolved to meet the needs of families and communities. So, as you commence on your canning journey, remember the pioneers who made it possible.
Evolution of Tomato Preservation
Throughout history, the preservation of tomatoes has evolved alongside advancements in canning techniques, allowing you to enjoy this versatile fruit well beyond its growing season. Early methods of preserving tomatoes often relied on fermentation techniques, where natural bacteria were allowed to break down the sugars, creating tangy flavors and extending shelf life. This method not only preserved tomatoes but also added a unique taste that many people still appreciate today.
As the demand for convenience grew, drying methods gained popularity. Drying tomatoes removes moisture, preventing spoilage and allowing for easy storage. You might have encountered sun-dried tomatoes, which are simply tomatoes that have been dried under the sun, intensifying their flavor. Other drying techniques include using dehydrators or ovens, which provide more controlled environments, ensuring you can achieve consistent results.
With the invention of canning in the early 19th century, tomato preservation took another leap forward. The ability to seal tomatoes in jars allowed for a longer shelf life and retained the fruit’s fresh taste. Today, you can choose from various canning methods, such as water bath canning or pressure canning, each suited for different types of tomatoes and desired results.
Now, when you think about preserving tomatoes, you have an array of options at your disposal. By understanding the evolution of these methods, you can choose the best preservation technique that fits your taste and lifestyle, ensuring delicious tomatoes all year round.
Benefits of Canning Tomatoes
Canning tomatoes offers you several benefits that make it a worthwhile endeavor. You’ll preserve their nutritional value, save money on groceries, and enhance their flavor with your favorite spices and techniques. Let’s explore how these advantages can elevate your cooking and pantry.
Nutritional Preservation Advantages
Preserving tomatoes through canning locks in essential nutrients, ensuring you enjoy their health benefits long after the harvest. When you can tomatoes, you maintain a high level of nutrient retention, especially vitamins A and C, which are crucial for your immune system and skin health. Unlike fresh tomatoes that can lose their nutritional value over time, canned tomatoes remain rich in these essential nutrients, making them an excellent choice for year-round consumption.
Moreover, the canning process helps to preserve antioxidants like lycopene, which is known for its cancer-fighting properties. By choosing to can your tomatoes, you’re not only extending their shelf life but also ensuring that every jar is packed with the goodness your body craves.
Canned tomatoes are incredibly versatile, allowing you to incorporate them into various recipes while reaping their health benefits. Whether you’re making sauces, soups, or stews, you can rest easy knowing that you’re boosting your meals with nutrient-dense ingredients. So, when you think about healthy eating, remember that canning tomatoes is a simple way to keep those nutrients close at hand, even during the off-season.
Don’t Miss Out—Click Here To Get Your Canning Essentials Now
Cost-Effective Food Storage
You’ll find that canning tomatoes is a smart way to save money while ensuring you have delicious, homemade ingredients ready for your meals. When you can your own tomatoes, you can take advantage of bulk purchasing or seasonal sales, cutting down your grocery bill considerably. Instead of paying premium prices for store-bought canned tomatoes, you can create your own at a fraction of the cost.
Having a well-stocked long-term pantry filled with your canned tomatoes means you can whip up budget-friendly meals whenever you want. Whether you’re making soups, sauces, or stews, you’ll always have a flavorful base on hand, reducing the urge to dine out or buy convenience foods. This not only saves you money but also encourages you to cook more at home.
Moreover, canning extends the shelf life of your tomatoes, allowing you to enjoy the taste of summer even in winter months. By investing a bit of time in canning, you’re making a smart choice for your wallet and your health. So, roll up your sleeves, grab those tomatoes, and start canning—your future self will thank you!
Flavor Enhancement Techniques
Enhancing the flavor of your tomatoes during the canning process opens up a world of culinary possibilities that can elevate your meals. You can transform your canned tomatoes into a gourmet ingredient by incorporating herb infusions and spice combinations. Start by adding fresh herbs like basil, oregano, or thyme to your jars. These herbs will infuse their flavors into the tomatoes, creating a vibrant taste that’s ready to use in sauces, soups, or stews.
Experimenting with spice combinations can also make a significant difference. Try incorporating garlic, red pepper flakes, or black pepper for a kick, or go for a sweeter touch with cinnamon or nutmeg. Adjust the spice levels to suit your palate, ensuring that each can reflects your personal taste.
Additionally, consider adding a splash of vinegar or lemon juice to create a tangy depth. This not only enhances flavor but also helps with preservation. By using these flavor enhancement techniques, you’re not just canning tomatoes; you’re crafting a base for countless delicious meals that are ready to shine at a moment’s notice. Enjoy the process and get creative!
Essential Equipment Needed
To can tomatoes successfully, you’ll need some essential equipment that makes the process easier and more efficient. First up, a pressure canner or water bath canner is vital, depending on your chosen preservation techniques. A pressure canner is necessary for low-acid foods, while a water bath canner works well for high-acid tomatoes.
Next, invest in canning supplies such as glass jars, lids, and bands. Make sure to choose jars specifically designed for canning, as regular jars may crack under pressure. The lids should be new and undamaged to guarantee a proper seal, while the bands can be reused if they’re in good condition.
You’ll also need a jar lifter to safely remove hot jars from the canner, preventing burns and spills. A funnel makes filling jars easier and reduces mess, while a bubble remover helps eliminate air pockets in the jars. Don’t forget about a ladle for pouring liquids and a measuring cup for precise ingredient amounts.
Consider having a food processor or blender on hand if you plan to create sauces or purees. Finally, a kitchen timer and a thermometer are useful for monitoring processing times and temperatures.
With these essential tools, you’ll be well-equipped to initiate your canning journey. So gather your supplies, and get ready to enjoy the delicious taste of home-canned tomatoes all year round!
Choosing the Right Tomatoes

Choosing the right tomatoes is essential for successful canning, as the type and quality directly impact the flavor and texture of your finished product. For canning, you’ll want to focus on varieties that are meaty and have fewer seeds, making them ideal for preserving. Roma varieties are a top choice, known for their thick flesh and low moisture content. These qualities help create a rich sauce or paste without excess water.
If you’re looking to add a unique twist, consider heirloom types. They come in various colors and flavors, allowing you to personalize your canned tomatoes while maintaining excellent taste. Cherry tomatoes can also be canned, but keep in mind they’re sweeter and may yield a different texture. They work well in salsas or as a vibrant addition to mixed jars.
Don’t overlook yellow tomatoes, either. They’re less acidic than their red counterparts and can bring a lovely color and flavor balance to your canned goods. You might also explore organic options, which can provide a more robust taste and align with your farming values.
Lastly, hybrid selections can offer disease resistance and high yields, making them practical for home canners. Ultimately, the choice is yours, but focusing on quality tomatoes will guarantee your canned products are delicious and satisfying. Make your selection based on your taste preferences and intended use, and you’ll be well on your way to canning success!
Don’t Miss Out—Click Here To Get Your Canning Essentials Now
Canning Tomatoes Recipe
Ingredients
- Ingredients:
- Fresh ripe tomatoes (about 20 pounds for 7 quarts)
- Bottled lemon juice or citric acid
- Canning salt optional
- Equipment:
- Canning jars quarts or pints
- Canning lids and bands
- Large pot or water bath canner
- Jar lifter
- Canning funnel
- Ladle
- Clean kitchen towels
- Large mixing bowl
- Ice bath
Instructions
- Instructions:
- Prepare the Tomatoes:
- Start by washing the tomatoes thoroughly under running water.
- To remove the skins, bring a large pot of water to a boil. While waiting for the water to boil, prepare an ice bath by filling a large bowl with ice water.
- Cut a small “X” on the bottom of each tomato. This will make peeling easier.
- Carefully place the tomatoes in the boiling water for 30-60 seconds until the skins start to peel away.
- Use a slotted spoon to transfer the tomatoes to the ice bath to cool quickly.
- Once cooled, peel the skins off the tomatoes and core them by removing the stem and white part near the top.
- Prepare the Canning Jars:
- Sterilize your canning jars by washing them in hot, soapy water, then rinsing well. You can also run them through a dishwasher cycle without detergent.
- Keep the jars hot by placing them in a pot of simmering water until you’re ready to fill them.
- Fill the Jars:
- Depending on your preference, you can leave the tomatoes whole, halved, or crush them.
- Add 2 tablespoons of bottled lemon juice or 1/2 teaspoon of citric acid to each quart jar (1 tablespoon lemon juice or 1/4 teaspoon citric acid for pint jars). This helps ensure safe acidity levels.
- If desired, add 1 teaspoon of canning salt per quart jar (1/2 teaspoon per pint).
- Pack the tomatoes into the jars, pressing them down gently to release some juice and remove air bubbles. Leave 1/2 inch of headspace at the top of each jar.
- Seal the Jars:
- Wipe the rims of the jars with a clean, damp cloth to remove any residue.
- Place the lids on top of the jars and screw on the bands until they are fingertip-tight.
- Process the Jars:
- Place the filled jars in a water bath canner, ensuring they are covered with at least 1-2 inches of water.
- Bring the water to a rolling boil, then process the jars:
- 40 minutes for quarts at sea level.
- 35 minutes for pints at sea level.
- Adjust the time for your altitude if necessary (consult a reliable canning guide).
- Cool and Store:
- After processing, carefully remove the jars from the canner using a jar lifter.
- Place them on a clean towel or cooling rack, and let them sit undisturbed for 12-24 hours.
- Check that each jar has sealed by pressing down on the center of the lid; it should not pop back. If it does, refrigerate the jar and use the tomatoes within a week.
- Label the jars with the date and store them in a cool, dark place. Properly canned tomatoes can last up to a year.
Step-by-Step Canning Process
Before you begin the canning process, gather all your necessary supplies and ingredients to guarantee a smooth and efficient experience. You’ll need clean jars, lids, a canner, a jar lifter, a funnel, and, of course, your chosen tomato varieties. Popular options include Roma and San Marzano, known for their low moisture content, which makes them ideal for canning.
Start by washing your tomatoes thoroughly. If you’re using whole tomatoes, blanch them in boiling water for about 30 seconds to loosen the skins, making them easier to peel. After peeling, chop or slice the tomatoes based on your preference and the canning technique you plan to use.
Next, prepare your jars. Place them in the canner or a pot of simmering water to sterilize. Meanwhile, you can prepare your tomatoes—some people prefer to add a bit of lemon juice or salt for flavor and preservation. Fill your jars with the prepared tomatoes, leaving about half an inch of headspace at the top.
Once filled, wipe the rim of each jar to ascertain a good seal, then place the lids on top and screw on the bands until they’re fingertip-tight. Process the jars in the canner according to the recommended time for your chosen canning technique—either boiling water bath or pressure canning. After processing, let the jars cool completely before checking the seals. Proper sealing ensures your canned tomatoes stay fresh and delicious for months to come!
Tips for Successful Canning
To guarantee your canning experience is smooth and successful, you’ll want to start with the right equipment. It’s also important to be aware of common mistakes that can lead to spoilage or unsafe jars. Let’s go over what you need and how to avoid pitfalls along the way.
Essential Equipment Needed
Gathering the right equipment is essential for guaranteeing your tomato canning process goes smoothly and safely. First, you’ll need high-quality canning jars. Make sure they’re specifically designed for canning, as regular jars might not withstand the pressure or heat. Check that the lids are new and free from dents to guarantee a proper seal.
Next, invest in a good pressure cooker if you’re canning low-acid tomatoes. This equipment allows you to reach the necessary temperatures to kill harmful bacteria and guarantee your canned tomatoes are safe to eat. If you’re using a water bath canner for high-acid varieties, make sure it’s large enough to hold your jars while fully submerged.
Additionally, consider having a jar lifter, funnel, and bubble remover on hand. These tools simplify the process and help prevent spills or accidents. A kitchen timer is also helpful for keeping track of processing times.
Lastly, don’t forget about clean, soft cloths for wiping jar rims before sealing. With the right equipment, you’ll be well on your way to mastering the art of canning tomatoes!
Common Mistakes to Avoid
Avoiding common mistakes in canning tomatoes can make the difference between a successful batch and a frustrating experience. First, always use tested canning techniques to guarantee safety. Following outdated methods or preservation myths can lead to spoilage or foodborne illnesses. Stick to reliable recipes from trusted sources.
Another common mistake is not properly preparing your jars and equipment. Make sure to sterilize your jars and lids before use. If you skip this step, you risk contamination. Additionally, never overpack your jars—leave the recommended headspace to allow for proper sealing.
Pay attention to the acidity of your tomatoes as well. If they’re low in acidity, you might need to add lemon juice or citric acid. Ignoring this can lead to unsafe preservation.
Storage and Safety Guidelines
Proper storage and safety guidelines are essential for guaranteeing your canned tomatoes remain safe to eat and maintain their delicious flavor. First, you need to focus on temperature control. Store your canned tomatoes in a cool, dark place, ideally between 50°F and 70°F. Avoid areas with temperature fluctuations, like garages or basements that can get too warm or too cold.
Next, pay attention to the shelf life of your canned tomatoes. While properly canned tomatoes can last up to a year or more, it’s best to consume them within the first year for peak taste and quality. Always check your cans for signs of spoilage, such as bulging lids, rust, or leaks. If you notice any of these issues, it’s safer to discard the can instead of risking foodborne illness.
Additionally, label your jars with the date you canned them. This simple step helps you keep track of freshness and guarantees you use older jars first. When you open a can, refrigerate any leftovers immediately, and consume them within three to four days.
Lastly, always practice good hygiene during the canning process. Wash your hands, utensils, and surfaces thoroughly to prevent contamination. Following these storage and safety guidelines will help you enjoy your home-canned tomatoes while keeping you and your family safe. Happy canning!
How To Make Canning Tomatoes; Frequently Asked Questions
Can I Can Tomatoes Without a Pressure Canner?
Yes, you can can tomatoes without a pressure canner by using water bath canning methods. Just choose high-acid tomato varieties, and guarantee you follow safe practices to preserve their flavor and prevent spoilage effectively.
What Types of Tomatoes Are Best for Canning?
For canning, you’ll want to choose tomatoes that have low moisture and high flavor. San Marzano varieties and Roma tomatoes work best, giving you a rich taste and thicker consistency for your canned goods.
How Long Do Canned Tomatoes Last?
Canned tomatoes typically last about one to two years when stored properly. For ideal tomato preservation, keep them in a cool, dark place. Always check for signs of spoilage before using them.
Can I Add Spices or Herbs During Canning?
Absolutely, you can add spices and herbs during canning! Experiment with various spice combinations and herb selection to enhance flavors. Just remember to follow safety guidelines for canning to guarantee your creations stay delicious.
What Should I Do if My Canned Tomatoes Seal Fails?
If your canned tomatoes seal fails, don’t panic! Check for cracks, clean the rim, and reprocess them within 24 hours using seal troubleshooting methods. Follow reprocessing tips to guarantee your tomatoes are safe to eat.

Conclusion
Canning tomatoes is a rewarding way to preserve summer’s bounty and enjoy delicious flavors year-round. By understanding the history and benefits of canning, along with following the essential steps and safety guidelines, you can confidently create your own jars of fresh tomato goodness. So gather your ingredients, set up your equipment, and start canning! You’ll not only savor the taste of homegrown tomatoes but also take pride in your preserving skills. Happy canning!