How To Perfect Bread Baking
How To Perfect Bread Baking; So, you’ve decided to embark on the journey of bread baking. Congratulations! Whether you’re a novice or a seasoned baker, there’s always room for improvement when it comes to perfecting the art of bread making. But fear not, for I am here to guide you through the process and help you achieve that elusive, mouthwatering loaf of bread. Just imagine sinking your teeth into a warm slice of freshly baked bread, with its crisp crust and soft, fluffy interior. But how do you get there? Well, my friend, let’s just say that with a few tried-and-true techniques and a sprinkle of patience, you’ll be well on your way to bread baking perfection.
Essential Ingredients for Bread Baking
To create perfect bread, you must begin with a precise selection of essential ingredients. The success of your bread baking depends heavily on the quality and type of ingredients you choose. One crucial aspect to consider is the type of yeast you use. There are several different options available, including active dry yeast, instant yeast, and fresh yeast. Each type has its own unique characteristics and requirements, so it’s important to choose the one that best suits your baking needs.
Bread shaping techniques also play a significant role in achieving the perfect loaf. The way you shape your dough affects its final texture and appearance. There are various shaping techniques you can try, such as the traditional round shape, baguette shape, or even decorative braids. The method you choose depends on the type of bread you’re making and the desired outcome.
When it comes to the essential ingredients themselves, there are a few key components you can’t overlook. Flour is the backbone of any bread recipe, and it’s important to choose the right type for the desired texture and flavor. All-purpose flour is versatile and commonly used, while bread flour provides a higher protein content for a chewier texture. Additionally, water, salt, and sugar are commonly used to enhance the flavor and texture of the bread.
The Importance of Proper Kneading Techniques
To achieve the perfect texture and rise in your bread, proper kneading techniques are essential. Kneading helps to develop the gluten in the dough, which gives bread its structure and elasticity. By using the right techniques, such as folding, pressing, and stretching, you can ensure that the gluten is evenly distributed and properly developed, resulting in a loaf that is soft, airy, and delicious.
Kneading for Gluten Development
Proper kneading techniques are essential for developing gluten, ensuring a perfect bread every time. Gluten formation occurs when the proteins in wheat flour, glutenin, and gliadin, combine with water and are manipulated through kneading. This process aligns the proteins, creating a network that traps air bubbles and gives bread its structure and texture.
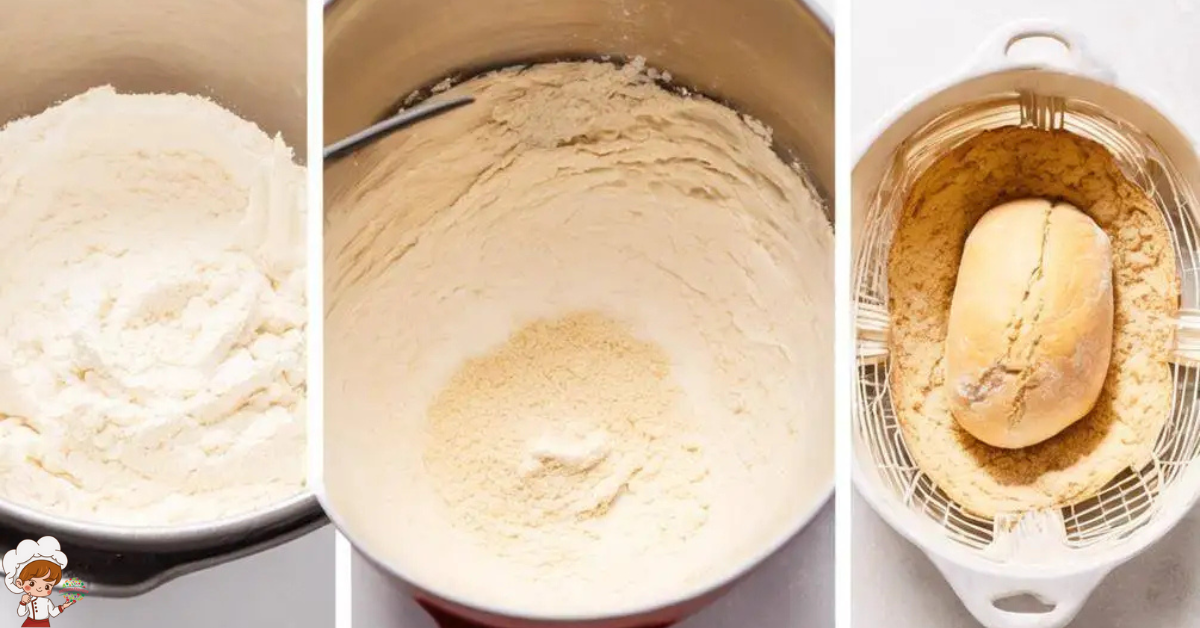
To achieve optimal gluten development, follow these kneading techniques. Begin by placing the dough on a lightly floured surface and using the heel of your hand to push it away from you. Fold it back over itself and repeat, rotating the dough periodically. Apply gentle pressure and avoid tearing the dough. Knead for 8-10 minutes until the dough is smooth, elastic, and springs back when lightly pressed.
Techniques for Proper Texture
Achieving the perfect texture in your bread requires mastering the art of proper kneading techniques. This involves two key factors: proper hydration and shaping techniques. Proper hydration refers to the correct ratio of water to flour in your dough. Too much water can result in a sticky, dense texture, while too little water can lead to a dry and crumbly texture. Finding the right balance is crucial for achieving a light and airy texture in your bread.
Additionally, shaping techniques play a significant role in determining the final texture of your loaf. Proper shaping helps to create an even distribution of air pockets throughout the dough, resulting in a soft and tender crumb. By understanding and implementing these techniques, you can ensure that each bite of your homemade bread is nothing short of perfection.
Mastering the Art of Proofing
To master the art of proofing, you must understand the importance of temperature control. The right temperature ensures that the yeast ferments properly, resulting in a well-risen loaf. Timing is also crucial during proofing, as overproofing can lead to a collapsed and dense bread. Lastly, keep an eye out for signs of proper proofing, such as a doubled in size dough and visible air bubbles.
Importance of Temperature
Mastering the art of proofing your bread dough requires careful attention to temperature control. The importance of temperature cannot be overstated when it comes to achieving the optimal rise in your bread. Temperature directly affects the activity of yeast, which is responsible for the fermentation process. For the dough to rise properly, the ideal temperature range is between 75°F and 85°F (24°C and 29°C).
If the temperature is too low, the yeast will be sluggish and the dough will take longer to rise. On the other hand, if the temperature is too high, the yeast will become too active and the dough will rise too quickly, resulting in a less flavorful and unevenly textured loaf. To ensure consistent and reliable results, it is crucial to monitor and control the temperature throughout the proofing process.
Timing Is Crucial
Timing plays a crucial role in mastering the art of proofing your bread dough. To achieve the perfect loaf, it is essential to understand the right time for each step of the process. One key factor to consider is proper dough hydration. The time it takes for your dough to rise depends on its moisture content. Ensuring the right balance of water in your dough will help it rise at the optimal speed.
Another tool that can assist you in determining the right timing is a bread thermometer. By measuring the internal temperature of your bread, you can ensure that it is fully proofed and ready for baking. Remember, precise timing is vital to achieve the best results in your bread baking journey.
Signs of Proper Proofing
Now that you understand the importance of timing in bread baking, let’s delve into the art of properly proofing your dough and the signs to look for. Proofing is the final rise of the dough after shaping, where the yeast ferments and produces carbon dioxide, creating airy, light bread. Over proofing, where the dough rises for too long, can result in a collapsed, dense loaf with a sour taste. Signs of over proofing include excessively puffy dough, a sticky or wet surface, and a lack of oven spring.
On the other hand, under proofing, where the dough hasn’t risen enough, can lead to a dense, heavy loaf with a tight crumb. Signs of under proofing include a dough that doesn’t hold its shape, minimal rise during baking, and a doughy, gummy texture. Mastering the art of proper proofing will ensure consistently delicious, well-risen bread.
Understanding Different Types of Flour
To achieve perfect bread baking results, it is essential to have a thorough understanding of the different types of flour available. The type of flour you choose can greatly impact the texture, flavor, and overall quality of your bread. There are many different flour types to choose from, each with its own unique characteristics and uses.
When it comes to flour selection, you have several options to consider. The most common types of flour used in bread baking are all-purpose flour, bread flour, and whole wheat flour. All-purpose flour is a versatile option that can be used for a variety of baked goods, including bread. Bread flour, on the other hand, has a higher protein content which helps to develop gluten and create a chewier texture. Whole wheat flour is made from the entire wheat kernel, giving it a nuttier flavor and denser texture.
In addition to these basic flour types, there are also specialty flours available for more specific purposes. Rye flour, for example, is often used in traditional sourdough breads for its distinct flavor. Gluten-free flours, such as rice flour or almond flour, are suitable options for those with gluten sensitivities or dietary restrictions.
When choosing a flour for your bread baking, it is important to consider the recipe and the desired outcome. Different flours have different protein contents, which can affect the structure and rise of your bread. Experimenting with different flour types can help you achieve the perfect texture and flavor for your bread.
Tips for Achieving the Perfect Crust
For the perfect crust on your bread, it is crucial to follow these expert tips. Achieving even browning is key to a beautiful crust that is both flavorful and visually appealing. To achieve this, make sure to preheat your oven to the correct temperature and place your bread on the middle rack for even heat distribution. Additionally, rotating the bread halfway through the baking process can help promote even browning.
Another tip for achieving the perfect crust is to use steam during the baking process. Steam helps create a crisp crust by delaying the formation of a hard crust, allowing the bread to expand fully before the crust sets. There are a few methods you can use to introduce steam into your oven. One method is to place a pan of hot water in the bottom of the oven while preheating and baking the bread.
The steam created from the water will help create a moist environment, resulting in a crisp crust. Another method is to spray water into the oven using a spray bottle before placing the bread inside. This will create a burst of steam that will quickly evaporate and create a crisp crust.
Troubleshooting Common Bread Baking Issues
If you encounter any issues while baking bread, there are several common problems that you may encounter and troubleshooting techniques to help you overcome them. One common issue is bread that doesn’t rise properly. This can be caused by several factors, such as using expired yeast or not allowing enough time for the dough to proof. To troubleshoot this issue, make sure to check the expiration date on your yeast and use fresh yeast if necessary. Additionally, ensure that you are giving the dough enough time to rise by following the recipe’s instructions for proofing.
Another common issue is bread that is too dense or heavy. This can be caused by using too much flour or not kneading the dough enough. To troubleshoot this issue, try reducing the amount of flour you use in the recipe and make sure to properly knead the dough to develop gluten. You can also try adding a little bit of extra yeast to help with the rising process.
Overly crusty bread is another common problem that bakers may encounter. This can be caused by baking the bread at too high of a temperature or for too long. To troubleshoot this issue, try reducing the baking temperature and/or the baking time. You can also try brushing the loaf with a little bit of water before baking to help soften the crust.
Lastly, bread that collapses or sinks in the middle is a frustrating issue that can occur. This can be caused by overproofing the dough or not using enough yeast. To troubleshoot this issue, make sure to follow the recipe’s instructions for proofing and use the correct amount of yeast.
How To Perfect Bread Baking; Frequently Asked Questions
Can I Use Gluten-Free Flour Instead of Regular Flour in Bread Baking?
You can use gluten-free flour as an alternative to regular flour in bread baking. However, keep in mind that you may need to adjust the baking time to ensure your bread is fully cooked.
How Long Should I Let the Dough Rise for the Best Results?
For the best results, let the dough rise until it has doubled in size. The ideal dough consistency should be smooth and elastic. Different types of yeast may have varying rise times, so follow the recipe instructions.
Can I Substitute Oil for Butter in Bread Recipes?
Yes, you can substitute oil for butter in bread recipes. Using oil in bread baking offers several benefits such as a lighter texture and longer shelf life. Experiment with different oils to find your preferred taste.
What Is the Ideal Temperature for Proofing Bread Dough?
To perfect your bread baking, it’s important to know the ideal temperature for proofing bread dough. This varies depending on the recipe, but generally ranges from 80-85°F. Different proofing methods can also affect the ideal proofing time.
How Do I Prevent My Bread From Becoming Too Dense?
To prevent dense bread, troubleshoot by checking your yeast, kneading technique, and proofing time. Ensure your yeast is fresh and active, knead the dough thoroughly, and allow enough time for proper rising.

Conclusion
In conclusion, perfecting bread baking requires a combination of essential ingredients, proper kneading techniques, mastering the art of proofing, understanding different types of flour, and tips for achieving the perfect crust. By following these guidelines and troubleshooting common issues, you can elevate your bread baking skills to a new level. With practice and experience, you will be able to consistently create delicious, crusty loaves of bread that will impress your friends and family. Happy baking!