How To Use Instant Pot Settings Effectively

How To Use Instant Pot Settings Effectively, you should start by understanding its various functions like pressure cooking, slow cooking, and sautéing. Each method has unique techniques—pressure cooking cuts time dramatically while locking in flavors. Slow cooking builds richness and tenderness, and sautéing is great for browning ingredients. Don’t forget to explore steaming for healthy meals or yogurt making for a tasty treat. Mastering these settings can elevate your cooking, making meal prep easier and more flavorful. If you want to uncover tips and techniques for each setting, there’s plenty more to discover!
Understanding Instant Pot Basics
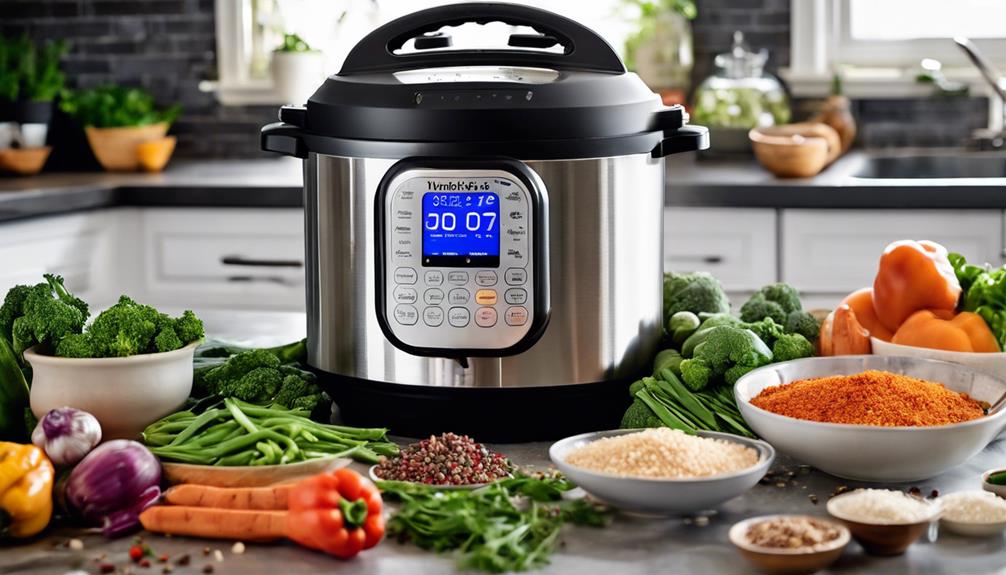
Understanding the basics of your Instant Pot can transform your cooking experience. Familiarizing yourself with its key features is essential for maximizing its potential. The Instant Pot isn’t just a pressure cooker; it’s a multi-functional appliance that includes settings for sautéing, slow cooking, steaming, and even yogurt making. Each feature is designed to save you time while enhancing the flavors of your meals.
Take a moment to explore the control panel. You’ll find options for cooking grains, soups, and even beans. Knowing how to use these settings effectively allows you to simplify your cooking process. For example, the sauté feature lets you brown ingredients right in the pot before shifting to pressure cooking, which builds depth in flavor without the extra dishes.
Additionally, investing in Instant Pot accessories can elevate your cooking game. Accessories like steaming racks, silicone molds, and glass lids expand the possibilities of what you can create. A steaming rack can help you cook veggies perfectly, while silicone molds are excellent for making desserts or egg bites.
Don’t forget to check out the recipe book that comes with your Instant Pot. It often includes tips on using various features and accessories. By understanding these basics, you’ll not only optimize your Instant Pot’s capabilities but also make your cooking more enjoyable and efficient. So, engage fully, experiment, and discover the joy of cooking with your Instant Pot!
Pressure Cooking Explained
Pressure cooking can reduce cooking time by up to 70%, making it a game-changer in the kitchen. You’ll find that this method not only speeds up meal prep but also locks in flavors and nutrients. Many people fall for pressure cooking myths, like the belief that it’s dangerous or complicated. In reality, modern pressure cookers, like the Instant Pot, come equipped with safety features that guarantee a secure cooking experience.
The pressure cooking benefits are numerous. First, you save time—perfect for busy weeknights. Second, the high-pressure environment helps tenderize tough cuts of meat, making them fall-apart delicious. Third, it conserves energy, as it uses less time and heat compared to traditional cooking methods.
To get the most out of your Instant Pot, familiarize yourself with various pressure cooking techniques. For instance, you can sauté before pressure cooking to enhance flavors, or use the natural release method for delicate foods. Always remember pressure cooking safety; never overfill your pot, and guarantee the sealing ring is properly in place to prevent leaks.
Slow Cooking Techniques
While pressure cooking is perfect for quick meals, slow cooking offers a different set of advantages that can enhance your culinary experience. When you use the slow cook function on your Instant Pot, you reveal a world of flavors and textures that develop over time. This method is ideal for hearty dishes, like stews and roasts, where ingredients meld beautifully.
In a slow cooker comparison, the Instant Pot stands out for its versatility. It allows you to choose between different temperature settings: low, medium, and high. Each setting impacts your cooking time and the final outcome of your dish. For instance, cooking on low usually takes 6-8 hours, while high is around 3-4 hours. Understanding these temperature settings helps you plan your meals effectively.
When you slow cook, you can throw your ingredients in and let them do their magic. This method not only saves you time during the day, but it also aids in retaining nutrients and enhancing flavors. You’ll notice that tougher cuts of meat become tender and juicy, while vegetables soften without losing their essential flavors.
To make the most of your slow cooking experience, remember to layer your ingredients properly. Place denser items, like root vegetables, at the bottom, and add more delicate ingredients, like herbs, closer to the top. This technique guarantees even cooking and prevents overcooking. Embrace slow cooking, and you’ll enjoy delicious, homemade meals with minimal effort.
Sautéing Like a Pro
Sautéing in your Instant Pot can elevate your cooking skills and flavors in no time. This versatile function allows you to brown, sear, and soften ingredients, creating a rich base for your dishes. Here are some essential sautéing tips to help you master this technique.
First, always preheat the pot on the “Sauté” setting. This guarantees your oil gets hot enough to properly brown your ingredients. Use a high smoke point oil, like canola or avocado oil, to avoid burning. Once the oil’s shimmering, add your aromatics—onions, garlic, or ginger—to start flavor layering. This step builds a depth of flavor that enhances your final dish.
Add your proteins next, letting them sear undisturbed for a few minutes. This develops a beautiful crust and locks in moisture. Don’t overcrowd the pot; it’s better to cook in batches than to steam your food. After browning, you can deglaze the pot with a splash of broth or wine, scraping up those tasty bits stuck to the bottom.
Finally, add any vegetables or other ingredients you want to incorporate, continuing to stir occasionally. This helps to ascertain even cooking and further develops those layered flavors. Remember, the key to effective sautéing is patience—allow your ingredients to caramelize properly.
With these tips, you’ll be sautéing like a pro in no time, turning every meal into a flavorful masterpiece!
Steaming for Healthier Meals
After mastering the art of sautéing, it’s time to explore another fantastic feature of your Instant Pot: steaming. This method not only locks in nutrients but also enhances flavors, making your meals healthier and more delicious. Whether you’re steaming vegetables or proteins like chicken and fish, the Instant Pot makes it incredibly easy.
Start with steaming vegetables. You’ll find that broccoli, carrots, and green beans retain their vibrant colors and nutrients while becoming perfectly tender. If you’re in the mood for a light dinner, try steaming fish with some fresh herbs and lemon slices for a flavorful, low-calorie option.
But don’t stop there! Steaming dumplings is a fantastic way to enjoy this dish without the added oil from frying. You can also use the Instant Pot to make perfect steaming potatoes, which can then be mashed or served as a side. And if you’re looking for a great way to prepare rice, the steaming function can help you achieve fluffy grains every time.
For a sweet twist, consider steaming fruits like apples or pears. They make a delightful dessert when paired with a sprinkle of cinnamon. Finally, you can even try steaming desserts, like puddings or custards, for a lighter take on your favorite treats.
With the Instant Pot, steaming is a simple and effective way to create healthier meals that don’t compromise on taste. So, get ready to enjoy delicious, nutritious dishes with minimal effort!
Using the Rice Setting
When you use the rice setting on your Instant Pot, you can achieve perfect rice consistency every time. It’s important to follow the cooking time guidelines specific to the type of rice you’re using. Let’s explore how to make the most of this handy feature for your meals.
Perfect Rice Consistency
Achieving perfect rice consistency is a game changer for any meal, and the Instant Pot’s rice setting makes it easier than ever. When you use this setting, you can effortlessly create different rice texture variations that suit your dish. Whether you prefer fluffy basmati or creamy risotto, the Instant Pot helps you nail it every time.
To get started, rinse your rice thoroughly to remove excess starch. This simple step guarantees your rice won’t clump together during cooking. Depending on the type of rice, you might want to adjust the water-to-rice ratio slightly. For instance, brown rice usually requires more water than white rice.
Once you’ve measured everything, it’s time to hit that rice button! The Instant Pot automatically adjusts cooking time and pressure for you, making perfecting rice almost foolproof. Just let it naturally release pressure for a few minutes before switching to quick release.
After you open the lid, fluff the rice with a fork to separate the grains. With this method, you’ll consistently achieve the perfect rice consistency, elevating your meals and impressing your family and friends. Enjoy the delicious results!
Cooking Time Guidelines
Understanding cooking time guidelines is vital for making the most of your Instant Pot’s rice setting. Typically, white rice cooks perfectly in about 4 to 10 minutes, while brown rice requires around 22 to 28 minutes. However, you might notice cooking time variations based on the specific brand of rice or even how you’ve stored it.
When you make ingredient adjustments, like adding vegetables or protein, remember to increase the cooking time slightly. For instance, if you’re adding frozen peas or diced chicken, you might need to extend the cooking time by a few minutes.
It’s also important to factor in the time it takes for the Instant Pot to come to pressure, which usually adds another 10 to 15 minutes. Always let your rice naturally release pressure for about 10 minutes before switching to a quick release; this helps achieve that perfect texture.
Lastly, if you’re experimenting with different types of rice or ingredients, keep notes on your cooking times. This way, you’ll refine your technique and guarantee you get perfect results every time you use the rice setting on your Instant Pot.
Yogurt Making Tips
Making yogurt in your Instant Pot can be a rewarding experience, but you need to start with the right milk. You’ll also want to pay close attention to temperature settings and fermentation time for the best results. Let’s explore these essential tips to help you create creamy, delicious yogurt at home.
Choosing the Right Milk
Selecting the right milk is essential for crafting delicious homemade yogurt in your Instant Pot. You’ve got a range of options, from whole milk to low-fat varieties, and even milk alternatives like almond, coconut, or soy milk. Each type will yield different textures and flavors, so it’s important to choose one that meets your taste preferences and dietary needs.
If you’re using traditional dairy milk, whole milk typically produces the creamiest yogurt. However, if you’re opting for milk alternatives, look for unsweetened and unflavored options to avoid unwanted additives. Many milk alternatives may require the addition of thickeners or stabilizers to achieve a yogurt-like consistency, so read the labels carefully.
Consider your milk storage as well. Always check the expiration date before using any milk for yogurt-making. Fresh milk yields the best results, so if you’re using leftovers, make sure they’ve been properly stored and are still fresh. Remember, the quality of your milk directly impacts the quality of your yogurt, so choose wisely! With the right milk in hand, you’re well on your way to making a delightful yogurt in your Instant Pot.
Proper Temperature Settings
When it comes to yogurt making, getting the temperature just right is essential for achieving that perfect tangy flavor and creamy texture. Start by verifying your Instant Pot’s temperature calibration is accurate. If it’s off, your yogurt may not set properly. Most recipes call for heating the milk to around 180°F (82°C) and then cooling it down to about 110°F (43°C) before adding your starter culture. This process helps guarantee that any unwanted bacteria are eliminated while creating an excellent environment for your yogurt cultures to thrive.
Once your milk reaches the ideal cooking temperature, maintain it carefully. If you’re using the Yogurt setting, you may need to adjust the time based on your Instant Pot model, as different models can vary slightly in temperature. Keep an eye on it, as even a few degrees can make a difference in texture and tanginess.
Fermentation Time Guidelines
After you’ve carefully heated and cooled your milk, the next step in yogurt making is determining the right fermentation time. This vital phase in the fermentation process directly impacts your yogurt’s flavor and texture. Generally, you’ll want to ferment your yogurt for about 6 to 12 hours, but the exact time can vary based on your taste preferences.
If you prefer a milder yogurt, aim for the 6 to 8-hour mark. For tangier yogurt, extend the fermentation to 10 to 12 hours. Keep in mind that the ideal temperature for fermentation is around 110°F (43°C). Your Instant Pot’s yogurt setting typically maintains this temperature, ensuring the live cultures thrive.
During fermentation, check the yogurt occasionally. If it’s not thickening as expected, give it more time. Remember, the longer you ferment, the tangier it’ll become, so adjust based on your personal preference. Once it reaches the desired tanginess, you can refrigerate the yogurt to halt the fermentation process. Ultimately, experimenting with fermentation times will help you find the perfect balance for your homemade yogurt. Enjoy the delicious results!
Manual Mode Insights
Mastering the manual mode of your Instant Pot can transform your cooking experience, offering you complete control over time and temperature. This setting is essential for those who love customizable cooking because it allows you to fine-tune each recipe to suit your taste and the ingredients you’re using. Instead of relying solely on preset functions, you can adjust the cooking time according to what you’re making, ensuring everything turns out just right.
One of the key manual mode advantages is the ability to cook a wide variety of dishes, from hearty stews to delicate grains. By selecting the pressure level and setting the timer, you can experiment with different cooking times, which is especially beneficial for dishes that require precision. If you’re making a tough cut of meat, for instance, you might opt for a longer cooking time to achieve that tender, fall-apart texture.
Additionally, manual mode encourages you to engage with your cooking process. You learn how different foods respond to various cooking times and pressures, enhancing your culinary skills. You’ll find that knowing how to adjust the settings based on your ingredients not only improves the final dish but also boosts your confidence in the kitchen.
Safe Food Release Methods
When it comes to releasing pressure in your Instant Pot, understanding the safe methods is essential. You can choose between Natural Pressure Release, which allows steam to escape gradually, or Quick Release, which lets you release the steam instantly. Knowing when to use each method can help guarantee your cooking is both safe and effective.
Natural Pressure Release
Natural Pressure Release (NPR) is an important technique for safely managing pressure in your Instant Pot. When you let the pressure drop naturally, you’re allowing the cooking process to finish gradually, which can enhance the flavors and textures of your dishes. One of the key natural release benefits is that it helps prevent the potential splatter of hot liquids, keeping your kitchen cleaner and safer.
Timing techniques are vital when using NPR. After your cooking cycle ends, simply turn off the Instant Pot and let it sit for 10 to 20 minutes, depending on your recipe. This gives the pressure time to decrease naturally. If you’re in a hurry, you can check the pressure valve; if it’s dropped, you can open the lid safely.
Using NPR is especially beneficial for recipes like soups, stews, or grains, where a gentle release allows for the ingredients to settle and meld together. Plus, it’s a great way to guarantee the meat remains tender and juicy. So, next time you cook, consider using Natural Pressure Release to get the best results from your Instant Pot!
Quick Release Method
The Quick Release Method is a fast and effective way to release pressure from your Instant Pot, allowing you to enjoy your meals without waiting too long. To use this method, simply turn the steam release valve from the sealing position to the venting position. You’ll hear a hissing sound as steam escapes, and the pressure inside your pot will drop quickly.
When practicing quick release techniques, it’s essential to prioritize quick release safety. Always use a long utensil or a kitchen towel to avoid getting burned by the hot steam. Keep your face and hands clear of the steam vent, as the steam can be extremely hot and may cause burns.
For dishes that are prone to foaming, like beans or grains, consider using a natural pressure release for a few minutes before switching to quick release. This helps minimize the risk of food clogging the valve.
Cleaning and Maintenance Tips
Keeping your Instant Pot clean and well-maintained is essential for peak performance and longevity. Establishing a regular cleaning routine is key. After each use, focus on inner pot hygiene by washing the inner pot and lid with warm, soapy water. Don’t forget the sealing ring; it can absorb odors. You should replace it every 6-12 months and clean it with mild soap regularly.
Next, pay attention to exterior cleaning. Wipe down the exterior of your Instant Pot with a damp cloth to remove any spills or stains. For the condensation collector, verify it’s empty and clean to prevent mold buildup.
Your maintenance checklist should include a thorough inspection of the steam release valve and electrical components. Make sure the steam release valve is free of food debris to guarantee proper function. If you notice any damage to the electrical components, consider contacting customer service for advice.
When storing your Instant Pot, keep the lid upside down on the pot to allow airflow and prevent odors. Also, consider removing the sealing ring to maintain its shape and longevity.
Frequently Asked Questions: How To Use Instant Pot Settings Effectively
Can I Cook Frozen Food in the Instant Pot?
Yes, you can cook frozen food in the Instant Pot. Just remember, frozen meats require longer cooking times, so adjust accordingly. It’s a convenient way to have a meal ready without thawing beforehand.
How Do I Adjust Cooking Times for High Altitude?
When you’re at high altitude, adjust your cooking times by adding extra minutes to your recipes. Use pressure cooking tips like increasing liquid and ensuring proper sealing for best results. Enjoy your perfectly cooked meals!
What Is the Difference Between Natural and Quick Release?
Natural release benefits include tenderizing food and enhancing flavors, while quick release methods rapidly release steam, saving time. Choose natural for dishes needing extra moisture and quick for faster meal prep when you’re short on time.
Can I Use My Instant Pot for Canning?
You can’t use your Instant Pot for pressure canning safely. It isn’t designed for that purpose, and improper canning can lead to foodborne illnesses. Always follow recommended guidelines for safe canning practices.
Is It Safe to Leave the Instant Pot Unattended While Cooking?
It’s not safe to leave your Instant Pot unattended while cooking. Always prioritize safety measures and maintain supervision. Keeping an eye on it guarantees you can promptly address any issues that may arise during the cooking process.
Conclusion
Now that you’ve got the lowdown on utilizing your Instant Pot’s settings, you’re ready to elevate your cooking game. Whether you’re pressure cooking, sautéing, or making yogurt, each function offers unique benefits that can save you time and enhance flavors. Remember to practice safe food release methods and keep your Instant Pot clean for longevity. Immerse yourself, experiment with different recipes, and enjoy the delicious meals you’ll create. Happy cooking!


