How To: Mastering The Art Of Baking Bread
Mastering The Art Of Baking Bread; Welcome to the delectable world of baking bread, where every loaf holds the promise of warmth and nourishment. Just like a sculptor molds clay into a masterpiece, you have the power to transform simple ingredients into a symphony of flavors and textures. But what does it take to truly master this art? How can you unlock the secrets to creating perfectly risen, golden-brown loaves that will make your taste buds dance?
In this discussion, we will unravel the mysteries of bread-making, guiding you through the essential techniques, tools, and ingredients that will elevate your bread-baking skills to new heights. Get ready to embark on a journey that will leave you craving the aroma of freshly baked bread and yearning for the secrets that lie ahead.
Types of Bread
When it comes to exploring the world of bread, understanding the various types is essential for becoming a baking bread master. From classic sourdough variations to gluten-free options, there is a wide range of choices to suit different tastes and dietary needs.
Sourdough variations are a popular choice among bread enthusiasts. Sourdough bread is made using a natural fermentation process that involves a starter culture of wild yeast and lactobacilli bacteria. This results in a distinct tangy flavor and a chewy texture. There are many variations of sourdough bread, such as whole wheat sourdough, rye sourdough, and even fruit and nut sourdough. Each variation offers a unique taste and texture, allowing you to experiment and find your favorite.
For those with gluten sensitivity or celiac disease, gluten-free bread options are a must. Gluten is a protein found in wheat, barley, and rye, which can cause digestive issues for some individuals. Fortunately, there are now numerous gluten-free alternatives available. These breads are typically made using a combination of gluten-free flours, such as rice flour, almond flour, or tapioca flour. They may also include ingredients like xanthan gum or psyllium husk to help bind the dough together. Gluten-free bread can be just as delicious and satisfying as traditional bread, allowing those with dietary restrictions to enjoy the pleasure of freshly baked bread.
Understanding the different types of bread is crucial for expanding your baking repertoire. Whether you’re a fan of tangy sourdough or need gluten-free options, there is a bread type out there to suit your preferences. By exploring and experimenting with various bread recipes, you’ll gain the confidence and skills needed to become a true baking bread master.
Essential Bread Baking Tools
When it comes to baking bread, there are several must-have tools that are essential for success. From measuring cups and spoons to a sturdy mixing bowl and a reliable bread knife, these tools will help you achieve professional results. Don’t forget about a good quality baking sheet and a bread pan, as they are crucial for achieving the perfect texture and shape.
Must-Have Baking Tools
To achieve mastery in baking bread, it is essential to have a set of must-have baking tools that will aid in the precise and technical process. Baking equipment forms the backbone of successful bread-making. The first essential tool is a good-quality digital kitchen scale, which ensures accurate measurements of ingredients. A sturdy mixing bowl and a wooden spoon or dough whisk are also necessary for combining ingredients and kneading the dough.
A bench scraper is invaluable for dividing and shaping dough, while a dough scraper helps to clean surfaces and scoop sticky dough. A bread lame or sharp knife is essential for scoring the bread before baking, allowing it to expand properly. Lastly, a baking stone or steel, along with a baking peel, is crucial for achieving a crispy crust and even baking. With these baking essentials, your journey towards bread baking mastery will be off to a great start.
Essential Equipment for Bread Making
Equip yourself with the essential bread baking tools to ensure precise and technical bread making. Having the right bread making equipment is crucial for achieving professional-quality results. Here are some essential tools you should invest in:
- Mixing Bowl: A sturdy mixing bowl is essential for combining your ingredients and allowing the dough to rise.
- Measuring Cups and Spoons: Accurate measurements are key to a successful bread recipe. Invest in a set of measuring cups and spoons to ensure precise proportions.
- Dough Scraper: A dough scraper is a versatile tool that helps you handle and shape the dough, making it easier to work with.
- Banneton: A banneton, also known as a proofing basket, is used for the final rise of the dough. It helps create a beautiful shape and texture.
- Baking Stone or Dutch Oven: These tools help create a crispy crust and even heat distribution, resulting in a perfectly baked loaf.
Selecting the Right Ingredients
To ensure the highest quality and taste in your freshly baked bread, carefully select the optimal ingredients for each batch. Choosing the right flour is essential in achieving the perfect texture and flavor in your bread. When selecting flour, consider the protein content. Higher protein content in flour, such as bread flour, creates a stronger gluten network, resulting in a chewier and more structured bread. On the other hand, lower protein content flour, like all-purpose flour, produces a softer and more tender bread. Experiment with different types of flour to find the one that best suits your taste preferences.
Another crucial factor in bread baking is hydration. Hydration refers to the amount of water in relation to the flour in your dough. It is essential to achieve the right level of hydration to ensure proper development of gluten and a moist crumb. Different types of bread require different hydration levels, so it is crucial to follow the recipe guidelines precisely. Too much water can lead to a sticky and unmanageable dough, while too little can result in a dry and dense bread. Adjust the hydration level based on the type of bread you are making and the desired outcome.
The Science of Bread-making
As you continue your journey towards baking bread mastery, it is important to delve into the science behind bread-making. Understanding the role of yeast and the impact of temperature are crucial components in creating the perfect loaf.
Yeast plays a vital role in bread-making. It is a microorganism that feeds on the sugars present in the dough, producing carbon dioxide gas as a byproduct. This gas gets trapped in the dough, causing it to rise and giving the bread its light and airy texture. Active dry yeast or instant yeast are commonly used in bread recipes. Active dry yeast needs to be activated by dissolving it in warm water before adding it to the dough, whereas instant yeast can be directly mixed in with the dry ingredients.
Temperature also plays a significant role in bread-making. Yeast is most active between 75°F and 95°F (24°C and 35°C). At temperatures below this range, yeast activity slows down, resulting in a longer rise time. On the other hand, temperatures above this range can cause the yeast to become too active, leading to a quick rise that may result in a dense and less flavorful loaf. It is important to maintain a consistent temperature throughout the proofing process to achieve optimal results.
Mastering the Art of Kneading
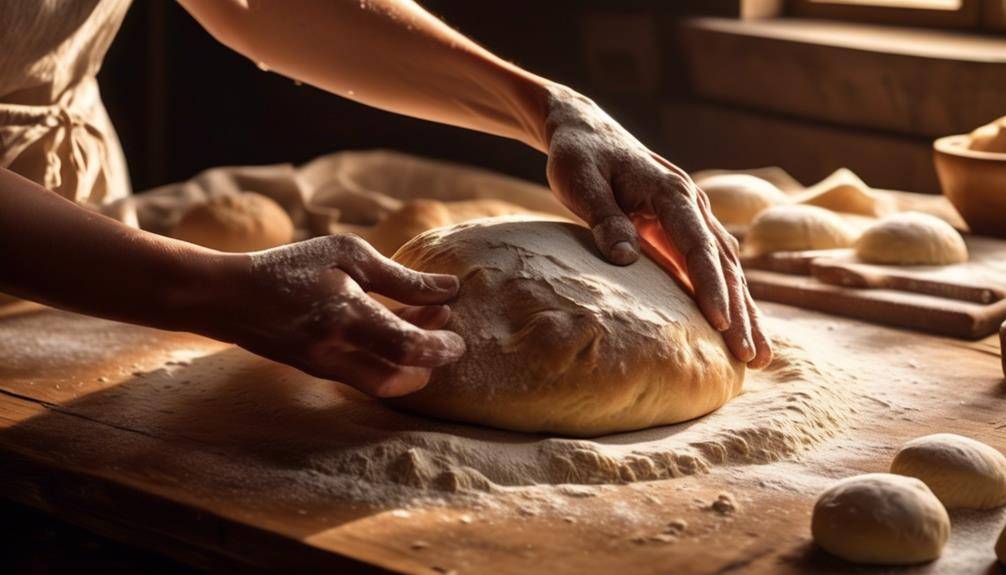
To become a master at baking bread, it is essential to develop a strong foundation in the art of kneading. Kneading is the process of working the dough to develop gluten, which gives bread its structure and texture. There are several techniques you can use to knead your dough effectively.
One common technique is the push-and-fold method. Start by pushing the dough away from you with the heel of your hand, then fold it back over itself. Repeat this motion, turning the dough a quarter turn each time, until it becomes smooth and elastic. Another technique is the stretch-and-fold method, where you stretch the dough out and fold it back onto itself, repeating this process several times. Both methods help to distribute the yeast evenly, ensuring a consistent rise and texture in the final bread.
Kneading has several benefits that contribute to the quality of your bread. Firstly, it helps to develop gluten, which gives bread its chewy texture and allows it to rise properly. Kneading also helps to incorporate air into the dough, resulting in a lighter and fluffier bread. Additionally, kneading helps to evenly distribute the ingredients, ensuring a consistent flavor throughout the loaf.
To master the art of kneading, practice is key. Pay attention to the texture of the dough and adjust your technique accordingly. Over kneading can lead to a tough and dense bread, while under kneading may result in a flat and dense loaf. With time and practice, you will develop a feel for the dough and be able to create perfectly kneaded bread every time. So roll up your sleeves and get kneading!
Understanding the Proofing Process
Now let’s talk about the importance of understanding the proofing process in bread baking. During proofing, the dough undergoes fermentation, which helps develop flavor, texture, and rise. Several factors, such as temperature, humidity, and the type of yeast used, can affect the proofing process. Proper timing is crucial to achieve optimal proofing results, as underproofing or overproofing can negatively impact the final product.
Importance of Proofing
Proofing is a vital step in the bread-making process that ensures optimal texture, flavor, and rise. Understanding yeast and achieving optimal fermentation is key to successful proofing. During proofing, yeast consumes sugars and releases carbon dioxide gas, which creates air pockets, making the bread light and airy. The yeast also produces alcohol and organic acids, which enhance the flavor of the bread. Proper proofing allows the dough to relax and develop gluten, which gives the bread its structure and chewiness. It also helps to develop complex flavors and aromas.
Overproofing can lead to a dense and collapsed loaf, while underproofing can result in a tight and doughy texture. Timing and temperature are crucial factors in achieving the perfect proof, as they affect the activity of the yeast. So, pay attention to the proofing stage, as it plays a significant role in creating a delicious, well-risen loaf of bread.
Factors Affecting Proofing
Understanding the factors that affect proofing is essential for achieving the perfect texture, rise, and flavor in your bread. Several key factors can impact the process, resulting in either a successful rise or a disappointing outcome. Temperature plays a significant role, as yeast activity is influenced by warmth. For optimal proofing, aim for a temperature range between 75-85°F (24-29°C). Humidity is another critical factor, as it affects yeast activity and dough hydration. A moderate humidity level of around 70% is ideal.
Additionally, the type and quality of yeast used can impact proofing. Active dry yeast requires proofing in warm water, while instant yeast can be added directly to the dry ingredients. Lastly, the duration of proofing should be carefully monitored to avoid overproofing, which can lead to a collapsed loaf. By understanding and managing these factors, you can employ effective techniques for achieving a perfect rise in your bread.
Significance of Proper Timing
To ensure the perfect rise in your bread, it is crucial to have a clear understanding of the proofing process and the significance of proper timing. The proofing process, also known as fermentation, allows the yeast in the dough to produce carbon dioxide gas, resulting in the desired airy texture of bread. Patience plays a key role during proofing. Rushing this process can lead to underdeveloped flavors and a dense texture. On the other hand, giving the dough enough time to proof allows the yeast to fully activate, creating a light and fluffy loaf.
Additionally, temperature has a significant impact on the proofing process. Warmer temperatures accelerate fermentation, but if it gets too hot, the yeast can become too active and produce an overly airy and collapsed bread. Conversely, cooler temperatures slow down fermentation, requiring longer proofing times. Finding the right balance and understanding the importance of proper timing is essential for achieving the perfect rise in your bread.
Baking Techniques and Tips
For improved results in baking bread, employing various techniques and tips can greatly enhance your baking skills. Two key aspects to consider are baking temperature and shaping techniques.
Firstly, baking temperature plays a crucial role in achieving the perfect loaf of bread. It is important to preheat your oven to the correct temperature before placing the dough inside. Generally, a temperature between 400-450°F (200-230°C) is recommended for most bread recipes. This high heat helps create a crispy crust while ensuring that the bread bakes evenly. However, it is essential to note that different types of bread may require different temperatures, so always refer to the specific recipe for guidance.
Secondly, mastering shaping techniques is vital to creating visually appealing and properly baked bread. When shaping your dough, it is important to handle it gently to avoid deflating the air bubbles that contribute to its light and airy texture. Start by gently patting and stretching the dough into a rectangle. Then, fold the sides inward, tucking them tightly to create tension on the surface. Finally, roll the dough into a cylinder shape, ensuring a tight seal at the seam. This shaping technique helps the bread rise evenly and maintain its shape during baking.
Troubleshooting Common Bread Baking Issues
Having trouble with your bread not rising properly? Or maybe your crust is turning out too hard or too pale? Don’t worry, we’ve got you covered. In this section, we will address common bread baking issues such as rising problems and crust issues, providing you with troubleshooting tips and solutions to help you achieve the perfect loaf every time.
Rising Problems
Experiencing difficulties with the rising process of your bread? Don’t worry, it happens to the best of us. There are a few common mistakes that may be causing your bread to have trouble rising, but luckily, there are troubleshooting techniques you can use to fix the problem. One common mistake is using expired or inactive yeast. Make sure to check the expiration date and proof the yeast before using it. Another mistake is using water that is too hot or too cold, which can kill the yeast or prevent it from activating properly. To troubleshoot this issue, use a thermometer to measure the water temperature and adjust accordingly.
Lastly, if your dough is not rising, it may be due to insufficient kneading or not giving it enough time to rise. Troubleshoot this by ensuring you knead the dough properly and allowing it enough time to double in size. By addressing these common mistakes and using these troubleshooting techniques, you can master the art of the rising process and bake perfect bread every time.
Crust Issues
If you’ve successfully addressed the rising problems in your bread baking process, it’s time to tackle another common issue: crust problems. Achieving the perfect crust color and texture can be a challenge, but with the right techniques, you can master it. To achieve a crispy crust, make sure your oven is preheated to the correct temperature before baking. A hot oven will help create a beautiful golden crust.
Additionally, consider using steam during the baking process. This can be done by placing a tray of hot water in the oven or spritzing water onto the dough before baking. The steam will contribute to a crust that is both crispy and chewy. Experimenting with different baking times and temperatures can also help you achieve the desired crust color and texture. Keep in mind that every oven is different, so it may take a few tries to find the perfect combination. By paying attention to these details, you’ll be well on your way to mastering the art of baking bread with an irresistible crust.
Adding Flavors and Enhancements
To enhance the flavor of your bread, consider incorporating various ingredients and techniques. Experimenting with ingredients can add complexity and depth to your bread, making it even more enjoyable to eat. One way to enhance the flavors is by adding herbs and spices. You can try adding herbs like rosemary, thyme, or basil for a savory twist, or cinnamon and nutmeg for a touch of warmth and sweetness. These ingredients can be added directly to the dough during the mixing process or sprinkled on top of the bread before baking.
Another way to enhance the flavors is by incorporating different types of flours into your bread recipe. You can experiment with whole wheat flour, rye flour, or even cornmeal to add a unique taste and texture to your bread. These alternative flours can be used in combination with regular all-purpose flour or substituted entirely for a more distinct flavor profile.
Enhancements can also come in the form of mix-ins like nuts, seeds, or dried fruits. Adding chopped walnuts, sunflower seeds, or raisins to your bread can provide a delightful crunch or burst of sweetness with each bite. These mix-ins can be incorporated into the dough or sprinkled on top of the bread before baking.
Lastly, you can enhance the flavors by using different techniques during the bread-making process. For instance, using a preferment like a poolish or a sourdough starter can contribute to a more complex flavor profile. Additionally, experimenting with different fermentation times and temperatures can also affect the taste of your bread.
Incorporating various ingredients and techniques allows you to elevate the flavors of your bread and create a unique and delicious loaf every time. So don’t be afraid to experiment and have fun with your bread baking endeavors.
Storing and Preserving Homemade Bread
When storing and preserving homemade bread, it is important to follow proper techniques to maintain its freshness and quality. Freezing bread is a popular method to extend its shelf life. To freeze bread, first allow it to cool completely. Then, wrap the bread tightly in plastic wrap or aluminum foil to prevent freezer burn. It is recommended to slice the bread before freezing, as it allows for easier portioning and thawing. Place the wrapped bread in a freezer-safe bag, removing as much air as possible to prevent freezer burn. Label the bag with the date of freezing to keep track of its freshness.
When you are ready to enjoy the frozen bread, remove it from the freezer and let it thaw at room temperature. To prevent moisture loss, avoid thawing in the refrigerator. Once thawed, you can reheat the bread in the oven or toaster to restore its freshness.
Another method to store homemade bread is by using bread storage bags. These bags are specially designed to keep bread fresh for longer. Simply place the bread inside the bag, seal it tightly, and store it at room temperature. The bag helps to maintain the bread’s moisture while preventing it from becoming stale. Bread storage bags are a convenient option for those who prefer not to freeze their bread.
Mastering The Art Of Baking Bread; Frequently Asked Questions
Can I Use a Bread Machine to Make the Recipes Mentioned in the Article?
Yes, you can use a bread machine for the recipes mentioned in the article. Using a bread machine simplifies the process and saves time compared to traditional baking methods.
What Are Some Alternative Flours I Can Use in Bread Baking?
You can use nut flours or bean flours as alternative options for bread baking. They provide unique flavors and textures to your breads, adding a delicious twist to your recipes.
How Can I Make Gluten-Free Bread?
To make gluten-free bread, you can use alternative flours like almond, rice, or tapioca. Follow gluten-free bread recipes that include xanthan gum or psyllium husk for binding. Make sure to use a gluten-free bread mix or flour blend for successful baking.
Can I Freeze the Dough and Bake It Later?
Yes, you can freeze the dough and bake it later. Freezing dough techniques allow you to prepare in advance and have fresh bread whenever you want. The benefits of freezing dough include convenience and maintaining the dough’s quality.
What Are Some Creative Ways to Use Leftover Bread?
To make bread pudding with leftover bread, tear it into small pieces and soak them in a mixture of eggs, milk, sugar, and vanilla. Bake until golden and custardy. For creative croutons, cube stale bread, toss with olive oil, herbs, and spices, then bake until crispy.
Conclusion
In conclusion, mastering the art of baking bread requires a deep understanding of the different types of bread, essential tools, selecting the right ingredients, and the science behind bread-making. It also involves perfecting kneading techniques, utilizing baking techniques and tips, troubleshooting common issues, and adding flavors and enhancements. Lastly, knowing how to properly store and preserve homemade bread ensures its freshness and longevity. With practice and knowledge, one can truly become a master in the art of baking bread.


