The Amazing Mysteries Of Perfectly Flaky Pie Crusts
Mysteries Of Perfectly Flaky Pie Crusts; Imagine embarking on a culinary journey, where each step is like unraveling the layers of a well-guarded secret. As you dive into the world of perfectly flaky pie crusts, you will discover the artistry behind choosing the right fat, the importance of using cold ingredients, and the delicate balance of adding the perfect amount of liquid. But that’s just the beginning. The mysteries of mixing techniques, resting the dough, and shaping the crust await, along with the secrets of pre-baking and troubleshooting common problems. Are you ready to unlock the secrets and elevate your pie-making skills to new heights?
Choosing the Right Fat
To create a perfectly flaky pie crust, it is crucial to carefully select the right fat for the job. The fat you choose will not only determine the texture and flavor of your crust but also its ability to hold its shape and deliver that satisfying crunch. When it comes to rendering techniques, butter is a popular choice among bakers for its rich flavor and ability to create a tender crust. However, if you’re looking to experiment with different flavors and textures, there are also some interesting butter substitutions you can try.
One rendering technique that is commonly used in pie crust making is the process of cutting cold butter into the dry ingredients. This method creates small pockets of fat within the dough, which then melt during baking, creating the flaky layers we all love. To achieve this, make sure your butter is cold and firm. You can cut it into small cubes or use a grater to create thin shreds that will distribute evenly throughout the dough.
If you’re looking for a butter substitution, there are a few options to consider. One popular choice is using vegetable shortening, which has a higher melting point than butter. This means that the fat will remain solid for longer during baking, resulting in a flakier crust. Another option is using lard, which has a rich flavor and creates a tender, melt-in-your-mouth texture. However, be mindful that lard can impart a distinct taste to your crust, so it may not be suitable for all types of pies.
Using Cold Ingredients
For a perfectly flaky pie crust, ensure that your ingredients are kept cold throughout the entire process. Chilling techniques and temperature control are of utmost importance when it comes to achieving the desired flakiness and texture in your pie crust.
Why is it so crucial to keep your ingredients cold? Well, it all boils down to science. When cold fats, such as butter or shortening, are incorporated into the dry ingredients, they create pockets of air. These pockets of air expand during baking, resulting in a light and flaky crust. On the other hand, if the fats are too warm, they will melt too quickly, leaving you with a dense and greasy crust.
To maintain the right temperature, start by chilling your fats. Cut the butter or shortening into small pieces and place them in the freezer for about 15 minutes before incorporating them into the dry ingredients. Additionally, refrigerate any liquids, such as water or milk, that you will be using in the dough. Keeping these cold will help prevent the fats from melting prematurely.
Once your dough is mixed, shape it into a disc and refrigerate it for at least 30 minutes. This resting period allows the gluten in the dough to relax and the fats to solidify, making the dough easier to roll out and handle. If you have the time, you can even refrigerate the dough overnight for even better results.
Adding the Perfect Amount of Liquid
When it comes to adding the perfect amount of liquid to your pie crust, precision is key. Measuring liquid accurately ensures the right consistency and texture. Incorporating the liquid evenly throughout the dough guarantees a uniform crust. And don’t be afraid to adjust the amount of liquid as needed, as different factors like humidity can affect the dough.
Measuring Liquid Accurately
Accurately measuring the perfect amount of liquid enhances the flakiness of your pie crust, elevating it to a delectable masterpiece. When it comes to measuring liquid for your pie crust, precision is key. Begin by using a liquid measuring cup specifically designed for liquids, ensuring accurate measurements. Remember, measuring flour accurately is equally important. Use a spoon to gently scoop flour into the measuring cup, then level it off with a straight edge.
Chilling the dough before adding liquid helps maintain its structure and prevents excessive gluten formation. This step is crucial in achieving a tender and flaky crust. So, take the time to measure your liquid precisely and chill your dough properly, and you’ll be rewarded with a pie crust that is not only visually stunning but also irresistibly delicious.
Incorporating Liquid Evenly
To achieve a perfectly flaky pie crust, it is essential to incorporate the liquid evenly, ensuring the ideal amount is added for optimal texture and taste. Here are three key tips to help you achieve an even distribution of liquid and maintain the right hydration levels:
- Gradually add the liquid: Rather than dumping it all in at once, slowly drizzle the liquid into the dry ingredients. This allows for better control and helps prevent over-mixing.
- Use a light touch: Gently incorporate the liquid using a fork or your fingertips. Avoid overworking the dough, as this can lead to a tough crust.
- Pay attention to the texture: The dough should come together easily and hold its shape without being too wet or crumbly. Adjust the amount of liquid as needed to achieve the desired consistency.
Adjusting Liquid as Needed
To ensure a perfectly flaky pie crust, achieving the perfect amount of liquid is key. Adjusting the consistency of your dough is crucial in creating a crust that is both tender and flaky. The amount of liquid needed may vary depending on factors such as humidity and the type of flour used. Start by adding the recommended amount of liquid indicated in the recipe, and then adjust as necessary. If the dough appears dry and crumbly, add small amounts of water or milk, a teaspoon at a time, until the dough comes together.
On the other hand, if the dough is too wet and sticky, sprinkle in small amounts of flour until the desired consistency is achieved. Additionally, consider alternative liquid options such as buttermilk or sour cream for added richness and flavor. Remember, the key is to find the perfect balance of moisture to create a beautifully flaky pie crust.
Mixing Techniques for Flaky Crusts
For achieving the flakiest pie crusts, employ these expert mixing techniques. The way you mix your pie crust can greatly affect its flakiness and texture. Follow these three essential mixing techniques to ensure your pie crust turns out perfectly every time.
- Gentle Whisking Technique: When incorporating the dry ingredients into the fat, use a gentle whisking technique. This helps to evenly distribute the fat and create pockets of air, which will result in a tender and flaky crust. Avoid overmixing, as this can lead to a tough crust. Instead, whisk the dry ingredients into the fat just until the mixture resembles coarse crumbs.
- Temperature Control: Maintaining the right temperature throughout the mixing process is crucial for a flaky pie crust. Start by making sure your ingredients, such as butter or shortening, are cold. Cold fats create steam when they melt in the oven, which creates pockets of air and contributes to the flakiness of the crust. Additionally, keep the mixing bowl and utensils chilled to prevent the fat from melting prematurely.
- Finger Blending: After incorporating the dry ingredients, it’s time to bring the dough together. Use your fingers to quickly blend the mixture until it starts to clump together. This technique ensures that the fat is evenly distributed without overworking the dough. Be careful not to over-handle the dough, as this can result in a tough crust.
Resting the Dough
Resting the dough allows for optimal hydration and relaxation, ensuring a tender and easy-to-work-with pie crust. After mixing the ingredients, it is crucial to give the dough some time to rest. This resting time allows the flour to fully hydrate, resulting in a more tender crust. It also allows the gluten strands to relax, making the dough easier to roll out without springing back.
The resting time for pie dough is typically around 30 minutes to an hour, although some recipes may call for longer resting times. During this period, the dough should be covered and refrigerated. The cold temperature helps to solidify the fats in the dough, which in turn creates pockets of air when baked, resulting in a flaky texture.
It is important to note that the temperature during resting plays a crucial role in the final outcome of the pie crust. If the dough is too warm, the fats will melt and the dough will become sticky and difficult to work with. On the other hand, if the dough is too cold, the fats will harden and make it challenging to roll out.
To ensure the ideal temperature, it is recommended to let the dough rest in the refrigerator. This will help maintain a consistent temperature throughout the dough, allowing it to rest evenly. Additionally, chilling the dough also helps to prevent shrinkage during baking.
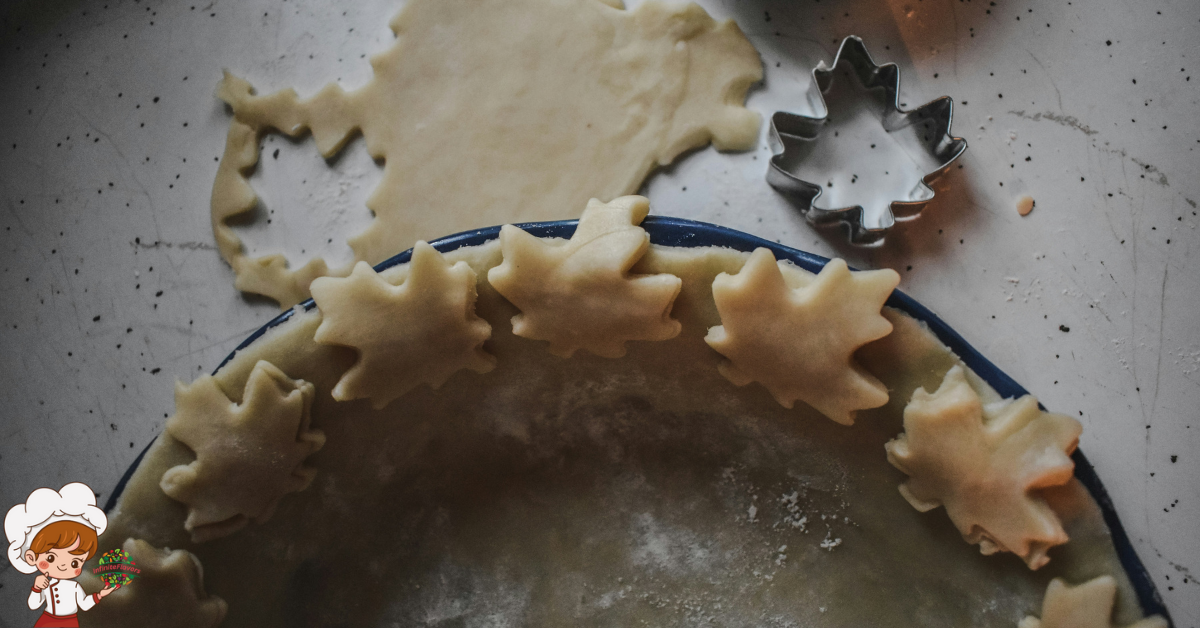
Rolling and Shaping the Crust
After allowing the dough to rest and hydrate, it’s time to move on to the next crucial step in creating a perfectly flaky pie crust: rolling and shaping. This is where the true artistry of pie making comes into play. With precision and knowledge, you can transform a simple ball of dough into a beautiful canvas for your pie filling.
To help you on your journey to pie perfection, here are three important techniques and tips for rolling and shaping your crust:
- Fluting techniques for decorative pie crust edges: The edge of your pie crust is the finishing touch that adds elegance and visual appeal. To achieve a beautifully fluted edge, gently fold the excess dough over itself and use your thumb and index finger to create a series of evenly spaced ridges. Experiment with different fluting techniques, such as the classic scallop or the more intricate rope design, to add your own personal touch to your pie.
- Using alternative flours for gluten-free pie crusts: For those with gluten sensitivities or dietary restrictions, there are alternative flours that can be used to create a delicious and flaky gluten-free pie crust. Almond flour, coconut flour, and rice flour are popular choices that can provide a similar texture and taste to traditional wheat flour. Experiment with different ratios and combinations to find the perfect gluten-free crust that suits your preferences.
- Proper thickness and evenness: When rolling out your crust, aim for a thickness of about 1/8 inch. This ensures a sturdy yet tender crust that will hold up to your filling without becoming tough. Additionally, make sure to roll the dough evenly, starting from the center and working your way outwards. This will help prevent any uneven shrinking or bubbling during baking.
Pre-baking or Blind Baking
To achieve a perfectly baked pie crust with a crisp and golden exterior, the technique of pre-baking, also known as blind baking, is essential. Pre-baking involves partially or fully baking the crust before adding the filling. This technique is particularly useful when you’re making a pie with a wet filling, as it helps prevent the crust from becoming soggy. It also ensures that the bottom crust is fully cooked and doesn’t remain undercooked.
One of the challenges in pre-baking a pie crust is preventing crust shrinkage. This happens when the crust pulls away from the sides of the pie dish during baking, causing it to shrink and lose its shape. To prevent this, it’s important to use a pie crust recipe that contains enough fat and liquid to create a tender and pliable dough. Additionally, chilling the dough before rolling it out and using pie weights or dried beans to weigh down the crust during baking can help maintain its shape.
If you’re looking for an alternative to traditional pie crust materials, there are a few options to consider. For a gluten-free crust, you can use a combination of almond flour and tapioca starch. This creates a nutty and slightly chewy texture that pairs well with fruit fillings. Another option is using a graham cracker crust, which is made by crushing graham crackers and combining them with melted butter and sugar. This crust is perfect for creamy or custard-based pies.
Pre-baking or blind baking your pie crust is a crucial step in achieving a perfectly flaky and delicious pie. By preventing crust shrinkage and exploring alternative crust materials, you can elevate your pie-making skills and create a crust that is both visually appealing and scrumptious.
Troubleshooting Common Pie Crust Problems
Having trouble with crumbly pie crusts or soggy bottoms? Don’t worry, we’ve got you covered. In this section, we’ll explore solutions to crumbly crusts and remedies for those dreaded soggy bottoms. So, let’s troubleshoot together and make sure your pie crusts turn out perfectly flaky every time.
Crumbly Crust Solutions
For a beautifully cohesive pie crust that holds together with each bite, follow these expert tips to troubleshoot any crumbly crust problems.
- Incorporate enough liquid: To improve texture and prevent a crumbly crust, make sure you are adding enough liquid to the dough. This will help bind the ingredients together and create a more cohesive crust.
- Don’t overwork the dough: Overmixing or overhandling the dough can result in a crumbly crust. Be gentle when incorporating the ingredients, and stop mixing as soon as the dough comes together. This will help maintain the integrity of the fat particles and prevent a dry, crumbly texture.
- Use an egg wash: To prevent overbrowning and add a touch of richness, brush the crust with an egg wash before baking. This will create a beautiful golden color and give the crust a slightly glossy finish.
Soggy Bottom Remedies
To achieve a perfectly crisp and flaky pie crust, it is essential to address and troubleshoot the common problem of a soggy bottom. A soggy bottom can ruin the texture and taste of your pie, but fear not, there are remedies to fix this issue. One of the most crucial steps is to ensure that your baking temperatures are accurate. If the oven is too hot, the crust may not have enough time to bake and set properly, resulting in a soggy bottom.
Additionally, if your pie filling is particularly wet, it can seep into the crust and make it soggy. To combat this, you can pre-bake the crust for a few minutes before adding the filling. Another trick is to use decorative crust designs on the bottom. These patterns create little air pockets that can help prevent moisture from soaking into the crust. By being mindful of these remedies, you can achieve a pie with a perfectly flaky and delicious crust.
Mysteries Of Perfectly Flaky Pie Crusts; Frequently Asked Questions
Can I Use Oil Instead of Butter or Shortening in My Pie Crust?
You can use oil instead of butter or shortening in your pie crust. Using different oils in pie crust has advantages and disadvantages. It’s a versatile option, but may result in a less flaky texture.
How Can I Prevent My Pie Crust From Shrinking During Baking?
To prevent your pie crust from shrinking during baking, make sure to chill the dough before rolling it out. Also, avoid stretching the dough too much when transferring it to the pie dish. These steps help achieve a perfectly flaky texture.
Can I Use Whole Wheat Flour Instead of All-Purpose Flour in My Pie Crust?
Yes, you can use whole wheat flour instead of all-purpose flour in your pie crust. It’s a great option for a healthier crust. Just keep in mind that whole wheat flour may result in a slightly denser texture. Experiment and enjoy!
What Is the Best Way to Store Leftover Pie Crust Dough?
To properly store leftover pie crust dough, wrap it tightly in plastic wrap and refrigerate for up to 3 days. As for creative ways to use it, consider making mini tart shells or savory hand pies.
Can I Freeze My Pie Crust Dough for Later Use?
Yes, you can freeze your pie crust dough for later use. Freezing helps to preserve the dough’s freshness and make it more convenient for future baking. Simply wrap it tightly in plastic wrap before placing it in the freezer.

Conclusion
Congratulations! You have now unlocked the mysteries of perfectly flaky pie crusts. By choosing the right fat, using cold ingredients, adding the perfect amount of liquid, employing the right mixing techniques, resting the dough, and mastering the art of rolling and shaping, you are on your way to pie crust perfection. Don’t forget to pre-bake or blind bake when necessary, and if any issues arise, you now have the troubleshooting skills to conquer them. Enjoy your delectable, flaky creations!