Exciting Step-By-Step To Perfect Gluten-Free Bread Baking

Step-By-Step To Perfect Gluten-Free Bread;Are you tired of attempting to bake gluten-free bread only to end up with a dense and crumbly mess? Imagine finally achieving that soft and fluffy loaf you’ve been dreaming of, with a perfectly golden crust that rivals any traditional bread. In this guide, we will walk you through the step-by-step process of perfecting your gluten-free bread baking skills. From choosing the right flour blend to troubleshooting common issues, we will equip you with the knowledge and techniques to ensure success in every loaf. So, put on your apron and get ready to embark on a gluten-free bread baking journey like no other.
Choosing the Right Gluten-Free Flour Blend
To ensure the best results for your gluten-free bread, it is crucial to carefully select the appropriate gluten-free flour blend. With the increasing demand for gluten-free options, there are now a wide variety of gluten-free flour options available in the market. Each flour blend has its own unique characteristics, so finding the right texture for your bread can be a bit of a challenge.
When it comes to gluten-free flour options, you have several choices to consider. Rice flour, made from finely ground rice, is a common choice and provides a light and fluffy texture. It is often combined with other flours to improve its nutritional value. Another popular option is almond flour, which adds a nutty flavor and a dense, moist texture to your bread. If you prefer a heartier taste, you can try using a blend of sorghum and buckwheat flour. These flours have a robust flavor profile and are perfect for creating rustic breads.
In order to find the right texture for your gluten-free bread, it is important to experiment with different flour blends. Don’t be afraid to mix different types of gluten-free flours to achieve the desired texture. Combining flours can help balance out their individual characteristics and create a well-rounded bread. Additionally, consider adding binding agents such as xanthan gum or psyllium husk powder to improve the structure and rise of your bread.
Understanding the Role of Xanthan Gum in Gluten-Free Baking
So you’re ready to tackle the world of gluten-free baking and understand the role of xanthan gum? Well, you’re in the right place! Xanthan gum is a crucial ingredient that helps mimic the texture and structure of gluten in gluten-free baked goods. It acts as a binder, providing elasticity and preventing the dough from becoming crumbly. But fear not, if you’re looking for alternatives, there are other options available too. Let’s dive into the benefits of xanthan gum and explore some alternatives that can work just as well.
Xanthan Gum Benefits
For those delving into the world of gluten-free baking, understanding the role of xanthan gum is essential for achieving the perfect texture and structure in your bread. Xanthan gum, a common ingredient in gluten-free baking, is a versatile additive that offers numerous benefits. Here are some of the advantages of using xanthan gum in your gluten-free recipes:
- Improved Texture: Xanthan gum acts as a binding agent, giving your bread a moist and chewy texture that closely resembles traditional wheat bread.
- Increased Shelf Life: By retaining moisture, xanthan gum helps prolong the shelf life of gluten-free bread, preventing it from becoming dry and crumbly.
- Enhances Rise: Xanthan gum aids in creating a better rise in gluten-free bread, resulting in a lighter and fluffier loaf.
- Xanthan Gum Substitutes: If you’re allergic to xanthan gum or simply want to explore other options, you can use alternatives like guar gum, psyllium husk, or flaxseed meal as substitutes.
In addition to bread baking, xanthan gum can also be used in other gluten-free recipes such as cakes, cookies, and pancakes. Its unique properties make it an invaluable ingredient for achieving exceptional results in gluten-free baking.
Xanthan Gum Alternatives
If you’re looking to explore alternatives to xanthan gum in your gluten-free baking, understanding its role in achieving the perfect texture and structure in your bread is crucial. Xanthan gum is a common ingredient used as a binder in gluten-free bread recipes. It helps to mimic the elasticity and structure that gluten provides in traditional bread. However, if you prefer to avoid xanthan gum or are looking for alternative binders, there are a few options you can consider.
One alternative is guar gum, which is derived from the guar bean. It has similar properties to xanthan gum and can help provide structure and elasticity to your gluten-free bread. Another option is psyllium husk powder, which is derived from the seeds of the Plantago ovata plant. It acts as a binder and can help improve the texture and rise of your bread. Lastly, you can also try using flaxseed meal or chia seeds as binders. They absorb moisture and create a gel-like consistency, which can help hold the bread together. Experimenting with these alternative binders can open up new possibilities for your gluten-free bread baking.
Preparing the Yeast for Gluten-Free Bread
To prepare the yeast for gluten-free bread, you can choose to activate it using warm water and a pinch of sugar, enhancing its flavor and ensuring a successful rise. Here are some key steps to follow for gluten-free yeast activation:
- Choose a gluten-free yeast: Make sure to use a yeast that is specifically labeled as gluten-free. This will ensure that your bread remains safe for those with gluten sensitivities or celiac disease.
- Measure the yeast: Use the recommended amount of yeast specified in your gluten-free bread recipe. This will help to ensure that your bread rises properly and has the right texture.
- Activate the yeast: In a small bowl, combine warm water and a pinch of sugar. Sprinkle the yeast over the water and let it sit for about 5 minutes, or until it becomes frothy. This process activates the yeast, allowing it to ferment and produce carbon dioxide, which helps the bread rise.
- Consider yeast substitution options: If you don’t have access to gluten-free yeast, you can use baking powder or baking soda as a substitute. However, keep in mind that these substitutions may alter the taste and texture of your bread.
Mixing the Dry Ingredients
Now that the yeast for your gluten-free bread is activated, it’s time to move on to the next step of mixing the dry ingredients. Mixing the dry ingredients is a crucial step in achieving the perfect texture for your gluten-free bread. With the right mixing techniques, you can create a light and fluffy bread that rivals its gluten-filled counterparts.
To start, gather all your dry ingredients, such as gluten-free flour, xanthan gum, salt, and any additional dry ingredients like herbs or spices. Measure them out accurately, using a kitchen scale if possible, to ensure precise ratios and consistent results.
In a large mixing bowl, combine the dry ingredients and whisk them together. This helps to evenly distribute the ingredients and prevent any clumps from forming. Whisking also introduces air into the mixture, which contributes to a lighter texture in the final bread.
Once the dry ingredients are well combined, you can proceed to the next step of adding the wet ingredients. Be sure to follow the recipe instructions carefully, as the order in which you add the wet ingredients can affect the final texture of the bread.
Mixing the dry ingredients thoroughly and incorporating air into the mixture are key steps in achieving the desired gluten-free bread texture. By following these steps, you can create a delicious loaf of bread that is light, airy, and gluten-free. So, let’s move on to the next step and continue our journey to perfect gluten-free bread baking.
Adding the Wet Ingredients
Once the dry ingredients are well combined, it’s time to take your gluten-free bread to the next level by adding the wet ingredients. This step is crucial in creating a moist and flavorful bread that will satisfy your gluten-free cravings. Here’s what you need to know about incorporating the wet ingredients:
- Wet ingredient ratios: When adding the wet ingredients, it’s important to follow the recipe’s ratios. These ratios are carefully calculated to achieve the perfect balance of moisture and structure in your bread. Whether it’s water, milk, eggs, or oil, each ingredient plays a vital role in the overall texture and taste of your gluten-free bread.
- Importance of room temperature ingredients: For optimal results, it is recommended to use room temperature wet ingredients. Cold ingredients can slow down the fermentation process and hinder the rising of the bread. Bringing your eggs, milk, or water to room temperature ensures that they will integrate seamlessly with the dry ingredients and promote proper gluten-free bread development.
- Slow and steady: When adding the wet ingredients to the dry mixture, it’s best to do it slowly and gradually. Pour a little at a time, allowing the mixture to incorporate fully before adding more. This method ensures even distribution of moisture throughout the dough and prevents any lumps or pockets of dry ingredients.
- Mix until just combined: Once you’ve added all the wet ingredients, mix the dough until just combined. Overmixing can lead to a dense and gummy texture in your gluten-free bread. So, be gentle and stop mixing as soon as there are no visible dry patches in the dough.
Kneading the Dough Thoroughly
Achieve the perfect texture and structure in your gluten-free bread by thoroughly kneading the dough. Thorough kneading techniques are essential when working with gluten-free dough, as it helps develop the desired elasticity and strength that is typically lacking due to the absence of gluten. Kneading involves a rhythmic process of folding, pressing, and stretching the dough to activate the proteins and create a cohesive structure.
When kneading gluten-free dough, it is important to use gentle but deliberate movements. Start by folding the dough over itself, then press it down with the heel of your hand. Push and stretch the dough away from you, then fold it back again. Repeat this process in a continuous motion, adding more pressure as needed, until the dough feels smooth and elastic.
Thoroughly kneading gluten-free dough offers several benefits. Firstly, it helps distribute the ingredients evenly, ensuring that all the components bind together properly. This results in a more consistent and uniform texture throughout the bread. Additionally, kneading helps develop the dough’s structure and traps air bubbles, which contributes to a lighter and fluffier final product. By thoroughly kneading the dough, you are essentially building the foundation for a successful gluten-free loaf.
Letting the Dough Rise Properly
To ensure optimal results in your gluten-free bread baking process, the next crucial step is allowing the dough to rise properly. Proper dough rising is essential for achieving a light, airy texture and a well-rounded flavor in your gluten-free bread. Here are some key tips to help you master this important step:
- Use the right yeast: Make sure to use a yeast that is specifically labeled as gluten-free. Regular yeast may not be as effective in gluten-free baking, resulting in poor rising.
- Create a warm, draft-free environment: Yeast thrives in warm conditions, so find a cozy spot in your kitchen for your dough to rise. Cover the bowl with a clean kitchen towel to protect it from drafts.
- Be patient: Gluten-free dough may take longer to rise than traditional dough. Allow the dough enough time to double in size, even if it takes longer than the recommended time.
- Troubleshooting rising issues: If your dough is not rising as expected, there are a few potential issues to consider. Check the expiration date on your yeast and make sure it hasn’t expired. Additionally, ensure that your liquid ingredients are at the right temperature – too hot or too cold can hinder yeast activity.
Properly rising gluten-free dough is a crucial step in achieving bakery-quality bread. By following these tips and troubleshooting any rising issues, you can create gluten-free bread that is fluffy, flavorful, and satisfying. So, be patient, create the right environment, and use the right ingredients to ensure your dough rises to perfection.
Shaping the Dough Into a Loaf
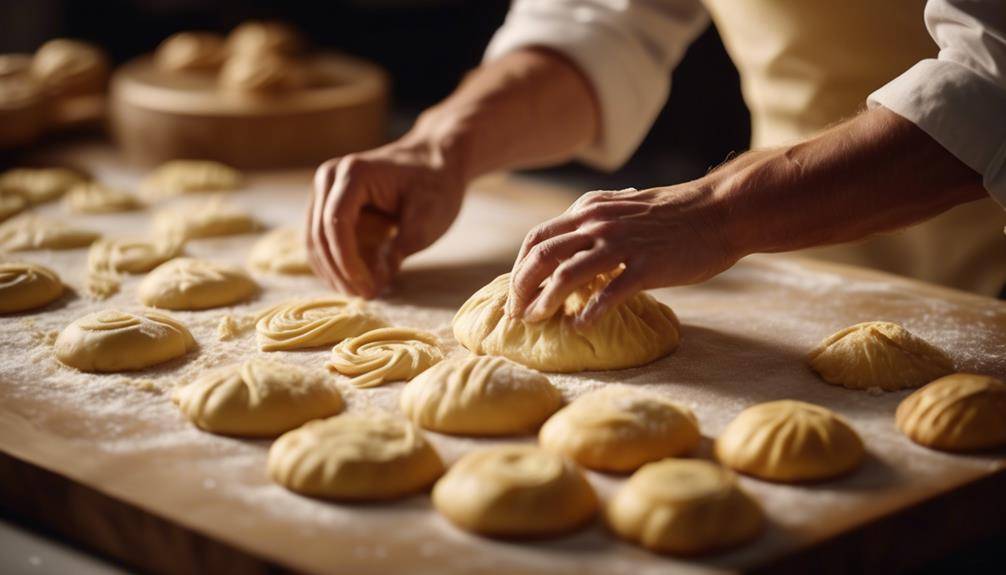
Now it’s time to shape your gluten-free bread dough into a loaf. This step is crucial to ensure an even shape and proper loaf size. By using the right technique, you can achieve a beautifully formed gluten-free loaf that is both visually appealing and delicious.
Technique for Even Shape
For a perfectly shaped loaf, follow these steps to shape your gluten-free bread dough:
- Start by gently deflating the risen dough with your fingertips.
- Next, transfer the dough to a lightly floured surface and shape it into a rough rectangle.
- Fold the top third of the dough towards the center, and then fold the bottom third on top of the folded portion.
- Using the heel of your hand, gently press down on the seam to seal it and create tension.
Proper Gluten-Free Loaf Size
After shaping the dough into a rectangle and creating tension with the seam, it’s important to proceed to shaping the gluten-free bread dough into the proper loaf size. This step is crucial in achieving the perfect texture and crust for your gluten-free bread. When shaping the dough, make sure to handle it gently to avoid overworking it, as gluten-free dough tends to be more delicate.
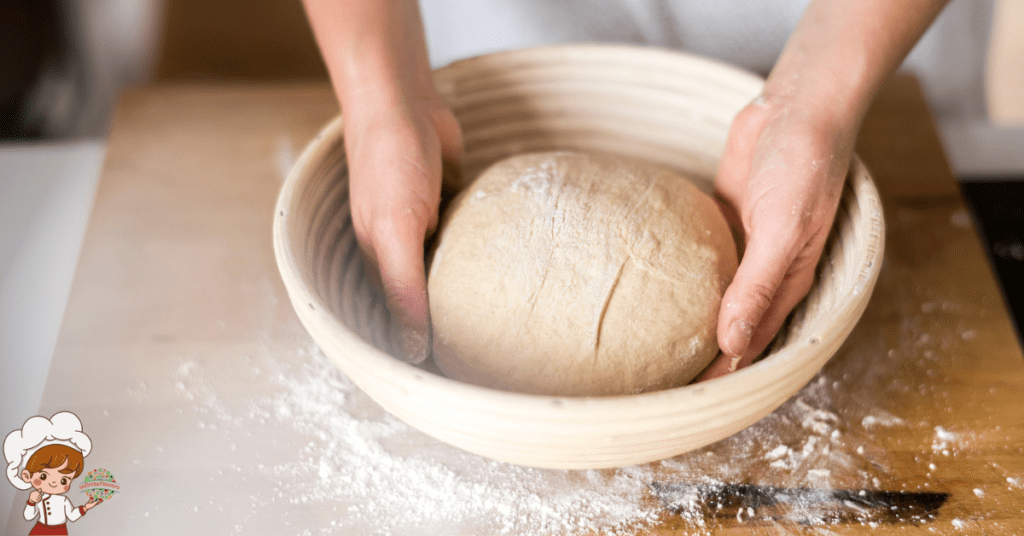
Begin by gently patting down the dough and then carefully roll it up tightly, starting from one end. Tuck the ends under and place the shaped dough into a greased loaf pan, making sure it fits snugly without any gaps. This will help the bread maintain its shape during baking and result in a well-risen loaf with a beautiful crust.
Baking at the Right Temperature and Time
To achieve perfectly baked gluten-free bread, it is crucial to ensure the right temperature and timing during the baking process. Baking at the correct temperature and for the right amount of time will result in a loaf that is beautifully golden on the outside and moist and fluffy on the inside. Here are some baking tips to help you achieve that perfect gluten-free bread:
- Preheat your oven: Start by preheating your oven to the recommended temperature. This ensures that the bread will bake evenly and rise properly.
- Use an oven thermometer: Ovens can sometimes be inaccurate, so it’s a good idea to use an oven thermometer to ensure that the temperature is correct. This will help you achieve consistent results every time.
- Bake in the middle of the oven: Place your bread in the middle rack of the oven. This allows for even heat distribution and prevents the bread from getting too brown on the top or bottom.
- Check for doneness: To determine if your bread is fully baked, insert a digital thermometer into the center of the loaf. The internal temperature should reach around 200°F (93°C). Additionally, tapping the bottom of the loaf should produce a hollow sound.
Testing for Doneness
To determine if your gluten-free bread is perfectly baked, use a digital thermometer and tap the bottom of the loaf to test for doneness. These testing methods are essential to ensure that your bread is cooked all the way through without being underbaked or overbaked.
Using a digital thermometer is a reliable way to check the internal temperature of your bread. When testing for doneness, insert the thermometer into the center of the loaf, making sure it doesn’t touch the pan. For gluten-free bread, the ideal internal temperature is between 200 and 205 degrees Fahrenheit (93 to 96 degrees Celsius). If the temperature falls within this range, your bread is ready to be removed from the oven.
In addition to using a digital thermometer, tapping the bottom of the loaf is another effective method to check for doneness. Gently tap the bottom of the bread with your fingertips. If it sounds hollow, it indicates that the bread is properly baked. This method works well for gluten-free bread that may not develop a dark golden crust like traditional bread.
It is important to note that the specific baking time and temperature can vary depending on the recipe and oven. Therefore, it is crucial to follow the instructions provided in the recipe and make adjustments as needed. Keep in mind that every oven is different, so it may take a few tries to find the perfect baking time and temperature for your gluten-free bread.
Allowing the Bread to Cool Completely
Once your gluten-free bread is removed from the oven, it is crucial to allow it to cool completely before slicing or serving. The cooling process is an essential step in achieving the perfect gluten-free bread. Here are four reasons why the importance of cooling cannot be overstated:
- Moisture redistribution: During the baking process, moisture is trapped inside the bread. Allowing the bread to cool ensures that this moisture is evenly distributed throughout the loaf. If you slice the bread too soon, the moisture will escape, resulting in a dry and crumbly texture.
- Structural stability: While the bread is hot, the structure is still setting. Cooling allows the structure to solidify and stabilize, ensuring that the bread maintains its shape when sliced. Slicing the bread too early can cause it to collapse or become dense.
- Improved flavor: As the bread cools, the flavors develop and meld together, resulting in a more pronounced and well-balanced taste. Patience is key in this process, as rushing can lead to a less flavorful end result.
- Easier slicing: Cooling the bread allows it to firm up, making it easier to slice without squishing or tearing. A fully cooled loaf will have a more even crumb and clean slices, enhancing the overall appearance and presentation.
Slicing and Storing Your Gluten-Free Bread
Now that your gluten-free bread has cooled completely, it’s time to slice and store it properly. Using the right slicing techniques will ensure that your bread doesn’t crumble or fall apart. And when it comes to storing, choosing the best methods will help keep your bread fresh for longer. Let’s explore these points in detail.
Proper Slicing Techniques
For optimal enjoyment and preservation of your gluten-free bread, mastering the art of proper slicing techniques is essential. Here are a few tips to help you slice your bread with precision while maintaining its loaf shape:
- Use a sharp serrated knife: A sharp knife ensures clean and even slices without squishing the bread.
- Let the bread cool completely: Slicing bread while it’s still warm can cause it to lose its shape. Allow it to cool for at least 30 minutes before slicing.
- Hold the loaf steady: Use one hand to hold the loaf firmly in place while slicing with the other hand.
- Apply gentle pressure: Instead of pressing hard, let the serrated knife do the work. Apply gentle pressure and let the knife glide through the bread.
Best Storage Methods
To ensure your gluten-free bread stays fresh and delicious, it is important to master the best storage methods, including proper slicing and storing techniques. When it comes to slicing your gluten-free bread, investing in the best bread slicer can make a world of difference. Look for a sturdy slicer with adjustable thickness settings to ensure even slices every time. This will not only enhance the presentation of your bread but also make it easier to store.
Speaking of storage, freezing gluten-free bread is an excellent way to extend its shelf life. Once sliced, wrap individual portions tightly in plastic wrap or place them in airtight freezer bags. When you’re ready to enjoy a slice, simply defrost it in the toaster or microwave. By mastering these storage methods, your gluten-free bread will always be fresh and ready to enjoy.
Keeping Bread Fresh
Ensure your gluten-free bread stays fresh and delicious by mastering the art of slicing and storing it properly. Here are some tips to help you keep your bread fresh and prevent spoilage:
- Slice it right: Use a serrated knife to ensure clean, even slices. Avoid applying too much pressure, as gluten-free bread can be delicate.
- Wrap it up: Store your bread in airtight plastic bags or containers to keep it from drying out. Make sure to remove as much air as possible before sealing.
- Refrigerate or freeze: If you won’t be consuming your gluten-free bread within a few days, refrigerate it to extend its shelf life. Alternatively, you can freeze it for longer storage. Just make sure to wrap it tightly to prevent freezer burn.
- Toast to revive: If your bread starts to lose its freshness, give it a quick toast to bring back some of its deliciousness.
Troubleshooting Common Gluten-Free Bread Baking Issues
Experiencing challenges in your gluten-free bread baking journey? Let’s dive into troubleshooting common issues to help you achieve the perfect loaf every time.
One common issue faced by gluten-free bread bakers is overproofing. Overproofed bread often leads to a dense and gummy texture. To troubleshoot this problem, keep a close eye on the dough during the proofing process. Look for signs of overproofing, such as excessive rise and a fragile, deflated appearance. To prevent overproofing, reduce the proofing time or adjust the temperature of your proofing environment. It’s important to find the right balance to ensure a light and airy texture in your gluten-free bread.
Another common issue is bread collapsing during baking, resulting in a flat loaf. This can be frustrating after putting in all the effort. To troubleshoot this problem, first, make sure to use the correct amount of leavening agents, such as yeast or baking powder, as specified in the recipe. Too much or too little can cause the bread to collapse. Additionally, avoid overmixing the dough, as this can lead to a weak structure that cannot hold its shape. Finally, ensure that your oven is preheated to the correct temperature and that the bread is baked for the recommended time. Proper baking will set the structure of the bread, preventing it from collapsing.
Frequently Asked Questions: Step-By-Step To Perfect Gluten-Free Bread
How Can I Prevent My Gluten-Free Bread From Being Too Dry?
To prevent your gluten-free bread from being too dry, try these tips: Add ingredients like applesauce or yogurt for moisture. Use a combination of different gluten-free flours for a soft and chewy texture.
Can I Substitute Xanthan Gum With Another Ingredient in Gluten-Free Baking?
Yes, you can substitute xanthan gum in gluten-free baking. Try using guar gum or psyllium husk instead. To achieve a moist texture in your gluten-free bread, add ingredients like applesauce, yogurt, or mashed bananas.
Why Is It Important to Let the Dough Rise Properly in Gluten-Free Bread Baking?
To achieve perfect gluten-free bread texture, it’s important to let the dough rise properly. This allows the yeast to work its magic, creating a light and airy texture. Follow these tips for the best results.
What Is the Best Way to Store Gluten-Free Bread to Keep It Fresh?
To keep your gluten-free bread fresh, the best way is to freeze it. Wrap slices individually and store in a freezer bag. To prevent it from becoming stale, keep it in an airtight container or bag.
How Can I Make My Gluten-Free Bread Rise Higher and Have a Lighter Texture?
To make your gluten-free bread rise higher and have a lighter texture, try experimenting with different gluten-free bread recipe variations. Also, troubleshoot common issues in gluten-free bread baking to ensure optimal results.
Conclusion
Congratulations! You are now equipped with the knowledge and skills to bake perfect gluten-free bread. By choosing the right flour blend, understanding the role of xanthan gum, and properly preparing the yeast, you can create delicious bread that is free of gluten. Remember to mix the dry and wet ingredients correctly, test for doneness, and allow the bread to cool before slicing and storing. With these tips, you’ll be able to troubleshoot any common baking issues and enjoy the satisfaction of homemade gluten-free bread. Happy baking!


