9 Best Techniques For Homemade Pasta Preparation
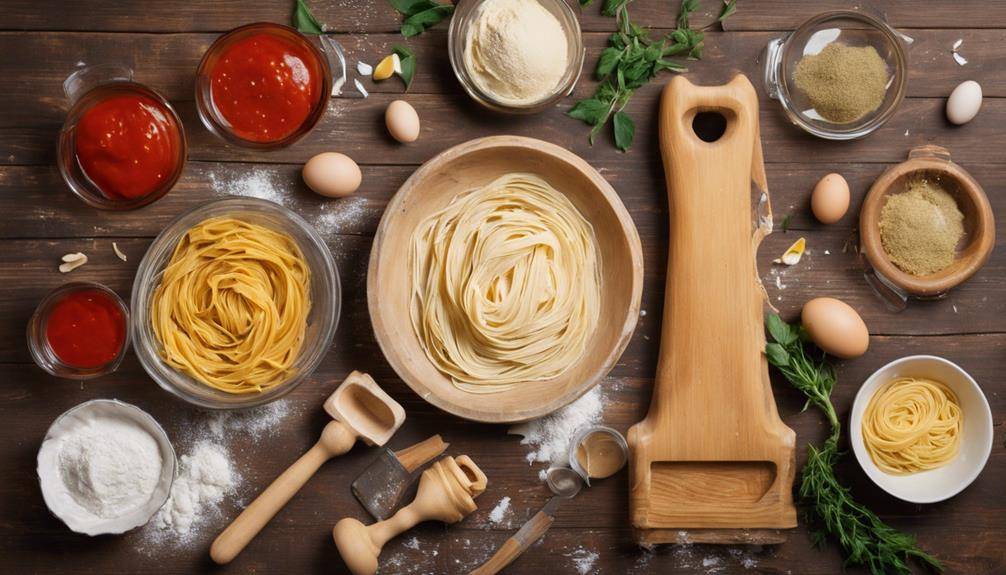
Techniques For Homemade Pasta Preparation: To master homemade pasta, start by choosing the right flour, like semolina for a firmer texture or "00" for silky, elastic pasta. Perfect your dough consistency by balancing hydration, and knead it thoroughly to develop gluten. Don't skip the resting step; letting the dough relax enhances texture. When rolling out your pasta, guarantee even thickness for consistent cooking. Cut and shape according to your favorite styles, then cook quickly in salted water for that perfect bite. Afterward, store your pasta properly to maintain freshness. Stick around, and you'll discover even more helpful pasta-making insights!
Choosing the Right Flour
Click Here and Turn Every Masterpiece into a Showstopper!
When you're ready to make homemade pasta, choosing the right flour is essential for achieving the perfect texture and flavor. The flour you select can greatly affect your pasta's overall quality, so it's vital to understand the various flour varieties available.
One of the most popular options is all-purpose flour, which has a moderate gluten content. This type works well for beginners and produces a tender pasta that holds its shape. However, if you're aiming for something more traditional, consider using semolina flour. With a higher gluten content, semolina creates a firmer texture, ideal for shapes like fettuccine or pappardelle.
You might also explore "00" flour, commonly used in Italy. It's finely milled and has a high gluten content, resulting in pasta that's incredibly smooth and elastic. This flour is perfect for making delicate ravioli or lasagna sheets.
Don't overlook whole wheat flour, either. It adds a nutty flavor and a bit more nutrition, though it can make your pasta denser due to its lower gluten content. For a unique twist, you might consider using specialty flours like spelt or chickpea flour, which can introduce different tastes and textures.
Ultimately, the choice of flour can transform your homemade pasta from ordinary to extraordinary. Experiment with different flour varieties to find the one that suits your taste and desired pasta style best.
Perfecting the Dough Consistency
To perfect your pasta dough, you need to pay close attention to the type of flour you choose and the hydration level you achieve. The right flour can greatly affect the texture, while proper hydration guarantees your dough is neither too dry nor too sticky. Let's explore how these factors work together to create the ideal consistency.
Flour Type Selection
Choosing the right flour is essential for achieving the perfect pasta dough consistency. Different flours offer unique characteristics that affect your pasta. For instance, semolina flour is ideal for traditional pasta varieties, providing a firm texture and a rich flavor. If you're looking for something with nutritional benefits, whole wheat flour not only adds a nutty taste but also increases fiber content.
If you're catering to dietary needs, gluten-free flours are widely available, such as rice flour or chickpea flour. Keep in mind that these may alter the texture of your pasta, so you might need to experiment with combinations to achieve the right consistency.
Regional flours can also enhance your pasta's flavor profile. For example, using Italian 00 flour results in a silky texture, perfect for delicate pasta dishes. Additionally, consider how each flour interacts with your chosen ingredients for flavor enhancements. As you explore the diverse options available, remember that the flour you select will greatly impact not just the texture differences, but also how your pasta complements sauces and other components of your dish. So, take your time and choose wisely!
Hydration Level Importance
Getting the hydration level right is essential for perfecting your pasta dough consistency. It determines how well the dough holds together and affects its texture. When you measure hydration, you're looking at the ratio of water to flour. Typically, a hydration measurement of around 30-40% works well for most pasta recipes, but you might need to adjust based on the flour type you've chosen.
If your dough feels too dry, it won't come together easily and will lack the necessary elasticity. On the other hand, too much water can lead to a sticky mess that's hard to work with. Achieving the right balance allows for a dough that's pliable and easy to roll out, while still maintaining structure when cut into shapes.
To find that sweet spot, start with a measured amount of flour and gradually add water. Knead the dough until it reaches a smooth texture. Remember, practice makes perfect. By fine-tuning your hydration measurement, you'll improve your dough elasticity, resulting in pasta that's not only delicious but also has the right bite. Enjoy the process, and soon you'll be making pasta like a pro!
Kneading Techniques for Success
When you knead your pasta dough, choosing the right flour is key to achieving the perfect texture. You'll also want to pay attention to the time you spend kneading, as this can make or break your pasta's consistency. Mastering a few essential techniques will guarantee your dough has an even texture that rolls out beautifully.
Proper Flour Selection
Selecting the right flour makes a significant difference in your pasta's texture and flavor. For traditional pasta, you'll want to use durum wheat flour or semolina flour, both known for their high gluten content. This gives your pasta the firm texture that holds up well during cooking. Semolina, made from coarser durum wheat, offers a slightly different texture, adding an enjoyable bite.
If you prefer a more versatile option, all-purpose flour works too, but keep in mind it has lower gluten content, leading to softer pasta. This can be great for specific dishes, but may not yield the classic pasta experience you're after.
You might also explore regional varieties, like '00' flour, which is finely milled and ideal for making silky pasta. Each flour has unique flavor profiles; durum wheat often has a nutty taste, while all-purpose flour is more neutral. Additionally, consider the nutritional benefits of your flour choice. Whole wheat flour can add fiber, though it may alter your pasta's texture. Experiment with different types to discover what suits your taste and desired dish best!
Kneading Time Importance
After you've chosen the right flour, kneading becomes the next vital step in your pasta-making process. This technique isn't just about mixing; it's essential for developing dough elasticity. Proper kneading allows gluten to form, which gives your pasta that perfect chewy texture.
You'll want to knead your dough for about 8 to 10 minutes, but pay attention to its feel. If it's too sticky, sprinkle a little flour; if it's too dry, add a touch of water. Use the palms of your hands to push the dough away from you, then fold it back over itself. This motion helps evenly distribute moisture and encourages gluten formation.
Don't rush this step. The longer you knead, the better your dough will respond when you roll it out. If you're unsure whether you've kneaded enough, perform the windowpane test: stretch a small piece of dough; if it forms a thin, translucent sheet without tearing, you've nailed it.
Mastering these kneading techniques will make a noticeable difference in your pasta's final texture. Keep practicing, and soon you'll develop a feel for just how much kneading your dough needs!
Techniques for Even Texture
Achieving an even texture in homemade pasta hinges on mastering your kneading techniques. Start by focusing on gluten development, which is vital for dough elasticity. As you knead, make sure you're balancing hydration; this means adding the right amount of water to create a dough that isn't too sticky or dry.
Incorporate air into the dough by folding and pressing it repeatedly. This technique not only enhances texture but also helps in achieving uniform thickness when you roll out your pasta. Remember, resting your dough is important too; letting it sit allows the gluten to relax, making it easier to shape later.
When rolling, use consistent pressure and employ rolling techniques that maintain even thickness throughout. This consistency is key for cooking uniformity, guaranteeing every piece cooks at the same rate. As you shape your pasta, whether it's fettuccine or ravioli, apply the same careful attention to technique.
Resting the Dough Effectively
Resting the dough is essential for developing the perfect texture and elasticity in your homemade pasta. When you mix your ingredients, the gluten in the flour starts to form, but it needs time to relax. This is where resting comes in. Ideally, you should let your dough rest for at least 30 minutes at room temperature. This resting duration allows the gluten strands to unwind, resulting in a more pliable dough that's easier to roll out later.
Pay attention to the dough temperature as well. If your kitchen is warm, the dough can become too soft and sticky, which makes it challenging to work with. In such cases, consider placing the dough in the refrigerator for a short period. A cooler temperature can help firm it up while still allowing for gluten relaxation. But remember, don't let it rest for too long. Keeping it in the fridge for more than an hour can lead to over-relaxation, making it difficult to achieve that perfect texture you desire.
After resting, wrap your dough in plastic wrap or cover it with a damp kitchen towel to prevent it from drying out. This will keep the moisture locked in, ensuring you have a supple and workable dough when you're ready to roll. By mastering the resting process, you'll set the foundation for delicious homemade pasta that will impress your family and friends.
Rolling Out the Pasta
When you're ready to roll out the pasta, verify that your work surface is clean and lightly dusted with flour to prevent sticking. Start by dividing your rested dough into manageable pieces; working with smaller portions will help you achieve the right pasta thickness more easily. If you're using a pasta machine, set it to the widest setting and feed the dough through, gradually decreasing the thickness as you go. Use even distribution of pressure when rolling the dough through the machine to guarantee uniformity.
If you prefer hand-rolling, grab a rolling pin and begin flattening your dough. Start from the center and roll outward, using your body weight for leverage. Maintain a consistent thickness by regularly checking the pasta and flipping it over to avoid sticking. Dust both sides with flour as needed. Using guides, like wooden dowels or specific measurements, can help you achieve that perfect thickness.
No matter which method you choose—machine or hand—be patient. It's crucial to avoid rushing through the process. Adjust your technique based on how the dough feels; if it's too sticky, dust it with a bit more flour. Tools needed for this task include a rolling pin, a pasta machine, and a bench scraper for any adjustments. With practice, you'll perfect your rolling techniques, guaranteeing your homemade pasta is as delightful as it is beautiful.
Click Here and Turn Every Masterpiece into a Showstopper!
Cutting and Shaping Pasta
Cutting and shaping pasta is an exciting step that lets you personalize your dish. Once you've rolled out your dough, you're ready to transform it into various pasta shapes that can enhance your meal. Whether you're aiming for fettuccine, tagliatelle, or even ravioli, this is where your creativity shines.
Start by selecting your cutting tools. A sharp knife or a pasta cutter works wonders for straight edges. If you're feeling adventurous, you can use a pizza wheel for a fun twist. For delicate shapes like farfalle or orecchiette, you can use your hands to pinch and fold the dough, giving each piece a unique touch.
To create uniform pasta shapes, consider using a pasta machine with different cutting attachments. These machines make it a breeze to achieve consistent widths, ensuring even cooking later on. When you cut your pasta, make sure to dust it lightly with flour to prevent sticking.
Experiment with different thicknesses and shapes! If you prefer long strands, stick with tagliatelle or spaghetti. If you're in the mood for stuffed pasta, roll out your dough and cut it into squares for ravioli.
Cooking Fresh Pasta Properly
After you've shaped your pasta, cooking it properly is key to achieving that perfect al dente texture. Start by bringing a large pot of salted water to a rolling boil. The salt not only enhances the flavor but also helps the pasta cook evenly. Once the water is boiling, gently add your fresh pasta. Since it cooks faster than dried pasta, keep an eye on it!
For pasta cooking, timing is essential. Fresh pasta typically cooks in just 2 to 4 minutes, depending on the thickness. To find out if it's done, taste a piece a minute or so before the suggested cooking time. You want it to have a slight bite—this is what al dente means.
While your pasta is cooking, save a cup of the starchy pasta water before draining. This liquid can be a game changer when you're tossing your pasta with sauce, helping to create a creamy texture and ensuring the sauce clings well.
Another cooking tip: don't rinse your pasta after draining. Rinsing washes away the starch that helps the sauce adhere. Instead, immediately toss your pasta with the sauce of your choice. If the sauce seems too thick, add a splash of that reserved pasta water to loosen it up.
Following these tips will elevate your homemade pasta experience, making every bite delicious and perfectly cooked. Enjoy your culinary creation!
Storing Homemade Pasta
Properly storing homemade pasta is essential for preserving its freshness and flavor. Once you've crafted your delicious pasta, you have a few options for storage depending on when you plan to use it. If you want to keep it fresh for a short time, refrigerator storage is ideal. Simply place your pasta in pasta storage containers, ensuring they're tightly sealed to prevent drying out.
For longer storage, freezing pasta is the way to go. Portioning pasta into individual servings will make it easier when you're ready to cook. You can either freeze it directly on a baking sheet before transferring it to vacuum sealing bags or airtight containers. This method prevents clumping and lets you take out only what you need. Don't forget to label your storage with the date to keep track of its pasta shelf life.
If you choose to dry pasta instead, hang it on a pasta drying rack or lay it flat in a single layer. Once fully dried, store it in a cool, dark place in an airtight container. This method can extend the shelf life considerably.
When it's time to enjoy your stored pasta, use proper reheating techniques. For refrigerated pasta, you can sauté it in a pan with a little oil or water. For frozen pasta, it's best to cook it directly from the freezer, adjusting the cooking time slightly. By mastering these storage techniques, you'll always have delicious homemade pasta on hand!
Pairing Sauces With Pasta
When it comes to enjoying homemade pasta, the right sauce can elevate your dish to new heights. To create the perfect pairing, you'll want to take into account various sauce types and their flavor profiles. For instance, a rich, meaty Bolognese pairs beautifully with tagliatelle, while a light, herbal pesto complements the delicate strands of spaghetti.
Think about regional pairings as well. In Italy, you'll often find seafood sauces with linguine, especially in coastal areas. Balance is vital; if your pasta's heavy, opt for a lighter sauce to avoid overwhelming it. Conversely, a thicker sauce can work wonders with robust pasta shapes like rigatoni.
Ingredient balance also plays a significant role. Seasonal ingredients not only enhance flavor but also contribute to a dish's visual appeal. For example, fresh tomatoes in summer can brighten a marinara sauce, while winter calls for hearty root vegetables in a ragu.
Don't overlook texture contrasts, either. A creamy sauce may benefit from a sprinkle of crunchy nuts or breadcrumbs, adding depth to each bite. Pay attention to cooking methods; sautéing garlic and onions before adding tomatoes can deepen the sauce's flavor.
Click Here and Turn Every Masterpiece into a Showstopper!
Frequently Asked Questions: Techniques For Homemade Pasta Preparation
Can I Use Whole Wheat Flour for Pasta?
Yes, you can use whole wheat flour for pasta! It offers health benefits, such as more fiber and nutrients. However, expect a denser pasta texture compared to traditional white flour, which some may find less desirable.
How Long Can I Store Homemade Pasta in the Fridge?
You can store homemade pasta in the fridge for three to five days. To maximize pasta shelf life, use airtight storage containers, ensuring they're sealed well to prevent moisture and maintain freshness. Enjoy your pasta!
Is It Necessary to Use Eggs in Pasta Dough?
Using eggs in pasta dough isn't necessary; you can opt for egg alternatives. Just keep in mind that this might slightly change the pasta texture, but you'll still end up with delicious noodles.
What Equipment Do I Need for Making Pasta at Home?
To make pasta at home, you'll need essential pasta making tools like a mixing bowl, rolling pin, and pasta cutter. Mastering dough rolling techniques guarantees your pasta turns out perfectly thin and delicious every time.
Can I Freeze Homemade Pasta for Later Use?
Yes, you can freeze homemade pasta for later use. For best results, use proper freezing methods. Store it in airtight containers or freezer bags to maintain quality, ensuring your pasta stays fresh when you're ready to cook.

Conclusion
Now that you know the best techniques for homemade pasta preparation, it's time to put your skills to the test. Remember to choose the right flour, perfect your dough, and don't skip the resting phase. With practice, you'll master rolling and cutting, ensuring your pasta is ready for a delicious sauce. Whether you're cooking for yourself or impressing guests, homemade pasta will elevate any meal. Get cooking, and enjoy every delicious bite!