A Great Beginners Guide To Curing Vegetables
A Great Beginners Guide To Curing Vegetables; Curing vegetables is a simple yet rewarding way to boost flavor and prolong shelf life. You can start by choosing fresh veggies like cucumbers or carrots. Use techniques like salting, pickling, or drying to draw out moisture and inhibit spoilage. Gather essential ingredients, such as salt, vinegar, and spices. Make sure you have the right tools, like sharp knives and airtight containers. Follow basic recipes and monitor the curing process to achieve the taste you desire. There’s a wealth of tips and techniques to explore, ensuring your culinary journey is both fun and fruitful.
What Is Curing?
Curing vegetables is a time-honored technique that enhances their flavor and extends their shelf life. At its core, curing involves using various methods to preserve vegetables, allowing you to enjoy them long after the harvest. You may be familiar with some common cure techniques, such as salting, pickling, or drying. Each method serves a unique purpose in vegetable preservation and can greatly alter the taste and texture of the produce.
When you salt vegetables, for instance, you’re drawing out moisture, which inhibits the growth of spoilage organisms. This process not only helps preserve the veggies but also intensifies their natural flavors. Pickling, on the other hand, involves soaking vegetables in vinegar or brine, giving them a tangy taste that can add excitement to any dish. Drying removes moisture as well, allowing you to store vegetables for extended periods while concentrating their flavors.
Understanding these cure techniques is essential for any aspiring home preserver. You can experiment with different vegetables and methods to discover what works best for your tastes. Whether you prefer the crunch of pickled cucumbers or the rich, savory notes of salted tomatoes, you’ll find that curing opens up a world of culinary possibilities. By mastering these techniques, you’ll not only reduce food waste but also create delicious, preserved vegetables that elevate your meals. So, gather your supplies and get started on your journey of vegetable preservation!
Benefits of Curing Vegetables
Curing vegetables offers you a range of benefits that can enhance your cooking experience. Not only does it boost nutritional value and extend shelf life, but it also intensifies flavors, making your dishes more delicious. By understanding these advantages, you can make the most of your fresh produce.
Nutritional Enhancement
Transforming fresh vegetables through the curing process not only enhances their flavor but also boosts their nutritional profile. When you cure vegetables, you’re actively engaging in a method that promotes nutrient retention. This means that many vitamins and minerals remain intact, making your cured veggies not just tasty but also a powerhouse of nutrition.
Curing can increase certain nutrients, such as antioxidants, which help combat oxidative stress in your body. These health benefits are particularly valuable in today’s fast-paced world, where maintaining peak health is essential. You’ll find that the process can enrich the flavors and textures of your vegetables, making them more enjoyable to consume.
Moreover, the enhanced flavors often encourage you to eat more vegetables, which is a win-win for your overall diet. By incorporating cured vegetables into your meals, you’re not only savoring delicious dishes but also reaping the nutritional rewards that come with them. So, if you’re looking to elevate your culinary experience while boosting your health, curing vegetables is an excellent choice that you shouldn’t overlook.
Extended Shelf Life
One of the most significant benefits of enhancing your vegetables through curing is the extended shelf life you gain. By employing various curing techniques, you can preserve your harvest for months, reducing food waste and saving money. This method has a rich curing vegetable history, dating back centuries when people relied on it to survive harsh winters.
When you cure vegetables, you’re fundamentally removing moisture and creating an environment that inhibits spoilage. This means your cured vegetable applications—like pickling, fermenting, or drying—will keep your veggies fresh and flavorful for much longer than their raw counterparts.
Imagine enjoying the taste of summer tomatoes in the middle of winter or savoring crunchy pickles year-round. Not only does curing extend the lifespan of your produce, but it also allows you to enjoy a diverse array of flavors and textures throughout the year.
Flavor Intensification
How can curing vegetables elevate their flavor to new heights? Curing concentrates the natural flavors of your veggies, transforming them into something truly special. As water is drawn out, the remaining compounds intensify, enhancing their unique flavor profiles. This process doesn’t just make them taste better; it also opens up a world of possibilities for seasoning combinations.
When you cure vegetables, you can experiment with various spices and herbs that complement their newly enhanced flavors. For example, cured radishes can pair beautifully with a touch of sea salt and dill, while cured cucumbers might shine with garlic and chili flakes. These combinations create a depth of flavor that fresh vegetables often lack.
Moreover, the curing process can introduce a delightful umami richness. It’s a fantastic way to elevate your dishes, making them more satisfying and complex. Whether you’re adding cured veggies to a salad, sandwich, or as a side dish, their intensified flavors will elevate your meals. Ultimately, curing vegetables not only preserves them but also transforms them into culinary powerhouses that excite your taste buds.
Essential Ingredients for Curing
Curing vegetables requires a few essential ingredients that not only enhance flavor but also aid in preservation. The first ingredient you’ll need is salt. It’s the cornerstone of the curing process, drawing out moisture and creating an environment where bacteria can’t thrive. When selecting vegetables, opt for fresh, firm options; they’ll hold up better during curing.
Next, consider your curing spices. They can elevate the taste of your vegetables markedly. Classic choices include black pepper, garlic, dill, and mustard seeds, but don’t hesitate to experiment with your favorites. Just remember that the right balance of spices can make or break your curing process.
You’ll also want to include sugar, which can help balance the saltiness and add depth to the flavor. It’s particularly useful for sweeter vegetables like carrots and beets. Vinegar is another great addition, especially for pickling; it adds acidity and aids in preservation.
Lastly, consider using a curing agent like sodium nitrate or nitrite if you’re looking to achieve that classic cured flavor and color. However, make sure to follow recommended guidelines, as these are powerful ingredients.
Tools and Equipment Needed
To successfully cure vegetables, you’ll need the right tools and equipment. Essential curing supplies like salt and spices are a must, along with recommended storage containers to keep everything fresh. Let’s explore what you’ll need to get started on this flavorful journey.
Essential Curing Supplies
When you’re ready to commence on the journey of curing vegetables, having the right supplies is vital for success. This practice, steeped in curing history and cultural importance, requires specific tools to guarantee your vegetables are preserved effectively.
First, you’ll need a sharp knife for precise cutting. A cutting board is equally important, as it provides a stable surface. Next, a large mixing bowl will help you combine your salt or sugar with the vegetables. A food scale is essential for accurately measuring your ingredients, making sure you achieve the right proportions for successful curing.
You can’t forget about the curing bags or containers, which are necessary for storing your vegetables as they cure. Confirm they’re airtight to prevent moisture from spoiling your work. Finally, consider a thermometer and hygrometer to monitor temperature and humidity levels, as these factors greatly impact the curing process.
Recommended Storage Containers
Choosing the right storage containers is key to ensuring your cured vegetables maintain their quality and flavor. You’ll want to evaluate different container types based on the specific vegetables you’re curing. Glass jars are excellent for storing items like pickles or fermented goods, as they provide an airtight seal and prevent moisture from spoiling your food.
Plastic containers are lightweight and versatile, but make sure they’re food-safe and BPA-free. If you’re dealing with larger quantities, think about using stainless steel or food-grade plastic buckets that can handle bulk storage while keeping your vegetables safe from air and light.
It’s essential to match your container choice with the right storage conditions. Keep your containers in a cool, dark place to extend the shelf life of your cured vegetables. Avoid areas with fluctuating temperatures, as this can lead to spoilage.
Different Curing Methods
Several methods exist for curing vegetables, each offering unique flavors and preservation techniques. Understanding these different curing methods can enhance your culinary repertoire and connect you to the rich curing history that spans cultures and generations.
One popular method is fermentation, which uses natural bacteria to convert sugars into acids. This traditional technique not only preserves vegetables but also adds a tangy flavor. Think of classic sauerkraut or kimchi; both are delicious examples of this method that bring vibrant tastes to your meals.
Another method is drying, where moisture is removed from vegetables to inhibit spoilage. You can sun-dry or use a dehydrator to achieve this. This technique has been practiced for centuries, allowing communities to store seasonal harvests for leaner months. Dried vegetables can add intensity to soups, stews, and snacks.
Smoking is another fascinating method that adds both flavor and preservation. When you smoke vegetables, you expose them to smoke from burning or smoldering materials, infusing them with a distinct taste while also extending their shelf life. This method ties back to traditional practices where smoking was essential for food preservation.
Lastly, you might try oil curing, where vegetables are submerged in oil, creating a barrier against spoilage. This method not only preserves but also enhances flavors, making it a valuable addition to your kitchen.
Salt Curing Techniques
When it comes to salt curing, you’ll want to master a few basic techniques to preserve your favorite vegetables. Different salts can impact flavor and texture, so understanding their roles is key. Let’s explore which vegetables work best with salt curing and how to get started.
Basic Salt Curing Methods
Salt curing is a time-honored technique that enhances the flavor and extends the shelf life of vegetables. To get started, you’ll want to choose your veggies, such as cucumbers, carrots, or radishes. The first step is to determine the appropriate salt concentration. A common ratio is about 5-10% salt to the weight of the vegetables. This guarantees effective preservation while maintaining flavor.
Next, prepare your vegetables by washing and cutting them into uniform pieces. Combine them with the salt in a bowl, guaranteeing every piece is coated. You can also add spices or herbs for extra flavor. Once mixed, pack the salted vegetables tightly into a clean jar or container.
The curing duration will depend on the type of vegetable and your desired flavor intensity. Generally, you should let the vegetables cure for at least a few days, but some may benefit from a week or more. Check them regularly to monitor the texture and flavor. After curing, store your vegetables in the refrigerator to maintain their quality. Enjoy your deliciously preserved treats!
Essential Salt Types
Choosing the right type of salt is essential for successful vegetable curing, as each variety offers unique flavors and textures. Rock salt is a popular choice due to its coarse granules, making it perfect for drawing moisture out of vegetables. It’s great for creating a solid curing brine.
Sea salt, with its natural minerals, adds a subtle flavor to your cured veggies. You might prefer kosher salt for its ease of handling and balanced flavor, making it a favorite among many cooks.
Himalayan salt not only enhances taste but also brings a beautiful pink hue to your dishes. It’s packed with trace minerals, which can elevate your curing process. If you’re feeling adventurous, consider using flavored salts, like garlic or herb-infused varieties, to add an extra layer of taste to your vegetables.
No matter which salt you choose, remember that the curing process is all about balance. Experimenting with different salts can help you discover your preferred flavors and textures, ultimately enhancing your culinary creations. So, gather your salts and get ready to transform your veggies into delicious, preserved delights!
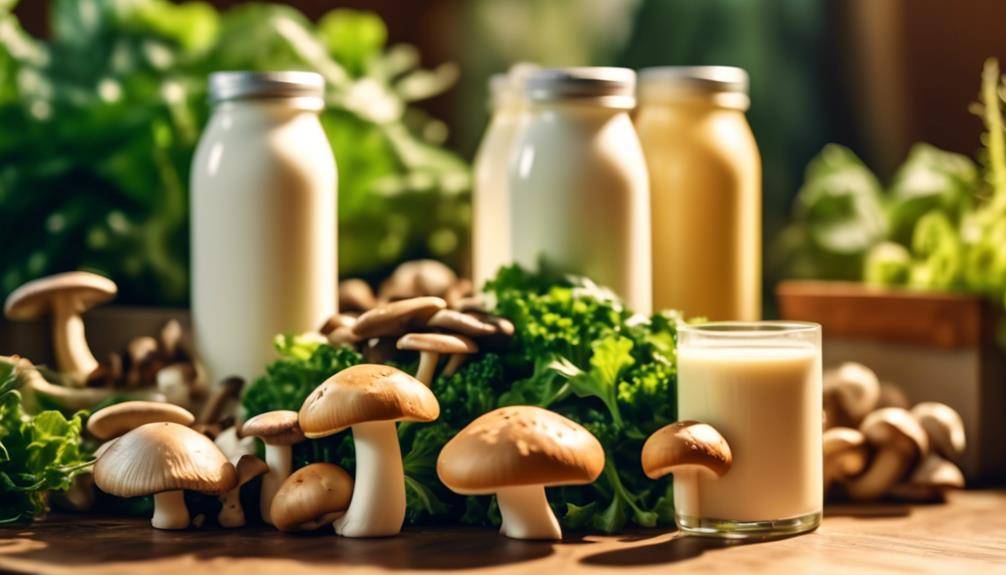
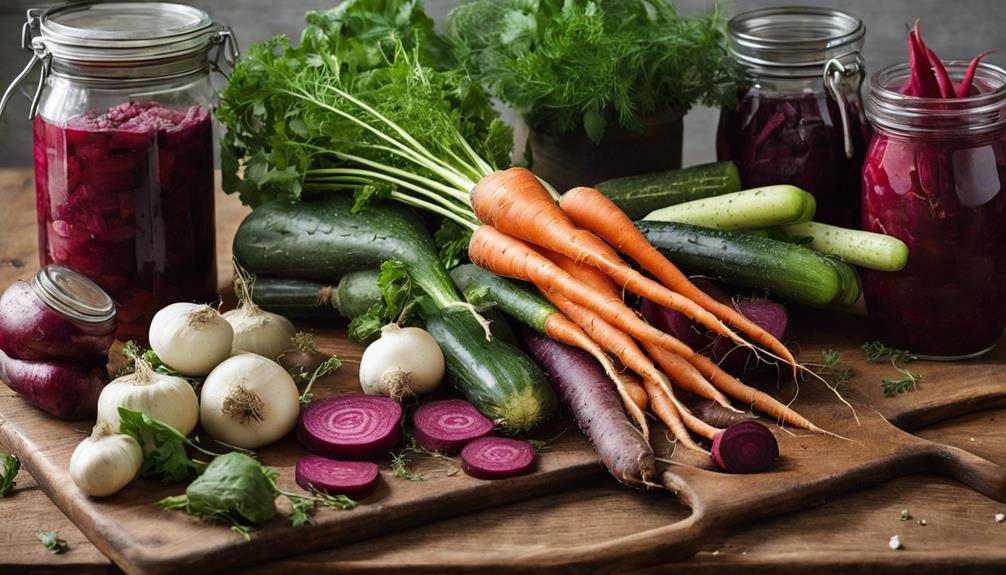
Common Cured Vegetables
Cured vegetables are a staple in many kitchens, offering a blend of flavors and preservation that enhances your meals. Each type of vegetable brings its unique taste and texture to the table through salt curing techniques.
For instance, carrot curing gives you sweet, tangy bites perfect for salads or snacking. Beet curing transforms earthy flavors, making them a vibrant addition to any dish. If you love crunch, try cucumber curing; it results in tangy pickles that are hard to resist.
Don’t overlook onion curing and garlic curing—both add depth to your recipes. Pepper curing can also yield a smoky flavor, ideal for salsas and marinades. Radishes can be cured to create a spicy kick, while squash curing enhances its natural sweetness.
Turnip curing deepens their flavor, making them a great side dish, and cabbage curing is essential for homemade sauerkraut. By experimenting with these techniques, you’ll elevate your cooking and enjoy the benefits of preserved vegetables in a variety of dishes. So grab your salt and start curing!
Sugar Curing Basics
When it comes to sugar curing, understanding the balance between sweetness and preservation is key. Sugar curing is a method that uses various sugar types, such as granulated sugar, brown sugar, or honey, to draw moisture out of vegetables while enhancing their flavor. This process not only adds sweetness but also inhibits spoilage by creating an environment unfavorable for bacteria.
To start, choose the right sugar type based on your desired flavor profile. Granulated sugar is great for a straightforward sweetness, while brown sugar adds depth with its molasses content. Honey can offer a unique taste, though it may require adjustments in your curing method due to its liquid form.
Next, you’ll need to decide on your curing method. The most common technique involves coating your vegetables in the chosen sugar type, ensuring they’re evenly coated. Place them in a non-reactive container, and let them sit in a cool, dark place. Depending on the vegetable and thickness, curing can take anywhere from a few hours to several days. During this time, you’ll want to monitor the vegetables, as they’ll start to release moisture, creating a syrup that aids in the curing process.
Once the vegetables reach your desired texture and sweetness, rinse off excess sugar and store them in an airtight container. Now you’ve got delicious, sweetened vegetables ready to enhance your meals! Enjoy experimenting with different sugar types and curing methods to find what you love best.
Fermentation Process Explained
Now that you’ve learned about sugar curing, it’s time to explore fermentation. You’ll need some essential ingredients, and I’ll guide you through a step-by-step procedure to get started. Plus, we’ll cover common fermentation techniques to help you along the way.
Essential Ingredients Needed
To successfully cure vegetables, you’ll need a few essential ingredients that play a significant role in the fermentation process. First, salt is your primary ingredient. It helps draw out moisture from the vegetables, creating an environment conducive to fermentation. Different curing cultures across history have utilized various types of salt, such as sea salt or kosher salt, but just make sure it’s free from additives.
Next, water plays an important role. Depending on your recipe, you’ll often mix salt with water to create a brine. This brine helps immerse your vegetables, promoting an even fermentation.
You’ll also want to include spices and herbs to enhance flavor. These can vary widely based on the curing culture you’re following. Think garlic, dill, or chili flakes, depending on the taste you’re after.
Step-by-Step Procedure
As you commence on the fermentation process, the first step is to prepare your vegetables by thoroughly washing and cutting them into uniform pieces. This guarantees even fermentation and consistent flavor. Next, you’ll want to focus on vegetable selection. Choose fresh, crisp vegetables like cucumbers, carrots, or cabbage, as they’ll yield the best results.
Once you’ve prepared your vegetables, it’s time to decide on the curing techniques you’ll use. You can opt for a simple brine solution, combining water and salt, or explore other flavor-enhancing ingredients like spices or garlic. Mix the salt into the water until it’s fully dissolved, then pour this brine over your vegetables in a clean fermentation vessel.
Make sure the vegetables are fully submerged to prevent spoilage. You can use weights or even a clean plate to keep them down. Cover the container with a cloth to allow airflow while keeping dust out. Finally, place your vessel in a cool, dark location. Monitor the fermentation process over the next few days, tasting occasionally until you reach your desired flavor. Patience is key, as good things come to those who wait!
Common Fermentation Techniques
Fermentation techniques vary widely, but they all share the goal of preserving vegetables while enhancing their flavors. One common method is lacto-fermentation, where you use salt to create an environment that promotes beneficial bacteria growth. This process is rooted in fermentation science, allowing the natural sugars in vegetables to convert into lactic acid, which not only preserves the veggies but also gives them a tangy taste.
Another popular technique is using brine, a saltwater solution, to submerge your vegetables fully. This helps prevent spoilage and encourages the growth of probiotics, which are essential for gut health. You can also experiment with airlock fermentation vessels, which allow gases to escape while keeping unwanted bacteria out.
Don’t forget about the temperature! Keeping your ferments in a cool, dark spot helps the beneficial bacteria thrive. As you explore these techniques, you’ll reveal the probiotic benefits of fermented vegetables, adding both flavor and nutrition to your diet. Each method offers a unique taste experience, so don’t hesitate to try different combinations to find what you love best!
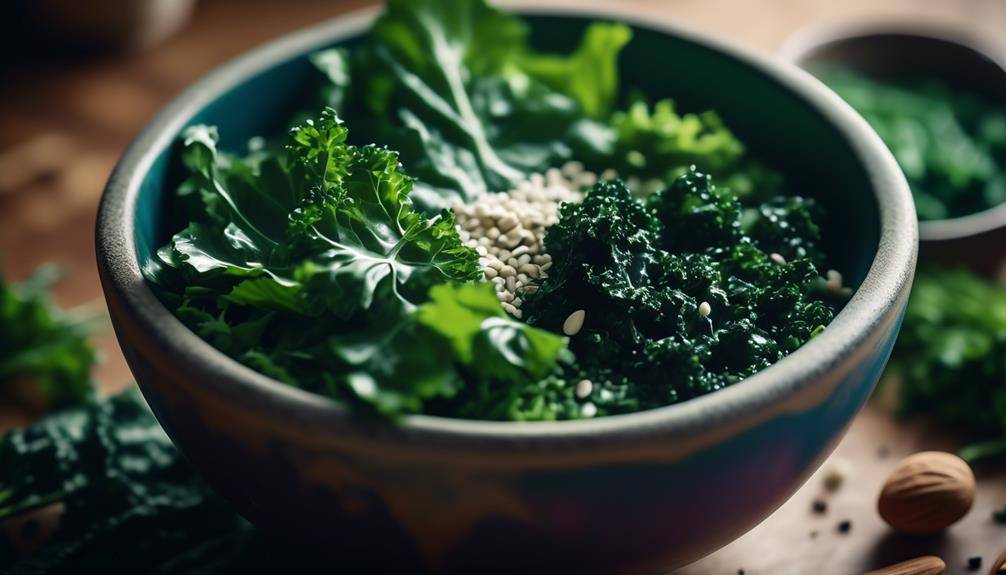
Choosing the Right Vegetables
When you’re selecting vegetables for curing, it’s essential to take into account both their texture and flavor. The right vegetable selection can make a significant difference in the final taste and quality of your cured product. Look for vegetables that have a firm texture, as they tend to hold up better during the curing process. Vegetables like carrots, cucumbers, and radishes are great options because they maintain their crunch and absorb flavors well.
Seasonal availability plays a key role in your vegetable selection. By choosing vegetables that are in season, you not only guarantee better flavor but also support local agriculture. Seasonal vegetables are generally fresher and more nutritious, making them ideal for curing. For instance, during the summer months, you might find an abundance of zucchini and bell peppers, while root vegetables like beets and turnips are more plentiful in the fall and winter.
Also, consider the flavor profile of your chosen vegetables. Some vegetables have a naturally strong flavor, like garlic or onions, while others are more subtle. Balancing these flavors can enhance your final product. Don’t hesitate to mix different vegetables to create a unique taste experience. Experimenting with combinations can lead to delightful surprises.
Preparing Vegetables for Curing
Before you immerse yourself in the curing process, it’s crucial to prep your vegetables properly. The right vegetable selection can make or break your curing experience. Start by choosing fresh, high-quality vegetables with no signs of decay or damage. This guarantees that you’re working with the best possible produce, which will lead to better flavor and texture in the end.
Once you’ve selected your vegetables, it’s time to focus on preparation techniques. Begin by washing your vegetables thoroughly under cold running water to remove dirt and pesticides. For leafy greens, consider soaking them in a basin of water for a few minutes before rinsing to verify they’re clean.
Next, trim any unwanted parts like stems or bruised areas. Depending on the vegetable, you might also want to cut them into uniform pieces to promote even curing. For instance, slicing cucumbers into spears or dicing peppers can help speed up the curing process and allow the flavors to penetrate more effectively.
After that, you can choose to blanch certain vegetables, which involves briefly boiling them and then plunging them into ice water. This technique helps to preserve color and texture while also reducing the enzymatic activity that could spoil them during curing.
Lastly, dry your vegetables thoroughly with a clean towel or let them air dry. Properly prepared vegetables will not only enhance the curing process but also yield delicious results that you can enjoy for months to come.
Safety Tips for Curing
Once your vegetables are prepped and ready for curing, it’s important to keep safety in mind throughout the process. Curing can introduce potential risks, so taking health precautions is essential to guarantee your vegetables remain safe and delicious.
First, always wash your hands thoroughly before handling any food. Good hygiene practices are significant, as they prevent the transfer of harmful bacteria. Use clean utensils and cutting boards, and avoid cross-contamination by keeping raw and cured foods separate.
Next, confirm your curing environment is clean and organized. Wipe down surfaces with a disinfectant and make sure all equipment is sanitized. If you’re using containers to store your cured vegetables, verify they’re food-grade and free from any residues that could spoil your efforts.
Temperature control also plays a fundamental role in safety. Keep your curing vegetables in a cool, dry place to inhibit the growth of harmful microorganisms. Monitor the curing conditions regularly, and if you notice any unusual smells or mold, discard the batch immediately.
Lastly, don’t forget to label your jars or containers with the date and type of vegetable. This practice not only helps you keep track of freshness but also guarantees you consume your cured items within a safe timeframe. By following these safety tips, you can enjoy the rewarding experience of curing vegetables while minimizing health risks.
Simple Curing Recipes
Curing vegetables is a straightforward process that can enhance their flavor and longevity. One of the simplest methods is quick pickling, which allows you to enjoy tangy, flavorful veggies in no time. To start, gather your favorite vegetables, such as cucumbers, carrots, or radishes. Slice them into desired shapes and pack them into a clean jar. In a saucepan, combine equal parts of vinegar and water, then add sugar and salt to taste. Bring the mixture to a simmer, stirring until everything dissolves. Pour the hot liquid over the vegetables, ensuring they’re fully submerged. Seal the jar and let it cool before refrigerating. You’ll have delicious pickled vegetables ready in just a few hours!
In addition to quick pickling, you can elevate your curing game with herb infusions. This method works wonderfully for vegetables like garlic or peppers. Start by heating your choice of oil—olive, sunflower, or even sesame—over low heat. Add fresh herbs like rosemary, thyme, or basil to the warm oil, allowing the flavors to meld for about 10-15 minutes. Once the oil is infused, strain out the herbs and let it cool. Submerge your chopped vegetables in the infused oil, ensuring they’re completely covered. Store this mixture in a jar, and give it a few days to develop its flavors.
With these simple recipes, you’ll discover how easy and rewarding curing vegetables can be!
Storing Cured Vegetables
After you’ve pickled or infused your vegetables, proper storage is key to maintaining their quality and flavor. To guarantee your cured vegetables stay fresh, it’s essential to store them at the right curing temperatures. Generally, a cool, dark place is ideal, as this helps in preserving their taste and texture. Avoid exposing them to direct sunlight or heat, which can degrade the flavors and shorten their shelf life.
When it comes to containers, choose glass jars or airtight containers. These options help minimize exposure to air, which can affect both taste and moisture levels. If your vegetables are too moist, they can develop unwanted bacteria, so make certain to drain any excess liquid before sealing them. Maintaining the right balance of vegetable moisture is critical, as too much moisture can lead to spoilage, while too little can result in dry, unappetizing produce.
If you’re storing pickled vegetables, keep them in the refrigerator for best freshness. The cold temperature will help preserve the crunch and flavor. For infused vegetables, a cool pantry or cellar works well. Just remember to check them regularly for any signs of spoilage, such as off smells or mold.
Troubleshooting Common Issues
When you plunge into curing vegetables, it’s not uncommon to encounter a few hiccups along the way. To help you navigate these challenges, let’s address some common curing mistakes and how to resolve them.
First, watch out for vegetable spoilage. This often happens due to poor moisture control or inadequate salt distribution. Confirm your vegetables are evenly coated with salt, and monitor their moisture levels throughout the curing process. If you notice excess moisture, it could lead to surface mold or fermentation failures.
Speaking of fermentation, it’s crucial to maintain a consistent temperature. Temperature fluctuations can disrupt the curing process, affecting both flavor balance and texture. Aim for a stable environment, ideally between 65°F to 75°F, to guarantee your vegetables ferment correctly.
If you’re facing texture issues, it might be due to incorrect ingredient ratios. Too much salt can make your vegetables overly tough, while too little can result in a mushy texture. Adjust your ratios based on the type of vegetable you’re working with.
Lastly, if you encounter surface mold, don’t panic. While some mold is normal in the curing process, excessive mold can indicate an imbalance. You may need to adjust your moisture control or check your salt distribution. By paying attention to these details, you’ll improve your curing technique and create delicious, well-balanced vegetables.
Frequently Asked Questions: A Great Beginners Guide To Curing Vegetables
How Long Can Cured Vegetables Be Stored?
Cured vegetables can last several months if you maintain proper storage conditions. Generally, their shelf life ranges from 3 to 12 months, depending on factors like humidity, temperature, and packaging. Always check for signs of spoilage.
Can I Use Fresh Herbs in Curing?
Absolutely, you can use fresh herbs in curing! They enhance flavor and offer herb benefits like added nutrients. Experimenting with different herbs can elevate your cured vegetables, making them even more delicious and nutritious. Enjoy the process!
What Are the Signs of Spoiled Cured Vegetables?
When checking for spoiled cured vegetables, look for spoilage indicators like an off smell, discoloration, or mold. You should also notice texture changes, such as excessive softness or sliminess, signaling that something’s gone wrong.
Is Curing Suitable for All Types of Vegetables?
Curing isn’t suitable for all vegetable types. While many root vegetables thrive with curing, others like leafy greens don’t hold up well. Understanding which cured vegetables work best for your recipes is essential for success.
Can I Combine Different Curing Methods?
Yes, you can combine different curing methods! By blending various cure techniques, you enhance flavor profiles and create unique tastes. Experimenting with combinations lets you discover new culinary delights that elevate your dishes to the next level.

Conclusion
Curing vegetables is a rewarding way to enhance flavors and preserve your harvest. With the right ingredients, tools, and methods, you can enjoy delicious cured veggies all year round. Remember to follow safety tips and troubleshoot any issues you encounter. Now that you have the knowledge, it’s time to get started! Experiment with different recipes, and soon you’ll be savoring the fruits of your labor. Happy curing!
If you enjoyed exploring this topic and want to dive even deeper, be sure to check out some of our other articles here on Infinite Flavors. From rich culinary histories to creative twists on classic recipes, there’s always something new to discover. Whether you’re curious about the origins of a dish, looking for fresh inspiration in the kitchen, or simply love learning about food culture, our collection of posts is the perfect next step on your flavor journey.
How To Control Humidity When Curing Food
How To Cure Food For Keto Diet
How To Cure Food Without A Smoker