Amazing Turkish Pastries And Breads: A Complete How-To Guide
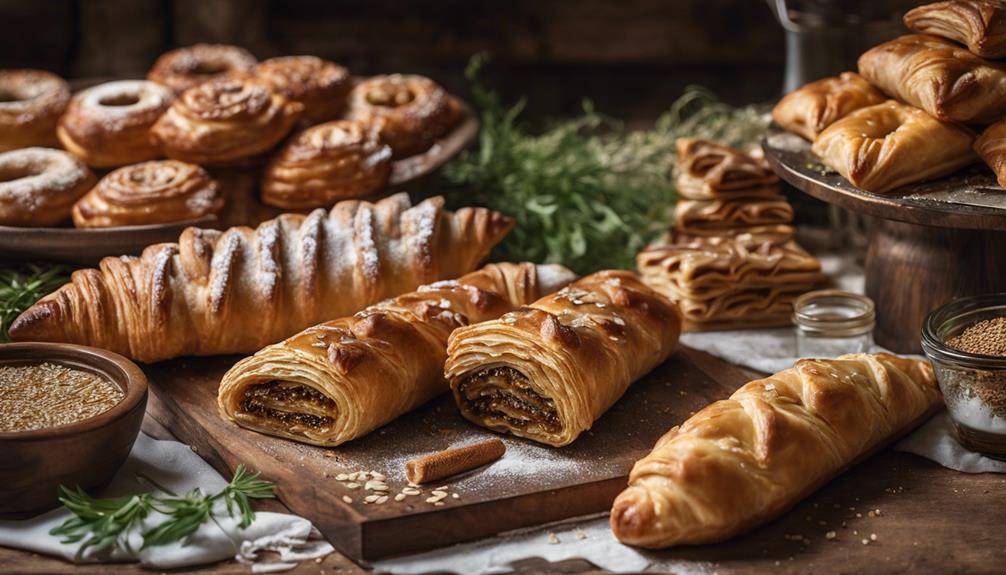
Amazing Turkish Pastries And Breads are a delightful addition to your culinary repertoire. You’ll find favorites like baklava, börek, and simit, each showcasing unique textures and flavors. Start with essential ingredients like all-purpose flour, yeast, and quality fillings to create authentic tastes. You’ll need tools like mixing bowls and baking trays to guarantee a smooth baking process. Mastering techniques such as kneading and resting dough is vital for achieving that perfect flaky layer. Explore the vast variety of Turkish baked goods and their cultural significance, and soon you’ll be crafting delicious treats that impress friends and family. More awaits you on this culinary journey.
Overview of Turkish Baked Goods
When you think of Turkish baked goods, a world of flavors and textures comes to mind. These delightful treats aren’t just delicious; they hold deep cultural significance, reflecting the rich history and traditions of Turkey. Each region contributes its own unique twist, showcasing a variety of ingredients and methods that make Turkish baking an exciting culinary adventure.
In cities like Istanbul, you’ll find iconic pastries such as baklava, filled with nuts and drenched in syrup, representing the Ottoman Empire’s influence. Meanwhile, in the coastal regions, you might encounter lighter, flaky pastries like börek, often stuffed with cheese or spinach, highlighting local ingredients. As you explore different areas of Turkey, you’ll notice how regional variations shape the baked goods you encounter. From the dense, hearty breads of Anatolia to the delicate sweets of the Aegean, each bite tells a story of local customs and ingredients.
Moreover, Turkish baked goods often play a significant role in celebrations and communal gatherings. You’ll likely find sweet pastries served during weddings, religious holidays, and family gatherings, reinforcing their importance in social traditions. As you immerse yourself in this culinary world, you’ll realize that Turkish baked goods are more than just food; they embody the spirit of a culture that values hospitality and shared experiences. Embrace the journey and savor the flavors, knowing each pastry and bread carries with it a wealth of history and pride.
Essential Ingredients for Turkish Baking
To create authentic Turkish baked goods, you’ll need to familiarize yourself with a few crucial ingredients that are foundational to this rich culinary tradition. One of the most critical components is flour. You can choose from various flour varieties, but the most common ones include all-purpose flour, bread flour, and semolina flour. Each type contributes a distinct texture and flavor to your pastries and breads. For instance, semolina flour is often used in making traditional Turkish breads like pide, giving it a unique chewiness.
Another important ingredient is yeast. Different yeast types can greatly affect your baking outcome. Active dry yeast and instant yeast are popular choices among bakers. Active dry yeast needs to be dissolved in warm water before use, while instant yeast can be mixed directly with flour, making it a convenient option for busy bakers. Make sure to check the expiration date on your yeast; fresh yeast will yield better results.
Don’t forget about sugar and salt; both play essential roles in flavor and fermentation. Sugar helps activate the yeast, while salt enhances the overall taste and controls the fermentation process. Finally, incorporating yogurt or milk adds moisture and richness to your dough, resulting in a tender and flavorful final product.
Tools and Equipment Needed
Having the right tools and equipment can make a significant difference in your Turkish baking experience. To start, investing in a good set of baking scales is vital. Accurate measurements guarantee your dough and pastries turn out just right. Whether you’re weighing flour or sugar, a digital scale takes the guesswork out of baking and helps maintain consistency.
Next, you’ll want to have a variety of mixing bowls. Opt for different sizes to accommodate everything from small pastry mixes to larger bread doughs. A sturdy wooden spoon or spatula is essential for mixing and folding ingredients, while a dough scraper makes handling sticky dough much easier.
You’ll also need baking trays and sheets lined with parchment paper for easy release of your pastries. Don’t forget about pastry brushes; they’re perfect for glazing your creations with egg wash or melted butter, giving your pastries that beautiful golden finish.
If you’re planning on making traditional breads, a baking stone can help achieve that perfect crust. A good rolling pin is also a must-have, especially when rolling out dough for baklava or pide.
Lastly, consider investing in a kitchen thermometer. It’ll help you monitor the temperature of your dough and guarantee everything bakes evenly. With these tools in hand, you’ll be well on your way to creating delicious Turkish pastries and breads, making your baking adventures enjoyable and successful.
Classic Turkish Pastries
When you think of classic Turkish pastries, a few popular varieties likely come to mind, like baklava and borek. Understanding the essential baking techniques behind these treats will make all the difference in your kitchen. Let’s explore the sweet and savory delights that define Turkish pastry culture.
Popular Turkish Pastry Varieties
Among the rich tapestry of Turkish cuisine, classic pastries stand out for their unique flavors and delightful textures. You’ll discover an array of sweet pastries like baklava, layered with flaky phyllo dough and filled with crushed nuts, drenched in syrup. Turkish delights, or lokum, offer a chewy alternative, often flavored with rosewater or citrus, making them an irresistible treat.
But it’s not all about sweetness. You can also enjoy savory options like börek, which comes stuffed with cheese, spinach, or minced meat, creating a perfect balance of flavor. Each region in Turkey boasts its own specialties, reflecting local ingredients and traditions. For example, the famous gözleme, a stuffed flatbread, is popular in rural areas and often prepared on the spot.
During festive occasions, you’ll find an abundance of these pastries, showcasing their cultural significance. They bring families and friends together, acting as symbols of hospitality and celebration. So whether you’re indulging in sweet pastries or savoring regional specialties, these classic Turkish pastries are sure to delight your palate and enrich your culinary experience.
Essential Baking Techniques
To master the art of classic Turkish pastries, you’ll often find that practicing essential baking techniques is key. Start by focusing on your kneading techniques. Proper kneading helps develop gluten, giving the dough its strength and elasticity. Aim for a balance between thoroughness and gentleness; you want to work the dough without overdoing it.
Next, pay attention to dough hydration. The right amount of water is vital for achieving that perfect texture. For flakier pastries like börek, a higher hydration level will yield better results. Always measure your ingredients carefully, as even a small difference can affect your dough’s consistency.
As you practice, don’t hesitate to experiment with different types of flour, which can also impact hydration and texture. Remember to let your dough rest; this relaxes the gluten and makes it easier to work with.
Once you’re comfortable with these techniques, you’ll find that your Turkish pastries not only taste incredible but also have that ideal texture that keeps everyone coming back for more. Keep practicing, and soon you’ll be whipping up delicious classics like baklava and simit with confidence!
Making Börek From Scratch
Making börek from scratch is all about choosing the right ingredients and mastering some essential baking techniques. You’ll want to gather fresh produce, quality cheese, and the perfect dough to create that flaky texture everyone loves. Let’s explore how to combine these elements for a delicious result!
Ingredients for Börek
Börek is a delicious Turkish pastry that requires a few essential ingredients to create its flaky layers and rich fillings. To start, you’ll need yufka or phyllo dough, which forms the base of your börek. If you opt for phyllo, make sure you keep it covered with a damp cloth to prevent it from drying out as you work.
Next, consider your börek fillings. Common options include cheese, spinach, minced meat, or potatoes. For a classic cheese filling, use a mixture of feta and ricotta, while sautéed spinach adds a delightful touch. If you prefer meat, ground lamb or beef seasoned with spices will bring a savory depth to your börek.
You’ll also need some oil or melted butter to brush between the layers of dough, giving it that perfectly crispy texture. Salt and pepper are essential seasonings, so don’t forget to include them in your fillings.
With these key ingredients in hand, you’re well on your way to making a variety of börek that’ll impress anyone who tries it. Enjoy experimenting with different börek varieties to find your favorite combination!
Baking Techniques Explained
Creating the perfect börek from scratch requires a few essential baking techniques that guarantee those flaky, golden layers and flavorful fillings come together seamlessly. Start by mastering your kneading techniques. When combining your flour and water, knead the dough until it’s smooth and elastic. This process develops gluten, which is vital for achieving that desired texture.
Once you’ve kneaded your dough, don’t skip the dough resting phase. Allow it to rest for at least 30 minutes. This step helps relax the gluten, making it easier to roll out later and resulting in a more tender final product.
When you’re ready to assemble your börek, roll the rested dough as thin as possible without tearing it. Layer your fillings evenly, and roll or fold the dough as per your recipe. Remember to brush the layers with melted butter or oil to enhance the flakiness.
How to Prepare Simit
When you’re ready to enjoy a taste of Turkey, preparing simit is a delightful endeavor. This iconic sesame-covered bread has a rich simit history, dating back to the Ottoman Empire, where it became a popular street food in Istanbul. To make your own simit, you’ll need flour, yeast, sugar, salt, water, and plenty of sesame seeds for that signature crunch.
Start by mixing warm water with yeast and sugar to activate the yeast. Once it’s frothy, combine it with flour and salt to form a dough. Knead the dough for about 10 minutes until it’s smooth and elastic. Let it rise in a warm area for about an hour or until doubled in size.
While the dough rises, prepare a mixture of molasses and water for dipping your simit. This gives them a unique flavor and helps the sesame seeds adhere. After the dough has risen, divide it into small balls and roll each into a long rope. Twist the ropes into a circular shape, dipping them first into the molasses mixture and then into sesame seeds.
Place the twisted simit on a baking sheet lined with parchment paper. Bake them in a preheated oven at 425°F (220°C) for about 15-20 minutes or until golden brown.
Feel free to explore simit variations, like adding spices or different toppings, to create your own unique twist. Enjoy your freshly baked simit warm, perhaps with cream cheese or as a snack on its own!
Traditional Pide Recipes
When you think of traditional pide, you’re in for a treat with its many delicious variations. You’ll need some essential ingredients to create that perfect dough and filling. Let’s go through a step-by-step guide to make your own pide at home!
Popular Pide Variations
Exploring the world of pide reveals a delightful array of traditional recipes that showcase the rich flavors of Turkish cuisine. You’ll quickly discover that pide comes in various shapes, each adding its own charm to the dish. The classic boat shape, with its raised edges, is perfect for holding generous pide toppings, while a more oval form allows for a different presentation.
When it comes to toppings, the options are endless. One of the most beloved variations is the minced meat pide, where ground lamb or beef is combined with onions, tomatoes, and spices. If you prefer something lighter, try the spinach and feta pide, which offers a revitalizing twist. For cheese lovers, a simple blend of mozzarella and beyaz peynir can create a deliciously gooey filling.
Vegetarian options abound as well, featuring ingredients like mushrooms, peppers, and eggplant. Each region in Turkey has its unique spin on these toppings, so feel free to experiment. Whether you stick to traditional recipes or explore new combinations, making pide is a rewarding culinary experience that brings a taste of Turkey right to your kitchen.
Essential Ingredients Needed
Creating authentic pide at home requires a few vital ingredients that form the foundation of this beloved Turkish dish. First, you’ll want to choose the right Turkish flour types, such as unbleached bread flour, which gives your pide the perfect texture. For a softer crust, you can mix in some all-purpose flour.
Next, consider yeast variations. Active dry yeast is commonly used, but you can experiment with fresh yeast for a richer flavor. Be certain to activate it properly to guarantee your dough rises beautifully.
Spice blends are essential for that authentic taste. Traditional pide often features a mix of sumac, paprika, and black pepper. Feel free to adjust the spices to suit your palate, but don’t skip this step; it’s what elevates your pide!
Lastly, sweeteners used in the dough can enhance the overall flavor. A touch of sugar or honey not only helps activate your yeast but also gives your pide a slight sweetness that balances the savory toppings. With these vital ingredients in hand, you’re well on your way to crafting delicious pide right in your own kitchen!
Step-by-Step Preparation Guide
To make traditional pide, you’ll want to start by preparing your dough. Combine flour, yeast, salt, and water in a mixing bowl, kneading until you achieve a smooth, elastic texture. Let the dough rest for about an hour until it doubles in size. Meanwhile, you can prepare your fillings. For savory pide, consider using ground lamb, onions, and spices, or opt for a cheesy blend of feta and mozzarella. If you’re in the mood for something sweet, try mixing nuts, sugar, and cinnamon for a delicious twist.
Once the dough has risen, divide it into equal portions and roll each out into an oval shape. Place your chosen filling in the center, leaving space at the edges. Fold the sides up, pinching them to create a boat-like shape, which allows the pide to bake perfectly while maintaining a flaky pastry texture. Preheat your oven to a high temperature and bake the pide for about 15-20 minutes or until golden brown. Serve hot, and enjoy the delightful combination of flavors, whether you chose savory or sweet fillings.
Mastering Lavash Bread
While mastering lavash bread may seem challenging at first, you’ll soon find that the process is both rewarding and enjoyable. Lavash has a rich history that dates back thousands of years, originating from the ancient civilizations of the Middle East. Understanding this history helps you appreciate the cultural significance of this flatbread, which has been a staple in many households across the region.
As you engage in making lavash, you’ll discover various regional variations that reflect local traditions and ingredients. For example, Armenian lavash is known for its thin, pliable texture, perfect for wrapping around meats and vegetables, while Turkish lavash can be slightly thicker and used to accompany meals. You can experiment with these styles to find what suits your taste best.
To start, gather your ingredients: flour, water, salt, and yeast. Knead the dough until it’s smooth and elastic, allowing it to rest for a while. This resting period is essential, as it helps develop the gluten, leading to a more elastic final product. When you roll out the dough, aim for an even thickness to guarantee uniform cooking.
Once your lavash is ready, cook it in a hot oven or on a griddle until it puffs up and develops those characteristic brown spots. Remember, practice makes perfect, so don’t be discouraged if your first attempt doesn’t turn out exactly how you envisioned. Embrace the journey, and soon, you’ll be enjoying your homemade lavash bread, a true reflection of your culinary skills.
Tips for Perfecting Texture
Achieving the perfect texture in your lavash bread is vital for both taste and presentation. To get those delightful flaky layers, focus on your dough elasticity. Start with a well-hydrated dough; this guarantees it’s pliable and easier to shape. When mixing your ingredients, use effective kneading techniques. Knead the dough until it’s smooth and elastic, about 10 minutes. This helps develop gluten, which contributes to that ideal texture.
Temperature control plays an important role too. Keep your dough at a consistent, warm temperature during the rising phase, as this encourages fermentation and flavor development. After kneading, allow your dough to rest for at least 30 minutes. This resting period relaxes the gluten, making it easier to roll out and guaranteeing your lavash achieves a crispy crust when baked.
When rolling out the dough, don’t rush. Take your time to create thin, even sheets. A rolling pin with a consistent pressure helps in forming those flaky layers. To enhance moisture retention, you can incorporate a bit of fat into the dough, which adds richness and keeps the lavash tender.
Serving and Enjoying Turkish Breads
How do you elevate your dining experience with Turkish breads? It all comes down to the way you serve and enjoy them. Start by presenting your freshly baked breads, like pide or lavash, on a beautiful platter. This adds visual appeal and invites your guests to dig in.
For serving suggestions, consider accompanying your breads with a variety of dips and spreads. Classic options include hummus, baba ghanoush, or a zesty yogurt dip. You can also add olives, feta cheese, or even a simple olive oil with herbs for dipping. These sides enhance the flavors of the bread and create a balanced taste experience.
When it comes to pairing drinks, think about what complements the rich flavors of your Turkish breads. A glass of traditional Turkish tea or a revitalizing Ayran (a yogurt-based drink) can work wonders. If you prefer something a bit stronger, a light red wine or a crisp white can also be delightful choices. The key is to match the drink to the bread and the toppings you’ve chosen.
Don’t forget the importance of sharing. Turkish culture thrives on communal dining, so encourage your guests to break the bread together. This not only makes the meal more enjoyable, but it also creates a warm atmosphere. By thoughtfully serving and pairing your Turkish breads, you’re sure to create a memorable dining experience that celebrates the richness of Turkish cuisine.
Frequently Asked Questions: Amazing Turkish Pastries And Breads
What Are the Best Storage Methods for Turkish Pastries?
To store your pastries effectively, use freezing techniques for long-term preservation. Make certain they’re wrapped tightly to maintain moisture retention. For short-term storage, keep them in an airtight container at room temperature for freshness.
Can I Use Gluten-Free Flour for Turkish Breads?
Yes, you can use gluten-free flour for Turkish breads. Just experiment with gluten alternatives to achieve the right texture variations. Keep in mind that the flavor and consistency might differ from traditional recipes, but it’s still delicious!
How Long Do Turkish Pastries Last at Room Temperature?
Turkish pastries typically last about 1 to 2 days at room temperature, maintaining their pastry freshness. For better shelf life, store them in an airtight container, but keep an eye on any signs of staleness.
Are There Any Common Allergens in Turkish Pastries?
Yes, there are common allergens in Turkish pastries, like wheat, nuts, and dairy. If you’re allergic, consider using allergy alternatives such as gluten-free flour or nut-free fillings to enjoy delicious treats safely.
What Beverages Pair Well With Turkish Baked Goods?
When enjoying Turkish baked goods, traditional drinks like tea or coffee enhance the flavors beautifully. For modern pairings, you might consider sparkling water or fruity cocktails, which add a revitalizing twist to your experience.

Conclusion
Now that you’ve explored the world of Turkish pastries and breads, it’s time to get baking! With the right ingredients, tools, and a bit of practice, you’ll be able to whip up delicious börek, pide, and lavash that’ll impress your family and friends. Don’t forget to experiment and find your perfect texture. Enjoy serving these delightful creations at your next gathering, and savor the rich flavors of Turkey right in your own kitchen! Happy baking!