10 Best Steps To Perfect Holiday Turkey Cooking
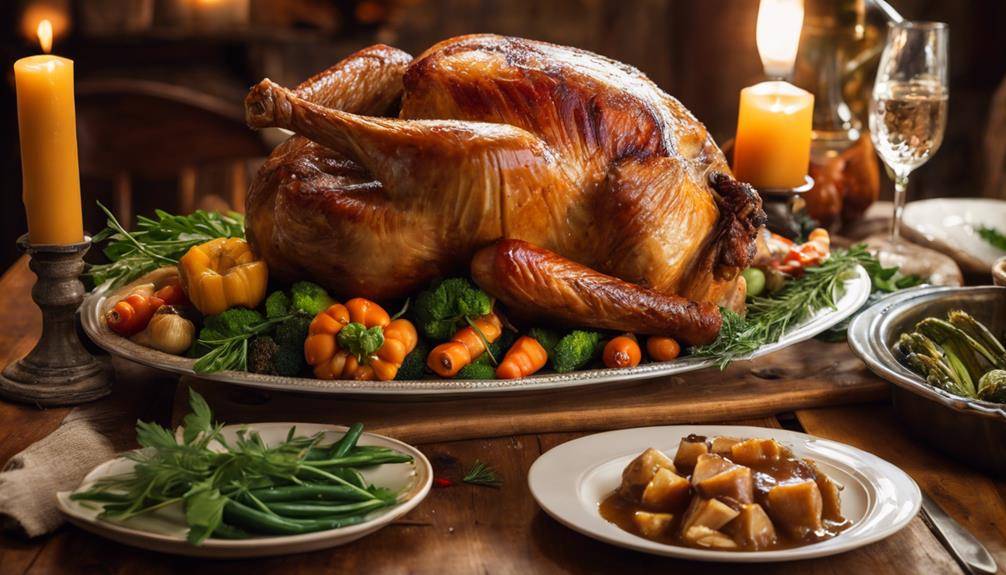
10 Best Steps To Perfect Holiday Turkey Cooking: Perfect holiday turkey cooking starts with choosing the right turkey, ideally 1 to 1.5 pounds per person. Thaw it safely in the refrigerator or using cold water. Enhance flavor by brining, whether wet or dry, a day or two before cooking. Season well with herbs, spices, or marinades. Prepare your cooking space with essential tools and ingredients ready to go. Monitor the temperature to guarantee it hits 165°F. Let your turkey rest for at least 20 minutes after cooking. Finally, carve with precision and store leftovers properly. Want to make your turkey even tastier? Discover the next essential steps!
Choose the Right Turkey
Click Here and Turn Every Masterpiece into a Showstopper!
Choosing the right turkey is vital for a successful holiday feast. You'll want to reflect on the various turkey breeds available, as each offers unique flavors and textures. For instance, heritage breeds like Bourbon Red or Narragansett provide rich, traditional tastes, while commercially raised Broad Breasted Whites are popular for their size and meat yield. Think about your guests and what they might enjoy; the right breed can elevate your holiday meal.
Next, size matters. A general rule is to plan for about 1 to 1.5 pounds of turkey per person. This guarantees everyone gets enough, plus a little extra for those irresistible leftovers. Once you know how many people you're feeding, you can choose a turkey that fits the bill.
Cooking times are essential, too. A turkey's weight influences how long it needs in the oven. For example, if you're roasting a 12-pound turkey, expect it to take around 3 to 3.5 hours at 325°F. Don't forget to check the internal temperature; it should reach at least 165°F in the thickest part of the breast.
When you pick the right turkey breed and size, and you keep cooking times in mind, you're setting yourself up for a memorable holiday feast. With a bit of planning, you can impress your guests and enjoy the delicious results.
Thawing Your Turkey Safely
When it comes to thawing your turkey safely, you've got a couple of reliable methods to choose from. The refrigerator thawing method is the safest, while cold water thawing can speed things up if you're in a pinch. Let's explore how to use both techniques effectively to guarantee your turkey is ready for cooking.
Refrigerator Thawing Method
Thawing your turkey safely is essential for a delicious holiday feast, and the refrigerator thawing method is one of the best ways to do it. This method allows you to keep your turkey at a safe temperature while it gradually thaws, minimizing the risk of bacterial growth. To use this method effectively, plan ahead, as you'll need about 24 hours of thawing time for every 4 to 5 pounds of turkey.
For example, if you have a 16-pound turkey, it'll take about four days to completely thaw in the refrigerator. Make sure to place the turkey in a leak-proof container to catch any juices that might drip, guaranteeing safe practices in your fridge.
It's important to keep your refrigerator temperature at or below 40°F to guarantee your turkey remains in the safe zone during thawing. Once thawed, you can keep your turkey in the refrigerator for another one to two days before cooking. This method not only assures safety but also preserves the quality of your turkey, setting the stage for a mouthwatering holiday meal. So, remember to plan and enjoy the process!
Cold Water Thawing
Another effective method for thawing your turkey safely is the cold water thawing technique. This method can save you time, especially if you forgot to take your turkey out of the freezer in advance. To start, make certain your turkey is in a leak-proof plastic bag to prevent any water from getting inside. This helps maintain the turkey's quality and keeps it safe from bacteria.
Next, submerge the turkey in cold water, changing the water every 30 minutes to keep it cold. A good rule of thumb for thawing timing is to allow about 30 minutes of thawing per pound. For example, if you have a 12-pound turkey, expect it to take around six hours to thaw completely.
Remember these cold water tips: always keep the water cold, and never leave the turkey out at room temperature. Once your turkey's fully thawed, cook it immediately to guarantee safety. With this method, you'll have a perfectly thawed turkey, ready for roasting, and your holiday meal will be off to a great start!
Brining for Flavor
Brining your turkey is one of the best ways to enhance its flavor and assure a juicy texture. When you soak your turkey in a saltwater solution, you're allowing it to absorb moisture and seasonings, which results in a more flavorful and tender bird. There are various brining techniques you can use, each offering unique benefits.
One popular method is the wet brine, where you dissolve salt in water and add sugar, herbs, and spices for flavor combinations that suit your taste. You might choose classic ingredients like garlic, thyme, and bay leaves, or get creative with citrus peels and spices like cinnamon or allspice. Just remember to balance the saltiness with other flavors to avoid overpowering the turkey.
Alternatively, dry brining involves rubbing a mixture of salt and spices directly onto the turkey's skin. This technique allows the turkey to absorb the flavors without the need for soaking. It also leads to a crispier skin when cooked, as it draws out moisture from the surface before roasting.
Regardless of the brining method you choose, be certain to start the process at least a day or two before cooking. This assures that the flavors penetrate deep into the meat. After brining, rinse the turkey to remove excess salt, and pat it dry to prepare for seasoning and roasting. By investing time in brining, you're setting the stage for a delicious, mouthwatering holiday turkey that'll impress your guests.
Seasoning Techniques
Once you've brined your turkey, it's time to kick up the flavor with effective seasoning techniques. You can start by choosing the right herb blends that complement your turkey. Consider combinations like rosemary, thyme, and sage for a classic touch. The balance of spice ratios is vital; too much can overpower, while too little might leave your turkey bland.
When it comes to seasoning application, think about using dry rubs. A mix of salt, pepper, garlic powder, and paprika makes a simple yet delicious rub. Massage this blend all over the turkey, ensuring it gets into every crevice for maximum flavor. Alternatively, marinating techniques can work wonders, too. A marinade incorporating olive oil, vinegar, and your favorite herbs can infuse the meat with moisture and taste.
Citrus infusions are another excellent option. Squeeze fresh lemon or orange juice over your turkey, or stuff the cavity with citrus halves for a zesty kick. This not only enhances the flavor profile but also adds a revitalizing aroma.
Don't forget about garlic combinations! Roasted garlic can elevate your turkey to new heights. Mix it with your herb blend or incorporate it into your marinade for that mouthwatering depth.
Experiment with these techniques to discover the perfect flavor profile for your holiday turkey. With the right seasonings, your turkey will be the star of the feast, leaving everyone craving more.
Preparing Your Cooking Space
Before you start cooking, make sure your countertop is clear and ready for action. Gather all the essential tools you'll need, and organize your ingredients efficiently to keep everything within reach. A well-prepared space sets the stage for a successful turkey feast!
Clear Countertop Space
Creating the perfect holiday turkey starts with a clean and organized workspace. Before starting the cooking process, take a moment to focus on your countertop organization. Start by clearing everything off your countertops, including small appliances, decorative items, and any clutter that's accumulated over time. This decluttering tip not only gives you more space to work but also helps you mentally prepare for the task ahead.
Once you've cleared the surfaces, wipe them down to guarantee they're sanitized and ready for food preparation. As you put back essential items, consider what you truly need. Limit the items on your counter to those that'll assist you in cooking the turkey, like mixing bowls and cutting boards.
If you find you have too many unnecessary kitchen gadgets, store them away. A well-organized countertop can make a significant difference in your cooking efficiency. With your workspace decluttered and ready, you'll feel more focused and less stressed as you set out on the journey to create a delicious holiday turkey that everyone will rave about.
Gather Essential Tools
Having the right tools at your fingertips is essential for a successful turkey cooking experience. Start by gathering a sturdy roasting pan; this will be your key to achieving that golden-brown crust while keeping all those delicious drippings for gravy. Make certain the pan is large enough to accommodate your turkey comfortably.
Next, don't forget a reliable turkey baster. It'll help you keep your turkey moist by basting it with its own juices throughout the cooking process. This simple tool makes a huge difference in flavor and texture, so it's worth having on hand.
Additionally, consider using a meat thermometer to ascertain your turkey reaches the perfect internal temperature. This will take the guesswork out of cooking and help you avoid a dry bird.
You may also want to have some kitchen twine handy to tie the legs together, promoting even cooking. Finally, make sure you have a carving knife and a cutting board ready for when it's time to serve your masterpiece. With these essential tools, you'll be well-prepared to create a holiday turkey that'll impress everyone at your table.
Organize Ingredients Efficiently
Efficiently organizing your ingredients is essential for a smooth turkey cooking experience. Start by gathering all your ingredients in one area. Check your ingredient storage, making sure everything is fresh and ready. Items like herbs, spices, and stock should be easily accessible.
Next, create a prep timeline. Break down your tasks into manageable steps, noting what needs to be done and when. For instance, marinating the turkey the day before can save you time on the big day. As you organize, keep similar items together. Place your seasonings in one spot, and your vegetables in another.
Using clear containers or labels can help you quickly identify what you need. This way, you won't waste time rummaging through cabinets or drawers.
Cooking Methods Explained
When it comes to cooking the perfect holiday turkey, understanding the various methods can make all the difference. You've got several options to weigh, each with its own unique flavor and texture.
Roasting techniques are the most traditional and popular choice. Preheat your oven to the right temperature, usually around 325°F, and baste your turkey periodically to keep it moist. Experiment with herb combinations like rosemary and thyme to enhance the flavor.
If you're looking for something a bit different, smoking methods can give your turkey a deep, rich flavor. Choose your wood chips wisely—hickory or applewood works well—and monitor the cooking times closely, as smoking can take longer than roasting.
Frying options are another fantastic way to achieve a crispy skin. Using a large pot and plenty of oil, you'll need to guarantee your turkey is fully submerged. Keep safety in mind, and follow instructions to avoid any mishaps.
Sous vide is a modern technique gaining popularity. You'll seal your turkey in a bag and cook it in a water bath at a controlled temperature for hours, resulting in perfectly tender meat.
Don't forget about presentation ideas! A well-cooked turkey deserves to shine on your table. Garnish with fresh herbs or citrus fruits for a festive look. No matter which method you choose, remember to incorporate those basting tips and flavor infusions to elevate your holiday feast!
Click Here and Turn Every Masterpiece into a Showstopper!
Monitoring the Temperature
To guarantee your turkey is perfectly cooked, you need to monitor its temperature closely. Using a meat thermometer is essential, and don't forget to check multiple areas for accuracy. This way, you can avoid any surprises when it's time to carve.
Use a Meat Thermometer
Using a meat thermometer is vital for guaranteeing your holiday turkey is cooked to perfection. With various meat thermometer types available, it's important to choose one that suits your cooking style. Instant-read thermometers are quick and easy, while probe thermometers allow you to monitor the temperature without opening the oven.
When using a meat thermometer, you're aiming for temperature accuracy to avoid undercooking or overcooking your turkey. The USDA recommends cooking your turkey to an internal temperature of 165°F (74°C). This guarantees that harmful bacteria are eliminated, making your meal safe to enjoy.
To get the best results, insert the thermometer into the thickest part of the turkey, avoiding bone, as this can give you an inaccurate reading. If you're using a probe thermometer, you can set it to alert you when your turkey reaches the desired temperature.
Check Multiple Areas
After confirming your turkey reaches the correct internal temperature with a meat thermometer, it's important to check multiple areas to confirm even cooking. Turkey history shows that this practice is rooted in cooking traditions, where families have gathered to enjoy a perfectly roasted bird. You'll want to probe the thickest parts of the breast and thigh, as these areas often take longer to cook.
Insert the thermometer into the thickest part without touching the bone, which can give you a false reading. Ideally, the breast should reach 165°F, while the thigh should hit around 175°F. If your turkey has stuffing, confirm that the center of the stuffing also reaches 165°F for safety.
Resting the Turkey
Resting the turkey is a crucial step that you shouldn't overlook. After all your hard work in cooking, letting your turkey rest allows the juices to redistribute throughout the meat, ensuring each slice is moist and flavorful. So, how do you get this right? It all comes down to resting techniques and ideal timing.
Start by removing the turkey from the oven and placing it on a cutting board or a large platter. Cover it loosely with aluminum foil to keep it warm without trapping too much steam, which could make the skin soggy. Let it rest for at least 20 to 30 minutes. This gives the muscle fibers time to relax and reabsorb the juices. If you've cooked a larger bird, like a 20-pound turkey, consider resting it for up to 45 minutes.
During this time, you can prepare your sides or gather your guests, making it a perfect opportunity to enjoy the ambiance of your holiday gathering. Remember, the longer you let the turkey rest, the better the outcome. This simple yet effective technique can elevate your holiday feast.
Once the resting period is over, you'll be ready for the next step—carving. But for now, trust the process, and give your turkey the time it deserves to achieve that juicy, succulent perfection. Your guests will appreciate the difference, and you'll be glad you took the time to rest your turkey properly.
Carving With Precision
Carving a turkey with precision can elevate your holiday meal from ordinary to extraordinary. Mastering the right carving techniques not only enhances the presentation but also guarantees everyone gets a taste of the juicy meat. Start by selecting the appropriate knife types. A sharp carving knife is essential; it slices through the meat cleanly, while a carving fork helps steady the turkey as you work.
Begin by removing the legs. Hold the turkey steady with the fork and cut through the skin connecting the leg to the body. Bend the leg back until you hear a pop, then slice through the joint to separate it. Repeat this for the other leg. Next, tackle the breast meat. Position your knife at the top of the breast and slice downwards, following the contour of the rib cage. Aim for even, thick slices that will impress your guests.
Don't forget about the wings! They can be cut off similarly to the legs by finding the joint and slicing through. As you carve, keep the meat intact by using smooth, even strokes. Consider placing the turkey on a large cutting board to catch any juices, which you can use later for gravy.
With practice, you'll become proficient in carving your turkey with precision. Your efforts will surely be appreciated, as beautifully carved turkey adds that touch of sophistication to your holiday feast. Enjoy the process and savor each moment as you prepare to serve your guests.
Serving and Storing Leftovers
Leftover turkey is a delightful bonus of your holiday feast, and knowing how to serve and store it properly can maximize its flavor and freshness. First, when serving, slice the turkey into manageable pieces. This not only makes it easier for your guests to enjoy but also helps in even reheating later. Consider pairing it with your favorite sauces or gravies to enhance the flavor. You can also create delicious leftover recipes like turkey sandwiches, turkey pot pie, or turkey soup that will keep your meals exciting.
When it comes to storing your leftovers, follow some key storage tips. Cool the turkey to room temperature before transferring it to airtight containers. This prevents condensation, which can lead to sogginess. Ideally, you should refrigerate leftovers within two hours of serving to keep them safe. Make sure to consume refrigerated turkey within three to four days, or freeze it if you plan to keep it longer.
For freezing, wrap portions tightly in plastic wrap or aluminum foil, and place them in freezer-safe bags. Label the bags with the date, so you know when to use them. Remember, frozen turkey maintains its best quality for about four to six months. When you're ready to enjoy those leftovers, thaw them in the fridge overnight, and reheat to an internal temperature of 165°F. With these serving and storage strategies, you'll make the most of your holiday turkey, ensuring delicious meals long after the festivities are over.
Click Here and Turn Every Masterpiece into a Showstopper!
Frequently Asked Questions: 10 Best Steps To Perfect Holiday Turkey Cooking
How Do I Choose the Right Size Turkey for My Guests?
To choose the right size turkey, consider your guest preferences. Generally, plan for about one pound per person. If your guests love leftovers, you might want a slightly larger turkey to satisfy everyone.
Can I Cook a Frozen Turkey Without Thawing It First?
Yes, you can cook a frozen turkey without thawing. Just remember, cooking times will be longer. Seasoning options might be limited initially, but you can add flavors once it's partially cooked. Enjoy the process!
What Are the Best Side Dishes to Serve With Turkey?
When planning your Thanksgiving traditions, think about turkey pairings that complement its flavor. Classic sides like mashed potatoes, green bean casserole, and cranberry sauce enhance your meal, creating a festive atmosphere everyone will enjoy.
How Long Can Leftover Turkey Be Stored in the Fridge?
You can store leftover turkey in the fridge for up to four days. Make sure to pack it properly to guarantee quality. Check out delicious leftover recipes to enjoy your turkey storage creatively!
Is It Safe to Reheat Turkey Multiple Times?
It's not safe to reheat turkey multiple times. Each reheating increases the risk of bacteria growth. Follow turkey storage tips: keep leftovers refrigerated and consume within three to four days for ideal turkey reheating safety.

Conclusion
Now that you've mastered these 10 steps for cooking the perfect holiday turkey, you're ready to impress your guests with a delicious centerpiece. Remember to choose the right bird, thaw it safely, and don't skip the brining! Keep an eye on the temperature, let it rest, and carve with care. With these tips, you'll not only serve a mouthwatering turkey but also create lasting memories around the table. Enjoy every bite and the joy of the season!