11 Essential Tips For Baking Crusty Loaf Bread
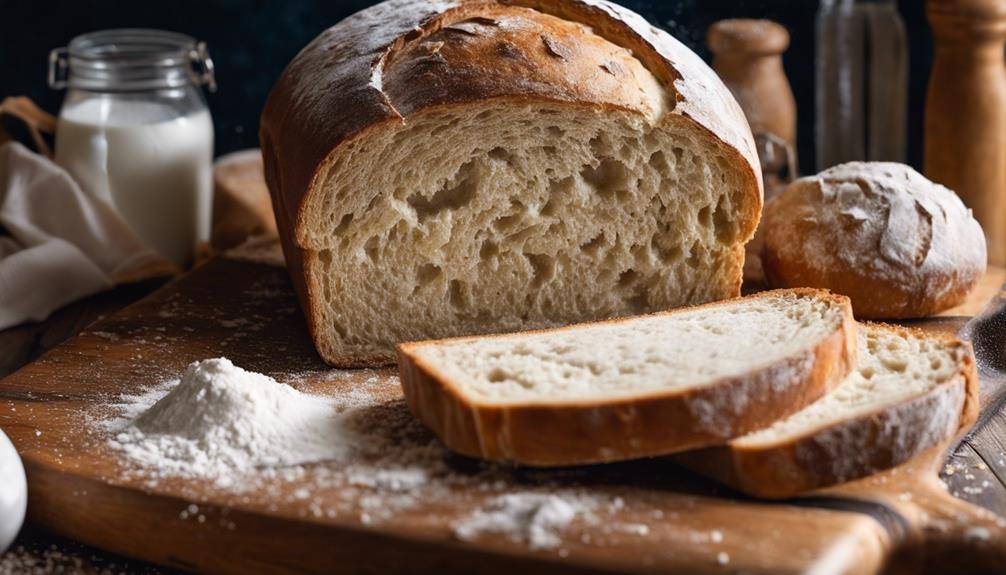
11 Essential Tips For Baking Crusty Loaf Bread: To bake a crusty loaf of bread that impresses, start by choosing high-protein bread flour and measuring ingredients accurately. Use fresh yeast for maximum rise, and focus on achieving the right dough consistency by adjusting hydration levels. Knead effectively to build gluten strength, and let your dough ferment for ideal flavor. Preheat your oven and create steam for that perfect crust. Monitor your baking time to avoid under or overcooking, and always cool the loaf before slicing. These steps will lead you to crusty perfection, and there's even more to discover for that ultimate baking experience.
Choose the Right Flour
Click Here and Turn Every Masterpiece into a Showstopper!
Choosing the right flour is essential for baking a crusty loaf bread that has the perfect texture and flavor. Different flour types have varying protein content, which directly affects the bread's structure. For a crusty loaf, you'll want a flour with higher protein, such as bread flour, which typically contains around 12-14% protein. This helps develop gluten, giving your bread that desirable chew.
If you're interested in whole grains, consider using whole wheat flour. While it adds depth of flavor and nutrition, keep in mind that it absorbs more water, so you might need to adjust your hydration levels. Specialty flours, like rye or spelt, can also bring unique tastes and textures to your bread.
For those who need gluten-free options, there are various gluten-free flours available, such as almond or rice flour. However, these often require blending with other flours or binders to achieve a satisfactory loaf.
Proper flour storage is vital, too. Keep your flour in a cool, dry place, ideally in an airtight container, to maintain its quality. Be aware of regional differences in flour; some areas may offer unique local flours that can elevate your baking.
Lastly, understand the milling processes. Stone-ground flours retain more nutrients and flavor compared to highly processed options. By choosing the right flour, you'll set a solid foundation for your delicious, crusty loaf bread. Happy baking!
Measure Ingredients Accurately
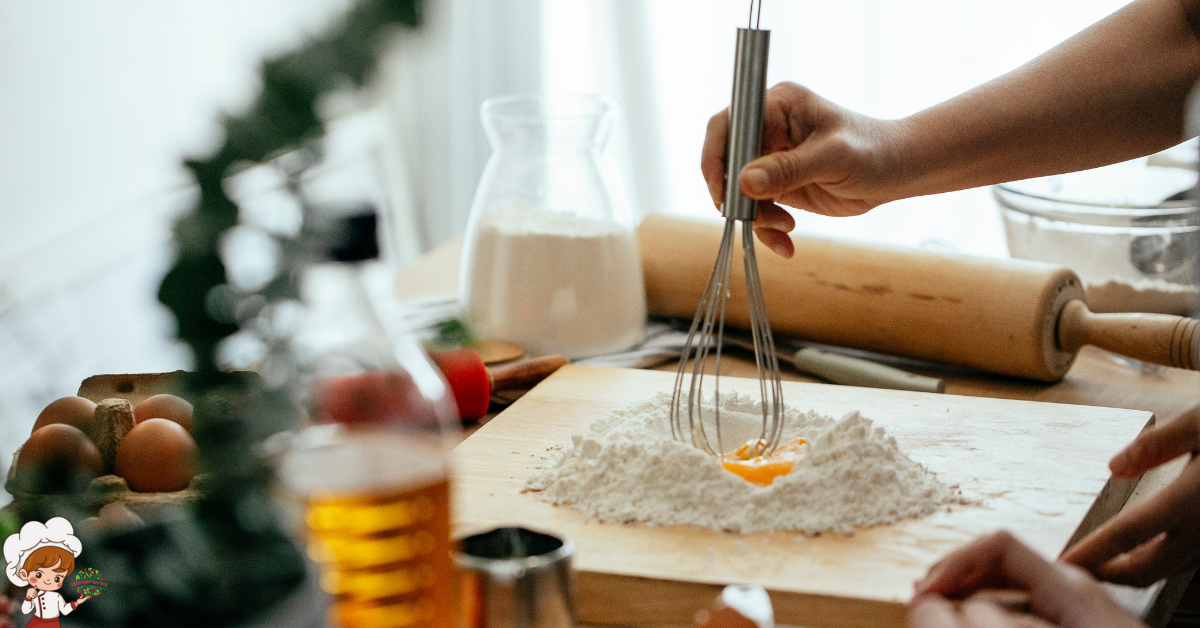
Once you've picked the right flour, accurately measuring your ingredients is key to achieving a crusty loaf bread. Precision matters in baking, as the balance of ingredient ratios can make or break your loaf. Start by gathering your measuring tools; a kitchen scale is your best friend for measuring flour, as weight is more reliable than volume. If you don't have a scale, use dry measuring cups for flour and liquid measuring cups for water or other liquids, guaranteeing you avoid packing the flour down.
When measuring flour, spoon it into your cup and level it off with a knife to avoid adding too much. For liquids, pour until you reach the desired mark, checking at eye level. Remember, small discrepancies can lead to a loaf that's too dense or too dry, so take your time.
Next, consider the ingredient ratios. A standard bread recipe often calls for a ratio of 3:1 flour to water. Adjusting these ratios slightly can impact the crust and texture of your bread. If you're experimenting with other ingredients like seeds or nuts, keep their proportions in check to guarantee you maintain the bread's structure.
Lastly, don't forget about salt! It not only enhances flavor but also strengthens the dough. Follow these measuring tips, and you'll be well on your way to baking a delicious crusty loaf that's sure to impress.
Use Fresh Yeast
Using fresh yeast is fundamental for achieving that perfect rise in your crusty loaf bread. When you use fresh yeast, you're ensuring that your dough gets the maximum lift and flavor. It's worth noting that fresh yeast has a shorter shelf life than dried yeast, so proper yeast storage is essential. Keep it in the refrigerator, and use it within a couple of weeks for the best results.
Before you start your baking, you need to activate your yeast. This step is critical, as it helps you confirm that your yeast is alive and ready to work. To activate your fresh yeast, crumble it into a small bowl with a pinch of sugar and some warm water. Let it sit for about 10 minutes. If you see bubbles forming, you're good to go! If not, your yeast may be too old or improperly stored, and it's time to get a new batch.
When using fresh yeast in your recipes, remember that it generally requires a higher quantity than dry yeast. A common ratio is about 2 to 3 times more fresh yeast compared to dry. Once activated, mix it into your dough along with your other ingredients, and watch as your bread rises beautifully. Using fresh yeast not only enhances the texture but also elevates the flavor, making your crusty loaf bread truly irresistible.
Perfect Your Dough Consistency
To achieve that perfect crusty loaf, your dough consistency is key. It all starts with the right hydration level, which affects the texture and rise of your bread. Once you've got that down, mastering your kneading technique will help you develop the gluten structure needed for a great bake.
Hydration Level Matters
Achieving the right hydration level is essential for perfecting your dough consistency when baking crusty loaf bread. The hydration level refers to the ratio of water to flour in your dough, and it greatly impacts the final texture and crust of your loaf. Different hydration variations can lead to distinctly different results. For instance, a higher hydration level creates a wetter dough, which can produce a more open crumb and a crustier exterior.
However, too much water can make your dough difficult to handle, leading to potential frustrations. It's vital to find that sweet spot where the hydration effects enhance your bread without overwhelming you. Generally, starting with a hydration level around 65-75% is a good rule of thumb for crusty loaf bread.
Keep in mind that factors like humidity and flour type can affect how much water you need. Experimenting with small adjustments will help you understand how different hydration levels affect your dough. As you practice, you'll discover the ideal consistency that yields the crusty, flavorful bread you desire. Remember, getting this right is a key step toward baking your perfect loaf!
Kneading Techniques Explained
Once you've nailed the right hydration level, the next step is mastering kneading techniques to perfect your dough consistency. Effective kneading is essential for developing gluten, which gives your bread that sought-after structure and chewiness.
Start by using stretching techniques. This involves pulling the dough gently and then folding it back onto itself. You can do this by grabbing one edge of the dough, stretching it out, and folding it over the center. Rotate the dough a quarter turn and repeat. This method encourages gluten development without overworking the dough.
Incorporate folding methods as well. After a series of stretches, let the dough rest for a few minutes. Then, perform a series of folds—grab one side of the dough, stretch it upward, and fold it over to the opposite side. Turn the dough and repeat until you've folded all sides. This technique not only strengthens the dough but also helps incorporate air, leading to a lighter loaf.
Knead Properly
Kneading is essential for developing gluten, which gives your bread its structure and chewiness. You'll want to master a few key techniques to guarantee your dough comes together beautifully. Let's explore how proper kneading can transform your loaf into a crusty masterpiece.
Importance of Gluten Development
To create that perfect crusty loaf, you've got to focus on gluten development. This process is essential for forming a strong gluten structure, which gives your bread the necessary framework to rise and hold its shape. When you knead the dough properly, you're aligning the gluten strands, enhancing the dough's elasticity. This elasticity allows your loaf to expand in the oven, creating those lovely air pockets that contribute to a crusty exterior and a soft interior.
If you skip this step, you risk ending up with a dense loaf that lacks the texture you're after. Proper gluten development not only supports the rise but also helps trap the gases produced during fermentation, ensuring that your bread is light and airy.
Kneading Techniques Explained
Mastering the art of kneading is essential for achieving that ideal crusty loaf. When you knead your dough, you're developing the gluten structure that gives your bread its chewy texture. Start with basic stretching techniques: gently pull the dough away from you, then fold it back over itself. This method helps to incorporate air and strengthen the gluten.
Next, try the fold method. With this technique, you'll flatten the dough slightly, then fold it into thirds, like a letter. Rotate the dough a quarter turn and repeat. This not only builds strength but also helps to create a uniform texture throughout the loaf.
Kneading shouldn't feel like a chore. Enjoy the tactile sensation of working with the dough, and remember to listen to its cues. If it feels too sticky, add a bit of flour; if it's too dry, a splash of water can help. Aim for a smooth, elastic dough that springs back when poked. With practice, you'll find the perfect kneading rhythm, setting the stage for a crusty, flavorful loaf that's sure to impress.
Allow for Adequate Fermentation
Allowing for adequate fermentation is vital in creating a crusty loaf that boasts flavor and texture. When you let your dough ferment properly, you reveal the fermentation benefits that contribute to a more complex taste and an airy crumb. The process involves allowing yeast and bacteria to work their magic, breaking down sugars and producing carbon dioxide. This not only helps the dough rise but also enhances the flavor profile.
Fermentation timing is significant. You'll want to let your dough rest for at least a couple of hours at room temperature. This allows the yeast to become active and start its work. If you're short on time, consider a shorter bulk fermentation, but know that it may compromise some flavor and texture. Ideally, you should aim for a longer fermentation, even overnight in the fridge, which can lead to an even better flavor.
During fermentation, keep an eye on the dough. It should roughly double in size, indicating that the yeast is doing its job. If you rush this process, your loaf may turn out dense and lacking the desired crustiness. So, resist the urge to skip this important step. Instead, embrace the waiting game and enjoy the transformation your dough undergoes. By allowing adequate fermentation, you're not just baking bread; you're crafting a delicious crusty loaf that's worth every moment spent waiting.
Click Here and Turn Every Masterpiece into a Showstopper!
Shape the Loaf Correctly
Shaping your loaf correctly is essential for achieving that perfect crusty finish. Start by choosing the right dough texture and mastering basic shaping techniques to create a strong structure. Remember, ensuring even surface tension will help your bread rise beautifully in the oven.
Choose Appropriate Dough Texture
Achieving the right dough texture is essential for shaping a perfect loaf. You need to focus on dough elasticity, as this directly affects how your loaf will rise and hold its shape. When your dough has the right elasticity, it'll stretch without tearing, allowing for a beautiful, airy crumb once baked.
Fermentation temperature plays an important role in developing this elasticity. If your dough ferments in a warmer environment, it'll rise faster, but too much heat can weaken the gluten structure. Aim for a controlled fermentation temperature, ideally around 75°F to 80°F. This helps create a balanced dough that's easy to work with.
As you knead, keep an eye on how the dough feels. It should be smooth and elastic, showing signs of strength. If it's too sticky, you might need to add a bit more flour; if it's too dry, a splash of water can help. Remember, the right texture not only makes shaping easier but also contributes to that crusty exterior and soft interior you're aiming for. So, take your time, pay attention to the dough, and you'll be well on your way to baking a perfect loaf.
Master Basic Shaping Techniques
Once you've mastered the right dough texture, it's time to focus on shaping your loaf correctly. Proper shaping enhances the final appearance and contributes to the crusty texture you desire. Start by gently turning your dough out onto a floured surface. Use your fingertips to press it into a rectangle, careful not to deflate it too much.
Next, choose a shaping method that suits your style. For a basic round loaf, fold the edges toward the center, creating tension on the surface. For a batard or oblong shape, taper the ends as you roll the dough into a log. Remember, good dough handling is essential here; too much pressure can ruin your hard work.
Once you've shaped the loaf, let it rest for a brief moment before placing it in the final proofing basket. This helps in achieving a uniform shape and sets you up for success. Don't rush this step—allow your dough the time it needs to develop. With practice, you'll find your preferred shaping methods and elevate your bread-baking game.
Ensure Even Surface Tension
Creating even surface tension is essential for a beautifully shaped loaf. When you shape your dough, you want to maintain its elasticity while ensuring that the surface is taut. Start with a well-floured surface and gently flatten your dough. As you shape it, use your hands to create a smooth surface. Imagine you're wrapping the dough around itself, tucking it under to build that tension.
You can achieve this by using a technique called "bench kneading." This involves pushing the dough against the work surface while rotating it. This action helps develop the dough's elasticity and creates that all-important surface tension.
Don't rush—take your time to shape it correctly. If the dough feels loose or slack, you might end up with a flat loaf. Instead, focus on creating a rounded shape, pulling the dough towards the center as you go.
Once you've shaped your loaf, let it rest for a short while before baking. This resting period allows the dough to relax, making it easier to handle and giving you a crusty, well-formed bread. Remember, even surface tension is your secret weapon for stunning crusty loaves!
Preheat Your Oven
Preheating your oven is an indispensable step in baking crusty loaf bread that shouldn't be overlooked. It sets the stage for creating that perfect crust and internal texture you desire. To achieve the best results, you'll want to preheat your oven to the right temperature, typically between 450°F to 475°F. This high heat is essential for the bread to rise properly and develop a beautiful, golden crust.
If you're using baking stones, now's the time to place them in the oven as it preheats. Baking stones retain heat exceptionally well, helping to create a stable baking environment. By preheating the stones along with the oven, you guarantee that they reach the same temperature, which aids in even baking and promotes a crusty exterior.
Make sure to allow at least 30 minutes for your oven and baking stones to heat up adequately. This duration guarantees that the stones are hot enough to create the initial burst of steam when you place the bread inside, which is essential for achieving that crusty texture.
Don't rush this process; patience pays off in the form of delicious bread. If your oven has a built-in thermometer, use it to double-check that the oven temperature is accurate. An oven that's not hot enough can lead to dense, undercooked bread, while one that's too hot can burn the crust before the inside is fully baked. Remember, a well-preheated oven is one of your best allies in baking crusty loaf bread.
Create Steam in the Oven
A hot oven alone won't guarantee that crusty loaf you're after; you need to create steam during the baking process. Oven humidity plays a vital role in achieving that perfect crust. Without steam, your bread can dry out too quickly, preventing it from expanding properly and forming a beautiful crust.
To create steam, you can use several steam methods. One popular method is to place a cast-iron skillet or a baking tray on the bottom rack of your oven while it preheats. When you're ready to bake, pour a cup of hot water into the skillet or tray. The steam generated will help keep your loaf moist in the initial baking phase.
Another effective method involves using a spray bottle filled with water. Just before you slide your loaf into the oven, give the walls of the oven a few quick sprays. Repeat this process a couple of times during the first few minutes of baking to maintain the ideal oven humidity.
Some bakers even opt for using a Dutch oven. Preheat the pot with the lid on, then carefully place your dough inside and cover it before baking. This traps steam inside, resulting in a beautifully browned crust.
Whichever steam method you choose, just remember that creating the right amount of humidity will elevate your crusty loaf bread to a whole new level. Happy baking!
Monitor Baking Time
Monitoring baking time is vital for achieving that perfect crusty loaf. Every oven behaves a bit differently, so it's important to keep an eye on your bread as it bakes. Start by preheating your oven to the recommended baking temperature, making sure it's hot enough to create that desired crust. As a general rule, smaller loaves will bake faster than larger ones, so adjust your timing accordingly.
When you place your loaf in the oven, set a timer based on the recipe's suggested baking time. However, don't rely solely on the timer. About five to ten minutes before the time's up, start checking the loaf. Look for a rich golden-brown color on the crust; this is an excellent first indicator that it's nearing readiness. If you're making a larger loaf, you might need to extend the baking time to guarantee the inside is cooked through.
You can also use the "thump test" to assess doneness. Gently tap the bottom of the loaf with your fingers; if it sounds hollow, it's likely done. If you're unsure, using a thermometer can help, with the internal temperature ideally reaching around 190°F to 200°F for a well-baked loaf.
Cool Before Slicing
After your loaf has finished baking and passed the thump test, it's tempting to slice into it right away. However, resist that urge! Allowing your bread to cool properly is essential for achieving the best texture and flavor. The ideal cooling time for crusty loaf bread is about 30 to 60 minutes. This waiting period allows the steam inside the loaf to redistribute, resulting in a better crumb structure and preventing a gummy texture.
During cooling, place your loaf on a wire rack. This promotes airflow around the bread and helps maintain that delicious crust you worked so hard to create. If you leave it on a flat surface, the bottom may become soggy, ruining your hard work.
When you finally do slice into the loaf, use the right slicing techniques. A serrated knife is your best friend here, as it can glide through the crust without squishing the soft interior. Start at one end and use gentle sawing motions, ensuring each slice is even and beautiful. If you want the perfect sandwich slice, aim for about half an inch thick.
Click Here and Turn Every Masterpiece into a Showstopper!
Frequently Asked Questions: 11 Essential Tips For Baking Crusty Loaf Bread
Can I Use Whole Wheat Flour Instead of All-Purpose Flour?
You can definitely use whole wheat flour instead of all-purpose flour. Whole wheat benefits include added fiber and nutrients, but the flour texture may be denser, so adjust your liquid for the best results.
How Do I Know if My Dough Has Risen Enough?
To know if your dough has risen enough, check the texture; it should feel soft and slightly puffy. After the appropriate fermentation time, it should double in size, indicating it's ready for baking.
What Type of Oven Is Best for Baking Bread?
For baking bread, convection ovens are ideal as they circulate heat evenly. If you can, use one with steam injection; it helps create a crusty exterior while keeping the inside soft and moist. You'll love the results!
Can I Freeze My Dough for Later Use?
Yes, you can freeze your dough for later use! Just make certain to use proper dough storage techniques, like wrapping it tightly. This'll help maintain its quality and guarantee successful baking when you're ready.
How Can I Tell if My Bread Is Fully Baked?
You can tell your bread's fully baked by checking its internal temperature, which should be around 190°F. Additionally, look for a golden-brown crust color; it signals your bread's ready to come out of the oven.

Conclusion
Now that you've got these 11 essential tips for baking crusty loaf bread, it's time to get started! Remember, the right flour and fresh ingredients make all the difference. Don't forget to knead well and create steam for that perfect crust. Keep an eye on your baking time, and let your bread cool before slicing—patience pays off! With practice, you'll master the art of baking delicious, crusty loaves that'll impress everyone. Happy baking!