Step-By-Step Guide: Sushi Rolling With Cooked Ingredients
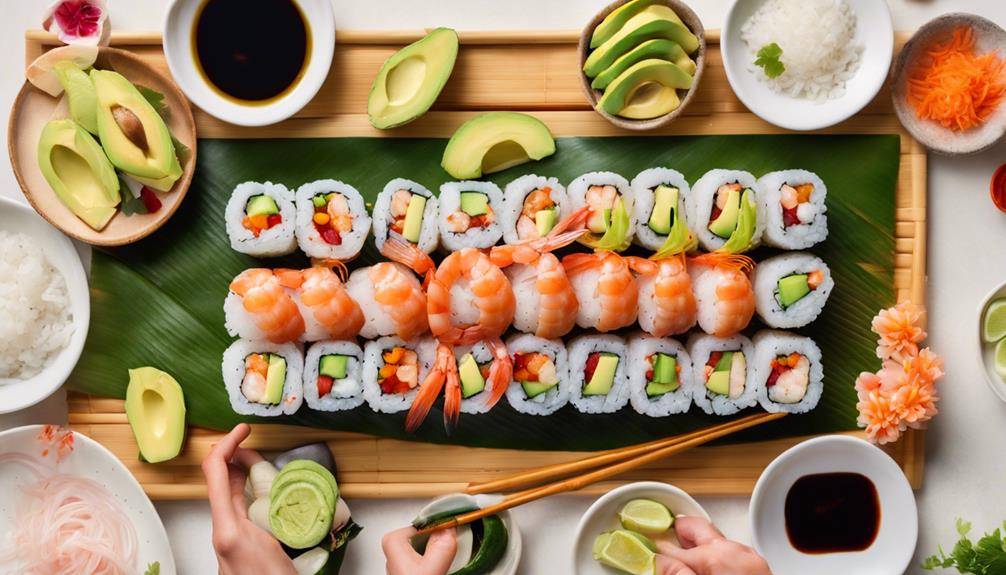
Guide: Sushi Rolling With Cooked Ingredients: You can easily master sushi rolling with cooked ingredients! First, gather your tools: a bamboo mat, sharp knife, and cutting board. Next, prepare sushi rice by rinsing and cooking short-grain rice, then seasoning it. Choose your cooked ingredients, like shrimp or avocado, for flavor and texture. Spread the rice on a sheet of nori, layer your ingredients, and roll tightly using the mat. Slice carefully for presentation, and serve with dipping sauces like soy sauce or spicy mayo. This guide's just the start; stick around to uncover more tips and techniques for perfecting your sushi!
Essential Tools and Equipment
Click Here and Turn Every Masterpiece into a Showstopper!
To roll sushi successfully, you'll need a few fundamental tools and equipment. First and foremost, a sushi mat is important for rolling your creations. A bamboo rolling mat allows you to apply even pressure and achieve tight, uniform rolls. You'll also want to have sharp knives on hand; they're essential for cleanly slicing your sushi without squishing the ingredients. A good cutting board is necessary to protect your countertops while giving you a stable surface to work on.
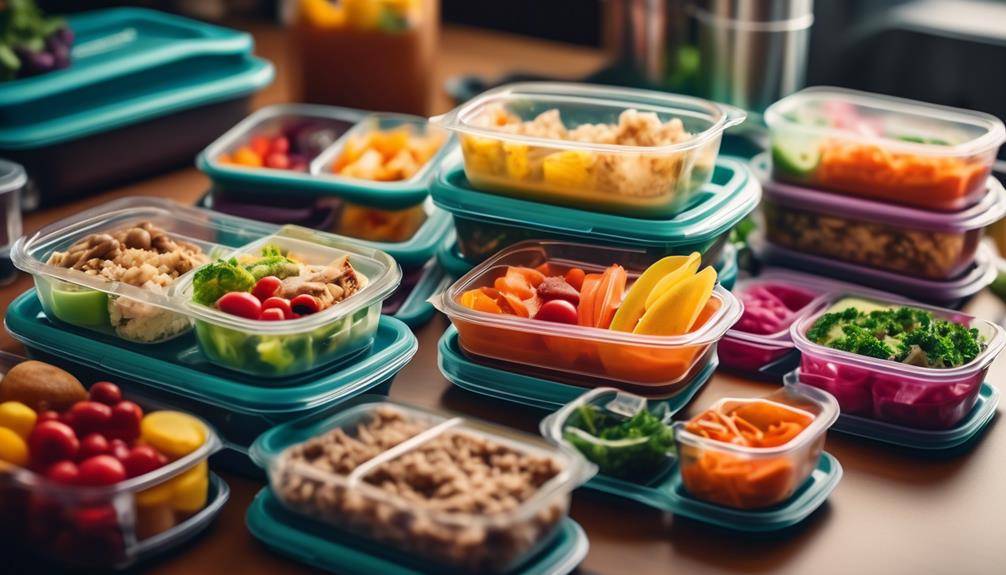
Cooking your rice to perfection is key, so a rice cooker will be your best friend. It takes the guesswork out of cooking sushi rice, ensuring you get the right texture every time. As you prepare your ingredients, consider using ingredient containers to keep everything organized and fresh. This way, you can easily grab what you need while rolling.
If you want to create specific shapes or sizes, sushi molds can help you achieve that effortlessly. They're perfect for making nigiri or other unique forms that stand out on your serving plates. Finally, don't forget about serving plates. Whether you choose traditional or modern designs, they'll enhance the presentation of your sushi and impress your guests.
With these fundamental tools and equipment in your kitchen, you're well on your way to mastering the art of sushi rolling!
Choosing Your Cooked Ingredients
When rolling sushi, you'll often find that the choice of cooked ingredients can make or break your dish. Start by considering your protein choices. Cooked seafood, such as shrimp, crab, or eel, can offer rich flavors and pair well with various sauces. Make sure these ingredients are fresh to enhance your sushi's taste and texture.
Next, explore vegetable options. Cooked vegetables like asparagus, sweet potato, or bell peppers can add a delightful crunch and vibrant color. Think about how these ingredients will complement your seafood or protein—texture considerations are key here. A mix of soft and crunchy elements can create a more satisfying bite.
Don't forget about flavor pairings. Ingredients like avocado or cream cheese can balance out stronger flavors, while pickled vegetables can add a tangy contrast. Always be mindful of ingredient freshness; stale or overcooked items can ruin your sushi experience.
Allergy awareness is also essential. If you're cooking for others, check for common allergens in your ingredient list. You might want to avoid certain seafood or soy-based products, depending on your guests' dietary restrictions.
Preparing Sushi Rice
When preparing sushi rice, you need to start with the right type of rice to achieve that perfect texture. Once you've selected your rice, you'll want to focus on cooking techniques that guarantee it's fluffy and sticky. Finally, don't forget to season your rice; the right balance of flavors can elevate your sushi experience.
Choosing the Right Rice
Choosing the right rice is vital for making authentic sushi, as it forms the foundation of the dish. You'll want to focus on sushi rice types, primarily short-grain or medium-grain varieties, which have a higher starch content. This starch is essential for achieving that sticky texture, allowing the rice to hold together when rolled.
When selecting your rice, look for labels that specify "sushi rice" or "shari." These types are specifically grown for sushi and will yield the best results. If you can't find sushi rice, opt for short-grain California rice as a substitute.
For rice preparation, rinse the rice thoroughly under cold water until the water runs clear. This process removes excess starch and prevents the rice from becoming overly sticky. Soak the rinsed rice for about 30 minutes to allow the grains to absorb water evenly. Once soaked, drain the rice before cooking, as this guarantees proper texture.
Cooking Techniques Explained
Cooking sushi rice requires attention to detail and precise timing to achieve that perfect texture. First, rinse your sushi rice under cold water until the water runs clear. This step is essential, as it removes excess starch, preventing the rice from becoming too sticky. Next, soak the rinsed rice for about 30 minutes to allow it to absorb water and achieve ideal cooking consistency.
Transfer the soaked rice to a pot and add the appropriate amount of water, typically in a 1:1 ratio, but check your rice package for specific instructions. Bring the water to a boil, then reduce the heat to low and cover the pot. Allow the rice to simmer for around 15 minutes, keeping it covered to trap steam. After the time's up, turn off the heat and let it rest for another 10 minutes without lifting the lid.
Understanding sushi history enriches your cooking experience, as the preparation of rice dates back centuries to Japan's ingredient origins. This method showcases the evolution of sushi, emphasizing the importance of perfect rice in creating a delightful dish. By mastering this technique, you're taking a significant step toward sushi perfection.
Seasoning for Flavor Enhancement
To elevate the flavor of your sushi rice, you'll need to season it with a mixture of rice vinegar, sugar, and salt right after it finishes cooking. This step is essential for enhancing the flavor profiles of your sushi. Start by measuring out about 1/4 cup of rice vinegar, 2 tablespoons of sugar, and 1 teaspoon of salt. Combine these ingredients in a small bowl and stir until the sugar and salt dissolve completely.
Once your rice is cooked, transfer it to a large wooden or plastic bowl, avoiding metal as it can react with the vinegar. While the rice is still hot, pour the seasoning blend over it. Use a wooden spatula to gently fold the rice, ensuring even distribution of the seasoning without mashing the grains. The goal is to maintain that perfect texture while allowing the flavors to meld.
Let the seasoned rice cool to room temperature before you start rolling your sushi. This seasoning not only adds depth but also balances the flavors of any cooked ingredients you'll be using. Enjoy experimenting with different seasoning blends to find your ideal taste!
Assembling Your Sushi Roll
When it's time to assemble your sushi roll, you'll find that the process is both simple and rewarding. Start by laying out your sushi mat, making sure it's clean and ready for action. Place a sheet of nori, shiny side down, on the mat. This is the foundation of your sushi roll assembly. You'll want to have your sushi rice, cooked ingredients, and any additional fillings nearby for easy access.
Begin with the rice. Wet your hands to prevent sticking, then grab a handful of sushi rice and evenly spread it across the nori, leaving about an inch at the top edge. This gap will help seal your roll later. Now, let's focus on ingredient placement. Arrange your cooked ingredients—like shrimp, crab, or vegetables—horizontally across the center of the rice. Feel free to add any extra flavor boosters, like avocado or cucumber, for added texture.
Make sure to layer the ingredients without overcrowding them. You want to create a balanced sushi roll that's easy to handle. Once you're satisfied with the ingredient placement, it's time to prepare for the next step. Hold the edge of the mat closest to you and start to lift it, tucking the nori over the filling. Keep it tight without squeezing too hard, ensuring all the delicious ingredients stay neatly inside. With practice, you'll master the art of sushi roll assembly, setting the stage for an amazing dining experience.
Rolling Techniques Explained
Now that you've assembled your sushi roll, it's time to master the rolling techniques that bring it all together. You'll learn the basic rolling methods to get you started, and then we'll explore advanced tips to take your skills up a notch. Let's get rolling!
Basic Rolling Techniques
Anyone can master the art of sushi rolling with a few basic techniques. Start by gathering your ingredients and tools: sushi mat, nori, rice, and fillings. The key to successful sushi rolling lies in the rolling patterns you choose.
Begin with the traditional maki roll. Lay your nori shiny-side down on the mat, then spread an even layer of rice, leaving about an inch at the top. Place your cooked fillings in a line across the rice, making sure not to overstuff.
Now, it's time to roll. Grasp the sushi mat, and gently fold the edge closest to you over the filling. Tuck it in with your fingers, then roll away from you, applying light pressure to keep everything snug. As you get to the edge of the nori, moisten it with a bit of water to seal the roll.
For a uramaki or inside-out roll, flip the nori over before adding rice on the outside. With practice, you'll refine your basic techniques and find your favorite rolling patterns. Enjoy experimenting and impressing friends with your sushi creations!
Advanced Rolling Tips
Mastering advanced sushi rolling techniques opens up a world of creative possibilities. As you gain confidence in your basic skills, it's time to explore how to elevate your sushi game. One effective method is the "inside-out" roll, where the rice is on the outside, allowing for a visually stunning presentation. To accomplish this, spread a thin layer of rice over the nori, then flip it over and add your creative fillings in the center.
Another advanced technique is the use of multiple fillings. Don't hesitate to mix ingredients like avocado, crab, and cucumber for a burst of flavor. Layer them strategically to guarantee every bite is delicious. You can also experiment with different types of sushi, such as the California roll or tempura rolls, incorporating cooked ingredients for added texture.
For a unique touch, consider garnishing your rolls with sesame seeds or spicy mayo. These elements not only enhance the flavor but also add visual appeal. Finally, practice your rolling technique; the tighter your roll, the better the presentation. With these advanced techniques, you'll impress friends and family with your sushi creations!
Click Here and Turn Every Masterpiece into a Showstopper!
Slicing Your Sushi Rolls
After rolling your sushi to perfection, the next essential step is slicing your sushi rolls. Proper slicing enhances presentation and guarantees each piece is easy to eat. Start by choosing the right knife type; a sharp, non-serrated knife, ideally a sushi or chef's knife, works best. A dull knife can squish the roll, ruining its shape and texture.
Before you begin slicing, wet the knife with a little water to prevent the rice from sticking. This simple trick makes the process smoother and helps maintain clean edges. Now, it's time to apply some slicing techniques. Position your roll on a cutting board, seam side down, to keep it intact.
Using a gentle sawing motion, slice the roll into six to eight pieces, depending on your preference. Aim for uniform thickness—about half an inch is ideal. Instead of pressing down hard, let the weight of the knife do the work. If you find the roll is getting squished, wipe the knife clean and wet it again before continuing.
After you've sliced the roll, take a moment to admire your handiwork. Each piece should showcase the vibrant colors of the ingredients inside, making your sushi visually appealing. Remember, practice makes perfect, so don't be discouraged if your first few attempts aren't flawless. Enjoy the process, and soon you'll be slicing like a pro!
Serving Suggestions and Dips
When it comes to serving sushi, a few thoughtful touches can elevate your dining experience. Start by assembling a stunning sushi platter that showcases your beautifully rolled creations. Use a large, flat serving dish to arrange your sushi pieces in an eye-catching pattern. Consider alternating colors and shapes for visual appeal.
Next, complement your sushi with a variety of dipping sauces. Soy sauce is classic, but don't shy away from experimenting with other options like spicy mayo or eel sauce. These sauces can enhance the flavor pairings of your cooked ingredients, adding an extra layer of taste.
For garnish options, think about adding thinly sliced green onions, pickled ginger, or wasabi. These not only add flavor but also provide a pop of color that brightens up your platter.
When it comes to serving styles, you can opt for individual plates or a communal style, where everyone shares from the same platter. If you choose the latter, make sure to provide small serving utensils to keep things hygienic.
Lastly, presentation tips are key to impressing your guests. Use chopsticks or small forks for easy picking, and consider adding decorative elements like edible flowers or citrus slices around the platter. These small details create an inviting atmosphere and make your sushi feast even more enjoyable. Enjoy the experience of sharing your creations!
Storage Tips for Leftovers
Leftover sushi can be a delightful treat, but proper storage is key to maintaining its freshness. To keep your sushi tasty, start by wrapping it tightly in plastic wrap or aluminum foil. This minimizes exposure to air, which can dry out the rice and fillings. If you've got sushi rolls with raw fish, it's essential to eat them within 24 hours. For cooked ingredients, you can stretch that time to about 2-3 days.
When it comes to refrigeration methods, make sure your sushi is stored in an airtight container in the fridge. This helps prevent odors from mingling and keeps your sushi as fresh as possible. Always place the container in the coldest part of your fridge, usually the back, to maintain a consistent temperature.
If you're not planning to eat your leftover sushi within a couple of days, consider freezing it. For freezing tips, it's best to separate the rolls and wrap each one individually. This way, you can thaw only what you need. Keep in mind that while freezing can preserve your sushi, the texture of the rice might change once thawed. To thaw, place your sushi in the fridge for a few hours or overnight, avoiding the microwave, which can make it rubbery.
Click Here and Turn Every Masterpiece into a Showstopper!
Frequently Asked Questions: Guide: Sushi Rolling With Cooked Ingredients
Can I Use Gluten-Free Soy Sauce for Dipping?
Yes, you can use gluten-free soy sauce for dipping. It enhances your sushi's flavor profiles, offering a delicious twist. Experiment with different sushi sauces to find the perfect match for your taste preferences!
How Do I Avoid Sushi Rice From Sticking?
To avoid sushi rice sticking, rinse it thoroughly before cooking. Use proper cooking techniques, and mix in rice vinegar after cooking. This balances moisture and enhances sushi texture, keeping your rolls easy to handle.
What Alternative to Seaweed Can I Use?
If you're looking for alternatives to seaweed, try sushi wrappers made from rice paper or use vegetable alternatives like cucumber or lettuce. These options can add freshness and unique flavors to your sushi creations.
Can I Freeze Sushi Rolls for Later Consumption?
Yes, you can freeze sushi rolls for later consumption. For ideal sushi roll storage, use proper freezing techniques like wrapping them tightly in plastic wrap and placing them in an airtight container to maintain freshness.
How Do I Make Sushi Without a Bamboo Mat?
You can make sushi without a bamboo mat by using sushi rolling techniques like the towel method. Experiment with alternative sushi fillings, and simply roll tightly, ensuring everything stays together for delicious homemade sushi.

Conclusion
Now that you've mastered sushi rolling with cooked ingredients, it's time to enjoy your delicious creations! Remember to experiment with different combinations and flavors to find your favorites. Whether you're serving them at a dinner party or enjoying a quiet night in, these sushi rolls are sure to impress. Don't forget to share your rolls with friends and family—after all, good food is meant to be enjoyed together! Happy rolling!