The 7 Best Techniques For Effortless Oyster Shucking
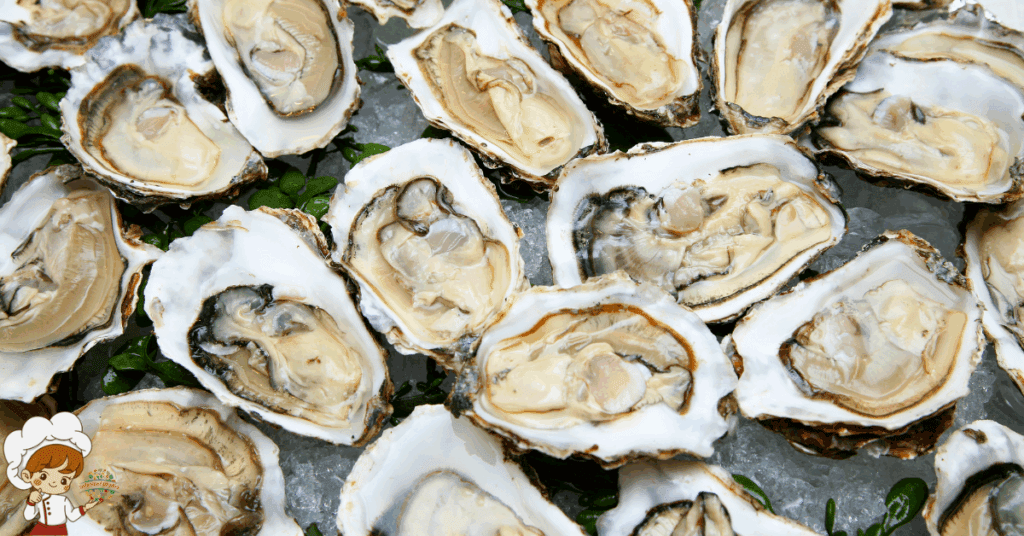
Techniques For Effortless Oyster Shucking; Like a hidden treasure waiting to be discovered, oysters hold a world of culinary delights within their shells. But the art of shucking these bivalves can seem daunting, with the potential for mishaps and wasted oysters. Fear not, for we have curated the 7 best techniques to effortlessly unlock the succulent goodness within. From choosing the right oyster to mastering the shucking technique, we’ll guide you step-by-step, ensuring a seamless journey towards oyster-shucking mastery. So prepare to embark on an adventure that will revolutionize your oyster experience, and unveil the secrets to effortless shucking.
Choosing the Right Oyster
When selecting an oyster, it is important to consider its freshness, size, and origin. Oyster varieties come in many different types, each with its own unique flavor profile. Some popular varieties include Pacific oysters, Kumamoto oysters, and Blue Point oysters. Pacific oysters are known for their briny and metallic taste, while Kumamoto oysters have a sweet and creamy flavor. Blue Point oysters, on the other hand, are known for their mild and slightly salty taste.
Freshness is a key factor when choosing an oyster. Look for oysters that are tightly closed or ones that close when tapped. This indicates that the oysters are still alive and therefore fresh. Avoid oysters that are open or have a strong fishy smell as they may be spoiled.
Size is another consideration when selecting an oyster. Oysters come in various sizes, ranging from small to large. Smaller oysters tend to have a more delicate and tender texture, while larger oysters have a meatier and chewier texture. Consider your preferences and the recipe you plan to use the oysters in when choosing the size.
Origin is also important to consider as it can affect the flavor of the oyster. Oysters from different regions have distinct flavor profiles due to variations in water temperature, salinity, and food availability. For example, oysters from the Pacific Northwest are known for their crisp and cucumber-like flavor, while oysters from the Gulf Coast have a creamy and buttery taste.
Proper Knife Selection and Care
When it comes to shucking oysters, choosing the right knife is crucial. A sharp, sturdy knife with a thin, pointed blade is ideal for smoothly opening the oyster shells. Additionally, it is important to regularly maintain the knife’s sharpness to ensure efficient shucking and reduce the risk of accidents. Lastly, proper cleaning and sanitizing of the knife after each use is essential to prevent contamination and ensure safe consumption of the oysters.
Choosing the Right Knife
To ensure efficient oyster shucking, it is essential to carefully select and maintain the appropriate knife. When choosing a knife for shucking oysters, consider the type of oyster you will be working with. Different oyster varieties have varying shell thickness and size, so it’s important to choose a knife that can easily penetrate the shell without damaging the delicate meat inside. Look for a knife with a strong, sturdy blade that is specifically designed for shucking oysters.
Additionally, proper knife maintenance is crucial to ensure smooth and safe shucking. Regularly sharpening the knife’s blade and keeping it clean and rust-free will prolong its lifespan and make the shucking process easier. Remember, a well-maintained knife is the key to effortless oyster shucking.
Maintaining Knife Sharpness
Now that you have chosen the right knife for shucking oysters, it is important to understand how to maintain its sharpness for efficient and safe shucking. Proper knife maintenance is key to keeping your shucking knife in top condition. Here are some sharpening techniques to help you maintain your knife’s sharpness:
- Regular honing: Use a honing steel to realign the edge of your knife, keeping it sharp and ready for use.
- Whetstone sharpening: Invest in a good quality whetstone and learn the proper technique for sharpening your knife.
- Professional sharpening: If you’re unsure about sharpening your knife yourself, consider taking it to a professional to ensure it’s done correctly.
- Storing properly: Avoid storing your knife in a drawer where it can bump against other utensils. Use a knife block or sheath to protect the blade.
- Cleaning and drying: Always clean and dry your knife thoroughly after each use to prevent rust and maintain its sharpness.
Cleaning and Sanitizing
Proper knife selection and care are essential for maintaining cleanliness and sanitization when shucking oysters. To ensure a hygienic process, it is crucial to clean and sanitize your oyster knife before and after each use. Start by washing the knife with warm soapy water to remove any dirt or debris. Pay special attention to the blade and handle, scrubbing them thoroughly.
Rinse the knife with clean water and pat it dry with a clean towel. To sanitize the knife, you can either soak it in a mixture of bleach and water for a few minutes or wipe it down with a sanitizing solution. Remember to always follow the instructions on the sanitizing product to ensure proper usage. By incorporating these cleaning techniques and sanitizing methods, you can maintain a safe and sanitary environment when shucking oysters.
Preparing the Oyster for Shucking
Before shucking the oyster, ensure it is properly cleaned and ready for the process. Here are some essential steps for pre-shucking preparation:
- Inspect the shell: Check the oyster’s shell for any cracks or chips. A damaged shell can indicate a dead or spoiled oyster, so it’s crucial to discard it to avoid any health risks.
- Remove dirt and debris: Rinse the oyster under cold running water to remove any dirt, sand, or debris clinging to the shell. Gently scrub the shell with a brush to ensure it is thoroughly cleaned.
- Secure the oyster: To prevent accidents while shucking, place the oyster on a flat surface, such as a cutting board, with the hinge side facing towards you. This will make it easier to open and reduce the risk of injury.
- Protect your hand: Use a thick kitchen towel or a specialized oyster glove to hold the oyster firmly in place while shucking. This will provide a better grip and protect your hand from any potential slips or cuts.
- Chill the oyster: For easier shucking, it’s recommended to refrigerate the oysters for about 10 minutes before starting the process. The cold temperature will help relax the oyster, making it simpler to open.
Mastering the Shucking Technique
To master the art of shucking oysters, follow these step-by-step instructions for a seamless and rewarding experience. Mastering oyster opening techniques is essential for both safety and efficiency. The first step is to ensure you have a proper oyster knife. It should be sturdy and have a short, thick blade with a pointed tip.
Start by holding the oyster firmly with a towel to protect your hand. Insert the knife into the hinge, which is the pointed end of the oyster. Apply gentle pressure and twist the knife back and forth to loosen the hinge. Be careful not to use too much force, as it can cause the knife to slip and result in injury.
Once the hinge is loosened, slide the knife along the top shell to separate it from the bottom shell. Keep the knife close to the top shell to avoid damaging the oyster meat. Use a twisting motion to detach the top shell completely.
Next, run the knife under the oyster meat to detach it from the bottom shell. Be careful not to cut the meat or spill any of the delicious oyster liquor. Take your time and work carefully to ensure a clean separation.
Common mistakes in oyster shucking include using too much force, which can lead to injuries, and not properly detaching the oyster meat from the shell, resulting in a messy presentation. Remember to always use a proper oyster knife and take your time to ensure a seamless shucking experience.
With these mastering oyster opening techniques and by avoiding common mistakes, you’ll be able to shuck oysters effortlessly and impress your guests with your culinary skills. Enjoy the delicious fruits of your labor!
Dealing With Stubborn Oysters
If you encounter particularly stubborn oysters, there are a few techniques you can employ to make the shucking process easier. Dealing with tough shells can be frustrating, but with the right approach, you can open oysters without damaging the meat. Here are some tips to help you overcome the challenge:
- Soaking the oysters: Placing the oysters in a bowl of cold water for about 10 minutes before shucking can help soften the shells. This makes them easier to pry open without applying excessive force.
- Using a towel or glove: Wrapping the oyster in a towel or wearing a protective glove can provide a better grip and protect your hands from any accidental slips. This allows you to exert more pressure on the shell without hurting yourself.
- Rocking the knife: Instead of trying to force the knife into the oyster, gently wiggle it back and forth while applying steady pressure. This rocking motion helps to weaken the connection between the top and bottom shell, making it easier to separate them.
- Applying leverage: Once you have inserted the knife into the oyster, use it as a lever to pry the shell open. Position the knife close to the hinge and push downwards, using the shell’s natural weak point to your advantage.
- Being patient: Shucking oysters requires finesse and patience. If you encounter resistance, take your time and avoid rushing the process. Applying too much force or using excessive speed can cause the shell to crack and potentially damage the delicate meat inside.
Safety Tips for Shucking Oysters
When shucking oysters, it’s important to keep your hands safe by placing them correctly. Always hold the oyster with a towel or glove to avoid any potential injuries. Additionally, use a shucking knife with a sturdy handle and a sharp blade to make the process easier and safer. Lastly, be mindful of knife slippage by maintaining a firm grip and using controlled, steady movements.
Proper Hand Placement
Place your hand firmly on the oyster with your thumb and index finger gripping the shell. This proper hand positioning is crucial for shucking oysters without injury. To ensure your safety and make the process effortless, follow these tips:
- Protective Gear: Wear a cut-resistant glove to shield your hand from accidental slips or cuts.
- Sturdy Surface: Place the oyster on a stable surface, like a cutting board, to give yourself better control.
- Apply Pressure: Use your hand to apply gentle pressure on the oyster, helping to stabilize it during shucking.
- Mindful Grip: Maintain a firm grip on the shell to prevent it from slipping or breaking.
- Avoid Using Force: Never force the knife into the oyster. Instead, use a gentle twisting motion to loosen the shell.
To safely use a shucking knife for oyster shucking, follow these essential tips. First, make sure to hold the knife firmly and securely in your dominant hand. This will give you better control and reduce the risk of accidents. Next, position the oyster flat side up, with the hinge facing towards you. Insert the tip of the shucking knife into the hinge, applying gentle pressure.
Twist the knife back and forth to loosen the shell. Be careful not to force it or use excessive pressure, as this can cause injury. Once the shell is loosened, slide the knife along the edge to separate the top and bottom shells. Finally, use the knife to carefully detach the oyster from the bottom shell. By following these oyster shucking tips, you’ll be shucking oysters like a pro in no time.
Avoiding Knife Slippage
Now that you have mastered using a shucking knife for oyster shucking, let’s focus on important safety tips to avoid knife slippage. Here are some key tips to prevent hand injuries and ensure a secure grip while shucking oysters:
- Keep your hands dry: Moisture can make the knife handle slippery, so make sure your hands are dry before you begin.
- Use a towel for better grip: Wrap a towel around the oyster and hold it firmly. This will provide better traction and reduce the chances of the knife slipping.
- Position your hand correctly: Place your non-dominant hand on a stable surface, such as a cutting board, to anchor the oyster and provide stability while shucking.
- Apply steady pressure: Use controlled, even pressure when inserting the knife into the oyster. Avoid applying excessive force, as it increases the risk of slipping.
- Take your time: Rushing can lead to accidents. Shuck oysters at a comfortable pace, focusing on maintaining a secure grip and keeping your hands safe.
Serving and Enjoying Your Shucked Oysters
To fully enjoy your freshly shucked oysters, consider enhancing their flavors with complementary sauces and accompaniments. Oysters are a delicacy that can be enjoyed on their own or with a variety of delicious additions. Here are some oyster serving tips and shucked oyster recipes to help you make the most of your culinary experience.
One classic way to serve oysters is with a squeeze of lemon juice. The acidity of the lemon enhances the briny flavor of the oyster, creating a refreshing and tangy combination. Another popular option is to serve oysters with a mignonette sauce. This sauce is made with a combination of vinegar, shallots, and cracked black pepper, which adds a subtle yet flavorful kick to the oysters.
If you prefer a more decadent option, try serving your shucked oysters with a dollop of cocktail sauce. This zesty sauce, made with ketchup, horseradish, Worcestershire sauce, and lemon juice, adds a spicy and savory element to the oysters. For those who enjoy a creamier accompaniment, consider serving your oysters with a homemade tartar sauce. This creamy sauce, made with mayonnaise, pickles, capers, and herbs, provides a rich and flavorful complement to the briny oysters.
If you’re feeling adventurous, you can also experiment with different shucked oyster recipes. Oysters Rockefeller, for example, is a popular dish where oysters are topped with a mixture of spinach, butter, breadcrumbs, and herbs, then baked until golden and bubbling. Another delicious option is to lightly fry the shucked oysters to create crispy oyster po’boys or sliders.
Frequently Asked Questions: Techniques For Effortless Oyster Shucking
Can I Use Any Type of Oyster for Shucking, or Are There Specific Types That Are Easier to Work With?
You can use any type of oyster for shucking, but some types are easier to work with. For beginners, it’s best to start with smaller oysters like Kumamoto or Pacific oysters.
Are There Any Alternative Tools That Can Be Used for Shucking Oysters, Besides a Traditional Oyster Knife?
When it comes to shucking oysters, there are alternative tools you can use besides a traditional oyster knife. These oyster shucking hacks include using a screwdriver, paring knife, or even a butter knife.
How Long Can I Store Unshucked Oysters Before They Go Bad?
You can store unshucked oysters for up to a week in the refrigerator. Look for freshness indicators such as a tightly closed shell, a briny smell, and a weighty feel.
Is There a Specific Way to Clean Oysters Before Shucking Them?
Before shucking oysters, it’s important to clean them properly. Rinse them under cold water to remove any dirt or debris. Use a stiff brush to scrub the shells, and handle them with care to avoid injury.
Are There Any Tips for Preventing Injuries While Shucking Oysters?
To prevent injuries while shucking oysters, it’s important to follow proper technique. Keep your hands steady, use a shucking knife with caution, and protect your hands with a glove.

Conclusion
In conclusion, with the right techniques and tools, shucking oysters can be a breeze. By carefully selecting the oysters, using a proper knife, and mastering the shucking technique, you can effortlessly enjoy this delicacy. Remember to be patient with stubborn oysters and prioritize safety throughout the process. Once shucked, serve and savor your oysters, knowing that you have mastered the art of effortless oyster shucking.