8 Best Techniques To Toss Pizza Dough Professionally
Techniques To Toss Pizza Dough Professionally: You can toss pizza dough like a professional by mastering eight key techniques. Start by ensuring your dough has the right consistency and is well-prepared on a clean, sturdy surface. Flatten the dough initially, then focus on gently stretching the edges while keeping the center thicker. Utilize gravity and your body’s momentum to lift and toss the dough effortlessly. Proper hand positioning and rhythm are essential for control during the spin. As you improve, experiment with adding toppings mid-air for an impressive finish. Stick around to discover helpful tips and tricks that can elevate your pizza-making game even further!
Understanding Dough Consistency
Click Here and Turn Every Masterpiece into a Showstopper!
When it comes to tossing pizza dough, understanding its consistency is essential for achieving that perfect crust. The key factor here is dough hydration, which refers to the ratio of water to flour in your pizza dough. Adjusting this ratio can markedly affect the texture and stretchability of the dough. For a softer, more pliable dough, aim for a hydration level of around 60-65%. This will help create a light, airy crust once baked.
Another important element is gluten development. As you knead your dough, gluten proteins form and strengthen, giving your pizza crust its structure. Proper gluten development allows the dough to stretch without tearing, which is crucial when you toss it. If your dough feels too sticky, it might need more flour or a little extra kneading to enhance gluten formation. Conversely, if it’s too dry and crumbly, you may need to increase the hydration.
To check if your dough is ready, perform the “windowpane test.” Take a small piece of dough and stretch it gently. If it forms a thin, translucent membrane without breaking, you’ve got excellent gluten development. If it tears easily, keep kneading. Finding the right balance between dough hydration and gluten formation will ultimately lead to a dough that not only tastes great but also tosses beautifully. With practice, you’ll master the art of tossing pizza dough, leading to that ideal, crispy crust everyone craves.
Preparing Your Work Surface
Before you start tossing your pizza dough, it’s important to prepare your work surface properly. A clean and suitable area will make a significant difference in your dough-handling experience. Begin by selecting the right surface materials. A large, sturdy countertop made of wood or marble works best, as they provide the ideal grip for the dough. Avoid surfaces that are too slick or uneven, as they can hinder your tossing technique.
Next, apply effective cleaning techniques to guarantee your workspace is hygienic. Wipe down the surface with hot, soapy water to remove any residue from previous meals. After that, sanitize it with a mixture of water and vinegar or a food-safe cleaner. This step not only keeps your area clean but also prevents any unwanted flavors from transferring to your pizza.
Once your surface is clean and dry, sprinkle a light dusting of flour. This will prevent the dough from sticking while you work with it. Be careful not to overdo it, as too much flour can lead to a dry crust. If you’re using a surface that tends to absorb moisture, like wood, you might want to take into account a thin layer of semolina flour instead, which adds texture and flavor.
Mastering the Basic Technique
To master the basic technique of tossing pizza dough, you’ll want to start with a well-rounded ball of dough that’s been allowed to rest. This resting period is essential because it enhances the dough elasticity, making it easier to work with. When you pick up the dough, gently press it down into a flat disk on your work surface. This initial flattening helps create an even shape.
Next, you’ll want to use your fingertips to stretch the edges of the dough while keeping the center thicker. As you stretch, focus on maintaining that beautiful elasticity. You’re aiming to create a uniform thickness, which requires both patience and practice.
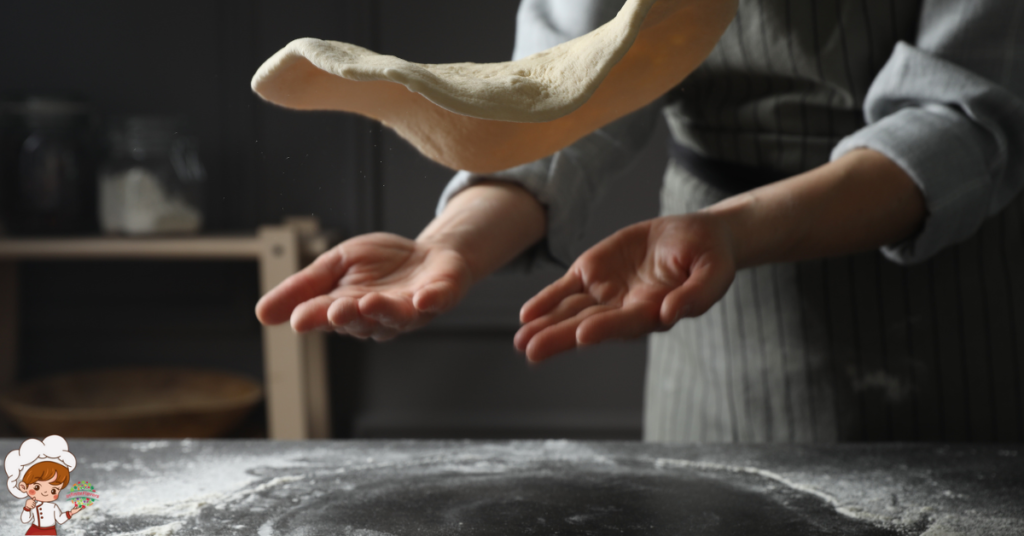
Now comes the fun part—tossing! With your hands, lift the dough from the edges, letting gravity do some of the work. Your hand strength plays a significant role here. Don’t be afraid to use a bit of force, but be gentle enough to avoid tearing the dough.
As you toss it into the air, use a quick flick of your wrists to give it a slight spin. This motion helps the dough maintain its shape and encourages an even spread. Keep your eyes on the dough as it rises and falls, ready to catch it if it starts to drift too far.
With practice, you’ll find the right balance between hand strength and dough elasticity, allowing you to toss like a pro. Stay consistent, and soon enough, you’ll impress everyone with your pizza-making skills!
Using Gravity to Your Advantage
When you toss pizza dough, using gravity can make a big difference. Shift your weight and use your body’s natural momentum to lift the dough effortlessly. This technique not only adds height but also helps you shape the pizza evenly.
Utilize Natural Weight Shift
One of the most effective techniques for tossing pizza dough is utilizing your natural weight shift to harness gravity. When you stand with your feet shoulder-width apart, your foot placement becomes essential. Start by bending your knees slightly, allowing your body to flow smoothly from one foot to the other. This body movement not only helps maintain balance but also lets you generate the necessary force to lift and toss the dough.
As you prepare to toss, lean slightly back before shifting your weight forward. This motion transfers your body weight into the dough, making it easier to lift off the surface. When you shift your weight, keep your arms relaxed and allow your hands to guide the dough upward. The goal is to use gravity to your advantage, letting it help the dough rise instead of relying solely on your arm strength.
Practice this technique repeatedly to find the rhythm that works best for you. With time, your coordination and confidence will improve, making it feel effortless to toss pizza dough like a pro. Embrace this natural weight shift, and you’ll elevate your pizza-making game in no time!
Momentum for Dough Lift
Mastering the momentum for lifting pizza dough can greatly improve your tossing technique. To harness gravity effectively, you need to understand how to utilize dough elasticity and your body’s natural movement. Start by positioning the dough on your hands, ensuring it’s well-kneaded and pliable. This elasticity allows the dough to stretch as you lift it.
As you begin the lift, engage your legs and core to create upward momentum. Bend your knees slightly, then push upward with your legs while simultaneously lifting your hands. This coordinated movement leverages gravity, allowing the dough to rise without excessive strain on your arms.
Once the dough is airborne, use your wrist and fingers to guide it into a circular motion. This is where hand coordination becomes essential. Your hands should work in unison with your body, maintaining control while letting the dough’s weight help with the toss.
Practice this technique regularly, and you’ll find that the combination of gravity, dough elasticity, and your hand coordination leads to a smoother, more professional-looking pizza toss. Soon, you’ll be tossing dough like a seasoned pro!
Practicing the Spin
When you practice the spin, focus on your hand positioning first. The right grip sets the stage for perfect timing and rhythm, which are essential for a successful toss. With a bit of practice, you’ll find that mastering these elements makes all the difference in your pizza dough technique.
Proper Hand Positioning
How can you guarantee your hands are positioned correctly for the perfect pizza toss? It all starts with your hand grip. You’ll want to hold the dough with a firm but gentle grip, making sure you don’t squeeze too hard. Your fingers should be spread out, providing enough surface area to toss the dough evenly.
Focus on your finger placement; the tips of your fingers should rest on the outer edges of the dough, while your palms support the bottom. This allows for a balanced lift and guarantees the dough can spin freely. When you’re ready to toss, make sure your thumbs are tucked in, providing extra stability as you initiate the spin.
As you practice, pay attention to how the dough responds to your grip. If you notice it’s tearing or dropping, adjust your hand positioning. Keeping your hands relaxed will give you better control over the dough. Remember, the right hand positioning is essential for achieving that professional pizza toss. Keep refining your technique, and soon you’ll be tossing pizzas like a pro!
Timing and Rhythm
To achieve a perfect pizza toss, you need to focus on the timing and rhythm of your movements. Start by establishing timing cues that help you predict when to apply force and when to let the dough hang in the air. Practice the spin by breaking it down into manageable steps. Begin with the initial lift of the dough, using a smooth upward motion. As it rises, engage your wrists in rhythmic motions that create a gentle spin.
The key is to synchronize your hand movements with the natural weight of the dough. As you toss, imagine the dough moving with a steady pulse, keeping it centered and balanced. This rhythm not only maintains the dough’s shape but also enhances your control.
Keep practicing until you can feel the right timing without overthinking it. You’ll notice that as your confidence grows, your ability to toss the dough becomes more fluid and effortless. Regular practice will help you internalize these timing cues, allowing you to perform each toss with finesse. Before you know it, you’ll be tossing pizza dough like a pro!
Click Here and Turn Every Masterpiece into a Showstopper!
Timing and Rhythm
Mastering the timing and rhythm of tossing pizza dough is essential for achieving that perfect stretch without tearing. When you toss the dough, you want to find a balance between speed and control. Timing techniques play a significant role here. First, let your dough rest adequately before you start tossing. A well-rested dough is more pliable, making it easier to manipulate.
As you begin, take a moment to gauge the weight of the dough in your hands. This awareness helps you anticipate how much force you’ll need. Start with a firm flick of your wrists to get the dough airborne, then let your hands guide it gently. The rhythm importance comes into play as you maintain a steady motion. You want to keep the dough rotating in the air, ensuring it stretches evenly. If you rush or hesitate, you risk creating uneven spots that could tear.
Practice makes perfect, so don’t be discouraged if it doesn’t come naturally at first. Pay attention to your body movements; they should flow together seamlessly. As you develop your timing and rhythm, experiment with different heights and spins. Each toss should feel fluid and natural, allowing you to build confidence. Keep your eyes on the dough, and soon you’ll find that perfect rhythm that will elevate your pizza-making skills. Remember, it’s all about feeling the dough and syncing your movements for the best results.
Adding Toppings at Height
While you’re tossing your pizza dough, adding toppings at height can elevate both the presentation and flavor distribution of your pie. This technique not only makes your pizza look more appealing but also guarantees even topping distribution, enhancing the overall taste. When you throw your ingredients into the air, they land more uniformly across the surface, creating a beautiful and balanced pizza.
For effective ingredient selection, consider using toppings that have varying weights. Lighter toppings like arugula or fresh herbs can be tossed last to prevent them from getting overcooked. Heavier items, such as meats or cheeses, should be added first, so they settle nicely into the sauce and dough. This layering will help maintain the integrity of each topping while guaranteeing it cooks perfectly.
When you’re ready to add toppings, aim for a gentle toss rather than a forceful throw. This allows for better control, helping you achieve that perfect spread without overwhelming the dough. Practice your timing to guarantee that the toppings land just as the dough finishes its spin in the air.
Troubleshooting Common Mistakes
Recognizing common mistakes in pizza dough tossing can save you from frustration and improve your technique. One of the first issues you might encounter is insufficient dough elasticity. If your dough isn’t stretchy, it can tear easily when you try to toss it. To fix this, guarantee your dough has rested enough to develop gluten. If it’s too tight, let it sit at room temperature for a bit longer before tossing.
Another common mistake involves air bubbles forming in your dough. When you toss, you want to keep the air bubbles evenly distributed. If you notice large pockets forming, try gently pressing the dough out with your fingertips before tossing. This technique helps maintain an even thickness while allowing for proper air distribution, which contributes to a better crust.
You might also struggle with the dough sticking to your hands or the work surface. To combat this, make sure you’re using enough flour or cornmeal to prevent sticking. Dust your hands and the surface lightly, but don’t overdo it, as excess flour can make your crust dry.
Lastly, if your dough lands unevenly, practice your tossing technique. Focus on a smooth, circular motion, and use your wrists to guide the dough. With time and patience, you’ll minimize these mistakes and enjoy tossing pizza dough like a pro. Keep these troubleshooting tips in mind, and you’ll be well on your way to perfecting your pizza-making skills!
Click Here and Turn Every Masterpiece into a Showstopper!
Frequently Asked Questions: Techniques To Toss Pizza Dough Professionally
What Type of Flour Is Best for Pizza Dough?
When choosing flour types for pizza dough, consider high-gluten flour for a chewy crust or all-purpose flour for a softer texture. Higher gluten content gives you a better rise and structure in your pizza.
How Long Should Pizza Dough Rest Before Tossing?
You should let your pizza dough rest for at least 30 minutes. This rest duration helps improve the dough texture, making it easier to toss. Don’t rush; a little patience goes a long way!
Can I Use a Rolling Pin Instead of Tossing?
You can use a rolling pin, but it flattens the dough too much, affecting its texture. Hand technique gives you better control and preserves air bubbles, resulting in a lighter, tastier crust.
How Do I Know When the Dough Is Ready?
You’ll know the dough is ready when its texture feels smooth and elastic. Check for gluten development by gently stretching a small piece; it should stretch without tearing, indicating it’s perfect for tossing!
What Temperature Should My Oven Be for Baking Pizza?
For baking pizza, set your oven to its highest temperature, usually around 475°F to 500°F. If you’re using baking stones, preheat them for at least 30 minutes to guarantee a perfectly crispy crust.

Conclusion
With these techniques in hand, you’re ready to toss pizza dough like a pro! Remember to focus on dough consistency, maintain a clean work surface, and practice your timing and rhythm. Don’t be afraid to experiment with gravity and the spin to achieve that perfect shape. Soon enough, you’ll be adding toppings at height and impressing your friends with your skills. Keep practicing, and before you know it, you’ll be serving up restaurant-quality pizzas right from your kitchen!