13 Tips For Ideal Fermentation Cooking Temperatures
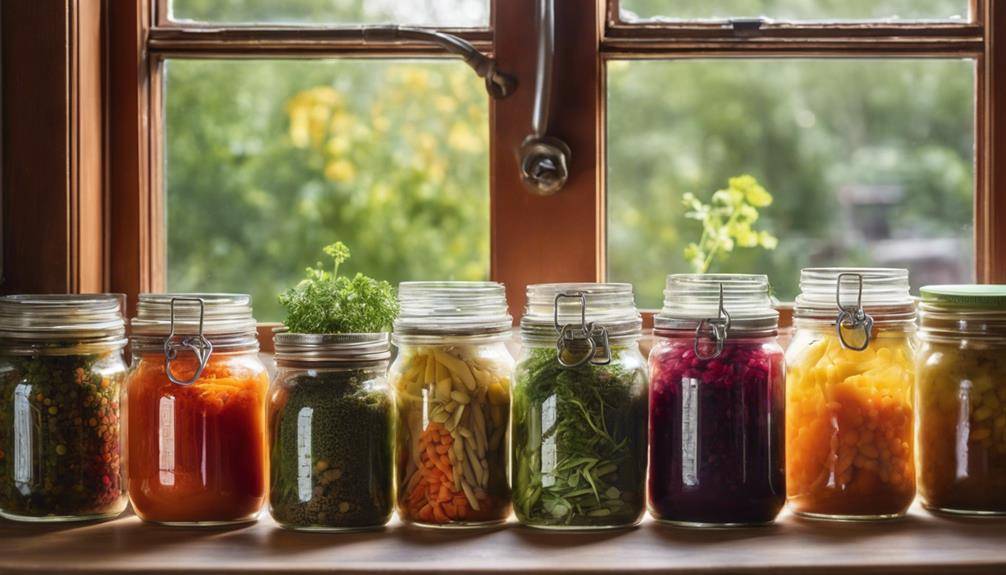
13 Tips For Ideal Fermentation Cooking Temperatures: To achieve ideal fermentation cooking temperatures, start by understanding the specific ranges for your project. Use a good thermometer to monitor these temperatures closely. Maintain a stable environment to prevent fluctuations that can spoil your efforts. Make sure you select fresh, quality ingredients and utilize starter cultures effectively. Experiment with fermentation times to find your perfect flavor profiles. Create a schedule and recognize signs of readiness in your ferments. Troubleshooting any temperature-related issues is essential, too. These tips can lead to perfect results, and there's plenty more to enhance your fermentation journey ahead.
Understand Temperature Ranges
Click Here and Turn Every Masterpiece into a Showstopper!
When it comes to fermentation cooking, understanding temperature ranges is vital for achieving the best results. The temperature impact on the fermentation process can't be overstated; it directly influences the flavor, texture, and quality of your final product. Fermentation science shows that different microorganisms thrive at specific temperature ranges, so knowing these can help you make informed decisions.
For instance, if you're making yogurt, you'll want to maintain a temperature around 110°F (43°C). This is the sweet spot for the beneficial bacteria to flourish, resulting in a creamy and tangy yogurt. On the other hand, when fermenting vegetables, a cooler range of about 60°F to 75°F (15°C to 24°C) works well. At these temperatures, lactic acid bacteria can develop flavors without overpowering your vegetables.
Temperatures above 75°F (24°C) can lead to unwanted bacteria and spoilage, while temperatures below 60°F (15°C) may slow down the fermentation process considerably. It's essential to monitor these ranges to guarantee your fermentations are successful.
Additionally, extreme temperatures can kill off beneficial microorganisms altogether. When you're aware of the ideal temperature ranges for your chosen fermentation, you're setting yourself up for success. So, before you immerse yourself in your next fermentation project, take a moment to familiarize yourself with the temperature guidelines, and you'll be well on your way to creating delicious, fermented foods.
Use a Thermometer
Using a thermometer is vital for getting accurate readings during fermentation. With various types of thermometers available, it's important to choose one that suits your needs. By following best measurement practices, you can guarantee your fermentation process stays on track.
Importance of Accurate Readings
Accurate temperature readings are essential for successful fermentation, as even slight deviations can alter the outcome of your culinary creations. When you're fermenting, maintaining the right temperature is vital. Temperature fluctuations can lead to inconsistent results, affecting the flavor, texture, and overall quality of your final product. By using a reliable thermometer, you can guarantee that you're hitting the ideal range for fermentation consistency.
In fermentation, specific temperatures trigger different microbial activities. For example, certain bacteria thrive at warmer temperatures, while others prefer cooler conditions. If you don't monitor the temperature closely, you might end up with a batch that's too sour or lacks the desired tang.
You might think it's enough to rely on your instincts, but without accurate readings, you're risking the success of your efforts. A thermometer helps you pinpoint exactly where you stand in the fermentation process, allowing you to make necessary adjustments in real-time.
In the end, investing in a good thermometer pays off. You're not just cooking; you're crafting flavors that can elevate your dishes, and accurate temperature readings are your best ally in that journey.
Types of Thermometers
Selecting the right thermometer can make all the difference in your fermentation journey, as each type offers unique features suited for specific processes. Digital thermometers are popular due to their quick readings and high accuracy, making them ideal for checking temperatures during fermentation. Instant read thermometers, a subset of digital models, provide readings in seconds, which is great when you need to monitor changes swiftly.
Infrared thermometers allow you to measure surface temperatures without direct contact, useful for monitoring fermentation vessels. If you're looking for versatility, probe thermometers can be used in various liquids and solids, guaranteeing precision in your fermentation temperature.
Glass thermometers are traditional and can be very accurate, but they take longer to stabilize and can be fragile. Bimetallic thermometers, while durable, may not provide the same level of accuracy as digital options. Regardless of the type you choose, it's vital to verify proper thermometer calibration to maintain thermometer accuracy. Regularly check your thermometer's performance to avoid any discrepancies in your fermentation process. With the right tool, you'll achieve ideal results in your fermentation endeavors.
Best Measurement Practices
To guarantee successful fermentation, monitoring temperatures consistently is key. Using a thermometer is essential to make sure you're within the ideal range for your specific fermentation process. Start by selecting a reliable thermometer; digital ones offer quick readings and are generally easier to read.
Once you've got your thermometer, familiarize yourself with proper measurement techniques. Always insert the thermometer into the middle of your mixture, avoiding contact with the sides of the container. This way, you'll get the most accurate reading of the temperature throughout the fermentation.
Don't forget calibration methods either. Regularly check your thermometer's accuracy by comparing it with a known reference point, such as boiling water or ice water. If you notice discrepancies, adjust your thermometer accordingly or consider replacing it.
Lastly, keep a log of your temperature readings. This practice not only helps you track the fermentation process but also assists in troubleshooting if something goes awry. By implementing these best measurement practices, you'll be well on your way to perfecting your fermentation technique and achieving the delicious results you're aiming for.
Control Your Environment
To achieve the best fermentation results, you need to control your environment carefully. Using temperature monitoring tools can help you maintain ideal conditions for your ingredients. By keeping an eye on the temperature, you'll set the stage for successful fermentation.
Temperature Monitoring Tools
When it comes to achieving ideal fermentation temperatures, having the right monitoring tools can make all the difference. You'll want to invest in reliable temperature monitoring devices to make certain your environment stays within prime ranges. Digital thermometers and temperature data loggers are excellent choices, providing real-time readings and alerts for any fluctuations.
Consider using a thermometer with temperature calibration features, as this allows you to maintain accuracy over time. Regularly calibrating your monitoring tools helps you avoid any surprises during the fermentation process.
For more advanced monitoring techniques, you might explore smart thermometers that connect to your smartphone. These devices can send notifications if temperatures drift too far from the ideal range, giving you peace of mind while you focus on other tasks.
Don't forget about the importance of placement; make certain your thermometer is positioned correctly to get accurate readings of your fermentation environment. By utilizing the right tools and techniques, you'll gain better control over your fermentation process, leading to more consistent results. Remember, effective temperature monitoring is key to successful fermentation!
Ideal Fermentation Conditions
Achieving ideal fermentation conditions hinges on controlling your environment effectively. Your fermentation environment plays an essential role in the success of your project. Guarantee temperature stability to promote peak microbial activity, which directly influences flavor development. Aim for a consistent temperature that aligns with your chosen fermentation duration and the specific needs of your ingredients.
Ingredient selection is equally important; seasonal ingredients can enhance flavor and align with traditional cultural practices, linking you to fermentation history. When exploring recipe variations, consider how different fermentation vessels can impact the final product. For instance, glass jars might allow for better monitoring, while ceramic crocks can maintain temperature stability.
Don't forget the probiotic benefits that come with a well-controlled environment. By managing factors like humidity and airflow, you can create perfect conditions for fermentation. This leads to healthier, tastier results while also providing a deeper appreciation for the art of fermentation. Remember, the right conditions can transform your culinary creations, allowing you to experiment confidently and enjoy the journey of fermentation at home.
Know Your Ingredients
Understanding your ingredients is essential for successful fermentation, as each element plays a specific role in the process. When it comes to ingredient selection, you need to choose fresh, high-quality items that will support the fermentation process. For example, if you're fermenting vegetables, select crisp, ripe produce free from blemishes. The quality of your ingredients directly impacts the flavor and texture of the final product.
Pay attention to the source of your ingredients. Organic produce tends to have fewer pesticides and can lead to healthier fermentation. When it comes to grains or legumes, opt for whole and unprocessed varieties whenever possible, as they contain more nutrients and natural flavors.
Don't forget about your starter cultures! Whether you're using wild yeast or a commercial starter, verify they're fresh and active. A healthy starter culture can greatly influence the fermentation outcome.
Additionally, consider the balance of your ingredients. For example, if you're working with sugar, know that different types will affect fermentation differently. Raw sugar might yield a different flavor profile compared to white sugar or honey.
Lastly, be conscious of the salt you use. Salt not only acts as a preservative but also controls the fermentation rate. Opt for high-quality sea salt or kosher salt, avoiding iodized varieties that can hinder the fermentation process.
Experiment With Time
Once you've selected high-quality ingredients, it's time to explore how time affects the fermentation process. Time variability plays a significant role in determining how your ingredients transform. By experimenting with fermentation duration, you can discover the perfect taste and texture that suits your preferences.
Start by making experimental batches, adjusting the fermentation intervals to see how timing effects the final product. For instance, you might try fermenting for a shorter duration to achieve a milder flavor, or extend it for a more robust taste. Each batch can teach you something new about the duration impact on your fermentation.
Be mindful of your time management skills during this process. Keeping track of each batch's fermentation duration will allow you to make necessary timing adjustments based on your observations. Document your results meticulously to identify patterns related to time variability. You might find that certain ingredients behave differently depending on how long they're left to ferment, leading to exciting discoveries.
Monitor Ph Levels
Monitoring pH levels is essential for successful fermentation, as it directly impacts the flavor and safety of your food. You should aim for specific pH ranges depending on what you're making, ensuring ideal conditions for fermentation. If your pH isn't in the perfect range, you'll need to adjust it to achieve the best results.
Importance of Ph Measurement
pH measurement plays an essential role in the fermentation process, influencing flavor, texture, and overall product quality. Monitoring the pH scale allows you to gauge microbial activity, which is vital for achieving ideal fermentation efficiency. When you understand the acidity effects on your mixture, you can better control the fermentation speed and guarantee that the desired flavor profile develops.
Using reliable measurement tools, like pH meters or strips, helps you test your mixture accurately. Regular testing allows you to make informed decisions about adjusting acidity, which can enhance both the flavor and the health benefits of your final product. If the pH drifts too far from the perfect range, it may lead to undesirable flavors or even spoilage, affecting your overall results.
Ideal Ph Ranges
To achieve best fermentation, you need to keep your mixture within specific ideal pH ranges. Most fermentation processes thrive at a pH between 4.5 and 5.5. Staying within this range promotes the growth of beneficial bacteria, guaranteeing a successful fermentation while inhibiting harmful pathogens.
Using pH indicators can be incredibly helpful in monitoring your fermentation. These indicators will show you the acidity level of your mixture, giving you insight into whether you're within the ideal fermentation range. You can find pH strips or digital pH meters at many kitchen supply stores, making it easy to test your mixture regularly.
If you notice the pH level drifting outside the ideal range, you may need to adjust your ingredients or fermentation method to get it back on track. Regularly checking the pH throughout the fermentation process not only guarantees the quality of your final product but also enhances flavor development.
Adjusting Ph Levels
Maintaining the right pH levels is essential for successful fermentation, so knowing how to adjust them is key. You can monitor your pH levels using pH indicators, which provide a clear snapshot of your fermentation's acidity. If you find the pH isn't within the ideal range, consider using fermentation additives or natural acidifiers like lemon juice or vinegar to lower it.
On the flip side, if you need to raise the pH, buffering agents like baking soda can help. Be mindful that adjusting pH affects microbial activity, which in turn influences taste development and flavor profiles in your fermentation recipes.
Scaling techniques, such as gradually adding these agents in small amounts, can prevent overwhelming your mixture. Keep in mind that environmental factors like temperature and humidity also play a role in pH levels, so stay observant. Regularly check your pH to guarantee the best conditions for your fermentation. By fine-tuning these levels, you can enhance the overall quality of your final product, making it more enjoyable for everyone who gets to taste it!
Adjust for Altitude
Altitude can greatly impact fermentation cooking temperatures, so it's essential to adjust accordingly. When you're at high altitude, the lower atmospheric pressure can lead to fermentation challenges that you don't encounter at sea level. This pressure effect means that liquids boil at lower temperatures, which can influence the microbial activity vital for successful fermentation.
To achieve fermentation success, you'll need to make some temperature adjustments and possibly recipe modifications. As you go higher, the ideal fermentation temperature often needs to increase slightly. This is because the yeast and bacteria may be less active in cooler conditions, and you want to guarantee they're thriving.
Additionally, consider how altitude influences the duration of your fermentation process. At higher elevations, fermentation can take longer than you might expect, so keep a close eye on your batches. You might need to tweak fermentation times based on your specific altitude to guarantee everything progresses as it should.
When adjusting your recipes, remember that other factors like humidity can also play a role. A dry environment can lead to faster evaporation, affecting your liquid levels and, consequently, your fermentation. So, always monitor your mixture and make certain it's at the right consistency.
Click Here and Turn Every Masterpiece into a Showstopper!
Consider Fermentation Type
Different fermentation types require distinct temperature ranges for perfect results. Understanding the specific fermentation methods you're using can greatly impact the outcome of your food. For instance, lactic acid fermentation, commonly used for yogurt and sauerkraut, thrives between 68°F and 72°F (20°C to 22°C). Keeping the temperature within this range enhances microbial activity, ensuring beneficial bacteria flourish while inhibiting unwanted organisms.
On the other hand, alcoholic fermentation, like that used for brewing beer or making wine, typically benefits from a warmer environment, around 62°F to 75°F (16°C to 24°C). This temperature supports the yeast's activity, allowing it to convert sugars into alcohol efficiently. If you're fermenting at too low a temperature, you risk sluggish fermentation, while excessively high temperatures can produce off-flavors.
For fermentation methods involving wild yeast or bacteria, such as sourdough bread, you'll want to strike a balance. These methods often prefer slightly warmer conditions, around 75°F to 85°F (24°C to 29°C), to encourage the right microbial activity.
Ultimately, knowing the ideal temperatures for each type of fermentation can save you time and frustration. By tailoring your approach to the specific fermentation method, you'll achieve the best flavor, texture, and preservation results. So, before you plunge into your next project, take a moment to research the best conditions for your chosen fermentation type. Your taste buds will thank you!
Be Mindful of Seasonal Changes
Seasonal changes can greatly influence fermentation outcomes, making awareness essential for successful results. As temperatures fluctuate with the seasons, you'll need to adapt your fermentation techniques to maintain the best conditions for your ingredients. Understanding how ambient conditions shift throughout the year allows you to establish a fermentation rhythm that aligns with what you're working on.
In spring and summer, warmer temperatures can speed up fermentation, so you might notice your seasonal recipes bubbling away faster than expected. Keep an eye on fermentation timing, as you may need to adjust your usual methods to prevent over-fermentation. Conversely, autumn and winter bring cooler temperatures, which can slow down the process. During these months, consider using warm water baths or heating pads to maintain a consistent temperature for your ferments.
Don't forget to embrace seasonal ingredients in your fermentation projects. They not only offer unique flavors but also align with the natural cycles of your environment. By practicing climate awareness, you can choose ingredients that thrive in your current conditions, enhancing your final product's quality.
Lastly, be prepared for temperature adaptation. If you're fermenting in an area with significant seasonal temperature changes, think about investing in a temperature-controlled environment. This way, you can maintain ideal conditions regardless of the season, leading to consistent and delicious fermentation outcomes all year round.
Use Starter Cultures Wisely
How can you guarantee the best results in your fermentation projects? One of the key factors lies in your starter culture selection. Choosing the right culture can markedly impact the flavor, texture, and overall success of your fermented foods. Whether you're making yogurt, kimchi, or sourdough, make certain you pick a starter culture that's proven to work well with your specific ingredients. Research different strains and their characteristics, and don't hesitate to ask fellow fermenters for recommendations.
Once you've selected your starter, ideal culture storage becomes essential. Most starter cultures need to be kept in a cool, dry place to maintain their viability. If you're using freeze-dried or powdered cultures, store them in an airtight container in the fridge to prolong their lifespan. For liquid starters like whey or active cultures, keep them refrigerated and use them within a reasonable timeframe to make sure they're at their best.
When you're ready to start your fermentation, remember to check the expiration dates on your cultures. Using old or expired starters can lead to inconsistent results, so it's better to be safe than sorry. Additionally, always follow the manufacturer's instructions for rehydrating or activating your starter culture, as this can help guarantee that you're starting off on the right foot. By being mindful of your starter culture selection and ideal culture storage, you're setting yourself up for a successful fermentation journey.
Create a Fermentation Schedule
Creating a fermentation schedule is vital for achieving consistent results in your projects. By outlining your fermentation timeline, you can better manage the various stages of the process and guarantee your ingredients develop the right flavors and textures. Start by determining the fermentation period for your specific recipe, noting how long each stage typically takes. This will help you plot out when to initiate each batch.
Next, factor in temperature fluctuations. Fermentation relies heavily on maintaining an ideal temperature range. If your environment changes, it can affect the fermentation speed and the final product. Keep a thermometer handy to monitor these fluctuations, and adjust your schedule accordingly. For instance, if you know a cooler room slows down fermentation, you might want to start the process earlier to achieve your desired results.
Also, consider your personal schedule. It's important to plan fermentation times around your availability for monitoring and tasting. Mark key dates on your calendar for when each batch needs attention, whether it's stirring, adjusting temperatures, or transferring to another container.
Recognize Signs of Readiness
Monitoring your fermentation schedule is just as important as knowing when to recognize the signs of readiness. As your fermented food progresses, pay attention to various visual cues that indicate it's nearing its prime. Look for bubble formation; this is a strong sign that fermentation is active and happening. The surface appearance can also reveal much; it might become frothy or develop a slight film, which often indicates good microbial activity.
Aroma indicators play an essential role too. Take a moment to sniff your ferment. A pleasant, tangy smell usually signals that it's on track, while any off-putting odors could be a warning sign. Don't forget about taste tests; sampling your ferment is one of the best ways to gauge readiness. You'll notice color changes and texture differences as well—your mixture should become more vibrant and may soften depending on what you're fermenting.
Keep an eye on your fermentation timeline; different foods require different lengths to reach perfection, so adjust your expectations accordingly. For instance, a quick ferment like sauerkraut might be ready in just a few days, while something like kimchi may take longer. Trust your senses; combining these indicators will help you determine the perfect moment to stop the fermentation process. By recognizing these signs, you'll guarantee that your fermented foods not only taste great but also deliver the health benefits you're after.
Troubleshoot Temperature Issues
Temperature plays an essential role in fermentation, and even a few degrees can make a significant difference. If you're facing fermentation failures, it's likely due to temperature fluctuations that can disrupt microbial activity. First, check your environment. Factors like drafts, direct sunlight, and humidity can alter your fermentation timeline. Make sure your fermenting jar is in a stable, temperature-controlled area.
If you notice off-flavors or undesirable aromas, it might be a sign that your fermentation's been too warm or cold. Warmer temperatures can speed up fermentation, leading to overly sharp flavor profiles, while cooler temperatures can slow down the process, resulting in flat or underdeveloped flavors. You may need to make recipe adjustments to accommodate the temperature in your kitchen.
To maintain ideal conditions, consider using a thermometer to monitor the temperature closely. If fluctuations occur, you can use techniques like wrapping your fermenting vessel in a towel or placing it in a water bath to stabilize the temperature.
Additionally, keep an eye on the fermentation timeline. If it seems longer than expected, check for any environmental factors that might be stalling progress. Remember, the right temperature not only enhances flavor profiles but also maximizes the health benefits of your fermented foods. By troubleshooting these temperature issues, you can make sure a successful fermentation experience happens every time.
Click Here and Turn Every Masterpiece into a Showstopper!
Frequently Asked Questions: 13 Tips For Ideal Fermentation Cooking Temperatures
How Do Different Fermentation Vessels Affect Temperature Control?
Different fermentation vessels impact temperature control considerably. Vessel materials like glass or plastic affect heat retention, while insulation techniques can help maintain consistent temperatures. Choose wisely to optimize your fermentation process and achieve the best results.
Can I Reuse Fermentation Brine for Future Batches?
Yes, you can reuse fermentation brine for future batches. Just guarantee proper brine storage. Reusing it not only enhances flavor but also introduces beneficial microbes, making your next batch even tastier and more effective.
What Are the Best Practices for Cooling Fermentations Quickly?
To cool fermentations quickly, you can use cooling techniques like ice baths or chillers. Rapid chilling helps maintain quality, so monitor temperatures closely and avoid drastic changes that could disrupt your fermentation process.
How Does Temperature Impact Flavor Development in Fermented Foods?
Temperature considerably impacts flavor development in fermented foods. By controlling the temperature range, you can enhance specific aspects of the flavor profile, creating a more complex and enjoyable final product tailored to your taste preferences.
Are There Specific Temperature Guidelines for Different Fermentation Methods?
Yes, there are specific temperature ranges for various fermentation techniques. For instance, yogurt ferments best between 100-115°F, while sauerkraut thrives around 65-75°F. Adjusting these temperatures can enhance your fermentation results considerably.

Conclusion
By following these tips for ideal fermentation cooking temperatures, you can enhance your culinary creations. Remember to monitor temperature ranges, use a reliable thermometer, and control your environment for the best results. Don't forget to experiment with your ingredients and timing, and make use of starter cultures. With practice, you'll easily recognize when your ferments are ready. Troubleshooting any temperature issues will only make you a better fermenter, so get started and enjoy the process!