What Are The Essentials Of Yeast Bread Baking
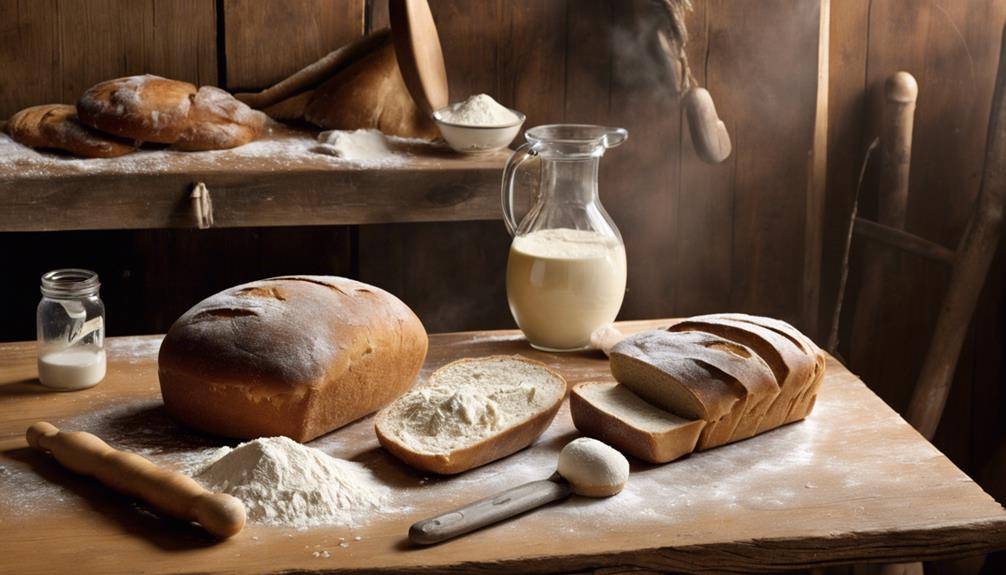
What Are The Essentials Of Yeast Bread Baking: To bake yeast bread successfully, focus on a few essentials. First, choose the right yeast—active dry, instant, or fresh—all impact your bread's flavor and texture. Next, select high-quality flour with adequate protein content for a chewy structure. Manage hydration carefully; too much water can lead to sticky dough. Pay attention to fermentation temperature, as warm water activates yeast efficiently. Finally, master your kneading technique, whether by hand or with a mixer. These elements are vital for achieving a delightful loaf, and you'll uncover even more tips to elevate your baking skills as you explore further.
Understanding Yeast Types
Click Here and Turn Every Masterpiece into a Showstopper!
When it comes to baking yeast bread, you'll encounter three main types of yeast: active dry, instant, and fresh (also known as cake) yeast. Understanding these yeast types is vital for mastering your baking skills. Each type plays a unique role in the fermentation process, which is important for developing flavor and texture in your bread.
Active dry yeast consists of dehydrated granules that require proofing in warm water before use. This process helps awaken the yeast, allowing it to start its fermentation magic. The yeast biology behind this type means it has a longer shelf life but can take a bit longer to rise compared to other types.
Instant yeast, on the other hand, is milled into finer granules and can be mixed directly with dry ingredients. It also contains enzymes that enhance the fermentation process, making it a favorite among bakers for quicker results. You won't need to proof it, allowing you to save time without compromising on quality.
Fresh yeast is less common but used by many professional bakers. It's a living organism that must be kept refrigerated and has a shorter shelf life. Its potent yeast biology makes it highly effective for fermentation, producing a rich flavor and light texture in bread.
Essential Ingredients Overview
When it comes to baking yeast bread, understanding your ingredients is key. You'll need to know the different types of yeast and how various flour options can impact your final loaf. Let's explore these essential components to set you up for success in your baking journey.
Key Yeast Types
Understanding the essence of yeast is crucial for successful bread baking. The type of yeast you choose can greatly impact your bread's texture and flavor. Active dry yeast is a popular choice, requiring yeast rehydration before use. Instant yeast, on the other hand, can be mixed directly with dry ingredients, making it convenient for quick recipes. If you prefer a fresher option, fresh yeast provides a vibrant flavor but has a shorter shelf life and requires proper yeast storage.
For those who love tangy flavors, a sourdough starter introduces wild yeast, giving your bread a unique taste and texture. Nutritional yeast, while not suitable for baking, can enrich your recipes with flavor and nutrients. If you're looking for speed, rapid rise yeast cuts down on proofing time, perfect for busy bakers or those using a bread machine.
Whichever yeast type you choose, remember that proper storage is key to maintaining its potency. Keep your yeast in a cool, dry place, and always check its expiration date to guarantee your bread rises beautifully.
Flour Varieties Explained
Flour is the backbone of any bread recipe, and choosing the right type is essential for achieving the desired texture and flavor. Bread flour, with its high protein content, creates a chewy crust and better structure, making it ideal for traditional yeast breads. On the other hand, all-purpose flour is versatile and works well for a variety of recipes, but it may not provide the same strength.
If you're looking for a nuttier flavor and added nutrients, whole wheat flour is a great choice. For those with dietary restrictions, gluten-free flour blends can replace regular flour, but they often require additional adjustments. Specialty flours like rye or spelt introduce unique tastes and textures, while ancient grains like einkorn and farro offer health benefits.
Enriched flour has added vitamins and minerals, making it a nutritious option, while self-rising flour includes baking powder and salt, perfect for quick breads. Depending on your recipe, you might choose high protein flour for dense loaves or low protein flour for lighter baked goods. Understanding these flour varieties helps you select the best one for your yeast bread baking endeavors.
Importance of Flour Quality
The quality of flour plays an essential role in the success of your yeast bread baking journey. When you choose flour, you need to take into account both its protein content and freshness. Flour protein directly impacts the structure and texture of your bread. Higher protein flours, like bread flour, give your dough the strength it needs to rise well, while lower protein flours, such as cake flour, might leave you with a denser loaf. So, if you want a chewy, airy bread, opt for a flour with a higher protein percentage.
Flour freshness is equally important. Fresh flour has a more pronounced flavor and better baking qualities. Over time, flour can lose its potency, leading to less effective gluten formation and a bland taste. Ideally, you should use flour that's been milled recently and store it in a cool, dark place to maintain its quality. If you're unsure about your flour's freshness, give it a sniff; stale flour will have a musty odor.
The Role of Water
Water plays an essential role in yeast bread baking, affecting everything from hydration levels to the temperature of your dough. Getting the right amount of water helps activate the yeast and guarantees proper fermentation. Understanding how these factors work together will elevate your bread-making skills.
Hydration Levels Matter
Getting the hydration levels just right is essential for successful yeast bread baking. The amount of water you add directly affects dough consistency, which in turn influences the final texture and flavor of your bread. Too much water can lead to a sticky, unmanageable dough, while too little can result in a dry, crumbly loaf.
To achieve the perfect hydration, you can experiment with various hydration techniques. Start by measuring your flour accurately, as different types can absorb water differently. For instance, bread flour typically requires more water than all-purpose flour. As you mix, observe the dough's texture; it should be smooth and elastic but not overly wet.
If you're unsure about your hydration level, consider starting with a basic recipe and adjusting the water gradually. Keep track of your changes in a baking journal to see what works best for you. Remember, it's all about finding that sweet spot where the dough feels just right. Mastering hydration will not only enhance your bread's structure but will also elevate your baking skills to new heights.
Temperature Impact
Temperature plays an important role in yeast bread baking, especially when it comes to water. The temperature of the water you use can directly affect yeast fermentation, which is essential for developing flavor and texture in your bread. If you use water that's too hot, it can kill the yeast, while water that's too cold can slow down fermentation considerably.
You want to aim for an ideal dough temperature, typically around 75°F to 80°F. This range helps to create a favorable environment for yeast activity, allowing it to thrive and produce carbon dioxide effectively. When you mix your ingredients, consider the temperature of your flour, water, and even the surrounding environment, as these factors can influence the final dough temperature.
If your dough temperature is too low, your bread might take longer to rise, leading to a denser loaf. Conversely, a higher dough temperature can speed up fermentation, potentially resulting in over-proofing. By carefully managing the temperature of your water and other ingredients, you can master the fermentation process, leading to delicious, well-structured bread.
Yeast Activation Process
When you mix water with yeast, you're kickstarting the activation process that's vital for successful bread baking. The warm water helps dissolve the yeast, allowing it to wake up and begin its work. This yeast activation is essential, as it sets the stage for the fermentation stages that follow.
As the yeast activates, it starts to feed on sugars present in your dough. This feeding process produces carbon dioxide and alcohol, which not only helps the dough rise but also contributes to the flavor of your bread. If you use water that's too hot, it can kill the yeast, while water that's too cold might not activate it effectively.
To achieve the best results, aim for water temperatures between 100°F and 110°F. Once you've got the right temperature, give the yeast a few minutes to bubble and foam. This visual cue indicates that it's ready to do its job. Remember, the quality and temperature of your water can greatly impact the yeast activation, so pay close attention to these details for a successful bread-baking experience.
Choosing the Right Sugar
Sugar plays an essential role in yeast bread baking, influencing both flavor and texture. When you're choosing the right sugar, it's important to understand the different sugar types available. Granulated sugar is the most common choice, providing a balanced sweetness and helping with browning. Brown sugar, with its molasses content, adds a rich flavor and moisture, making your bread softer.
If you're looking for healthier options, consider sweeteners alternatives like honey or maple syrup. These natural sweeteners not only enhance flavor but also contribute to the bread's moisture. Keep in mind that when using liquid sweeteners, you'll need to adjust the overall liquid in your recipe.
Another option is using coconut sugar, which has a lower glycemic index and a slight caramel flavor. It can be a great substitute for granulated sugar, but remember, it might alter the color of your bread slightly.
For those avoiding sugar altogether, you can experiment with sugar substitutes like stevia or erythritol. These sweeteners can provide the desired sweetness without the calories, but be cautious—too much can lead to an off taste or affect the bread's texture.
Ultimately, the sugar type you choose should align with your specific recipe and personal taste preferences. Experimenting with different sweeteners can lead to delicious variations in your bread, so don't hesitate to try out what works best for you!
Salt and Its Functions
Salt is a vital ingredient in yeast bread baking, serving multiple essential functions that enhance both flavor and texture. First and foremost, it elevates the overall taste, balancing the sweetness from sugars and emphasizing other flavors in your bread. Without salt, your loaf might taste flat and uninviting.
Different salt types can affect your baking results. Table salt is the most common choice, but kosher salt and sea salt can also be used. Each type has unique characteristics; for instance, kosher salt has larger crystals, which can impact how it dissolves in your dough. When using different salt types, be mindful of the conversion; a tablespoon of kosher salt is not the same as a tablespoon of table salt.
Beyond flavor, salt plays a vital role in fermentation. It controls yeast activity, ensuring that your bread rises at the right pace. Too much salt can inhibit yeast, while too little can lead to overly rapid fermentation, resulting in poor texture.
If you need to limit sodium intake, consider salt substitutes, but be cautious. Some substitutes may not provide the same flavor balance or fermentation control that traditional salt offers. If you choose to experiment with these alternatives, start with small amounts and adjust as needed.
Measuring Ingredients Accurately
Accurate measurement of ingredients is vital for successful yeast bread baking. When you're measuring, even small discrepancies can lead to significant differences in the final product. To achieve that perfect loaf, you'll want to invest in reliable tools, such as measuring spoons and digital scales.
Using measuring spoons is key for smaller quantities like yeast or salt. Confirm you're using them correctly by leveling off the ingredients for precise amounts. A heaping spoonful can throw off your recipe, resulting in bread that's either too salty or lacks rise.
For larger quantities, digital scales are your best friend. They provide the most accurate measurements, especially for flour and water. Instead of using cup measurements, weigh your ingredients in grams or ounces. This method eliminates inconsistencies caused by packing or sifting flour. It also allows for more precise adjustments if you're experimenting with hydration levels or different flours.
Don't forget about temperature as well! If your recipe calls for warm water, use a kitchen thermometer to verify it's just right. This attention to detail in measuring ingredients will enhance the fermentation process and lead to better texture and flavor in your bread.
Mixing Techniques Explained
Now that you've measured your ingredients accurately, it's time to focus on mixing techniques. Whether you prefer hand mixing or using a stand mixer, each method has its own benefits and can affect the final texture of your bread. Let's explore these techniques to find what works best for you.
Hand Mixing Methods
When it comes to hand mixing methods for yeast bread, mastering the right techniques can make all the difference in your baking. You can choose between traditional methods and modern techniques, depending on your comfort and preference. Traditional methods often involve using your hands to knead the dough, allowing you to feel its texture and elasticity. This tactile approach helps you understand when the dough is ready.
Start by mixing your ingredients in a bowl, using a wooden spoon or your hands. Once combined, turn the dough onto a floured surface and knead it. Push the dough with the heel of your hand, fold it over, and repeat this motion. Kneading by hand typically takes about 8-10 minutes, ensuring you develop the gluten properly.
On the other hand, modern techniques may include the "stretch and fold" method. This involves stretching and folding the dough periodically, allowing it to rise without intense kneading. This technique is great for handling wetter doughs and can yield a beautifully airy loaf.
Whichever method you choose, remember that practice makes perfect, so don't hesitate to experiment and find what works best for you.
Stand Mixer Techniques
Using a stand mixer can streamline the bread-making process while still delivering excellent results. When you use a stand mixer, you'll achieve a more consistent mixing consistency than you might by hand. Start by combining your dry ingredients in the bowl, then add the wet ingredients gradually. Attach the dough hook and mix on low speed to combine everything, increasing the speed as the dough begins to form.
As you mix, keep an eye on the dough's texture. You want it to be smooth and elastic, indicating good dough elasticity. If it feels too sticky, add a bit more flour, but do this sparingly; a little can go a long way. Continue mixing until the dough pulls away from the sides of the bowl and passes the windowpane test—stretch a small piece, and it should form a thin membrane without tearing.
Once you achieve the right consistency, let the mixer do the work for kneading, which usually takes about 5 to 10 minutes. You'll be left with perfectly mixed dough, ready for the first rise. This efficient method not only saves time but also enhances the quality of your bread.
Click Here and Turn Every Masterpiece into a Showstopper!
Kneading for Gluten Development
Kneading brings dough to life, transforming a sticky mixture into a smooth, elastic ball that's ready for baking. This essential process develops gluten, the protein that gives bread its structure, chewiness, and dough elasticity. When you knead, you're aligning the gluten strands, which helps trap air bubbles, resulting in a well-risen loaf.
To effectively knead your dough, start by dusting your work surface with a little flour. Use your palms to push the dough away from you, then fold it back over itself. This motion encourages gluten development. You can also use various kneading techniques, such as the "stretch and fold" method, which involves stretching the dough and folding it over itself at intervals. This is especially beneficial for wetter doughs, as it adds strength without excessive flour.
Aim to knead the dough for about 8 to 10 minutes, or until it feels smooth and elastic. You can test its readiness by performing the "windowpane test." Take a small piece of dough and stretch it gently; if it forms a thin, translucent membrane without tearing, you've kneaded enough. Remember, under-kneaded dough will result in a dense loaf, while over-kneaded dough can become tough.
Mastering kneading is essential for achieving the perfect bread texture. So roll up your sleeves, embrace the process, and watch your dough transform into something extraordinary!
The Proofing Process
Proofing is an essential step in yeast bread baking that allows your dough to rise and develop flavor. During this process, yeast activity increases, leading to dough expansion and a light texture. The proofing temperature typically ranges between 75°F to 85°F (24°C to 29°C), which creates an ideal environment for yeast to thrive.
The proofing duration can vary depending on your recipe and the ambient temperature. Generally, you'll want to aim for 1 to 2 hours for the first proofing, also known as bulk fermentation. Keep an eye on visual cues; the dough should roughly double in size. If you notice it's getting too puffy, it might be ready for the next step sooner than expected.
To assess the dough's readiness, try aroma evaluation. A pleasant, slightly sweet smell indicates that fermentation is happening as it should. After the first proofing, consider a second proofing to further enhance the flavor and texture. This is especially important for more complex breads.
Using proofing containers can help maintain a consistent environment. Make sure they're covered to prevent the dough from drying out. As you monitor the dough, pay attention to its elasticity. It should feel soft and supple, making it easy to stretch without tearing. Mastering the proofing process will not only improve your bread's texture but also elevate its overall flavor.
Shaping the Dough
When it comes to shaping dough, mastering the right techniques is essential for achieving that perfect loaf. You'll want to avoid common mistakes that can affect the final texture and appearance of your bread. Let's explore some effective methods and pitfalls to watch out for as you shape your dough.
Techniques for Shaping Dough
Shaping dough is a crucial step in the bread-making process that can greatly influence the final texture and appearance of your loaf. You'll want to focus on creating proper dough tension, which helps develop the gluten structure and gives your bread a nice rise. Start by gently degassing the dough after it's risen. Flatten it slightly, then use your hands to stretch and fold the edges towards the center. This technique helps in building tension.
For a classic round loaf, use the "boule" technique. Cup your hands around the dough and rotate it while gently pulling it towards you on the work surface. This creates a smooth outer layer. If you're aiming for a loaf shape, try the "batard" method. Flatten the dough into a rectangle, then fold the top third down and the bottom third up, pinching the seams to seal. Roll it tightly, maintaining the tension, and pinch the seam closed.
Experiment with various shaping techniques to find what works best for you. Remember, the goal is to create a tight surface that will hold its shape during baking, resulting in a beautiful, airy loaf. Happy baking!
Common Shaping Mistakes
Even with a solid understanding of shaping techniques, mistakes can still happen that affect your bread's final outcome. One common error is not paying attention to dough consistency. If your dough is too dry or too wet, it won't hold its shape properly, leading to uneven loaves. Always aim for a smooth, elastic texture; this guarantees better shaping and rise.
Another frequent mistake is overworking the dough. While kneading is essential, excessive handling can cause the gluten to become too tight, making it difficult to shape. Instead, gently shape your dough, allowing it to rest if necessary to relax the gluten.
Additionally, neglecting to properly shape your loaf can lead to poor oven spring. If you don't create surface tension by tucking and rolling your dough, it may spread instead of rising.
Lastly, not using enough flour on your work surface can result in sticking, which disrupts your shaping process. Remember, a little extra flour can help manage dough consistency and make shaping easier. By avoiding these common mistakes, you'll elevate your bread-baking game and achieve beautifully shaped loaves.
Baking Temperature Insights
Baking temperature plays an essential role in achieving the perfect loaf of yeast bread. If you want that golden crust and soft interior, you'll need to pay close attention to your oven's temperature. Generally, most yeast breads bake well between 350°F and 475°F, but understanding baking temperature variations can help you adjust based on the type of bread you're making. For example, rich doughs like brioche benefit from slightly lower temperatures, while crusty artisan loaves often call for a hotter oven.
When you're setting your baking temperature, think about the ideal baking conditions for your recipe. Preheating your oven is important; it guarantees that your bread begins cooking evenly from the moment you place it inside. If you skip preheating, you risk uneven baking, leading to a loaf that's undercooked on the inside or overcooked on the outside.
Keep an eye on your bread as it bakes. Oven temperatures can vary, and using an oven thermometer can help you achieve the precise temperature you need. If you notice your bread browning too quickly, you can rotate it or lower the temperature slightly to avoid burning.
Steam and Crust Formation
Creating a beautiful crust on your yeast bread involves more than just the right temperature; steam plays an essential role in this process. When you introduce steam into the oven during the initial baking phase, you're setting the stage for an incredible crust texture that's both crisp and chewy. This steam infusion helps keep the outer layer of the dough moist, allowing it to expand properly before it sets into a crust.
The moisture created by steam delays the crust from forming too quickly, which is vital for achieving that ideal oven spring. If you let the crust harden too soon, your loaf won't rise as much, and you'll miss out on that airy interior you desire. Additionally, the steam creates a shiny finish on the crust, enhancing the overall appearance of your bread.
To effectively incorporate steam, you might place a pan of water in the oven or spritz the dough with water just before closing the oven door. This simple step can dramatically elevate your bread-baking game. As the steam rises, it envelops the dough, promoting that beautiful browning and flavor development that makes freshly baked bread irresistible.
Cooling and Storing Bread
Once you've mastered the art of baking, the next essential step is cooling and storing your bread properly to maintain its freshness. After you take the bread out of the oven, let it cool on a wire rack. This bread cooling method guarantees that air circulates around it, preventing a soggy bottom. Once it's completely cooled, you'll want to think about your storage methods.
For short-term storage, keep your bread at room temperature in an ideal container, like a bread box. This helps with humidity control and keeps your loaf fresh for about three to five days. If you want to extend the shelf life, consider wrapping your bread in plastic wrap or aluminum foil. These wrapping techniques prevent moisture loss and protect against mold.
If you've baked more than you can eat within that timeframe, freezing bread is a great option. Slice the loaf first, as this makes it easier to grab just what you need later. Wrap the slices in plastic or place them in a freezer bag, squeezing out excess air to prevent freezer burn. When you're ready to enjoy, simply toast or thaw the slices at room temperature.
Troubleshooting Common Issues
The joy of baking can quickly turn to frustration when things don't go as planned. If your dough is too sticky, it could be due to excess moisture or not enough flour. Try adjusting your ingredient ratios, and remember that humidity can affect dough stickiness. If you notice over proofing signs, like a dough that collapses easily, it's a sign you've let it rise too long. Keep an eye on your rising time to avoid this issue.
Under kneading effects can lead to a dense loaf. Make sure you knead until the dough is smooth and elastic. If your bread turns out too dense, check the yeast freshness; expired yeast can hinder your loaf size and texture. Crust color issues may arise if your oven temperature is off. If the crust is too dark, try reducing the temperature or covering it with foil; if it's too light, increase your baking time slightly.
Ingredient substitutions can also impact your final product. For example, using whole wheat flour can enhance flavor development, but it may alter the dough's structure, leading to unexpected results. Always adjust hydration levels accordingly. If your loaf is smaller than expected, it's often due to insufficient rising or improper kneading; both are critical for achieving the desired texture and height. With these troubleshooting tips, you'll be better equipped to tackle common issues and enjoy the wonderful process of yeast bread baking.
Click Here and Turn Every Masterpiece into a Showstopper!
Frequently Asked Questions: What Are The Essentials Of Yeast Bread Baking
Can I Use Expired Yeast for Baking Bread?
You can't rely on expired yeast for baking bread. Its viability decreases over time, affecting the fermentation process. Test it by proofing in warm water with sugar; if it bubbles, it's still good to use.
How Does Humidity Affect Bread Baking?
Humidity impacts yeast activation and dough consistency. In high humidity, dough may become too sticky, while low humidity can dry it out. Adjust your flour and liquid ratios to achieve the perfect balance for baking.
Is It Necessary to Use a Bread Machine?
You don't need a bread machine to make great bread, but it offers benefits like convenience and consistent results. Exploring alternative bread-making methods can also lead to delicious creations without relying on specialized equipment.
What Is the Best Method for Storing Baked Bread?
To store baked bread effectively, use airtight storage containers. For freshness, slice the bread using proper slicing techniques. This prevents staleness and keeps your bread delicious for longer, ensuring you enjoy every bite.
Can I Substitute Oil for Butter in Bread Recipes?
You can substitute oil for butter in bread recipes. Oil benefits include added moisture and a longer shelf life. However, it might slightly alter the flavor impact, making your bread taste less rich and buttery.

Conclusion
Now that you know the essentials of yeast bread baking, you're ready to create delicious loaves at home. Remember to choose the right yeast and ingredients, pay attention to flour quality, and control your baking environment. Don't forget the importance of cooling and storing your bread properly. With practice, you'll troubleshoot any issues that arise, ensuring every loaf is a success. So grab your apron, and enjoy the wonderful world of bread baking!