15 Quick Tips For Perfect Bread Baking Recipes
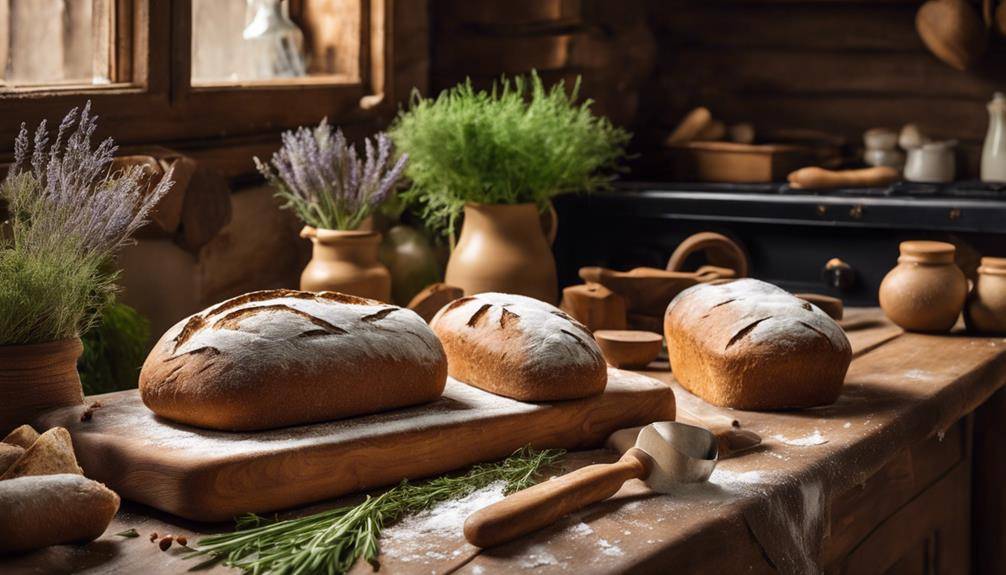
15 Quick Tips For Perfect Bread Baking Recipes: To bake perfect bread, start with the right flour and measure ingredients accurately. Always use fresh yeast, and proof it properly to guarantee a good rise. Control your water temperature to keep yeast active and knead the dough effectively to develop gluten. Allow for proper fermentation and shape your loaves carefully to create surface tension. Preheat your oven and use steam to enhance the crust. Finally, cool and store your bread correctly. Practice these tips, and you'll soon create bakery-quality loaves at home. There's even more to discover about making the most of your baking efforts!
Choose the Right Flour
Click Here and Turn Every Masterpiece into a Showstopper!
Choosing the right flour is vital for perfect bread baking, as each type brings unique qualities to your dough. Start by understanding flour types and how their gluten content affects your bread's structure. For instance, bread flour, with higher protein levels, creates a chewier texture, while all-purpose flour offers versatility for various recipes. If you prefer whole grains, whole wheat flour provides nutrients and flavor but may require adjustments in hydration due to its absorbent nature.
Don't overlook specialty flours like rye, spelt, or even gluten-free options. Each of these can contribute unique flavors and textures to your bread. Remember, the choice of flour not only impacts taste but also baking performance. Higher protein flours yield better rise and chew, while lower protein flours may result in denser bread.
When selecting your flour, consider organic options to avoid additives and chemicals. Organic flours often provide a richer taste and healthier choice. Additionally, proper flour storage is imperative. Keep your flour in a cool, dry place to maintain its freshness, and consider using airtight containers to prevent moisture and pests from ruining your ingredients.
Ultimately, choosing the right flour sets the foundation for your bread baking success. Experiment with different types, and pay attention to how they interact with your recipes. You'll soon find the perfect flour that aligns with your tastes and baking goals, turning each loaf into a masterpiece.
Measure Ingredients Accurately
After selecting the right flour, measuring your ingredients accurately is the next step in achieving perfect bread. Accurate measurements guarantee that the ingredient ratios are balanced, which is essential for the texture and flavor of your bread. Using the right measuring tools makes all the difference. Invest in a set of dry measuring cups for solids and a liquid measuring cup for wet ingredients.
When measuring flour, spoon it into the measuring cup and level it off with a straight edge. Avoid scooping directly from the bag, as this can compact the flour and lead to using too much. For ingredients like sugar and salt, use the same method: scoop and level. A kitchen scale can be a game-changer, providing precise measurements in grams or ounces. This is especially helpful when you follow recipes that specify weight rather than volume.
Don't forget the importance of ingredient ratios. For example, if you're making a basic bread recipe that calls for 3 cups of flour to 1 cup of water, sticking to those ratios is key for the dough's hydration. Deviating from these ratios can lead to overly dry or wet dough, impacting the final product.
Use Fresh Yeast
Using fresh yeast is essential for achieving that perfect rise in your bread. You'll want to store it properly and recognize the signs of freshness to guarantee your baking success. Let's explore how to keep your yeast at its best and what to look for when you're ready to bake.
Importance of Freshness
When it comes to baking perfect bread, the freshness of your yeast plays an essential role in the final outcome. Using fresh yeast guarantees that your bread rises properly, creating that delightful texture you crave. Old or expired yeast can lead to dense, unappealing loaves, ruining your hard work.
Incorporating fresh ingredients, including yeast, not only affects the rise but also contributes to flavor enhancement. Fresh yeast brings out the natural flavors in your dough, allowing for a more robust taste. You'll notice that your bread has a richer aroma and a more complex flavor profile, making every bite enjoyable.
To verify you're using fresh yeast, check the expiration date and store it correctly. Freshness is key; it directly impacts the effectiveness of your yeast and, ultimately, the quality of your bread. So, always prioritize fresh yeast in your baking routine. Remember, the effort you put into sourcing fresh ingredients will pay off in the deliciousness of your final product. Embrace the significance of freshness, and you'll find yourself baking bread that's not only perfect in texture but also bursting with flavor.
Yeast Storage Tips
To maintain the effectiveness of your fresh yeast, proper storage is essential. Different yeast types, like active dry, instant, and fresh yeast, have varying storage requirements. If you're using fresh yeast, keep it in the refrigerator, ideally wrapped tightly to prevent it from drying out. You can store it in an airtight container or tightly sealed plastic wrap. This helps to maximize yeast longevity, allowing you to bake with confidence.
For longer storage, consider freezing fresh yeast. Just crumble it into small pieces, portion it out, and place it in a freezer-safe bag. When you're ready to use it, thaw the yeast in the refrigerator overnight. Remember, once thawed, use it within a few days for the best results.
If you're using dry yeast, keep it in a cool, dark place, away from moisture. Once opened, transfer it to an airtight container for added protection. Always check expiration dates and try to buy smaller quantities if you don't bake often. Following these yeast storage tips will guarantee you maintain the potency of your yeast, leading to delicious, fluffy bread every time.
Signs of Fresh Yeast
Fresh yeast is an essential ingredient for achieving that perfect rise in your bread. To verify you're using fresh yeast, start by checking its texture. Fresh yeast should be soft and crumbly, not dry or hard. If it feels too gritty or has a powdery consistency, it's likely past its prime.
Next, pay attention to the aroma. Fresh yeast emits a pleasant, slightly sweet smell, reminiscent of bread dough. If you detect any sour or off-putting scents, it's a sure sign that your yeast has gone bad.
Another way to test freshness is to activate it. Dissolve a small piece in warm water with sugar. If it bubbles and froths within a few minutes, you're good to go! If nothing happens, toss it out and grab a new batch.
Proof Your Yeast Properly
To achieve perfect bread, you need to proof your yeast properly. Start by using the right activation techniques and keeping an eye on the ideal temperature range. Getting this step right guarantees your dough rises beautifully and results in a delicious loaf.
Yeast Activation Techniques
Yeast is the magic ingredient that transforms your dough into a fluffy masterpiece, but activating it properly is vital for success. Different yeast types, like active dry and instant yeast, require specific activation techniques. Start by checking the expiration date—using fresh yeast is essential for ideal results.
If you're using active dry yeast, dissolve it in warm water (around 110°F) along with a pinch of sugar. This sugar acts as food for the yeast, helping it to wake up. Let it sit for about 5-10 minutes until it becomes foamy. This foaming indicates that your yeast is alive and ready for the fermentation stages of bread making.
For instant yeast, you can skip the proofing step and mix it directly with your dry ingredients. However, if you want to verify its effectiveness, you can still hydrate it in warm water for a few minutes.
Keep in mind that yeast can be sensitive to temperature, so always measure your liquids accurately. Mastering these yeast activation techniques will set the foundation for perfectly risen bread every time you bake. Happy baking!
Ideal Temperature Range
Properly proofing your yeast is essential for achieving the perfect rise in your bread. To do this, you need to pay attention to the ideal temperature range for yeast activation. Yeast thrives in warm environments, typically between 100°F and 110°F (37°C to 43°C). If you go above this range, you risk killing the yeast, while temperatures below 70°F (21°C) can slow down its activity considerably.
To guarantee you're maintaining proper bread temperature control, use a thermometer to check the water before adding it to your dry ingredients. If you don't have a thermometer, a good test is to dip your finger in the water; it should feel warm but not hot.
Once you've added the yeast to the mixture, give it time to proof. You'll know it's ready when it becomes frothy and bubbly, indicating it's active and ready to help your bread rise.
Control Water Temperature
Controlling water temperature is essential for perfect bread baking, as it directly influences yeast activity and dough development. When you use water that's too hot, it can kill the yeast, leading to a flat loaf. Conversely, water that's too cold can slow down yeast activity, resulting in a dense bread. Aim for a water temperature around 100°F to 110°F for ideal results. This range encourages yeast to thrive, ensuring a good rise and texture.
To achieve the best results, you should also consider the water temperature effects on your overall dough. It's vital to remember that the temperature of your flour and the environment will impact the dough's final temperature. If your kitchen is warm, a cooler water temperature may be necessary. Conversely, in a colder environment, slightly warmer water can help maintain the perfect dough temperature.
Maintaining ideal hydration ratios in your bread recipe is equally important. The right balance between flour and water contributes to the dough's elasticity and extensibility. If you adjust water temperature, be mindful of how it affects these ratios. A well-hydrated dough will yield a lighter, airier loaf, while insufficient hydration can lead to a dry final product.
Knead Dough Effectively
Once you've mastered water temperature, the next step in achieving perfect bread is kneading the dough effectively. Kneading isn't just about working the dough; it's essential for developing gluten, which gives your bread structure and texture. Start by lightly flouring your work surface to prevent sticking, but remember that too much flour can affect your dough hydration.
Use various kneading techniques to find what works best for you. The traditional method involves pressing the dough with your palms, folding it over, and then turning it 90 degrees. Repeat this process for about 8-10 minutes. You should notice the dough becoming smoother and more elastic. If you're short on time, consider using the stretch and fold technique. Simply stretch the dough upwards and fold it over itself every 30 minutes during the first rise. This method is gentle and helps maintain moisture, enhancing dough hydration.
Pay attention to the texture of your dough. It should feel soft and slightly tacky, but not sticky. If it sticks to your hands excessively, you might need to sprinkle on a little more flour. However, avoid over-kneading, which can make the bread tough. A well-kneaded dough will bounce back when pressed and hold its shape. Trust your instincts and practice these techniques, and you'll soon be kneading dough like a pro, setting the foundation for that perfect loaf you're aiming for.
Allow for Proper Fermentation
Allowing for proper fermentation is vital for developing the flavor and texture of your bread. When you understand fermentation science, you'll appreciate how fermentation temperature and time influence the final product. The right temperature encourages yeast activity, which can vary based on the type of bread you're making. For instance, a cooler environment may require longer fermentation time, while warmer conditions speed things up.
You should also be aware of the different fermentation stages. The initial fermentation, or bulk fermentation, is where the dough rises and develops flavor. During this time, you can employ fermentation techniques like stretch and fold to strengthen the dough. As you progress, you'll notice fermentation benefits such as improved gluten structure and richer flavors.
Creating an ideal fermentation environment is essential. Keep your dough covered to prevent drying out and maintain consistent temperatures. If you encounter any issues, fermentation troubleshooting techniques can help; for example, adjusting the temperature or extending fermentation time can rectify under- or over-fermented dough.
Experimenting with fermentation varieties can also yield delightful results. For example, using a sourdough starter introduces unique fermentation flavors that elevate your bread. Remember, patience is key. Don't rush the process; allow your dough the time it needs to ferment fully. This will guarantee you achieve a loaf with a beautiful crumb and complex taste, making all your efforts worthwhile. Happy baking!
Shape Your Loaves Carefully
Shaping your loaves carefully is vital for achieving that perfect rise and texture. By mastering essential shaping techniques and understanding the importance of tension, you can greatly enhance your bread's final appearance. Watch out for common shaping mistakes, as they can lead to disappointing results in the oven.
Essential Shaping Techniques
Getting your loaves into the right shape is essential for achieving that perfect rise and texture. You'll find that different shaping styles can lead to diverse results, so it's worth experimenting to see what works best for you. Start with a basic round or oval shape. For a classic round loaf, gently flatten your dough, fold the edges towards the center, and turn it seam-side down. Then, use your hands to rotate the dough into a tight ball.
When it comes to shaping tools, a bench scraper is a must-have. It helps you manipulate the dough without tearing it, making the process smoother. If you're aiming for a more artisan approach, consider using a banneton to support the dough's shape as it rises. This can enhance the final look of your loaf.
Remember to keep your work surface lightly floured, but don't overdo it; too much flour can affect the dough's hydration. Practice these techniques consistently, and you'll develop the skill to shape your loaves like a pro. Feel free to mix and match different styles to find what best suits your baking goals!
Importance of Tension
Creating the right tension in your dough is essential for achieving a beautiful rise and an airy crumb. When you shape your loaves, you need to focus on building dough elasticity and ensuring the surface tension is just right. This process helps trap gases during fermentation, allowing your bread to rise effectively.
Start by gently stretching the dough, then fold it over itself. This not only develops gluten but also creates that vital surface tension. As you shape your loaf, you want to pull the outer layer tight, creating a smooth surface. This tension helps the dough hold its shape and rise evenly in the oven.
Pay attention to the way you handle the dough. If you're too rough, you might deflate it and lose that lovely elasticity. Instead, use a light touch to manipulate the dough, allowing it to maintain its structure.
Common Shaping Mistakes
Many bakers unknowingly make mistakes when it comes to shaping their loaves, which can lead to disappointing results. One of the most common errors is neglecting surface tension. When you handle the dough, make sure you create enough tension by tucking the edges inward. This helps your loaf maintain its shape during baking.
Using the right shaping techniques is essential. Different bread styles require different shaping methods. For example, a baguette needs a different approach than a round loaf. Pay attention to visual cues, like how the dough feels and looks, to gauge if you're on the right track.
Another mistake is not using the appropriate shaping tools. A bench scraper can help you manipulate the dough effectively without deflating it. Be mindful of your loaf sizes; if they're too large, they may not bake evenly.
Click Here and Turn Every Masterpiece into a Showstopper!
Preheat Your Oven
Before you plunge into baking that perfect loaf, it's vital to warm up your oven. Preheating your oven is an important step that can greatly impact the outcome of your bread. When you set the right oven temperature before placing your dough inside, you guarantee that your bread rises properly and develops a beautiful crust.
One of the main preheating benefits is that it allows your yeast to activate fully. If you put your dough in a cold oven, it won't rise as it should, leading to a denser loaf. By preheating, you give your bread the best chance to expand and create that airy texture we all crave. Additionally, a hot oven helps to achieve that golden-brown crust that makes your bread so appetizing.
Aim for the temperature specified in your recipe, as different types of bread require different heat levels. For example, artisan bread often benefits from a higher heat, while softer breads may call for a lower temperature. Make sure to give your oven enough time to reach the desired temperature before you slide in your dough. This usually takes about 20-30 minutes, depending on your oven.
Create Steam in Oven
Creating steam in your oven is essential for achieving that perfect crust on your bread. It helps the dough expand and develop a golden-brown exterior while keeping the inside soft and airy. Let's explore why steam matters and the best methods to generate it in your baking setup.
Why Steam Matters
When it comes to baking bread, steam plays an essential role in achieving that perfect crust. The steam benefits are numerous; it helps keep the dough moist, allowing for better oven spring. This means your bread rises beautifully, creating an airy interior and a crust that's both crispy and golden. Without steam, you might face steam prevention issues, leading to a dense loaf with a dry crust.
In fact, steam helps create the right environment for the bread to expand while it's baking. The moisture delays the formation of the crust, giving the bread time to rise. Once the crust begins to form, the steam evaporates, resulting in that desirable crunchy exterior.
Moreover, steam also contributes to the Maillard reaction, which enhances the bread's flavor and color. If you're aiming for professional-quality bread at home, don't underestimate the importance of steam in your baking process. Without it, your loaves might end up less impressive than you hoped. So, before you put your dough in the oven, make certain you're ready to create that steam for the best results.
Methods to Create Steam
To achieve that perfect crust you've been dreaming of, you'll need to incorporate steam into your baking process. Steam plays an essential role in bread baking by helping to create a crispy exterior while keeping the interior moist. There are several effective steam generation techniques you can use right in your oven.
One popular method is to place a shallow pan filled with water on the bottom rack of your oven while it preheats. As the oven heats up, the water will evaporate, creating steam. Alternatively, you can use a spray bottle to mist the oven walls a few times during the first few minutes of baking. This adds moisture without requiring extra equipment.
Another steam type to take into account is the use of a Dutch oven. Preheat the pot in your oven, then place your dough inside and cover it. The trapped steam inside the pot helps achieve that bakery-quality crust.
Experiment with these methods to see which steam generation techniques work best for your bread. With a little practice, you'll be able to create that delightful crust and impress everyone with your baking skills!
Check for Doneness
Knowing how to check for doneness can make all the difference between a perfect loaf and a disappointing one. To guarantee your bread is fully baked, you can rely on both internal temperature and visual cues.
First, invest in an instant-read thermometer. When you insert it into the center of your loaf, the ideal internal temperature for most breads is around 190°F to 210°F. If it reads lower than this, your bread likely needs more time in the oven. Remember, underbaked bread can lead to a gummy texture, while overbaking can dry it out.
Next, pay attention to visual cues. A well-baked loaf should have a golden-brown crust that's firm to the touch. Gently tap the bottom of the loaf; if it sounds hollow, that's a strong sign it's done. Additionally, the bread should have risen nicely, and you should see a nice dome on top.
Don't overlook the color of the crust, either. It should be uniform and rich, indicating that the sugars in the dough have caramelized properly. If you see dark spots, it might be overbaked in those areas.
Lastly, if you're making artisan bread, you may want to check for a slight sheen on the crust, which indicates a well-developed crust. By using these methods, you can confidently determine when your bread is ready to come out of the oven, guaranteeing that every loaf you bake is a success.
Cool Bread Properly
After pulling your bread from the oven, proper cooling is essential for achieving that perfect texture and flavor. If you slice into your loaf too soon, you'll end up with a gummy mess instead of delicious bread. So, what's the best way to cool your bread? Start by transferring it to a cooling rack. This allows air to circulate around the loaf, preventing moisture from building up on the bottom and ensuring a crusty exterior.
Place the bread on the cooling rack as soon as it's safe to handle. Let it cool for at least 30 minutes, or until it's completely cool to the touch. This cooling period is vital; it allows the crumb structure to set, which improves the overall texture. If you're impatient and slice the bread while it's still warm, you risk losing that ideal soft and airy crumb.
Keep in mind that different types of bread may require varying cooling times. For denser loaves, like sourdough, you might need to let them cool for up to an hour. On the other hand, lighter breads, like brioche, may be ready to slice in about 30 minutes.
Once your bread has cooled properly, you can enjoy it as-is or move on to bread slicing. Remember, patience is key when it comes to cooling. Your taste buds will thank you for it!
Store Bread Correctly
Although you've put in the effort to bake a perfect loaf, how you store it can make all the difference in maintaining its freshness. To keep your homemade bread tasting as delightful as it did fresh out of the oven, you'll want to take into account a few key factors in your bread storage.
First, avoid storing your bread in the refrigerator. While it might seem like a good idea, the cold environment can actually dry it out and lead to staleness. Instead, opt for a cool, dark place in your kitchen. A bread box or a cloth bag works well, allowing your loaf to breathe while still keeping it protected. If you're dealing with a crusty bread, use a paper bag to maintain that lovely crust, but consume it within a day or two.
For longer-term storage, think about slicing your bread and freezing it. Wrap each slice tightly in plastic wrap and place them in an airtight container or a freezer bag. This method preserves bread freshness effectively, and you can toast slices directly from the freezer as needed.
If you've baked multiple loaves, store them separately to prevent moisture transfer. Always remember, the key to great bread storage is keeping it dry and away from direct sunlight. By following these simple tips, you can enjoy your homemade bread at its best for days to come, ensuring every bite is just as satisfying as the first.
Experiment With Add-Ins
Storing your bread properly sets the stage for even more delicious possibilities in your baking journey. One of the best ways to elevate your bread is to experiment with add-ins. You can start by incorporating seasonal ingredients; think fresh herbs in spring or dried fruits in autumn. These add-ins not only enhance flavor but can also provide nutritional benefits. For instance, seeds like flax or chia can boost fiber content while adding a delightful crunch.
Don't shy away from exploring flavor combinations that reflect regional influences or cultural traditions. Adding spices like cumin or coriander can transport your bread to another culinary landscape. Consider how these influences can shape your baking—experiment with ingredients from different cultures to create a unique loaf that tells a story.
Texture variations are equally important. Adding nuts, seeds, or even oats can create a hearty texture that contrasts beautifully with a soft crumb. If you're looking for dietary alternatives, try incorporating whole grains or gluten-free flours, which can introduce new flavors and health benefits to your bread.
Practice Regularly
Regular practice is key to mastering the art of bread baking. The more you bake, the more you'll understand the nuances of different recipes and techniques. Create a baking schedule that fits into your routine, allowing you to practice regularly without feeling overwhelmed. This consistency will help you develop your skills and gain confidence in the kitchen.
One of the greatest practice benefits is that you'll start to recognize how dough behaves. You'll learn to identify when it's properly kneaded, how long to let it rise, and what the perfect crust looks and feels like. Each loaf you bake teaches you something new, whether it's adjusting the hydration level or tweaking the fermentation time.
Don't be discouraged by the occasional failure; instead, view it as a valuable learning experience. Every baker has had their share of loaves that didn't turn out as planned. Use these moments to analyze what went wrong and make adjustments for next time.
Additionally, try baking various types of bread to broaden your skill set. From sourdough to whole grain, each recipe presents unique challenges that can enhance your overall baking proficiency. Remember, the goal is progress, not perfection.
Click Here and Turn Every Masterpiece into a Showstopper!
Frequently Asked Questions: 15 Quick Tips For Perfect Bread Baking Recipes
Can I Use Whole Wheat Flour Instead of All-Purpose Flour?
Yes, you can use whole wheat flour instead of all-purpose flour. Whole wheat benefits include more nutrients and fiber, but it'll change the flour texture, making your bread denser. Experiment for the best results!
How Can I Tell if My Yeast Is Still Active?
To check your yeast activation, mix it with warm water and a pinch of sugar. If it bubbles and foams within 5-10 minutes, your yeast's active. If not, it's time for yeast testing.
What's the Best Way to Store Leftover Bread?
To store leftover bread effectively, use ideal bread wrapping methods. You can wrap it tightly in plastic wrap or aluminum foil, or place it in an airtight container to maintain freshness and prevent staleness.
How Do I Prevent My Bread From Getting Stale Quickly?
To prevent your bread from getting stale quickly, wrap it tightly to retain moisture and keep its crust texture. Store it in a cool, dry place, or freeze it for longer freshness.
Can I Freeze My Homemade Bread, and How?
Yes, you can freeze your homemade bread! To preserve bread texture, wrap it tightly in plastic wrap or aluminum foil. Use proper freezing techniques, and it'll stay fresh for months. Just thaw before enjoying!

Conclusion
By following these quick tips, you'll be well on your way to baking perfect bread every time. Remember to choose the right flour, measure accurately, and pay attention to your yeast. Don't forget to control your water temperature and cool your bread properly. With practice and a little experimentation, you'll discover your own favorite recipes. So grab your ingredients, roll up your sleeves, and enjoy the delicious journey of bread baking! Happy baking!