The Best Way Of Pressure Cooking Beans Without Soaking
Way Of Pressure Cooking Beans Without Soaking; You can easily pressure cook beans without soaking them first, making meal prep quick and efficient. Simply rinse and sort your beans to remove any impurities, then add them to your pressure cooker with enough water. Cooking times vary by type; for instance, black beans take about 20-25 minutes, while chickpeas can take 35-40 minutes. Once cooked, let the pressure release naturally for ideal texture. You’ll also want to think about adding aromatics or broth to elevate the flavor. There’s plenty more you can explore to perfect your pressure cooking technique!
Benefits of Pressure Cooking Beans
One of the standout benefits of pressure cooking beans is the significant time savings it offers. Instead of soaking your beans overnight, you can cook them in a fraction of the time, making it easier to whip up a nutritious meal even on busy days. In just about 30 minutes, you can have perfectly cooked beans ready to serve, which is a game-changer for anyone with a packed schedule.
Not only do you save time, but you also access the nutritional benefits that beans provide. Pressure cooking helps retain essential vitamins and minerals that can be lost in other cooking methods. The high heat and pressure guarantee that the beans soften quickly while preserving their rich nutrients, making your meal not just quicker, but healthier too.
Imagine being able to enjoy a hearty bean chili or a flavorful bean salad without having to plan ahead or wait hours for your beans to cook. This method allows you to be more spontaneous in the kitchen, encouraging you to incorporate beans into your diet more frequently.
Incorporating beans into your meals boosts your intake of protein, fiber, and various vitamins, which are essential for overall health. With the time-saving advantages of pressure cooking, you can easily add these nutritious powerhouses into your diet, enhancing your meals without sacrificing your time or health. It’s a win-win situation that makes cooking both efficient and rewarding.
Choosing the Right Beans
When it comes to choosing the right beans for pressure cooking, consider your recipe and the flavors you’re aiming to achieve. Different bean varieties offer distinct tastes and textures, so knowing what you want will guide your selection. For instance, if you’re making a savory chili, black beans or pinto beans work well due to their rich flavors. On the other hand, if you’re preparing a light salad, you might prefer navy beans or cannellini beans, which have a milder taste.
Think about your cooking preferences, too. Some beans, like lentils, cook quickly and don’t require much time in the pressure cooker, while larger varieties, like kidney beans or chickpeas, need a bit more time to soften. If you enjoy experimenting, consider mixing different bean varieties in one dish. This approach not only enhances the flavor but also adds interesting textures to your meal.
Remember to check the quality of the beans you choose. Fresh beans cook better and yield a tastier result. If you have specific dietary needs, such as gluten-free or high-protein options, there are beans that cater to those preferences as well. Ultimately, the right beans can make a significant difference in how your dish turns out, so take the time to select those that align with your culinary goals and taste buds.
Preparing Beans for Cooking
Once you’ve chosen the right beans, it’s essential to rinse and sort them properly. This step helps remove any dirt or debris, ensuring your beans are clean and ready to cook. You’ll also need to adjust the cooking time based on the type of beans you select, so keep that in mind as you prepare.
Choosing the Right Beans
Choosing the right beans is essential for a successful pressure cooking experience. With so many bean varieties available, it’s important to know what you’re looking for based on your cooking needs and preferences. For instance, black beans, kidney beans, and pinto beans are popular choices, each offering unique flavors and textures.
When selecting beans, consider their nutrient profiles as well. Different bean varieties provide various health benefits. For example, lentils are high in protein and fiber, while chickpeas are packed with vitamins and minerals. Understanding these nutrient profiles can help you make informed decisions based on your dietary goals.
Also, think about how you plan to use the beans in your meals. If you want a hearty chili, kidney beans are a great option. For soups or salads, you might prefer black beans or garbanzo beans. By choosing the right beans for your recipe, you’ll enhance the overall flavor and nutritional value of your dish.
Rinsing and Sorting Beans
Rinsing and sorting beans is an essential step in preparing them for pressure cooking. When you choose your favorite bean varieties, it’s important to verify they’re clean and free from debris. Start by spreading the beans out on a clean surface, like a countertop or a cutting board. This allows you to easily spot any small stones, damaged beans, or impurities that might have snuck in during packaging.
Once you’ve sorted through them, it’s time to rinse. Use a fine mesh strainer for effective rinsing techniques. Simply place the beans in the strainer and run them under cold water, gently stirring with your hand. This method helps remove any dust or dirt lingering on the beans. Rinsing also washes away any potential anti-nutrients that could affect digestion.
Don’t skip this step; it really enhances the flavor and texture of your beans once cooked. After rinsing, you’re ready to move on to cooking them, knowing you’ve prepped them properly for the best results. Enjoy the satisfaction of knowing you’ve set yourself up for delicious pressure-cooked beans!
Cooking Time Adjustments
When preparing beans for pressure cooking, understanding cooking time adjustments is crucial for achieving the perfect texture and flavor. Unlike traditional cooking methods, pressure cooking greatly reduces the time it takes to cook beans without soaking. However, you need to tweak the cooking times depending on the type of beans you’re using.
For instance, black beans typically cook in about 20 to 25 minutes, while chickpeas might need 35 to 40 minutes. If you’re cooking larger beans like kidney beans, aim for around 25 to 30 minutes. To enhance the flavor, consider adding aromatics, such as garlic or onions, during the cooking process. This can elevate the taste of your beans, making them more delicious.
It’s important to remember that after cooking, allow for natural pressure release for about 10 to 15 minutes before manually releasing any remaining pressure. This step not only guarantees even cooking but also further enhances the flavor. By adjusting your cooking times and adding thoughtful ingredients, you’ll create perfectly cooked beans that are flavorful and ready to be enjoyed in your favorite dishes.
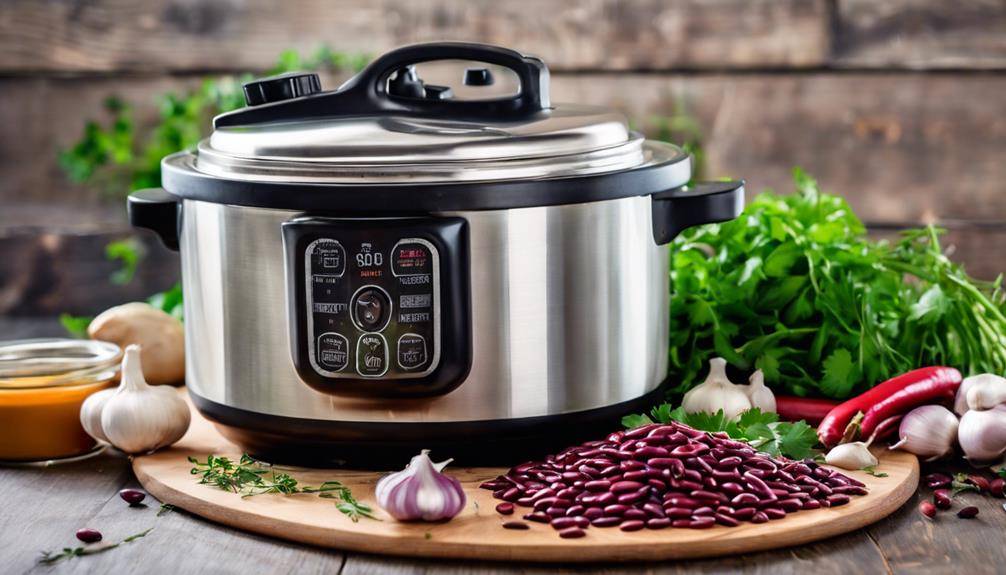
Pressure Cooking Techniques
Mastering pressure cooking techniques can transform your bean preparation from a lengthy process into a quick and efficient task. First, make sure you’re using enough water. Beans need ample liquid to cook properly, so follow your pressure cooker‘s guidelines. Cooking myths often suggest that you need to soak beans beforehand, but with a pressure cooker, that’s not necessary.
Next, seal the lid securely and set your pressure cooker to the right pressure level. Most modern cookers have an easy-to-use interface, allowing you to choose the appropriate setting for your beans. Once it reaches pressure, it’s time to adjust your cooking time.
After the cooking cycle is complete, you’ll need to manage the pressure release. You can either use a natural release, where you let the cooker cool down on its own, or a quick release, where you carefully release steam manually. The choice depends on the type of beans you’re cooking. For example, lentils often benefit from a quick release, while larger beans like kidney or black beans may yield better results with a natural release.
Don’t forget to check for doneness after the pressure release. If they’re not quite tender enough, you can always seal the lid and cook them for a few more minutes. With these techniques, you’ll be able to enjoy perfectly cooked beans without soaking, debunking the cooking myths that may have held you back.
Cooking Times for Different Beans
When pressure cooking beans, knowing the right cooking times is essential for perfect results. Each type of bean has its own specific duration, so you’ll want to pay attention to these differences. Let’s explore an overview of cooking times and the specific durations for popular beans.
Cooking Times Overview
Understanding the cooking times for different beans can make all the difference in achieving the perfect texture and flavor. Each bean variety has its unique requirements, and knowing these can help you select the best cooking methods. When pressure cooking without soaking, the times will vary greatly based on the type of beans you’re using.
For instance, small beans like lentils typically cook faster, needing about 6 to 9 minutes under pressure. On the other hand, larger varieties like kidney or black beans generally take around 25 to 30 minutes. If you’re using chickpeas, expect them to take about 20 to 25 minutes. The cooking method plays a vital role, too—using a pressure cooker can drastically reduce cooking times compared to traditional stovetop methods.
It’s important to remember that while pressure cooking is efficient, you’ll also need to account for the time it takes for the cooker to reach pressure and release it afterward. By understanding these cooking times, you can guarantee that each bean variety is cooked to perfection, achieving the ideal balance of tenderness and flavor in your dishes.
Bean-Specific Cooking Durations
How long should you cook different types of beans in a pressure cooker? The cooking time varies greatly depending on the type of bean, and knowing these specifics can enhance your cooking efficiency. Here’s a quick guide to help you.
For black beans, set your pressure cooker for about 20-25 minutes. This gives you a creamy bean texture that’s perfect for soups or tacos. Pinto beans require a similar duration, around 20-30 minutes, yielding a soft texture great for refried beans or chili.
Navy beans need about 25-30 minutes to achieve that tender, smooth consistency. If you’re cooking chickpeas, aim for 35-40 minutes; they retain a firm yet creamy texture ideal for hummus. For kidney beans, you’ll need around 30-35 minutes, ensuring they’re soft yet not mushy.
Flavoring Your Beans
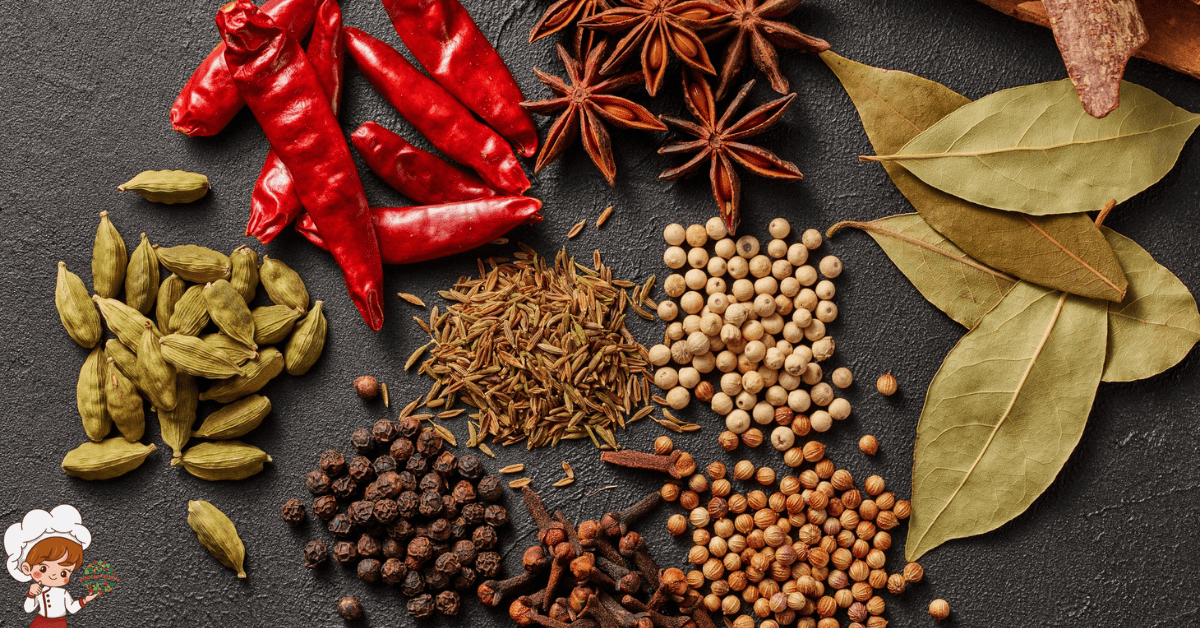
Flavoring your beans can transform a simple dish into a culinary delight. When you pressure cook your beans, you have a fantastic opportunity to infuse them with rich flavors that enhance their natural taste. Start by experimenting with various herb combinations. Fresh herbs like cilantro, parsley, or thyme can add freshness, while dried herbs like oregano or rosemary provide depth. Toss them into the pot before cooking to let their essence seep into the beans.
Don’t forget about spice additions! Spices can elevate your beans from ordinary to extraordinary. Consider adding cumin for a warm, earthy flavor, or chili powder for a kick. Smoked paprika can give your beans a subtle smokiness, perfect for a cozy dish. You can even create your own spice blend by combining your favorites, ensuring a unique flavor profile that fits your palate.
Another great way to enhance flavor is by using broth instead of water. Vegetable or chicken broth can impart a savory richness that plain water just can’t achieve. Adding aromatics like garlic and onion will also enhance the overall taste. For a touch of sweetness, toss in a bay leaf or even a splash of vinegar after cooking to balance the flavors.
Troubleshooting Common Issues
When pressure cooking beans, you might encounter a few common issues that can affect your results. One common problem is texture issues. If your beans turn out mushy, it could be due to overcooking. Make sure you’re following the recommended cooking times for the type of beans you’re using. On the flip side, if they’re undercooked or hard, you may need to increase the cooking time or check the pressure level during cooking.
Another issue can arise during the pressure release phase. If you’re using a natural pressure release and your beans still aren’t cooked to your liking, consider switching to a quick release method. This allows you to open the pot sooner and check the beans for doneness. Just be cautious, as this can sometimes lead to splatter.
Lastly, if you notice a foamy residue or excessive bubbling during cooking, you might be dealing with excessive starch from the beans. To minimize this, try rinsing your beans thoroughly before cooking. If you’ve already cooked them and see foam, just let the pressure release naturally to avoid a mess.
Storing Leftover Beans
After you’ve enjoyed your perfectly cooked beans, it’s important to know how to store any leftovers properly. Proper bean storage can help maintain their flavor and texture for future meals. If you’ve got a good amount left over, you might want to contemplate freezing them for later use.
To store your beans in the fridge, let them cool completely before transferring them to an airtight container. They’ll last about 3 to 5 days this way. However, if you know you won’t use them within that time frame, freezing is your best option. When using freezing methods, portion the beans into smaller quantities, like one or two-cup servings. This makes it easier to thaw just what you need later on.
Before placing the beans in the freezer, ascertain they’re cooled down and drain any excess liquid. You can use freezer-safe bags or containers, but avoid overfilling them, as beans expand when frozen. Label each bag or container with the date so you can keep track of freshness.
When you’re ready to use the frozen beans, simply take them out and let them thaw in the fridge overnight, or you can defrost them in the microwave for quicker use. Whether you’re adding them to soups, stews, or salads, properly stored beans can be a fantastic addition to your meals, saving you time and reducing food waste.
Frequently Asked Questions: Way Of Pressure Cooking Beans Without Soaking
Can I Pressure Cook Canned Beans Without Soaking Them First?
Yes, you can pressure cook canned beans without soaking them first. Just remember, since they’re already cooked, you’ll need a shorter cooking time—about 5 minutes should be enough to heat them through perfectly.
How Does Altitude Affect Pressure Cooking Beans Without Soaking?
When you’re at high altitude, cooking times for beans increase due to lower atmospheric pressure. You’ll need to adjust your cooking duration, ensuring they fully soften while still maintaining their texture and flavor.
Are There Any Beans That Should Never Be Pressure Cooked?
Certain bean varieties, like kidney beans, contain toxins that require proper cooking to neutralize. You shouldn’t pressure cook them without adequate preparation. Always follow safe pressure cooking techniques to guarantee your meals are both tasty and safe.
What Is the Best Way to Season Beans During Cooking?
To season beans during cooking, try combining spices like cumin, paprika, and garlic powder. This spice combination boosts flavor enhancement, ensuring your beans are delicious and aromatic. Don’t forget to adjust for personal taste preferences!
Can I Mix Different Types of Beans in One Pressure Cooking Batch?
You can mix different types of beans in one pressure cooking batch, but be mindful of cooking times. Some bean combinations may require adjustments, so check for doneness to guarantee everything cooks evenly.

Conclusion
To summarize, pressure cooking beans without soaking is a quick and convenient way to enjoy nutritious meals. By selecting the right beans and using proper techniques, you can achieve tender results in no time. Don’t forget to experiment with flavors to make your dishes even more delicious. If you encounter any issues, troubleshooting is simple, and storing leftovers means you’ll always have a tasty option on hand. Give it a try, and you won’t be disappointed!
If you enjoyed exploring this topic and want to dive even deeper, be sure to check out some of our other articles here on Infinite Flavors. From rich culinary histories to creative twists on classic recipes, there’s always something new to discover. Whether you’re curious about the origins of a dish, looking for fresh inspiration in the kitchen, or simply love learning about food culture, our collection of posts is the perfect next step on your flavor journey.
Selecting The Right Pressure Cooker
How To Pressure Cooking For Breakfast Recipes
The Great Time-Saving Tips With Pressure Cooking