7 Essential Tips For Baking Bread In Wood Oven
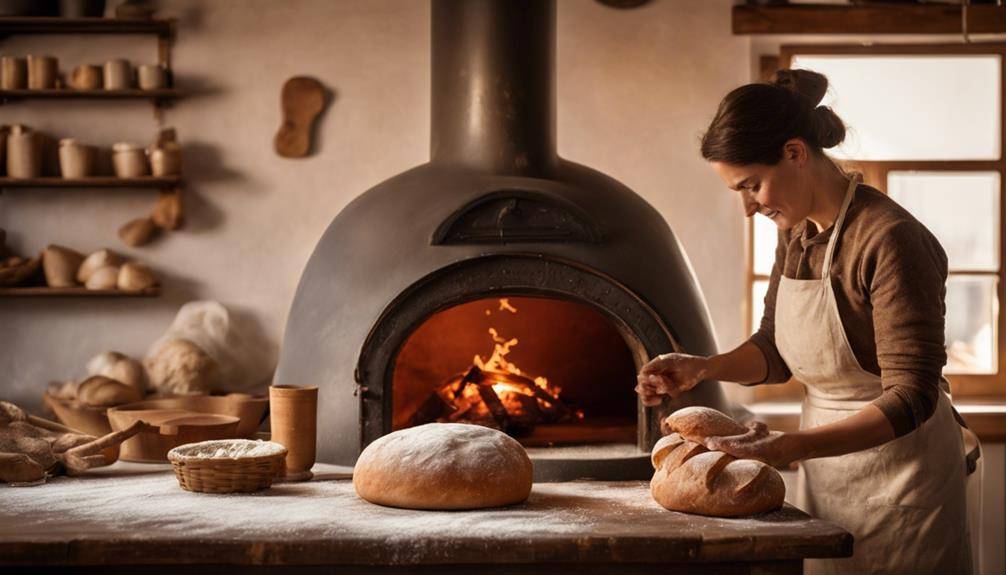
7 Essential Tips For Baking Bread In Wood Oven: To bake bread in a wood oven, start with hardwood like oak or hickory for a robust flavor. Preheat your oven for at least an hour to guarantee even heat distribution. Focus on your dough's hydration for the right texture, and knead it well for elasticity. Choose a heat-retaining baking surface like brick or seasoned cast iron. Keep an eye on the oven temperature, calibrate your thermometer, and create steam for a perfect crust. Finally, monitor baking time closely. Stick around, and you'll uncover more tips to perfect your wood oven baking skills.
Choose the Right Wood
Click Here and Turn Every Masterpiece into a Showstopper!
When it comes to baking bread in a wood oven, selecting the right wood is essential for achieving that perfect crust and flavor. Different wood types can dramatically influence not only the temperature but also the aroma and taste of your bread. You'll want to choose hardwoods like oak, hickory, or maple for their high heat output and long burn time. These woods provide consistent heat, which is vital when you're looking for that ideal oven environment.
Consider the flavor profiles that each type of wood offers. For instance, oak lends a mild, smoky flavor that complements most bread types without overpowering them. If you're looking to add a unique twist, try using hickory, which has a stronger, more pronounced flavor that can enhance rustic loaves. Fruit woods like cherry or apple offer a sweeter, lighter smoke that can elevate lighter breads and pastries.
Avoid softwoods such as pine or fir, as they can produce excessive resin and create an unpleasant taste in your bread. Additionally, these woods tend to burn too quickly, making it challenging to maintain a steady temperature.
Preheat Your Oven Properly
Preheating your wood oven is essential for baking bread that rises perfectly and develops a beautiful crust. To achieve the right oven temperature, you'll need to plan ahead. Start by lighting your fire at least an hour before you intend to bake. This allows the oven to heat up evenly and reach the desired temperature.
Proper flame management is key during this process. Use dry, well-seasoned wood to create a strong, consistent flame. As the fire burns, you'll want to keep an eye on the flames and adjust the wood accordingly. If the flames are too high, they can scorch your bread, while too low a flame can lead to uneven baking. Aim for a steady flame that helps maintain a stable temperature throughout the oven.
You should also check the oven's floor temperature with an infrared thermometer or by tossing a handful of flour onto the surface. If it browns quickly, your oven is ready. Ideally, you're looking for a temperature of around 450°F (232°C) for bread baking.
Once your oven reaches the desired temperature, let it settle for a few minutes. This helps guarantee that the heat is distributed evenly throughout the oven. Remember, your goal is to create an environment that promotes ideal rising and crust formation. With the right preheating and flame management, you'll set yourself up for successful bread baking.
Master Dough Consistency
To achieve that perfect loaf, you need to master your dough's consistency. Understanding hydration levels and how they affect your bread is essential, so don't overlook it. Plus, using the right kneading techniques can make all the difference in texture and rise.
Hydration Level Importance
The hydration level of your dough plays an essential role in achieving the perfect master dough consistency. When you adjust the water content, you directly influence the hydration effects, which can make or break your bread. A higher hydration level generally leads to a more open crumb structure, enhancing the flavor and texture. However, if you go too high, you risk making the dough overly sticky and hard to handle.
Dough elasticity is another critical aspect affected by hydration. With the right balance of water, your dough will develop the necessary gluten structure, allowing it to stretch and rise effectively. This elasticity is crucial for trapping gases produced during fermentation, resulting in a well-aerated loaf.
To find your ideal hydration level, start with a basic recipe and gradually adjust the water content in small increments. Pay attention to how the dough feels during mixing and shaping. As you experiment, you'll discover how different hydration levels impact the final product and develop a master dough consistency that suits your baking style. Remember, practice makes perfect, so don't hesitate to tweak and refine your technique!
Kneading Techniques Explained
Achieving the right hydration level sets the stage for effective kneading, which is vital for developing your master dough consistency. Once you've mixed your ingredients, it's time to knead. Use your palms to push the dough away from you, then fold it back over itself. This stretching technique helps build gluten, giving your bread structure. Don't rush—take your time to guarantee the dough becomes smooth and elastic.
During the kneading process, pay attention to how the dough reacts. If it feels too sticky, sprinkle a little flour; if it's too dry, add a few drops of water. Mastering this balance is essential for proper dough fermentation, as it allows the yeast to work effectively, creating those delightful air pockets in your bread.
Kneading typically takes about 10 to 15 minutes. You should notice the dough becoming less sticky and more cohesive. To test if you've achieved the right consistency, perform the "windowpane test." Stretch a small piece of dough; if it holds together without tearing, you're good to go! With practice, these techniques will help you create perfectly kneaded dough, setting you up for success in your wood oven baking endeavors.
Use the Right Baking Surface
When baking bread in a wood oven, the surface you choose is essential for success. You'll want to select materials that can withstand high temperatures and promote even heat distribution. This guarantees your bread bakes evenly and develops that perfect crust you're aiming for.
Choose Appropriate Material
Selecting the right baking surface is vital for achieving that perfect loaf of bread. The materials you choose can greatly impact the texture and flavor of your bread. Ideally, you should opt for oven materials that retain heat well, like brick or stone. These materials provide even heat distribution, which is essential for consistent baking.
When evaluating insulation types, make sure that your baking surface is designed to withstand high temperatures. Avoid using materials that can warp or crack under heat, as this can lead to uneven baking. A thick, well-insulated baking stone will help maintain a stable temperature, allowing your bread to rise beautifully and develop a crispy crust.
Another factor to take into account is the surface's non-stick properties. Some bakers prefer using a seasoned cast iron skillet or a baking steel, which can also enhance the browning of your crust. Ultimately, choosing the right material for your wood oven will create a conducive environment for baking, making certain your bread comes out perfectly every time. Don't overlook this important step; it can make all the difference in your baking results!
Consider Surface Temperature
The surface temperature of your baking material plays a crucial role in the outcome of your bread. To achieve that perfect crust and airy crumb, you need to guarantee your baking surface maintains an ideal temperature. For this, consider using materials like stone or cast iron, which are known for their excellent heat retention methods. These surfaces absorb and radiate heat effectively, giving your bread that desirable oven spring.
Before you start baking, check the temperature of your oven. You can use an infrared thermometer to get an accurate reading of the baking surface. If it's too cool, your bread may not rise properly, resulting in a dense loaf. Implementing effective oven insulation techniques can also help maintain high temperatures. Insulating the walls of your wood oven will prevent heat loss, allowing your baking surface to reach and sustain the appropriate temperature.
Always remember, the hotter the surface, the better the crust. So, take your time to prepare your baking surface adequately. With the right materials and techniques, you'll guarantee your bread bakes evenly and achieves that delightful texture you're aiming for. Happy baking!
Maintain Even Heat Distribution
Achieving an even heat distribution is essential to successful bread baking in a wood oven. To make this happen, you need to choose the right baking surface. A stone or ceramic baking surface is ideal because of its excellent heat retention properties. These materials have high thermal mass, allowing them to absorb and evenly distribute heat throughout the oven, which is vital for baking bread evenly.
Before you start baking, preheat your oven for a sufficient amount of time to guarantee the baking surface reaches the desired temperature. This preheating process allows the thermal mass to store heat, which helps maintain consistent temperatures when you place your dough inside. If you use a metal surface, you'll likely face issues with uneven heat distribution, leading to unevenly baked loaves.
Also, consider rotating your bread during the baking process. This simple action can help mitigate any hot or cold spots, ensuring every side of your loaf bakes perfectly. By using the right baking surface and managing heat distribution effectively, you'll set yourself up for bread that's beautifully risen and evenly cooked.
Click Here and Turn Every Masterpiece into a Showstopper!
Monitor Oven Temperature
Monitoring oven temperature is essential for successful bread baking in a wood oven. If you don't keep a close eye on the temperature, you might end up with undercooked or burnt loaves. Start by ensuring your oven thermometer is properly calibrated. An inaccurate thermometer can lead to significant temperature fluctuation effects, resulting in inconsistent baking results. To calibrate it, you can place the thermometer in boiling water; it should read 212°F (100°C). If it doesn't, adjust or replace it as needed.
Once you have a reliable thermometer, regularly check the oven temperature before and during the baking process. Wood ovens can be tricky, as they tend to fluctuate in temperature due to the burning wood. After you've heated your oven, allow it to stabilize for a while before baking. Aim for a consistent temperature, typically around 450°F (232°C) for most bread recipes.
Keep in mind that different types of bread may require slight adjustments in temperature. For instance, artisan loaves often do well at higher temperatures, while softer breads may need a lower heat.
You should also be aware of how the placement of your loaves affects the temperature. Baking stones or tiles can retain heat, so placing your bread directly on them might yield a hotter cooking surface. By monitoring your oven temperature closely, you'll be well on your way to achieving the perfect crust and crumb for your homemade bread.
Manage Steam and Moisture
Managing steam and moisture in your wood oven is essential for creating the ideal crust and texture in your bread. When you control the steam levels, you enhance the baking process and achieve a beautiful, golden crust that's crispy on the outside and soft on the inside.
To start, consider using a steam pan in your oven. Fill it with water and place it at the bottom or side of the oven before preheating. This will help generate steam during the initial baking phase, promoting moisture retention in the dough. The steam keeps the crust flexible, allowing your bread to expand properly while baking. Just be cautious not to let too much steam accumulate, as that can lead to a gummy texture.
Another technique is to mist the oven's interior with water before loading your dough. Use a spray bottle for a quick, even application. This method can also help with steam control, giving you the right amount of moisture in the early stages of baking.
Once you've achieved your desired crust color, it's time to reduce the steam. You can do this by removing the steam pan or opening the oven door briefly. This step allows the moisture to escape, allowing the crust to set and become crispy.
Always remember that managing steam and moisture is a delicate balance. With practice, you'll find the right techniques that work for your specific wood oven, leading to consistently excellent bread.
Timing and Temperature Control
When it comes to baking bread in a wood oven, timing and temperature control are vital for success. The right oven temperature can make or break your loaf, so you need to keep a close eye on it. Typically, a wood oven should be preheated to around 450°F to 500°F. This high heat is essential for achieving that beautiful crust and airy interior that everyone loves. Remember, the temperature fluctuates as the fire burns down, so you'll want to monitor it closely throughout the baking process.
Once the oven reaches the desired temperature, it's time to take into account baking duration. Most bread types require a baking duration of 25 to 45 minutes, depending on their size and density. A good rule of thumb is to start checking your bread around the 20-minute mark. If you see a golden-brown crust forming, it's a sign that you're on the right track.
Don't forget to rotate your loaves halfway through baking to guarantee even cooking. Wood ovens can have hot spots, so this step is essential. Use an instant-read thermometer to check for doneness; the internal temperature of the bread should be around 190°F to 200°F for a perfect bake.
Click Here and Turn Every Masterpiece into a Showstopper!
Frequently Asked Questions: 7 Essential Tips For Baking Bread In Wood Oven
What Types of Wood Should I Avoid for Baking Bread?
When choosing wood, avoid resinous types like pine, as they produce excessive smoke flavor and ash residue. Instead, focus on hardwoods with low moisture for better heat retention and desirable flavor profiles in your bread.
How Long Does It Take to Preheat a Wood Oven?
Preheating a wood oven takes about 30 to 45 minutes, depending on your preheating techniques. You'll want to reach ideal temperatures around 450°F to 500°F for perfect baking results. Keep an eye on the heat!
Can I Use Store-Bought Dough in a Wood Oven?
Yes, you can use store-bought dough in a wood oven. The advantages include convenience and consistent results. Just guarantee proper dough preparation, allowing it to rise adequately before baking for the best outcome.
What Tools Are Essential for Baking in a Wood Oven?
To bake effectively in a wood oven, you'll need a pizza peel, a thermometer, and a sturdy oven brush. Mastering these baking techniques and maintaining your oven's condition will enhance your overall baking experience.
How Can I Tell When My Bread Is Fully Baked?
To tell if your bread's fully baked, check the crust color—golden brown indicates doneness. You can also use a thermometer; an internal temperature of around 190°F guarantees your bread's ready to enjoy.

Conclusion
Baking bread in a wood oven can be a rewarding experience when you follow these essential tips. By choosing the right wood, preheating your oven, mastering dough consistency, and managing steam, you'll create delicious, rustic loaves. Keep an eye on the temperature and timing, and don't forget the baking surface for best results. With a bit of practice, you'll enjoy the unique flavors and textures that only a wood-fired oven can provide. Happy baking!