DIY Pasta Dough Recipe: A Beginner’s Guide
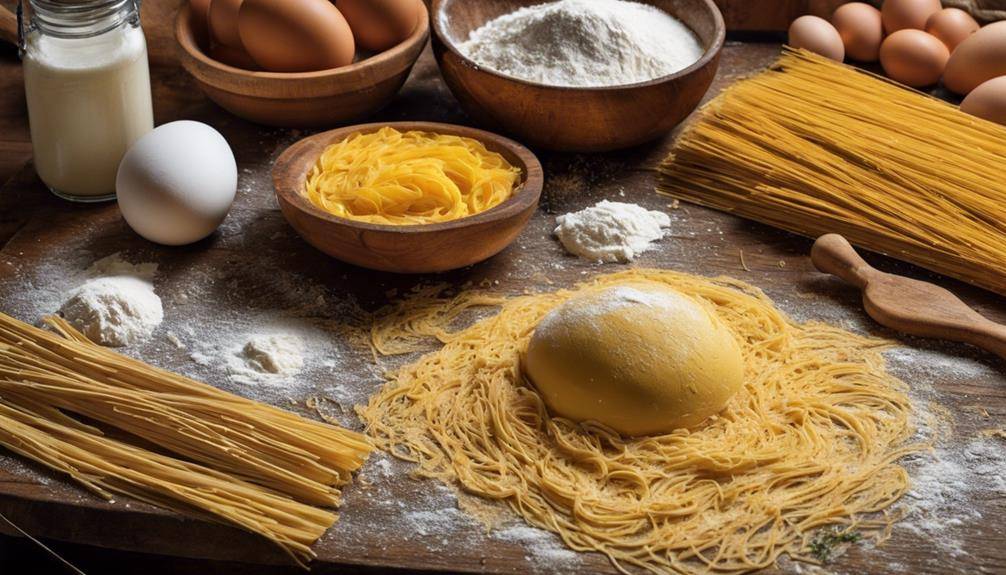
DIY Pasta Dough Recipe: A Beginner’s Guide: Making your own pasta dough is easier than you think. Start with two parts flour to one part egg, and add a pinch of salt. Mix the ingredients by creating a well in the flour and whisking the eggs in. Knead the dough on a floured surface for about 8 to 10 minutes until smooth and elastic. Let it rest for 30 minutes to relax the gluten. You can then roll it out and cut it into your favorite shapes. Cooking fresh pasta is quick! If you stick with it, you'll discover tips and tricks for perfecting your pasta skills.
Essential Ingredients for Pasta Dough
Click Here and Turn Every Masterpiece into a Showstopper!
When you're ready to make your own pasta dough, it's important to gather the right ingredients. The foundation of any good pasta dough typically includes just a few key components: flour, eggs, and salt. You might choose to use all-purpose flour, but remember that different types of flour can lead to various pasta variations. For instance, semolina flour lends a firmer texture, while 00 flour creates a silky finish, perfect for delicate shapes.
Eggs are another vital ingredient, adding richness and color to your dough. Depending on your recipe, you might use whole eggs or just yolks, which can enhance the dough's flavor and create a more tender result. Don't forget to sprinkle in a pinch of salt; it boosts the overall flavor and balances the richness of the eggs.
If you're feeling adventurous, consider incorporating flavor enhancements into your dough. Adding ingredients like spinach or beet puree not only provides a vibrant color but also infuses your pasta with unique tastes. Herbs and spices can also be mixed in to create exciting flavor profiles, perfect for complementing your favorite sauces.
Once you've gathered these important ingredients, you're on your way to crafting delicious homemade pasta. With a little practice and experimentation, you'll discover the perfect combinations that suit your palate and elevate your pasta dishes to the next level. So, roll up your sleeves and get ready to enjoy the rewarding process of making pasta from scratch!
Choosing the Right Flour
When you're making pasta, the type of flour you choose can make a big difference. Different flours have varying gluten content, which affects the texture of your dough. Let's explore the best options to guarantee your pasta turns out perfect every time.
Types of Flour
Selecting the right flour is essential for creating the perfect pasta dough. The choice you make will greatly affect the texture and flavor of your pasta. Two popular options are semolina flour and whole wheat flour.
Semolina flour, made from durum wheat, has a coarse texture and a high protein content. This makes it ideal for pasta, as it provides a firm structure that holds up well during cooking. If you want your pasta to have a slightly nutty flavor and a vibrant yellow color, semolina is your best bet.
On the other hand, whole wheat flour brings a heartier taste and additional nutrients to your pasta. It's less refined than all-purpose flour, which means it retains more of the grain's natural fiber and flavor. However, using whole wheat might result in a denser texture, so consider blending it with semolina for a balanced approach.
Experimenting with these flours can lead you to discover your favorite pasta style. So go ahead, try different combinations to find the perfect dough that suits your taste buds. Happy pasta making!
Gluten Content Importance
Gluten content is essential in choosing the right flour for your pasta dough, as it directly impacts the texture and elasticity of your final product. Different gluten types can create varying results, so knowing what you need is vital. For pasta, you'll want a flour with a higher gluten content, typically found in durum wheat or semolina. These flours produce a strong gluten texture, giving your pasta the perfect chewiness.
If you opt for all-purpose flour, you might end up with a softer, less elastic dough, which isn't ideal for traditional pasta. A low-gluten flour won't hold together well, leading to a mushy or fragile result. In contrast, high-gluten options provide that necessary structure and resilience.
When you're experimenting, don't hesitate to combine flours to achieve the desired gluten texture. Mixing, for instance, a bit of all-purpose flour with semolina can balance tenderness and chewiness. Remember, a well-chosen flour makes all the difference, so pay attention to gluten content when crafting your perfect pasta dough. With the right flour, you'll master that delightful bite in no time!
Preparing Your Workspace
Before you start making pasta, clear your counter space to create an inviting area for your dough. Gather all the necessary tools, like a rolling pin and a sharp knife, and make certain you have everything within reach. Finally, measure your ingredients accurately to guarantee your pasta turns out just right.
Clear Your Counter Space
To guarantee a smooth pasta-making experience, start by clearing your counter space of any clutter. You'll want a clean, flat surface to work with, so remove any items that don't belong in the kitchen. This includes dishes, appliances, or anything else that might get in your way.
Next, consider the countertop materials. A wooden or marble surface is ideal for rolling out pasta dough, as they provide a sturdy foundation and help prevent sticking. If your countertop is made of materials like laminate or granite, make sure it's clean and dry to confirm the best results.
Use effective cleaning techniques to wipe down your counter before you begin. A simple mixture of warm water and mild soap works wonders. Scrub the surface gently and rinse with a clean cloth to remove any residue that could affect your pasta.
Once you've cleared and cleaned your space, you'll feel more organized and ready to plunge into making delicious pasta from scratch. A tidy workspace not only enhances your cooking experience but also helps you focus on the task at hand without distractions.
Gather Necessary Tools
You'll want to gather a few essential tools to make the pasta-making process smooth and enjoyable. First, grab a clean, flat surface—your countertop or a large cutting board works well. Next, consider your pasta tools. A rolling pin is vital for rolling out the dough, while a sharp knife or a bench scraper will help you cut your pasta into desired shapes. If you plan to make shapes like fettuccine or tagliatelle, a pasta cutter can save you time.
For workspace organization, keep a bowl handy for your fresh pasta, and have a clean cloth nearby to cover your dough as it rests. You might also benefit from a flour sifter to prevent your dough from sticking. Don't forget measuring cups and spoons, as they're essential equipment when you start measuring ingredients accurately.
Lastly, if you have a pasta machine, it can elevate your pasta-making game, but it's not mandatory for beginners. With everything laid out, your kitchen setup will be efficient, allowing you to focus on creating delicious homemade pasta without any fuss. Get ready to immerse yourself in the fun of pasta making!
Measure Ingredients Accurately
Precision is key when it comes to measuring ingredients for your pasta dough, as it directly impacts the final texture and flavor. To achieve the perfect dough, you need to use effective measuring techniques that guarantee accuracy. Start with a digital kitchen scale for the most reliable results—measure your flour and other dry ingredients by weight rather than volume. This helps maintain consistent ingredient ratios, essential for a successful dough.
When measuring liquids like eggs or water, use a clear liquid measuring cup to avoid any miscalculations. If the recipe calls for large eggs, stick to that size; small or extra-large eggs can alter the dough's moisture content.
Always sift your flour before measuring if the recipe specifies it; this technique aerates the flour, preventing clumps. Remember, consistency matters, so take your time with each measurement.
Once you have everything measured out accurately, you're ready to mix your ingredients. By paying attention to these details, you'll set yourself up for a great homemade pasta experience. Happy cooking!
Mixing the Ingredients
Start by gathering your flour and eggs, creating a well in the center of the flour mound. This well will help you mix your ingredients effectively. The key to a great pasta dough lies in the right ingredient ratios, typically two parts flour to one part egg. With your flour shaped into a mound, crack the eggs into the well, making sure they don't spill over the sides.
Now, it's time to start mixing. Use a fork to gently whisk the eggs, gradually incorporating the flour from the edges of the well. This mixing technique helps to prevent the eggs from running away and keeps your dough consistent. As you add flour to the eggs, you'll notice the mixture thickening. Don't rush this process! Take your time to make certain the flour and eggs are well combined.
Once you've mixed in enough flour that the dough starts to come together, switch to your hands. At this stage, you'll want to feel the texture of the dough and make sure everything's evenly combined. If the dough feels too sticky, sprinkle in a little more flour, but be cautious—too much flour can throw off your ingredient ratios.
Continue mixing until the dough forms a rough ball. The goal here is to create a cohesive mixture without overworking it. When you've achieved that, you're ready to move on to the next step in your pasta-making journey!
Kneading the Dough
With the dough now formed into a rough ball, it's time to knead it to develop the gluten, which gives pasta its characteristic texture. Kneading isn't just about mixing; it's an essential step that transforms your dough into something smooth and elastic. Start by placing your dough on a clean, floured surface.
Using the heel of your hand, push the dough away from you, stretching it slightly. Then, fold it back over itself. Rotate the dough a quarter turn and repeat this process. You'll want to knead for about 8 to 10 minutes, incorporating more flour as needed to prevent sticking. You should notice the dough becoming less sticky and more cohesive.
Keep an eye on your dough texture; it should be smooth and elastic when you're done. If it's too dry, you can dampen your hands with a little water and continue kneading. On the other hand, if it's too wet, sprinkle in small amounts of flour.
You can also experiment with different kneading techniques. Some people prefer a slap-and-fold method where you slap the dough down and fold it over. This can be effective too, just make sure you're applying even pressure.
Once your dough feels right, give it a gentle poke. If it springs back, you've achieved a good gluten development. Now, you're ready to move on to the next step in your pasta-making journey!
Resting the Dough
Resting your pasta dough is essential for achieving the perfect texture. It allows the gluten to relax, making it easier to roll out and shape. Aim for at least 30 minutes of resting time to get the best results.
Importance of Resting
Allowing your pasta dough to rest is fundamental for achieving that perfect texture. When you mix flour and eggs, you create gluten, which can make your dough tough if you start rolling it out immediately. Resting allows the gluten to relax, resulting in a softer, more pliable dough that's easier to work with.
In addition to improving dough texture, resting also aids in flavor development. During this time, the moisture from the eggs and any added liquids is evenly distributed throughout the flour. This process not only enhances the overall taste but also guarantees that the dough absorbs flavors more effectively when you cook it.
Think of resting as a significant step to elevate your pasta from good to great. By taking the time to let your dough sit, you're assuring a better outcome in both texture and flavor. So, don't skip this step! Whether you're making lasagna, fettuccine, or ravioli, resting your dough will make all the difference. Embrace this essential part of the pasta-making process, and you'll be rewarded with delicious, homemade pasta that's sure to impress.
Ideal Resting Time
After you've let your pasta dough rest, you'll want to keep an eye on the timing to guarantee excellent results. The best duration for resting your dough is typically around 30 minutes to 1 hour. This timeframe allows the gluten to relax, which is essential for achieving that perfect texture. If you skip this step or rush it, your pasta may end up tough and hard to roll out.
During this resting period, you'll enjoy various resting benefits. The dough becomes easier to handle, making it simpler to roll out into thin sheets or shape into your favorite pasta forms. If the dough feels too sticky after resting, just sprinkle a little flour on your workspace to help with rolling.
If you find yourself in a pinch, you can rest the dough in the fridge for up to 24 hours, but remember to let it come back to room temperature before using it. This longer resting time can deepen the flavor, but be careful not to overdo it. Ultimately, paying attention to the best resting time will help you create delicious pasta that you can be proud of!
Click Here and Turn Every Masterpiece into a Showstopper!
Rolling Out the Dough
Once you've mixed and kneaded your pasta dough, it's time to roll it out into thin sheets. Start by dividing your dough into smaller portions; this makes it easier to handle. Keep the pieces you're not using covered with a clean cloth to prevent them from drying out.
When you're ready to roll, lightly flour your work surface and the dough to prevent sticking. Using a rolling pin, apply even pressure as you roll the dough out. Aim for a consistent dough thickness of about 1/8 inch, but feel free to adjust based on your preference or the specific pasta type you're making. For example, lasagna sheets can be a bit thicker, while ravioli might need thinner sheets.
There are various rolling techniques you can employ. One effective method is to roll from the center outwards, rotating the dough a quarter turn after each pass. This helps maintain an even thickness and prevents the dough from becoming too elongated. If you have a pasta machine, you can also feed your dough through the rollers, gradually reducing the width setting until you reach the desired thickness.
Keep an eye out for any tears or holes as you roll; if you notice any, gently patch them with a bit of extra dough. Once you've achieved your desired thickness, you're ready to move on to the next step. Enjoy the satisfying process of rolling out your pasta, and don't forget to have fun!
Cutting Your Pasta
Cutting your pasta is an exciting step that brings your dough to life. After rolling it out, you're ready to transform that flat sheet into delicious pasta shapes. There are a few cutting techniques you can use, depending on the kind of pasta you want to create.
If you're aiming for something classic, like fettuccine or tagliatelle, you'll want to fold your rolled-out dough into thirds or quarters. This method makes it easier to slice into even strips. Using a sharp knife or a pizza cutter, simply cut across the folded dough. Unfold the strips, and you'll have perfectly cut pasta ready for cooking!
For shapes like ravioli, you'll need to cut squares or circles. Roll out your dough and use a pastry cutter or a glass to create uniform shapes. Place your filling in the center of each, then top with another piece of dough and seal the edges with a fork or your fingers.
If you're feeling adventurous, you might try cutting your pasta by hand into unique shapes, like farfalle (bowties) or orecchiette (little ears). These techniques require a bit more practice, but they can add a personal touch to your meal.
No matter which pasta shapes you choose to create, cutting your pasta is all about having fun and experimenting. Don't hesitate to try different techniques and find what works best for you. Enjoy the process, and soon you'll be serving up your homemade pasta with pride!
Cooking Fresh Pasta
Cooking fresh pasta is a rewarding experience that elevates your meal to a whole new level. Once you've cut your dough into the desired shapes, it's time to cook it. Start by bringing a large pot of salted water to a rolling boil. The salt enhances the pasta's flavor, so don't skip this step! When the water's bubbling, gently drop your fresh pasta in. Unlike dried pasta, fresh pasta cooks quickly—usually in just 2 to 4 minutes.
While it cooks, keep an eye on it. You'll know it's done when it floats to the surface and has a tender yet firm bite, known as "al dente." Once cooked, use a slotted spoon to transfer the pasta directly to your sauce, or drain it carefully in a colander. This method allows the pasta to absorb the sauce better, enhancing the overall flavor.
Now, let's talk about pasta sauce pairings. Fresh pasta pairs beautifully with lighter sauces like a simple garlic and olive oil mix or a fresh tomato basil sauce. If you're feeling adventurous, try a creamy Alfredo or a rich Bolognese. The key is to choose a sauce that complements the pasta's texture and flavor without overpowering it.
Experiment with different pasta cooking techniques, like sautéing your cooked pasta in the sauce for a minute or two, which helps the flavors meld beautifully. Enjoy your delicious, homemade pasta and the satisfaction of having created a culinary delight from scratch!
Storing Leftover Dough
After enjoying your fresh pasta, you might find yourself with some leftover dough. Don't worry; you can easily store it for later use. The key is to choose the right method based on when you plan to use it.
If you're thinking of using the dough within a day or two, refrigerating dough is your best option. Simply wrap the dough tightly in plastic wrap or place it in an airtight container. This will help prevent it from drying out and forming a crust. When you're ready to use it, just take it out of the fridge and let it sit at room temperature for about 30 minutes before rolling it out.
On the other hand, if you want to save your dough for a longer period, freezing dough is the way to go. To do this, divide your dough into manageable portions, wrap each piece tightly in plastic wrap, and then place them in a freezer-safe bag. Label the bags with the date so you can keep track of how long it's been in there. When you're ready to use the frozen dough, simply transfer it to the fridge the night before to thaw.
Tips for Perfect Pasta
When it comes to making perfect pasta, nailing the dough consistency is vital. You want it to be smooth and elastic but not too sticky. If your dough feels tacky, add a bit more flour; if it's too dry, a splash of water can help. Once you've got the right texture, let it rest. This allows the gluten to relax, making it easier to roll out.
When you're ready to shape your pasta, remember that different pasta shapes work better with various sauce pairings. For instance, long, thin pasta like spaghetti pairs wonderfully with light sauces, such as a classic marinara or olive oil and garlic. On the other hand, if you're making a hearty ragu or a creamy Alfredo, consider using broader shapes like fettuccine or pappardelle, which can hold up to these richer sauces.
Don't forget to flour your work surface and rolling pin to prevent sticking. When cutting your pasta, be precise and even; uneven shapes can cook differently, leading to inconsistent textures. Also, consider drying your pasta for a bit before cooking, especially if you're making shapes like farfalle or tortellini. This can help maintain their form during cooking.
Lastly, always salt your boiling water before adding the pasta. It's a simple yet vital step that enhances the overall flavor. Keep these tips in mind, and you'll be well on your way to crafting perfect pasta every time.
Click Here and Turn Every Masterpiece into a Showstopper!
Frequently Asked Questions: DIY Pasta Dough Recipe: A Beginner’s Guide
Can I Use Whole Wheat Flour for Pasta Dough?
Yes, you can use whole wheat flour for pasta dough. It offers health benefits, like increased fiber, but it may change the pasta texture, making it denser. Experiment to find your preferred balance!
How Long Can I Store Fresh Pasta in the Fridge?
You can store fresh pasta in the fridge for up to three days. To maintain pasta texture, sprinkle it lightly with flour and cover it tightly. That'll help prevent sticking and keep it fresh longer.
What's the Best Way to Freeze Pasta?
To freeze pasta effectively, you should first guarantee it's cool. Then, use airtight containers or freezer bags for pasta storage. Label them with dates and use freezing techniques like portioning for easy future meals.
Can I Make Pasta Without Eggs?
Absolutely, you can make pasta without eggs! Use egg alternatives like aquafaba or flaxseed meal to achieve a similar pasta texture. Experiment with different ingredients to find your perfect combination and enjoy delicious, egg-free pasta dishes!
How Can I Tell if My Dough Is Over-Kneaded?
You can tell your dough's over-kneaded by its texture; it'll feel too stiff and rubbery. Over-kneading leads to excessive gluten development, making it tough instead of the desired smoothness for pasta. Trust your instincts!

Conclusion
Now that you've mastered the basics of making your own pasta dough, you're ready to impress friends and family with your culinary skills! Remember, practice makes perfect, so don't hesitate to experiment with different shapes and flavors. Fresh pasta is a treat that's worth the effort, and with your newfound knowledge, you can enjoy delicious meals right from your kitchen. Get cooking, and have fun creating your own pasta masterpieces!