DIY Guide: Easy Homemade Pizza Dough
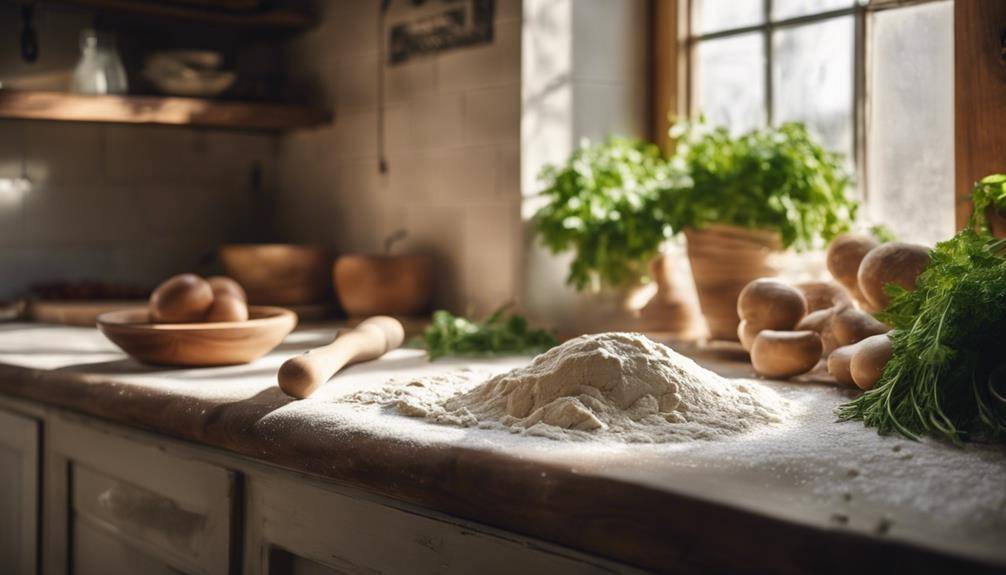
DIY Guide: Easy Homemade Pizza Dough: Making easy homemade pizza dough is a fun and rewarding experience! Start with high-quality flour, active dry yeast, and salt. Measure each ingredient accurately—this helps achieve the perfect texture. Mix your dry ingredients and gradually add water until combined. Knead the dough for about 8-10 minutes until it's smooth and elastic. Allow it to rise for an hour, then shape it into your desired pizza form. You can even freeze any leftover dough for future meals. Get ready to explore different flour types and creative flavor variations that will elevate your homemade pizza. Your culinary adventure awaits!
Essential Ingredients for Dough
Click Here and Turn Every Masterpiece into a Showstopper!
To make a great pizza dough, you'll need just a few fundamental ingredients. Start with high-quality flour, as flour quality plays a significant role in your dough's texture and flavor. Opt for a type like bread flour, which has a higher protein content, yielding a chewier crust. If you prefer a lighter crust, all-purpose flour is a solid choice, too.
Next, you'll need yeast. Active dry yeast is a popular option, but make sure it's fresh for the best results. To activate the yeast, dissolve it in warm water with a touch of sugar. This step is crucial; the warmth wakes the yeast, causing it to bubble and foam. If your yeast doesn't activate, your dough won't rise, leading to a dense pizza base.
You'll also want to add salt, which enhances the flavor and strengthens the gluten structure. It's important to balance the salt with your yeast to avoid inhibiting its growth, so mix them in separate bowls until they're ready to combine.
Understanding Dough Consistency
When making pizza dough, getting the consistency just right is essential for the perfect crust. You'll want to find that balance between thickness, stickiness, and dryness to guarantee it's easy to work with. Plus, mastering the proper kneading technique will help you achieve a smooth, elastic dough that rises beautifully.
Ideal Dough Thickness
Finding the ideal dough thickness is essential for achieving that perfect pizza crust. You want a balance that gives you a satisfying bite while ensuring it cooks evenly. A thickness of about ¼ inch usually works well for most styles, but you might prefer thicker or thinner crusts depending on your taste.
When you roll out your dough, consider how it'll puff up in the oven. If you want a chewier crust, aim for a bit more thickness. On the other hand, a thinner dough yields a crispier crust texture, which many pizza lovers enjoy.
Remember, the dough will continue to rise as it bakes, so don't be afraid to experiment a little. If your pizza turns out too soft or undercooked in the center, you may need to roll it thinner next time. Conversely, if it's too dense or doughy, try rolling it out a bit more.
Ultimately, the right dough thickness for your pizza will depend on your personal preferences, so don't hesitate to adjust until you find your perfect crust. Enjoy the process and have fun with your homemade pizza!
Stickiness Vs. Dryness
Understanding the balance between stickiness and dryness in pizza dough is essential for achieving the right consistency. The key lies in dough hydration, which refers to the amount of water in your dough relative to the flour. A higher hydration level results in stickier dough, making it easier to shape but more challenging to handle. On the other hand, lower hydration can lead to a dry, stiff dough that lacks elasticity.
When you mix your ingredients, pay attention to the dough's texture. If it's too sticky, adding a small amount of flour can help, but be cautious—too much flour will dry it out. Conversely, if your dough feels dry and crumbly, a splash of water might be all it needs to improve yeast activity and create a more cohesive mixture.
Proper Kneading Technique
To achieve the perfect pizza dough, mastering the proper kneading technique is essential for developing the right consistency. Start by positioning your hands correctly. Place your palms on the dough, using the heels of your hands to push down and away from your body. To engage your whole body, guarantee your body alignment is straight and your core is engaged. This will give you more strength and control.
As you knead, fold the dough over itself, then turn it a quarter turn before repeating the process. This method helps incorporate air and develop gluten—key factors in achieving that chewy texture. Keep a light dusting of flour on your work surface to prevent sticking, but be careful not to overdo it, as too much flour can dry the dough out.
Pay attention to the dough's texture. It should be smooth and elastic, not too sticky or dry. If it feels too wet, knead in a bit more flour. If it's too dry, you can sprinkle in a little water. Trust your instincts; with practice, you'll learn to recognize the perfect dough consistency. Happy kneading!
Measuring Ingredients Accurately
Measuring your ingredients accurately is vital for perfecting your pizza dough. Without precision, you might end up with a dough that's too dry or too sticky. Let's explore the essential tools you need to guarantee every measurement counts.
Importance of Precision
Precision in measuring ingredients is essential for achieving the perfect pizza dough. When you measure accurately, you reveal the precision benefits that lead to a consistent texture and flavor every time you make pizza. If you're off by just a little, your dough might turn out too dry or too sticky, ruining your pizza experience.
Using effective measurement techniques can make all the difference. For dry ingredients like flour and sugar, use a scale to weigh them for the most accuracy. When it comes to liquids, pour carefully into a measuring cup, checking at eye level to avoid miscalculations. Remember, even a slight variation can impact the yeast activation and gluten formation, which are vital for a well-risen crust.
Don't overlook the importance of precision in your homemade pizza journey. By being meticulous with your measurements, you're setting yourself up for success. The result? A delicious, homemade pizza that'll impress everyone at your table. So grab your measuring tools and remember: precision isn't just a suggestion; it's a key ingredient in your pizza-making process.
Tools for Measuring
Getting your hands on the right tools for measuring can make all the difference in your pizza dough preparation. First, invest in a good set of measuring cups and measuring spoons. These are essential for accurately measuring dry ingredients like flour and sugar. When it comes to liquid measurements, a liquid measuring cup will guarantee you get the right amount of water or oil, which is vital for the dough's consistency.
For even greater accuracy, consider using a kitchen scale. Weighing your ingredients provides precision that measuring cups can't always match, especially when it comes to ingredient ratios. This is particularly helpful if you're making metric conversions or experimenting with different flour types.
Mixing the Dough
Once you've gathered all your ingredients, mixing the dough is the next important step in creating the perfect pizza base. Start by combining your dry ingredients in a large bowl. This typically includes flour, salt, and yeast. If you're using active dry yeast, verify it's fully activated by dissolving it in warm water first. This step is essential for yeast activation, as it kick-starts the fermentation process that gives your dough its rise and flavor.
Once the yeast is bubbly and frothy, pour it into the bowl with the dry ingredients. Add your water slowly, allowing the flour to absorb it evenly. The water plays a significant role in dough hydration, which determines the texture and chewiness of your crust. Too little water can result in a dry dough, while too much can make it sticky and hard to handle.
Use a wooden spoon or your hands to mix everything until it starts to come together. You want to confirm that all the flour is incorporated and that no dry pockets remain. If the dough feels too dry, add a little more water, but do it gradually. Conversely, if it's too sticky, sprinkle in a bit of flour. The goal is to have a cohesive dough that's slightly tacky but manageable. Once you've mixed the ingredients well, you're ready to move on to the next step—kneading.
Kneading Techniques
To achieve a smooth and elastic pizza dough, mastering kneading techniques is vital. Kneading helps develop gluten, giving your dough its structure and chewiness. Start by sprinkling a clean surface with a bit of flour to prevent sticking. Grab your dough and place it on the floured surface.
Now, let's focus on your hand techniques. Use the heels of your hands to push the dough away from you. Then, fold it back over itself. This motion creates a nice kneading rhythm. Repeat this process for about 8-10 minutes. Don't be afraid to apply a little pressure, but avoid overworking the dough, as it can become tough.
If the dough feels too sticky, sprinkle a little more flour as needed. Conversely, if it's too dry, dampen your hands slightly before continuing. Listening to the dough is essential; it should feel elastic and smooth by the end of your kneading session.
To check if you've kneaded enough, do the "windowpane test." Take a small piece of dough and stretch it gently. If it stretches thin enough to let light through without tearing, you've achieved the right consistency. If it tears easily, keep kneading for a few more minutes.
First Rise: Importance
While you might be keen to shape your pizza after kneading, the first rise is essential for developing flavor and texture. This period, often referred to as proofing, allows the yeast to kick into action through yeast fermentation. As the yeast consumes sugars in the dough, it produces carbon dioxide and alcohol, which not only helps the dough rise but also enhances its flavor. Skipping this step can leave you with a dense, bland crust that won't impress anyone.
During the first rise, the dough will double in size, becoming airy and light. This is your opportunity to set the stage for a delicious pizza. With the right amount of time, the yeast fermentation process contributes to a complex flavor profile, giving your crust that delightful tang. You might even notice subtle changes in aroma as the dough rises, a sign that the yeast is working hard.
It's tempting to rush through this process, but giving your dough sufficient time to rise is a game-changer. Ideally, you should let it rest for at least an hour, or even longer if you can. The longer fermentation period can lead to even more pronounced dough flavor, making your pizza crust truly unforgettable.
How to Know When Ready
Knowing when your dough is ready can make all the difference in achieving that perfect pizza crust. You'll want to look for specific dough readiness signs to guarantee you've reached the right point in your pizza-making process. First off, check for the dough's volume; it should have roughly doubled in size after the first rise. This is a key fermentation indicator, showing that your yeast is active and working its magic.
Next, perform the "poke test." Gently press your finger into the dough. If the indentation springs back slowly and retains a slight impression, you're good to go. If it springs back immediately, it might need more time to rise. On the other hand, if it doesn't spring back at all, it may have over-proofed, so keep a close eye on it.
Another sign to watch for is texture. Your dough should feel smooth and elastic, not sticky or overly wet. If you notice it sticking to your hands or the bowl, sprinkle a bit of flour and knead it gently until it reaches the right consistency.
Lastly, the aroma plays a role too. A pleasantly yeasty smell indicates that fermentation is happening correctly. If the scent is sour or overly strong, your dough might be over-fermented.
Shaping Your Pizza Dough
Now that your dough is ready, it's time to shape it into the perfect pizza base. You'll want to take into account the flour types you're using, as they can affect the texture and stretchability of your dough. Let's explore some stretching techniques and shaping styles to help you create a delicious pizza masterpiece.
Flour Types to Use
Choosing the right flour type is vital for shaping your pizza dough to perfection. The flour you choose can greatly affect the texture and flavor of your crust. For a classic chewy crust, use bread flour, which has a high protein content that promotes gluten development. If you want something lighter, all-purpose flour works well too, offering a good balance between chewiness and tenderness.
If you're looking for healthier options, consider whole wheat flour or specialty flours like ancient grains. These add unique flavors and nutrients but may require adjustments in hydration. For those with dietary restrictions, gluten-free flours are available, allowing everyone to enjoy homemade pizza.
Self-rising flour is another option; it contains leavening agents, which can create a thicker, biscuit-like crust. However, it's important to remember that using self-rising flour may limit your ability to control the dough's rise and texture.
Stretching Techniques Explained
When it comes to shaping your pizza dough, mastering the stretching technique is key to achieving that perfect crust. You'll want to start with a well-proofed dough that has good dough elasticity, making it easier to stretch without tearing. One effective stretching method is the hand-tossing technique. Lightly flour your hands and the dough, then gently press down in the center, working your way outwards. Use your fingers to stretch the edges while letting gravity help; this gives you a nice, even thickness.
Another method is the rolling pin technique, which is great for beginners. Just sprinkle flour on your work surface and roll the dough out to your desired thickness. Keep in mind that rolling can sometimes reduce the dough's elasticity, so don't overdo it.
Lastly, you can use the bench rest technique—allow the dough to rest for about 10-15 minutes before stretching. This relaxes the gluten, making it easier to shape. Experiment with these stretching methods to find what works best for you, and soon you'll be creating delicious pizzas with a crust that's both crunchy and chewy.
Shaping Styles Overview
Once you've got your dough stretched to the desired size, the next step is to explore different shaping styles that can elevate your pizza-making game. You can start with traditional styles, like the classic round shape, which is often preferred for its even cooking and familiar presentation. If you're feeling adventurous, consider modern styles, such as the rectangular or square pizza, which offers a unique twist and makes for easier slicing.
Don't forget to check out regional variations, like the Neapolitan or Sicilian styles, each boasting its own unique characteristics and flavors. These can inspire you to experiment with different thicknesses and toppings, tailored to your taste.
For those who love to get creative, try shaping your pizza into fun, unexpected forms like hearts or stars. These creative shapes can add a personal touch to your pizza night and impress your friends and family. Ultimately, your choice of shaping style will depend on personal preferences, so don't hesitate to try out different techniques until you find the ones that resonate with you. Happy shaping!
Click Here and Turn Every Masterpiece into a Showstopper!
Second Rise: Why It Matters
The second rise is a significant step in making pizza dough that shouldn't be overlooked. This phase allows the gluten structure to relax and develop further, leading to a dough that's not only lighter but also has a better texture. You might be wondering about the benefits of the second rise. Well, it gives the yeast a chance to produce more carbon dioxide, which creates those delightful air pockets in your crust. This results in a pizza base that's both chewy and tender, making each bite a joy.
Timing considerations for the second rise are essential. After you've shaped your dough, let it rest for about 30 minutes to an hour. This time allows the dough to expand and develop flavor. You don't want to rush this step; giving it enough time can make all the difference in achieving that perfect crust. If your kitchen is warm, keep an eye on it, as the dough might rise faster than you expect.
When you finally bake your pizza, you'll notice the difference. A well-executed second rise will yield a crust that puffs up nicely, creating a beautiful golden-brown exterior. So, don't skip this important phase; embrace it! Your pizza will thank you, and you'll be rewarded with a homemade pie that's restaurant-quality. Remember, good things come to those who wait, and in pizza making, the second rise is one of those good things.
Tips for Perfect Crust
To achieve the perfect crust, you'll want to pay close attention to the type of flour you use. Different flours can dramatically affect the texture and flavor of your dough. Plus, mastering kneading techniques is essential for developing that ideal elasticity and structure.
Flour Type Matters
Choosing the right flour is essential for achieving that perfect pizza crust. Your flour selection directly influences the texture and flavor of your dough. For a classic Neapolitan-style pizza, opt for "00" flour, which has a fine texture and a high protein content. This type of flour yields a chewy crust with a light, airy interior.
If you prefer a thicker crust, go for bread flour, which also boasts a higher protein level but offers a slightly coarser texture. The increased gluten development in bread flour gives your crust a delightful chewiness. On the other hand, all-purpose flour is a versatile option if you're looking for something in between, but it may not provide the same level of chew and crispness as the other flours.
Keep in mind that flour properties like protein content and grind size play a significant role in your dough's performance. Experimenting with different types of flour can help you discover your ideal crust. So, whether you want a light, crispy base or a thick, hearty crust, your flour choice is key to pizza perfection!
Kneading Techniques Explained
Kneading your dough properly is essential for developing that perfect crust. When you knead, you're activating gluten, which gives your pizza its structure. Aim for a smooth, elastic dough that springs back when poked. A good rule of thumb is to knead for about 8-10 minutes by hand or 5-7 minutes in a stand mixer.
One of the key kneading benefits is improved dough hydration. As you knead, you're allowing the flour to absorb water more effectively, resulting in a dough that's easier to shape and stretch. If your dough feels too sticky, don't be tempted to add more flour right away; instead, keep kneading. The moisture will incorporate over time.
You can use the "windowpane test" to check if your dough is ready. Take a small piece and stretch it; if it forms a thin, translucent layer without tearing, you've done it right. Remember to let your dough rest afterward to relax the gluten. This makes rolling it out much easier. With these techniques, you're one step closer to achieving that delicious, crispy crust!
Storing Leftover Dough
Preserving the freshness of leftover pizza dough is essential for ensuring a delicious meal later on. To store your dough effectively, start by shaping it into a ball. Lightly coat the dough with olive oil to prevent it from drying out. Next, you'll want to wrap it tightly in plastic wrap. This helps to seal in moisture and keep your dough from developing a crust.
Once wrapped, place the dough in an airtight container or a resealable plastic bag to provide extra protection. Make sure to label the container with the date, so you know how long it's been stored. For best results, you should store your dough in the refrigerator. The cool temperature slows down fermentation, allowing you to keep your dough fresh for up to three days.
When you're ready to use your refrigerated dough, simply remove it from the fridge and let it sit at room temperature for about 30 minutes. This will make it easier to stretch and shape, ensuring your pizza crust turns out perfectly.
If you follow these refrigeration tips, you'll find that your leftover pizza dough remains pliable and flavorful, ready for your next pizza night. Remember, proper dough storage not only saves ingredients but also enhances your cooking experience, allowing you to whip up a tasty pizza whenever the craving hits!
Freezing Pizza Dough
If you've got more pizza dough than you can use in a few days, freezing it is a great way to extend its shelf life. Proper dough storage is key to maintaining its quality. Start by shaping your dough into balls, then wrap each one tightly in plastic wrap to prevent freezer burn. Place the wrapped dough in a freezer bag or an airtight container for added protection. Be sure to label your bags with the date so you can keep track of how long it's been frozen.
When you're ready to use your frozen dough, you'll need to employ some effective thawing methods. The easiest way is to move the dough from the freezer to the fridge the night before you plan to make your pizza. This slow thawing allows the dough to rise slightly and enhances its texture. If you're short on time, you can also thaw the dough at room temperature for about 30 to 60 minutes, but keep an eye on it to guarantee it doesn't become too warm.
Once your dough is thawed, gently knead it for a minute or two before rolling it out and adding your favorite toppings. Freezing pizza dough not only saves you time in the kitchen but also guarantees you always have a delicious pizza base on hand. Enjoy your homemade pizza anytime with this convenient trick!
Common Mistakes to Avoid
Making pizza dough can be a fun and rewarding experience, but there are common mistakes that can derail your efforts. One of the biggest pitfalls is not paying attention to dough temperature. If your ingredients are too cold, your dough won't rise properly. On the flip side, if it's too warm, you risk over-activating the yeast, which can lead to a dense crust. Aim for room temperature ingredients, ideally around 70°F to 75°F, for the best results.
Another frequent error is improper yeast activation. If you're using active dry yeast, make sure to dissolve it in warm water (about 110°F) before adding it to the flour. If the water's too hot, it can kill the yeast, while water that's too cold won't activate it at all. Always check the expiration date on your yeast; expired yeast can lead to disappointing results.
You should also avoid adding too much flour during kneading. It's tempting to sprinkle extra flour to prevent sticking, but too much can make your dough tough. Instead, use just enough to keep it manageable.
Lastly, don't rush the rising process. Allow your dough ample time to rest and rise, usually about an hour in a warm place. This step is essential for developing the gluten structure and achieving that perfect chewy texture. By steering clear of these common mistakes, you'll be well on your way to creating delicious homemade pizza dough!
Flavor Variations for Dough
After mastering the basics of pizza dough, you might want to experiment with flavor variations to elevate your homemade pizzas. One easy way to add depth is by creating herb-infused dough. Simply mix in dried or fresh herbs like basil, oregano, or rosemary into your flour for a fragrant twist. If you're a garlic lover, consider adding minced garlic or garlic powder for a delicious garlic flavor that pairs well with any topping.
For those looking to get creative, cheese-stuffed crusts can really impress your guests. Just take small pieces of mozzarella or ricotta, place them along the edges of your rolled-out dough, and fold it over before baking. You could also explore spicy variations by mixing in red pepper flakes or a bit of cayenne pepper for a kick that adds excitement to every bite.
If you're health-conscious, try whole wheat flour for a nuttier taste and added nutrition. For friends who need dietary alternatives, gluten-free flour blends can work well too, ensuring everyone can enjoy pizza night. If you're in the mood for something sweet, a sweet dough variation with a touch of sugar and cinnamon can make a delightful dessert pizza, especially when paired with seasonal toppings like fresh fruit or chocolate.
With these flavor variations, your pizza dough can transform into an essential canvas for creativity and deliciousness.
Using Your Dough Creatively
While you might think of pizza dough solely as a base for traditional toppings, it can actually serve as a versatile ingredient in various creative dishes. You can explore different pizza shapes, transforming your dough into fun designs that kids will love. Think about using cookie cutters to make themed pizzas for parties or special occasions.
Don't shy away from gourmet twists! Experiment with creative toppings like grilled vegetables, gourmet cheeses, or unique sauces that elevate your pizza experience. You can also incorporate seasonal ingredients, like fresh basil or ripe tomatoes in summer, to enhance the flavor. Pair these with alternative flours, such as whole wheat or gluten-free options, for a healthier spin.
Consider crafting dough art by twisting or braiding your pizza dough into creative shapes. This adds an artistic flair to your meals and is a fantastic way to engage kids in the kitchen. For a fun family night, try making mini pizzas using individual dough balls that everyone can customize with their favorite toppings and flavor pairings.
You can even use your dough for more than just pizza. Create calzones, breadsticks, or even dessert pizzas with sweet toppings like Nutella and fruits. The possibilities are endless! With a little imagination, your homemade pizza dough can become the star of countless dishes, ensuring that every meal feels special and uniquely yours.
Click Here and Turn Every Masterpiece into a Showstopper!
Frequently Asked Questions: DIY Guide: Easy Homemade Pizza Dough
Can I Substitute All-Purpose Flour With Whole Wheat Flour?
Yes, you can substitute all-purpose flour with whole wheat flour. While you'll get added whole wheat benefits, the dough texture may be denser. Adjusting hydration can help achieve a better consistency for your recipe.
How Long Can I Store Pizza Dough in the Fridge?
You can store pizza dough in the fridge for up to three days. If you need longer storage, consider dough freezing; it lasts up to three months in the freezer while maintaining quality.
What Type of Yeast Is Best for Pizza Dough?
When choosing yeast for pizza dough, instant yeast is often preferred for its quick rising. Active dry yeast works too, but it requires longer fermentation time. Both will give you delicious, fluffy results in your pizza.
Can I Use a Stand Mixer Instead of Kneading by Hand?
Sure, you can use a stand mixer instead of kneading by hand. Just adjust your mixing techniques for ideal dough hydration. The mixer'll save time and effort, ensuring a well-developed dough for your pizzas.
How Do I Know if My Dough Has Over-Risen?
You'll know your dough's over-risen if it feels overly soft and sticky, lacking elasticity. If it's doubled in size beyond the recommended rising time, it's likely time to shape or use it immediately.

Conclusion
Now that you've got the hang of making homemade pizza dough, it's time to get creative! Experiment with different flavors and toppings to make each pizza uniquely yours. Remember to avoid common mistakes, and don't hesitate to freeze extra dough for a quick meal later on. With a little practice, you'll impress friends and family with your delicious creations. So roll up your sleeves and enjoy the process—your perfect pizza is just a dough away!