The Best Temperature For Roasting Whole Chicken
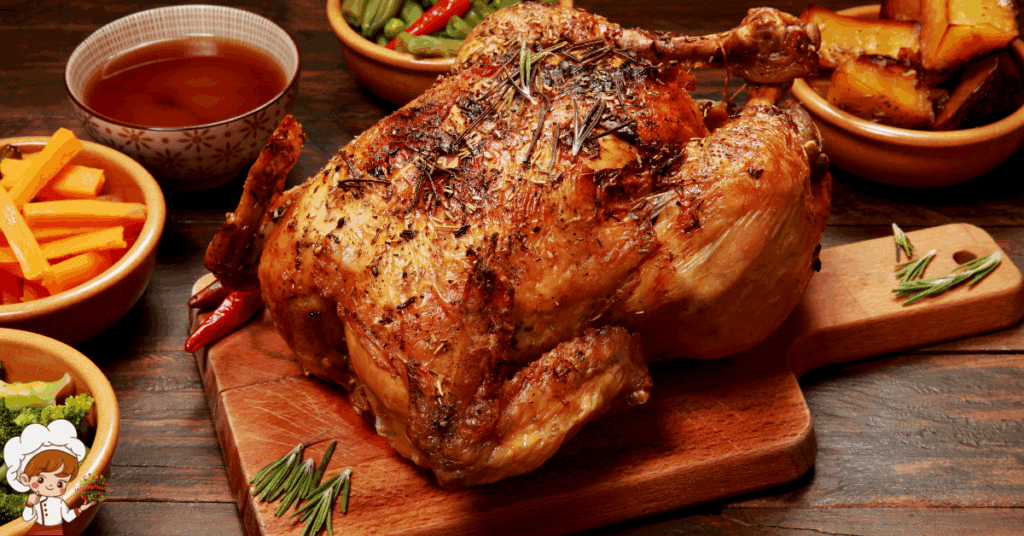
Best Temperature For Roasting Whole Chicken; To roast a whole chicken perfectly, set your oven to 425°F (220°C). This temperature helps achieve crispy skin and juicy meat. For a slower roast, you can go with 375°F (190°C), which is great for even cooking and allows the flavors to develop. Remember, a meat thermometer is essential – the internal temperature should hit 165°F (75°C) in the thickest part of the thigh. Resting your chicken for about 15-30 minutes after roasting enhances its juiciness. If you want tips for flavoring or side dishes, there’s much more to explore.
Importance of Roasting Temperature
When it comes to roasting a whole chicken, the right temperature can make all the difference. You might wonder why temperature matters so much, but it truly impacts the roasting benefits you experience. If you roast your chicken at too low a temperature, you risk ending up with dry, undercooked meat. On the flip side, if the temperature’s too high, you could end up with a burnt exterior while the inside remains raw. Finding the sweet spot is crucial for achieving that perfectly roasted bird.
A proper roasting temperature not only guarantees even cooking but also promotes the development of flavor and texture. The Maillard reaction, which occurs at higher temperatures, gives your chicken that golden-brown, crispy skin everyone loves. This delightful texture and flavor enhance your overall dining experience, making it worth the effort you put into roasting.
Moreover, the temperature impacts how quickly your chicken cooks. A well-chosen roasting temperature allows the meat to retain moisture, leading to a juicy, flavorful dish. You’ll find that a chicken roasted at the correct temperature is not just more appetizing, but it’s also a healthier option since it minimizes the risk of harmful bacteria.
Recommended Oven Temperatures
When roasting a whole chicken, choosing the right oven temperature is essential for achieving that perfect golden skin and juicy meat. Ideally, you want to aim for a temperature that balances cooking time and flavor. Let’s explore what temperature works best and how it affects your cooking time.
Ideal Roasting Temperature
For anyone looking to achieve perfectly roasted chicken, setting the right oven temperature is essential. The ideal roasting temperature for chicken is typically around 425°F (220°C). This high temperature allows the skin to crisp up beautifully while ensuring the meat remains juicy and tender. When you start your chicken preparation, preheat your oven to this temperature, as it can make a significant difference in your final dish.
Using this roasting technique, you’ll create a lovely golden-brown exterior that’s irresistible. If you prefer a slower roast, you can opt for 375°F (190°C), but keep in mind that it may take longer to achieve that perfect crispy skin. Regardless of the temperature you choose, make sure your chicken is properly seasoned and stuffed (if desired) before placing it in the oven.
Experimenting with different roasting techniques at these temperatures can lead to discovering your personal favorite method. With the right oven temperature, you’re one step closer to serving a delicious, perfectly roasted chicken that’ll impress your family and friends. So, get that oven ready and enjoy the process!
Cooking Time Considerations
Cooking a whole chicken requires not just the right temperature but also careful consideration of cooking times. The cooking time can vary based on several factors, including the weight of the chicken and the cooking methods you choose. Generally, a good rule of thumb is to roast your chicken at 375°F (190°C) for about 20 minutes per pound. If you’ve used brining techniques to enhance flavor and moisture, you might notice a slightly different cooking time, as brined chickens tend to cook a bit faster.
To guarantee your chicken reaches the perfect doneness, invest in a meat thermometer. The internal temperature should hit 165°F (75°C) in the thickest part of the thigh. If you’re using alternative cooking methods like spatchcocking or grilling, adjust your timing accordingly; spatchcocked chickens cook faster due to their flattened shape.
Always let your chicken rest for at least 10-15 minutes after cooking. This helps retain juices and improves flavor. Keeping these cooking time considerations in mind will lead to a perfectly roasted chicken that’s juicy and delicious every time.
High Vs. Low Temperatures
When roasting a whole chicken, choosing between high and low temperatures can make a big difference in your results. High temperatures can give you a crispy skin and juicy meat, while low temperatures provide even cooking and tenderness. Understanding these benefits will help you decide which method works best for your taste.
Benefits of High Temperatures
Roasting a whole chicken at high temperatures delivers a crispy, golden skin while locking in moisture for tender, juicy meat. One of the key high heat benefits is the Maillard reaction, which occurs when proteins and sugars caramelize. This process not only enhances flavor but also contributes to that irresistible crispy skin you crave. You’ll notice that cooking at temperatures around 425°F to 475°F guarantees the skin becomes beautifully browned and crunchy, making each bite a delight.
Another advantage of high temperatures is the reduction in cooking time. A whole chicken can roast in about 1 to 1.5 hours, allowing you to enjoy your meal sooner. The quick cooking also minimizes the risk of drying out the meat, as the exterior sears rapidly, creating a barrier that traps moisture.
Using high heat also means less chance for bacteria to thrive, as the intense temperature rapidly kills off harmful pathogens. So, if you want a roast chicken that’s not only delicious but also safe, high temperatures are the way to go. Embrace the high heat method, and you won’t regret the flavor and texture it brings to your meal.
Advantages of Low Temperatures
Why consider low temperatures for roasting a whole chicken? Cooking at lower temperatures, typically around 325°F, has some significant advantages. First, it promotes moisture retention. When you roast at high heat, the exterior cooks quickly, which can lead to a dry chicken. Lower temperatures allow the meat to cook more evenly, ensuring that juices remain trapped inside, resulting in a succulent and tender bird.
Another key benefit is flavor development. As the chicken cooks slowly, the flavors have more time to meld and deepen. This slow roasting brings out the natural flavors of the chicken, enhancing the overall taste without the need for excessive seasoning. You’ll find that herbs and spices have a chance to infuse the meat more thoroughly, resulting in a richer flavor profile.
Additionally, cooking at lower temperatures reduces the risk of overcooking. You’ll have more control over the doneness, allowing you to achieve that perfect juicy finish. So, if you’re after a moist, flavorful roast, embracing low temperatures could be your best bet for a delicious whole chicken.
Internal Temperature Guidelines
Achieving the perfect internal temperature is essential for a safely roasted whole chicken. You want to verify that your chicken is not only juicy and flavorful but also free from harmful bacteria. The USDA recommends that the internal temperature of the chicken reaches at least 165°F (74°C) to guarantee safe cooking. This temperature applies to all parts of the chicken, including the breast, thigh, and wing.
To check the internal temperature accurately, use a reliable meat thermometer. Insert it into the thickest part of the thigh, avoiding the bone, as this can give you a false reading. If you’re cooking a stuffed chicken, make sure to check the temperature of the stuffing as well. It should also reach 165°F to be considered safe.
For an even more tender and flavorful chicken, you might consider cooking it to a slightly higher temperature, around 175°F (80°C) for dark meat. This can help break down the collagen in the meat, making it even more succulent. However, always remember that the minimum safe internal temperature is your priority.
Once your chicken reaches the desired temperature, let it rest for about 15-20 minutes before carving. This resting period allows the juices to redistribute, resulting in a moist and delicious dish. By keeping these internal temperature guidelines in mind, you’ll verify your roast chicken is not only safe to eat but also a hit at the dinner table.
Cooking Time Calculations
Knowing the internal temperature guidelines helps when figuring out cooking times for your whole chicken. Generally, you’ll want to roast your chicken at 375°F (190°C) for best results. A good rule of thumb is to cook your chicken for about 20 minutes per pound. For example, if you have a 4-pound chicken, you’re looking at approximately 1 hour and 20 minutes of cooking time.
Different cooking methods can affect these times. If you’re using a convection oven, you can reduce the cooking time by about 15-20% since the hot air circulates around the chicken more efficiently. On the other hand, if you’re opting for a slow cooker, it may take anywhere from 4 to 6 hours on low heat. It’s important to remember that these times can vary depending on factors like your oven’s accuracy and how you’ve prepared the chicken.
Preparation tips also play a significant role in cooking times. For instance, if you stuff your chicken, it’ll require additional time to guarantee both the meat and stuffing reach a safe internal temperature. Always use a meat thermometer to check the thickest part of the thigh, aiming for at least 165°F (75°C) to guarantee the chicken is fully cooked.
Preparing the Chicken
Before roasting, it’s vital to properly prepare your chicken. Start by deciding whether you want to use brining techniques, which can greatly enhance the flavor and juiciness of your bird. If you choose to brine, mix water with salt and any desired flavorings, like garlic or herbs. Submerge the chicken in this solution for several hours or overnight, depending on its size. This method allows the meat to absorb moisture and seasoning, resulting in a tender roast.
Once you’ve brined, it’s time to rinse the chicken thoroughly under cold water to remove excess salt. Pat it dry with paper towels; a dry surface will help the skin crisp up during roasting. Next, consider your herb selection. Fresh herbs can elevate the dish, so think about using thyme, rosemary, or parsley, all of which pair beautifully with chicken. You can either stuff these herbs inside the cavity or scatter them around the chicken in the roasting pan.
Don’t forget to remove any giblets from the cavity if they’re included. This step is necessary, as leaving them in can affect cooking time and flavor. After preparing the chicken, let it rest at room temperature for about 30 minutes before roasting. This helps guarantee even cooking throughout the bird. By taking these preparation steps seriously, you’ll set yourself up for a delicious, perfectly roasted chicken that everyone will love.
Seasoning for Flavor
Seasoning your chicken properly is vital for enhancing its flavors, and it’s something many home cooks often overlook. A well-seasoned chicken can make all the difference between a bland dish and a mouthwatering feast. Start by deciding whether you want to use herb blends or spice rubs. Both options can provide incredible flavor, but they each offer a unique twist.
If you’re leaning towards herb blends, consider mixing fresh or dried herbs like rosemary, thyme, and parsley. These herbs bring a delightful aroma and freshness to your chicken. Rub the blend generously under the skin and on the surface to guarantee the flavors penetrate deeply. You can also add garlic and lemon zest for an extra burst of flavor.
On the other hand, if you prefer spice rubs, you can create a mixture that includes paprika, cumin, and black pepper. This combo gives your chicken a warm and slightly smoky flavor. Don’t be shy about using salt either; it’s essential for enhancing all the other seasonings. Just be sure to balance it with a touch of sweetness, like brown sugar, to create a well-rounded profile.
Regardless of which method you choose, let the seasoned chicken sit for at least 30 minutes before roasting. This allows the flavors to meld beautifully. Remember, the better you season your chicken, the more delicious your final dish will be. So, take the time to experiment and find the perfect combination that suits your palate!
Using a Meat Thermometer
Using a meat thermometer is essential for ensuring your whole chicken is cooked safely and perfectly. You’ll want to aim for the recommended temperature guidelines to avoid undercooking or overcooking your meal. Trusting the thermometer takes the guesswork out of roasting and guarantees delicious results every time.
Importance of Accurate Temperature
Accurate temperature is essential when roasting a whole chicken, as it guarantees both safety and flavor. Using a meat thermometer helps you avoid temperature variations that can lead to undercooking or overcooking. You want to confirm the chicken reaches the ideal doneness without compromising its juicy texture or taste.
When you rely solely on cooking equipment like timers or visual cues, you might miss the mark. Different ovens can heat unevenly, leading to those frustrating temperature discrepancies. A meat thermometer eliminates guesswork and gives you a clear reading, confirming your chicken is cooked to perfection every time.
Make certain to insert the thermometer into the thickest part of the chicken, avoiding bone, which can give you a false reading. Aim for an internal temperature that guarantees the meat’s safety while preserving its delicious flavor. By taking this extra step, you’re not just following a guideline; you’re making a commitment to serve up a meal that’s both safe and satisfying. Investing in a reliable thermometer is a small price to pay for culinary success, transforming your roasting experience from uncertain to flawless.
Recommended Temperature Guidelines
When roasting a whole chicken, knowing the right temperature is key for achieving juicy, flavorful meat. To guarantee safe cooking, you should always use a meat thermometer. The USDA recommends cooking your chicken to an internal temperature of 165°F (75°C). This guarantees that harmful bacteria like Salmonella are effectively eliminated.
While the recommended temperature is 165°F, you might encounter temperature variations based on your oven and the size of your chicken. For example, if you’re roasting a larger bird, it might take longer to reach that safe internal temperature. To get the best results, insert the thermometer into the thickest part of the thigh without touching the bone. This spot typically takes the longest to cook.
If you prefer a crispier skin, consider roasting at a higher temperature—around 425°F (220°C)—for the first 30 minutes, then lower it to 350°F (175°C) until the chicken is fully cooked. Just remember to monitor the internal temperature closely. Using a meat thermometer is your best bet for guaranteeing both safety and flavor, so don’t skip this essential step in your roasting process!
Resting the Chicken
After roasting, an essential step often overlooked is letting the chicken rest. This resting period allows the juices to redistribute throughout the meat, resulting in a juicier and more flavorful bird. If you slice into it too soon, you’ll likely end up with dry, unappealing chicken.
To maximize the resting benefits, aim for about 15 to 30 minutes of rest time. Cover the chicken loosely with aluminum foil to retain warmth while allowing some steam to escape. This helps prevent the skin from becoming soggy while still keeping the meat warm. If you’re using a particularly large bird, consider resting it for up to 45 minutes.
When it comes to resting techniques, you can also place the chicken on a cutting board or a platter. If you have a roasting rack, you can leave it there as well. This allows air to circulate around the chicken, ensuring that it doesn’t steam. During the resting period, you can prepare your side dishes or sauces, making the most of your time.
Tips for Crispy Skin
Once your chicken has rested, achieving that coveted crispy skin is the next priority. To get that perfect crunch, you’ll want to employ a few crispy techniques that’ll elevate your dish. First, make certain the skin is as dry as possible before roasting. Patting it down with paper towels removes excess moisture, which is key to achieving that golden, crispy exterior.
Another skin secret is to season generously. A good mix of salt and your favorite spices not only enhances the flavor but also helps draw out moisture from the skin, leading to better crispiness. Don’t be shy—rub the seasoning under the skin as well, so every bite is packed with flavor.
Temperature plays a vital role, too. Start roasting your chicken at a high temperature, around 425°F (220°C), for the first 20–30 minutes. This initial blast of heat will help render the fat beneath the skin, allowing it to crisp up nicely. After that, you can lower the temperature to finish cooking through.
Lastly, consider using a wire rack in your roasting pan. Elevating the chicken allows air to circulate around it, promoting even crispiness all around. By combining these crispy techniques with those essential skin secrets, you’ll guarantee your roasted chicken comes out with a delightful, crunchy skin that everyone will love. Enjoy that crispy goodness!
Basting Techniques
Basting is a powerful technique that can elevate the flavor and moisture of your roasted chicken. By regularly applying a flavorful liquid, you’ll help keep the meat juicy and enhance its taste. There are several basting methods you can choose from, depending on your preferences and the ingredients you have on hand.
One of the simplest methods is to use a baster or a spoon to drizzle the chicken with its own pan juices. This method allows you to coat the skin evenly, which promotes browning and crispiness. You can also experiment with flavored liquids like broth, wine, or a mixture of melted butter and herbs. Each of these options adds a unique twist to the overall flavor profile.
When it comes to basting frequency, you’ll want to do it every 20 to 30 minutes during the roasting process. This will guarantee that the chicken remains moist without interrupting the cooking too much. However, be cautious not to open the oven door too often, as this can lower the temperature and extend cooking time.
If you’re aiming for a more robust flavor, consider marinating your chicken before roasting. This pre-roasting technique can infuse your bird with flavor, reducing the need for excessive basting during cooking. Remember, the goal is to keep your chicken juicy and delicious while achieving that perfect golden-brown skin. Enjoy the process, and your efforts will surely pay off with a mouthwatering meal.
Common Roasting Mistakes
Roasting a whole chicken can be a rewarding experience, but there are common mistakes that can lead to disappointing results. One of the most prevalent errors is incorrect oven settings. If you don’t preheat your oven properly, you could face temperature fluctuations that affect cooking times. Make sure to check your oven’s calibration to avoid these issues.
Timing mistakes are another frequent pitfall. It’s important to calculate the cooking time based on the chicken’s weight. Underestimating this can lead to a raw center, while overcooking will dry it out. Pair this with ideal cooking techniques, like using a meat thermometer to check for doneness, rather than just relying on time alone.
Ingredient selection also plays a vital role. Using low-quality chicken or neglecting to properly season it can result in bland meat. Be mindful of your seasoning issues; a well-seasoned bird enhances flavor greatly.
Preparation errors, such as failing to let the chicken rest before carving, can ruin your meal, as it allows juices to redistribute. Additionally, consider your equipment choices. Using a roasting pan that’s too small can lead to uneven cooking.
Flavor Variations and Marinades
When it comes to enhancing the flavor of your whole chicken, experimenting with marinades can make all the difference. You’ve got a world of options at your fingertips, and each one can transform your dish into something extraordinary. For a bright and zesty kick, try citrus marinades made with lemon, lime, or orange juice. These not only add flavor but also help tenderize the meat.
If you’re leaning toward a more aromatic experience, herb blends are your best bet. Combine fresh herbs like rosemary, thyme, and oregano with olive oil for a simple yet delicious marinade. For those who enjoy heat, spicy rubs with chili powder or cayenne pepper can create a bold flavor profile that’ll leave your taste buds tingling.
On the sweeter side, sweet glazes made from honey or maple syrup can provide a delightful contrast to the savory chicken. Yogurt marinades offer a creamy texture that’s perfect for infusing rich flavors, while mustard mixtures can add a tangy punch. Garlic infusions are another fantastic choice, bringing depth and aroma that complements the chicken beautifully.
If you’re looking for an umami boost, soy sauce or wine marinades can work wonders. And don’t forget about fruit salsas; they’re excellent for adding freshness and a pop of color. Mix and match these flavors to create your signature marinade, and watch your whole chicken transform into a culinary masterpiece!
Side Dishes to Pair
When you roast a whole chicken, the right side dishes can elevate your meal. Think about a classic vegetable medley to add freshness and color, or consider flavorful grain options that provide a hearty complement. These choices not only enhance the dish but also balance the rich flavors of the chicken.
Classic Vegetable Medley
A classic vegetable medley is the perfect companion to a roasted whole chicken, bringing vibrant colors and flavors to your plate. For your vegetable preparation, choose a mix of seasonal vegetables like carrots, bell peppers, zucchini, and red onions. These not only look appealing but also complement the flavors of the chicken beautifully.
When it comes to roasting variations, you can toss your chosen vegetables with olive oil, salt, and pepper, then spread them out on a baking sheet. This method allows the veggies to caramelize and develop a rich flavor alongside your chicken. If you prefer, you can also add herbs like rosemary or thyme to enhance the taste further.
Roasting these vegetables alongside your chicken is a great way to maximize flavor and simplicity. You’ll save time and effort while guaranteeing a delicious side dish. Keep an eye on the cooking time to guarantee everything finishes perfectly; vegetables typically take about 30-40 minutes at the same temperature you use for your chicken. With this classic vegetable medley, you’ll create a balanced, colorful meal that satisfies both the eye and the palate. Enjoy your feast!
Flavorful Grain Options
Pairing your roasted whole chicken with flavorful grains can elevate your meal to new heights. Consider options like quinoa, farro, or wild rice, which not only offer delicious taste but also provide excellent grain pairings. These grains introduce a nutty flavor that complements the savory chicken beautifully.
Quinoa is a fantastic choice; it’s light and fluffy, with a slightly crunchy texture that contrasts nicely with the tender chicken. Farro brings a chewy texture, adding depth to your plate. If you’re looking for something heartier, wild rice’s earthy flavor and firm bite can create a satisfying contrast.
Don’t forget to season your grains! A touch of olive oil, fresh herbs, or citrus zest can enhance their flavor and make your meal even more enjoyable. You can also mix in sautéed vegetables or nuts for added texture and color.
When you choose grains wisely, you not only create a balanced meal but also elevate the dining experience. So, toss those grains into your meal plan and watch how they transform your roasted chicken into an extraordinary feast. Enjoy experimenting with different combinations to find your favorite!
Storing Leftover Chicken
Properly storing leftover chicken is essential to maintain its flavor and safety. After enjoying your delicious roasted chicken, you should aim to refrigerate any leftovers within two hours. This helps prevent the growth of harmful bacteria. Place the chicken in an airtight container or wrap it tightly in plastic wrap or aluminum foil. Make certain to label the container with the date, so you can keep track of how long it’s been stored.
In general, your leftover storage should be kept at or below 40°F (4°C). You can safely keep cooked chicken in the refrigerator for up to three to four days. If you don’t think you’ll eat it within that time frame, consider freezing it for longer storage. Frozen chicken can last up to four months, but it’s best to use it sooner for ideal taste and texture.
Once you’re ready to enjoy those leftovers, you can use them in various chicken recipes. Shredded chicken works great in salads, wraps, or casseroles. You can also add it to soups or stir-fries for a quick meal. Just make sure to reheat the chicken thoroughly to at least 165°F (74°C) to confirm it’s safe to eat.
Frequently Asked Questions: Best Temperature For Roasting Whole Chicken
Can I Roast a Frozen Chicken Without Thawing It First?
Yes, you can roast a frozen chicken without thawing it first. Just remember, cooking times will be longer—about 50% more—so keep an eye on it to guarantee it cooks thoroughly and safely.
What Type of Roasting Pan Is Best for Whole Chicken?
When choosing a roasting pan for whole chicken, consider pan materials like stainless steel or cast iron for even heating. These options enhance your roasting techniques, ensuring a juicy, flavorful result every time you cook.
How Do I Know When the Chicken Is Done Without a Thermometer?
To know when your chicken’s done without a thermometer, check the juices; they should run clear. You can also rely on cooking times—typically around 20 minutes per pound—for that juicy chicken you crave.
Can I Roast Chicken at a Higher Altitude?
Yes, you can roast chicken at high altitude, but you’ll need to adjust the roasting time. High altitude effects can cause it to cook faster, so keep an eye on it to avoid overcooking.
Is It Safe to Stuff the Chicken Before Roasting?
Yes, it’s safe to stuff the chicken before roasting, but guarantee the stuffing reaches a safe cooking temperature of 165°F. This helps prevent foodborne illnesses and guarantees both the chicken and stuffing are delicious.

Conclusion
Roasting a whole chicken at the right temperature is key to achieving juicy, flavorful results. By following the recommended oven temperatures and internal guidelines, you’ll guarantee your chicken is perfectly cooked every time. Don’t forget to experiment with different marinades and sides to elevate your meal. And if you have leftovers, store them properly to enjoy later. Now, you’re all set to impress your family and friends with your delicious roasted chicken! Happy cooking!
If you enjoyed exploring this topic and want to dive even deeper, be sure to check out some of our other articles here on Infinite Flavors. From rich culinary histories to creative twists on classic recipes, there’s always something new to discover. Whether you’re curious about the origins of a dish, looking for fresh inspiration in the kitchen, or simply love learning about food culture, our collection of posts is the perfect next step on your flavor journey.
Great Tips For Smoking Meat On Gas Grill