Easy Homemade Pan Frying Breading Recipe
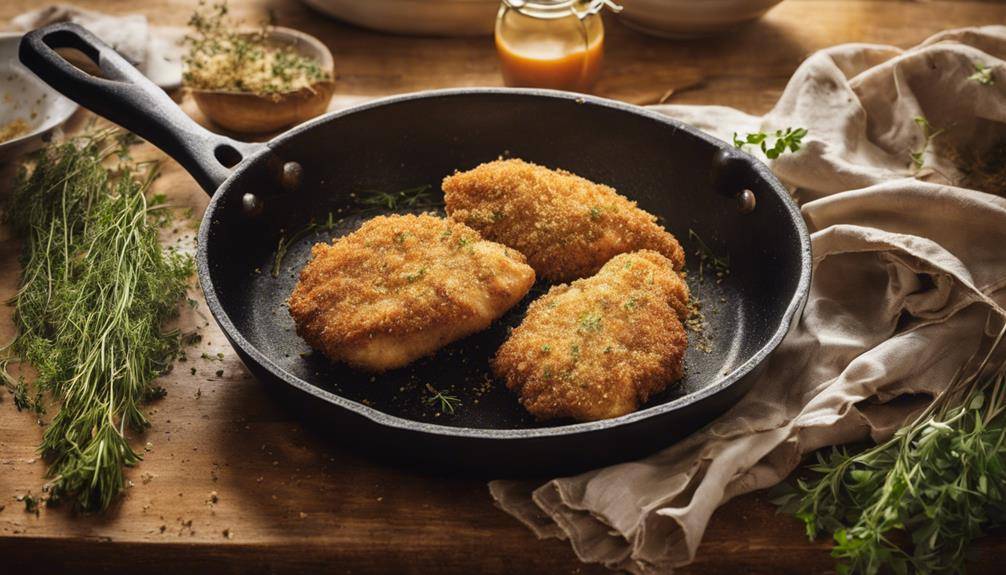
Easy Homemade Pan Frying Breading Recipe; Homemade pan frying breading gives you full control over the taste and texture, making your dishes stand out. Start with your choice of breadcrumbs—white, whole wheat, or panko. Mix in seasonings like garlic powder and paprika for extra flavor. For binding, use eggs or buttermilk to guarantee the breading sticks nicely. Coat your food with flour first, then dip into the wet mixture, followed by breadcrumbs for a perfect crust. Fry in hot oil to achieve that crispy goodness. Explore further for tips on storing leftovers and variations to keep your meals exciting!
Click Here and Turn Every Masterpiece into a Showstopper!
Why Make Homemade Breading
When you make your own breading, you not only control the ingredients but also enhance the flavor and texture of your dishes. One of the key benefits of homemade breading is that you can customize it to suit your taste preferences. Whether you prefer a spicier kick or a herby aroma, you can adjust the seasonings and flavors according to what you enjoy most.
Another advantage is that homemade breading can be a cost-effective alternative to store-bought mixes. Many commercial breading products contain preservatives and additives that can drive up the price. By creating your own, you can use basic pantry staples, which are often much cheaper. You’ll find that a few cups of breadcrumbs or flour can go a long way, and you can save money while enjoying fresher, more wholesome results.
Moreover, when you prepare your own breading, you’re avoiding unnecessary allergens and artificial ingredients. This is particularly beneficial for those with dietary restrictions or specific health goals. You can experiment with gluten-free options or even explore whole grain alternatives, tailoring each batch to fit your needs.
Essential Ingredients Needed
To create a delicious homemade breading, you’ll need just a few essential ingredients. First, choose your preferred bread types. Traditional white or whole wheat bread works great, as they provide a classic flavor and texture. If you’re looking for something lighter, consider using panko breadcrumbs; they offer a delightful crunch. Alternatively, if you’re following a gluten-free diet, you can opt for gluten-free bread or store-bought gluten-free breadcrumbs.
Next, you’ll want to select your seasonings. A mix of salt, pepper, garlic powder, and paprika can elevate the flavor of your breading. Don’t hesitate to adjust these seasonings according to your taste preferences. For an extra layer of flavor, consider adding grated Parmesan cheese or dried herbs like oregano or thyme.
Another key ingredient is the binding agent. You’ll need something to help the breading stick to your food. Eggs are the most common choice, but you can also use buttermilk or even a plant-based milk mixed with a bit of flour if you’re looking for a vegan option.
Lastly, don’t forget about oil for frying. A neutral oil, such as vegetable or canola oil, will work best, giving you that crispy finish without overwhelming the flavors.
Choosing the Right Flour
Selecting the right flour is essential for achieving the perfect breading texture. The flour you choose can greatly affect the crispiness and flavor of your pan-fried dishes. There are various flour types to take into account, each offering unique properties. For a classic, crispy coating, all-purpose flour is a popular choice. It’s versatile and provides a balanced texture that complements a variety of proteins.
If you’re looking for a lighter, airier result, think about using cake flour. Its lower protein content creates a delicate breading that’s perfect for seafood or chicken. Alternatively, for a heartier option, you might opt for whole wheat flour, which adds a nutty flavor and a more robust texture.
For those needing gluten-free options, several alternatives exist. Almond flour is an excellent choice, imparting a slightly sweet, rich taste and a crunchy texture. Coconut flour is another gluten-free option, though it absorbs more moisture, so you’ll need to adjust your liquid ingredients accordingly.
Rice flour is also a fantastic gluten-free choice, offering a light, crispy finish. It’s often used in Asian cuisine and works wonderfully for tempura-style breading. No matter which flour type you decide on, remember that the key is to guarantee an even coating for maximum frying. By choosing the right flour, you’ll not only enhance the texture but also elevate the overall quality of your pan-fried meals.
Adding Flavorful Seasonings
Boosting the flavor of your breading can take your pan-fried dishes to the next level. When you add the right seasonings, you create a mouthwatering crust that enhances the overall taste of your meal. Start by experimenting with various spice blends. You might try a mix of smoked paprika, garlic powder, and cayenne for a smoky, spicy kick. Alternatively, a combination of Italian herbs like oregano, thyme, and basil can give your chicken or veggies a fresh, aromatic flavor.
Don’t shy away from customizing your breading to match the dish you’re preparing. If you’re frying fish, consider adding dill and lemon zest to your mix for a bright, zesty touch. For a more Asian-inspired breading, use five-spice powder and a hint of sesame seeds.
Incorporating herb combinations can also elevate your breading. Fresh herbs like parsley or cilantro can be finely chopped and mixed into your flour for a burst of freshness. Dried herbs work well too; just remember to adjust the quantities since dried herbs are more potent.
Lastly, think about the balance of flavors. A pinch of salt can enhance all the other seasonings, while a touch of sugar can add depth and roundness. Play around with different combinations until you find your perfect blend. With a bit of creativity, you’ll make your homemade breading not just a coating, but a key player in your pan-fried dish’s flavor profile.
The Role of Eggs
Eggs play an essential role in creating the perfect pan-frying breading. They act as a binding agent, helping the breading stick to your food, whether it’s chicken, vegetables, or fish. When you dip your item in beaten eggs before coating it with breadcrumbs, you guarantee that the breading adheres well during cooking, leading to that desirable crunch. One of the key egg benefits is that they create a moisture barrier, preventing the food from drying out while frying. This results in a juicy interior that contrasts beautifully with a crispy exterior.
If you’re looking for alternatives, don’t worry; there are several egg substitutes that can work just as well. For instance, you can use a mixture of flour and water, or even a flaxseed meal combined with water, which mimics the binding properties of eggs. Unsweetened applesauce or mashed bananas can also be effective, especially for those who prefer plant-based options. Just be mindful that these substitutes may alter the flavor and texture slightly, so it’s best to experiment to find what suits your taste.
Techniques for Coating
When it comes to coating your food for pan frying, understanding the different types of breading is key. You’ll want to master proper coating techniques to guarantee a crispy, flavorful crust. Let’s explore the essentials that will elevate your frying game.
Breading Types Overview
Breading is a key technique that transforms ordinary ingredients into deliciously crispy dishes. This method has a rich breading history, with roots tracing back to various cultures around the world. You’ll find that different regions have their own unique approaches to breading, showcasing local ingredients and flavors.
For instance, in Southern cuisine, the classic buttermilk and cornmeal combination gives fried chicken its signature crunch, while Italian recipes often use seasoned breadcrumbs for coating meats and vegetables. In Asian cooking, panko breadcrumbs create an airy, crispy texture that elevates dishes like tonkatsu or tempura.
When you’re breading, you’ve got options. You can stick with the traditional three-step method of flour, egg, and breadcrumb, or experiment with alternatives like crushed nuts or cornflakes for added texture and flavor. Each option brings its own flair, making it easy to customize your dish based on your taste and the occasion. Embrace these regional variations, and you’ll find that breading not only enhances the taste but also adds a delightful crunch that’s hard to resist.
Click Here and Turn Every Masterpiece into a Showstopper!
Proper Coating Techniques
To achieve a perfectly coated dish, mastering the proper coating techniques is essential. Start by selecting the right coating type for your ingredients. Whether you’re using flour, breadcrumbs, or a batter, each type offers unique flavors and textures.
Before you begin, gather your coating tools—like shallow dishes for each coating type and a pair of tongs or forks for handling your food. First, dredge your item in the dry coating, making certain it’s evenly covered. Shake off any excess to avoid clumps. Next, dip it into any wet mixture, like beaten eggs or buttermilk, to help the final coating adhere better. Finally, roll it in your chosen dry coating again, pressing gently to make sure it sticks.
If you want a thicker crust, repeat the wet and dry process a second time. This layering technique provides a satisfying crunch when cooked. Remember to keep your workspace organized to streamline the coating process. With practice, you’ll find the right balance of coating types and techniques that work best for your favorite dishes. Enjoy the crispy results of your hard work!
Preparing Your Cooking Area
Creating a well-organized cooking area can greatly enhance your frying experience. Start by cleaning surfaces where you’ll be working. Wipe down countertops and tables to remove any dust or residues that might interfere with your cooking. It’s crucial to begin with a clean slate, especially when you’re dealing with breading and frying.
Next, it’s time to organize your tools. Gather all the utensils you’ll need, such as mixing bowls, measuring cups, and a whisk. Keep them within arm’s reach to streamline your process. You don’t want to be searching for a tool while your oil heats up. If you have multiple bowls for different stages of breading, line them up in a way that makes sense. For example, place the dry ingredients first, followed by the wet mixtures, and finally, the frying pan.
Also, consider the order of your ingredients and tools. Having everything in a logical sequence can save you time and effort. Lay out your breading ingredients next to the frying station. If you’re using a shallow dish for dredging, make sure it’s nearby and easily accessible.
Lastly, verify you have adequate space to work. Clear away any unnecessary items that might clutter your area, making it difficult to maneuver. A tidy, well-organized cooking space sets the stage for a successful frying session, allowing you to focus on creating delicious, crispy dishes without unnecessary distractions.
Pan Frying Tips
When you pan fry, getting the oil temperature just right is vital for that perfect crispy texture. Mastering the breading techniques can make all the difference in how your dish turns out. Let’s break down these essential tips to elevate your frying game.
Oil Temperature Importance
Proper oil temperature is essential for achieving perfectly pan-fried dishes. When you heat your oil to the right temperature, you enhance its viscosity, allowing it to create that crispy, golden crust you’re after. If the oil’s too cool, your food will absorb too much oil, resulting in greasy, soggy bites. Conversely, if the oil’s too hot, the exterior can burn before the inside cooks through, compromising both texture and flavor.
To guarantee frying safety, use a thermometer to keep an eye on the oil temperature. Ideally, you want your oil to be around 350°F to 375°F for most frying tasks. This range helps maintain ideal viscosity, allowing the food to cook evenly. If you don’t have a thermometer, you can use the classic test: drop in a small piece of bread. If it browns in about 60 seconds, your oil’s ready.
Remember to adjust the heat as you add food, as the temperature will drop. Keep an eye on it, and don’t overcrowd the pan, which can also lower the temperature. By mastering oil temperature, you’ll elevate your pan-frying game considerably!
Breading Techniques Explained
Breading techniques play an essential role in achieving that delightful crunch in your pan-fried dishes. Understanding the history of breading can enhance your cooking experience. Over centuries, various cultures have developed their own methods, leading to regional variations that you’ll want to explore.
To start, prepare your ingredients: proteins like chicken or fish, and a three-step breading station—flour, egg wash, and breadcrumbs. Dredge the protein in flour first; this helps the egg adhere better. Next, dip it into the egg wash, ensuring it’s fully coated. Finally, roll it in breadcrumbs, pressing gently to create a solid layer.
For added flavor, consider seasoning each component. You can mix herbs or spices into the flour or breadcrumbs, reflecting your own regional inspiration. If you’re feeling adventurous, try panko breadcrumbs for an extra crunch, or even crushed cornflakes for a unique twist.
Cooking Times for Different Foods
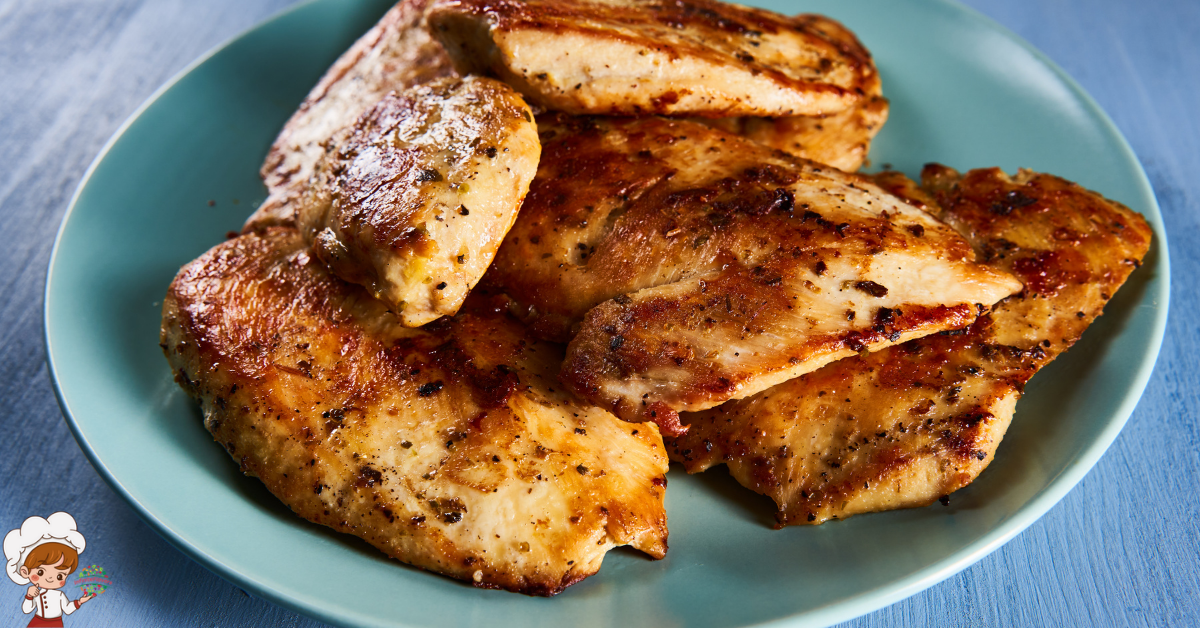
Cooking times can vary considerably depending on the type of food you’re pan frying. To get the best results, it’s crucial to know how long to cook different food types. For instance, chicken breasts typically need about 6-8 minutes per side on medium heat. Make sure you check that the internal temperature reaches 165°F to verify it’s fully cooked.
If you’re frying fish fillets, aim for around 3-5 minutes per side, depending on thickness. You want the fish to flake easily and have a golden crust. Vegetables like zucchini or eggplant usually take about 4-6 minutes, but be sure to cut them into uniform pieces for even cooking.
When it comes to potatoes, whether you’re frying wedges or slices, expect cooking times to range from 8-12 minutes. You should test for tenderness with a fork to know they’re done. Shrimp cooks quickly, usually needing just 2-3 minutes per side, so keep an eye on them to avoid overcooking.
Lastly, for breaded items like mozzarella sticks or chicken tenders, you’re looking at about 4-6 minutes per side. The goal is a crispy, golden exterior. Remember, these cooking times are guidelines, and factors like the size of your food pieces and the heat of your oil can affect how long they actually take. So, always monitor your food closely for the best results!
Storing Leftover Breading
After you’ve enjoyed your delicious pan-fried meals, you might find yourself with leftover breading. It’s important to store it properly to maintain its freshness and flavor. Start by transferring any unused breading into an airtight container. This helps prevent moisture and air from compromising its quality.
When it comes to leftover storage, a cool, dry place is ideal. You can keep your container in a pantry or cupboard away from direct sunlight. If you’ve mixed in any wet ingredients or if the breading has absorbed moisture, it’s best to refrigerate it. This will help extend its lifespan considerably.
The breading shelf life generally lasts about one to two weeks when stored at room temperature. However, if you choose to refrigerate it, you can extend that to about three to four weeks. Just be sure to check for any signs of spoilage, such as an off smell or change in texture, before using it again.
If you want to save it for even longer, consider freezing your leftover breading. Spread it out on a baking sheet, freeze until solid, then transfer it to a freezer-safe bag or container. This way, you can enjoy your homemade breading for up to three months. Whenever you’re ready to use it, just thaw it in the fridge overnight. With proper storage techniques, your leftover breading will be ready for your next cooking adventure!
Variations on the Recipe
When you’re ready to experiment in the kitchen, consider trying out some variations on your homemade pan frying breading. This is a great opportunity to customize your breading to suit your taste and the dish you’re preparing.
Start by exploring different grain options. Instead of the usual all-purpose flour, you might use cornmeal for a crunchier texture or whole wheat flour for a nuttier flavor. You can even mix grains; try combining panko breadcrumbs with crushed crackers or oats for a unique twist. Each grain brings its own character to the dish, so don’t hesitate to get creative.
Next, spice blends can elevate your breading to new heights. You can easily incorporate your favorite spices to enhance flavor. Consider adding garlic powder, paprika, or even a pinch of cayenne for some heat. If you’re feeling adventurous, try a pre-made spice blend like Cajun or Italian seasoning. Just remember that the amount you add can greatly change the flavor, so start with a small quantity and adjust to your liking.
For an extra burst of flavor, think about adding herbs or grated cheese into your breading mixture. Fresh or dried parsley, basil, or even Parmesan can add a delightful touch. With these variations, you’ll not only enjoy deliciously crispy results but also create a unique twist on classic recipes. So, gather your ingredients and start experimenting!
Click Here and Turn Every Masterpiece into a Showstopper!
Healthier Alternatives
If you’re looking to lighten up your meals without sacrificing flavor, consider some healthier alternatives for your pan frying breading. One great option is to swap traditional breadcrumbs for crushed nuts or seeds. Almonds, pecans, or even sunflower seeds add a delightful crunch and an extra boost of nutrients. This not only enhances the flavor but also provides healthy fats.
If you’re seeking gluten-free options, you can use rice flour or gluten-free breadcrumbs made from oats or chickpeas. These alternatives guarantee you can enjoy your favorite fried dishes without the gluten, while still achieving a crispy texture. Plus, they can be seasoned to match your dish for added flavor.
For those who prefer plant-based alternatives, consider using a mixture of ground flaxseeds and water as a binding agent. This acts as a perfect substitute for eggs and helps your breading stick well. You can also explore using nutritional yeast for a cheesy flavor without the dairy. Not only does it boost the nutritional profile, but it also adds a unique twist to your breading.
You might also want to experiment with spices and herbs mixed into your breading. Paprika, garlic powder, or Italian seasoning can elevate the taste, making your meal feel indulgent without the extra calories. By making these simple swaps, you can enjoy delicious, crunchy pan-fried dishes that align better with your health goals, all while keeping the flavor intact.
Serving Suggestions
Serving up your homemade pan-fried dishes can be just as exciting as the cooking process itself. To elevate your meal, think about the dipping sauces you’ll pair with your crispy creations. A zesty aioli or a tangy barbecue sauce can add a delightful kick. If you’re feeling adventurous, whip up a spicy sriracha mayo for a bold flavor that complements the crunch of your breaded items.
Next, consider your side dishes. Fresh salads, roasted vegetables, or a classic coleslaw can bring balance to your plate. The crispness of a salad can contrast nicely with the richness of your fried food, creating a well-rounded dining experience. You might also want to experiment with flavor pairings, like serving your pan-fried chicken with a side of creamy mashed potatoes or buttery corn on the cob.
Presentation matters, too. Use attractive serving platters to showcase your dishes. Arrange your pan-fried delights artfully, perhaps stacking them high for a tower of flavor. Surround them with your chosen dipping sauces and side dishes for a visually appealing spread. Don’t forget garnishing with fresh herbs or lemon wedges to add a pop of color.
Ultimately, the goal is to create a meal that’s not only delicious but also inviting. So, gather your friends or family around the table, serve up your masterpieces, and enjoy the fruits of your labor!
Click Here and Turn Every Masterpiece into a Showstopper!
Frequently Asked Questions: Easy Homemade Pan Frying Breading Recipe
Can I Use Gluten-Free Flour for Homemade Breading?
Yes, you can definitely use gluten-free flour for your breading. There are plenty of gluten-free options available, and experimenting with different breading alternatives can lead to delicious results. Just guarantee the texture suits your dish!
How Long Can I Store Homemade Breading?
You can store homemade breading for up to three months in airtight storage containers. Just keep an eye on the breading texture; if it feels stale or off, it’s best to discard it.
Can I Freeze Leftover Breading?
Yes, you can freeze leftover breading. Just guarantee it’s stored in an airtight container to maintain its consistency. Proper breading storage helps retain flavor and texture when you’re ready to use it again.
What Is the Best Oil for Pan Frying?
When you’re pan frying, the best oil types are canola, vegetable, or peanut oil, as they handle high frying temperatures well. These oils provide excellent flavor and help achieve that perfect crispy texture you want.
How Do I Prevent Breading From Falling off During Frying?
To prevent breading from falling off during frying, use effective breading techniques like pressing firmly and letting it rest. Also, consider frying tips like maintaining consistent oil temperature for ideal adhesion and crispiness.

Conclusion
Making your own pan frying breading is a game changer for elevating your dishes. You’ve got the power to customize flavors and textures, ensuring every bite is just right for your taste buds. Plus, it’s a fun way to experiment in the kitchen! Whether you stick to the basics or try out healthier alternatives, you’ll find that homemade breading not only enhances your meals but also makes them uniquely yours. So, get cooking and enjoy your delicious creations!