How To Get The Best Sear On Chicken
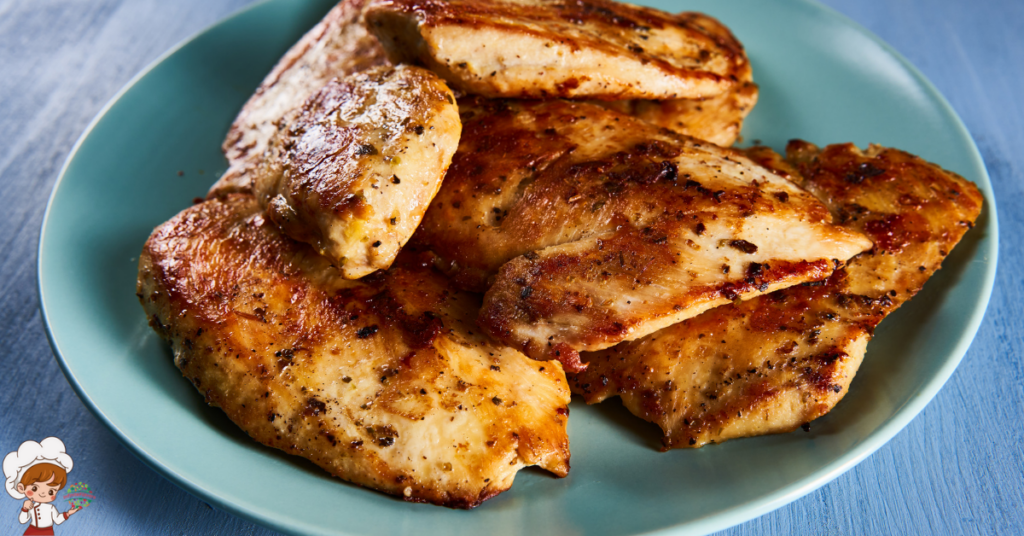
How To Get The Best Sear On Chicken; To sear chicken perfectly, aim for about 6-8 minutes per side, but this can vary based on the cut and thickness. Boneless, skinless breasts typically need 6-7 minutes on one side while bone-in pieces may take longer, around 10-12 minutes. Always check that the internal temperature reaches 165°F for safety. Preheat your pan until the oil shimmers, and remember to avoid overcrowding for even cooking. Adjust your timing based on the specific chicken cut you’re using. There’s more to master, including marinades and techniques to elevate your dish even further.
Click Here and Turn Every Masterpiece into a Showstopper!
Understanding Searing Basics
Searing chicken is an essential step in cooking that locks in flavor and creates a delicious crust. When you sear chicken, you’re not just cooking it; you’re enhancing its taste and texture. To achieve that perfect sear, make sure your pan is hot enough before adding the chicken. This high heat creates that beautiful golden-brown crust while keeping the juices locked inside.
Now, let’s talk about marinade options. Marinades not only add flavor but also help tenderize the chicken. You can choose from a variety of marinades, whether it’s a simple mix of olive oil, garlic, and herbs or a more complex blend of soy sauce and citrus. Marinate your chicken for at least 30 minutes, or even overnight, to let those flavors penetrate deeply.
Once your chicken is seared, consider pairing it with a complementary sauce. A rich pan sauce made from the drippings can elevate your dish to the next level. You could also go for a fresh chimichurri or a zesty salsa that contrasts beautifully with the savory crust.
Factors Affecting Searing Time
Several factors influence how long you should sear chicken to achieve that perfect crust. One of the most significant is the marinade impact. If you’ve marinated your chicken, the moisture content will affect the searing time. A wet marinade can create steam, which prolongs the time it takes to get that golden-brown crust. On the other hand, a dry marinade or rub will allow the chicken to sear more quickly, as it doesn’t introduce extra moisture.
Another factor to take into account is the thickness of the chicken. Thicker pieces require longer searing times to guarantee the exterior cooks properly without burning, while thinner cuts will sear faster. You’ll also need to ponder the heat level of your cooking surface. High heat is essential for a good sear, but if it’s too hot, your chicken might char before it’s cooked through.
Seasoning techniques can also impact your searing time. If you’ve used a lot of salt in your seasoning, it can draw moisture out, leading to a quicker sear. Conversely, if you’ve added sugar, it can caramelize quickly, requiring you to adjust your cooking time to prevent burning.
Lastly, your cooking vessel matters. A cast iron skillet retains heat well and can sear chicken more effectively than a non-stick pan. By paying attention to these factors, you can fine-tune your searing time for perfectly cooked chicken every time.
Searing Different Chicken Cuts
When it comes to searing chicken, different cuts require different techniques and times. You’ll want to adjust your approach whether you’re cooking breasts, thighs, or wings to achieve that perfect sear. Let’s break down the specifics for each cut so you can get the best results every time.
Breast Searing Time
To achieve perfectly seared chicken breasts, timing is essential. You’ll want to heat your skillet over medium-high heat and add a bit of oil. Once the oil shimmers, place your marinated chicken breasts in the pan. Sear them for about 6 to 7 minutes on one side without moving them; this helps create a nice crust.
The marinade effects come into play here. If you’ve marinated your chicken, it not only adds flavor but also helps with moisture retention, making your breasts juicier. After the initial sear, flip the breasts and sear for another 5 to 6 minutes until they reach an internal temperature of 165°F.
Once you’ve achieved that perfect sear, don’t forget the resting importance. Letting the chicken rest for 5 minutes before slicing allows the juices to redistribute, ensuring every bite is tender and flavorful. Remember, timing isn’t just about cooking; it’s also about letting the chicken rest. So, follow these guidelines for perfectly seared chicken breasts that are packed with flavor and moisture. Enjoy your delicious creation!
Click Here and Turn Every Masterpiece into a Showstopper!
Thigh Searing Techniques
Searing chicken thighs requires a bit more attention to detail, but the reward is well worth it. These cuts are juicier and more flavorful than breasts, so getting the searing right enhances their natural taste. Start by marinating your thighs for at least 30 minutes; this will maximize the marinade effects. Use a mix of oil, herbs, and spices to infuse the meat with flavor.
When you’re ready to cook, pat the thighs dry to guarantee a nice sear. Heat your skillet over medium-high heat, adding a splash of oil. Once the oil shimmers, place the thighs skin-side down. The key here is to resist the temptation to move them around; let them sear uninterrupted for about 6-8 minutes. This allows the skin to crisp up beautifully.
After that, flip the thighs and reduce the heat slightly. Cook for another 8-10 minutes, or until the internal temperature reaches 165°F. Throughout this process, you can sprinkle additional seasoning techniques like garlic powder or paprika to elevate the flavor profile. Remember, patience pays off when it comes to perfecting your chicken thigh sear!
Wing Cooking Duration
For perfectly cooked chicken wings, timing is essential. When you sear wings, aim for about 6 to 8 minutes on each side over medium-high heat. This timing not only helps achieve that crispy exterior but also guarantees the inside remains juicy. If you’re using a thicker wing sauce or heavy wing seasoning, consider searing them longer, as the added moisture can affect cooking time.
Once you’ve flipped the wings, keep an eye on them. You want a beautiful golden-brown color and an internal temperature of 165°F for safety. If you’re making a batch with various sauces, it’s best to sear them plain first and then toss them in your favorite wing sauces afterward. This method allows the wings to cook evenly without burning any sauce.
After searing, let your wings rest for a few minutes to lock in the juices. Whether you prefer spicy, tangy, or sweet, that final toss in wing sauces brings everything together. Remember, perfect wings are all about that balance—timing, seasoning, and sauce. Enjoy your delicious creation!
Click Here and Turn Every Masterpiece into a Showstopper!
Ideal Pan Temperature
Achieving the perfect sear on chicken hinges greatly on the pan’s temperature. You want your pan to be hot enough to create that golden crust while ensuring the inside cooks thoroughly. For optimal outcomes, your pan selection plays an essential role. A heavy-bottomed skillet or cast-iron pan is ideal because it retains heat well. Avoid lightweight pans, as they may cause uneven cooking and a less desirable sear.
Once you’ve selected your pan, it’s time to focus on oil choice. Use oils with a high smoke point, such as canola, grapeseed, or avocado oil. These oils can withstand higher temperatures without burning, allowing you to achieve that crispy exterior you crave. Pour just enough oil to coat the bottom of the pan, and let it heat up until it shimmers. This indication means it’s hot enough to start cooking.
It’s critical to preheat your pan properly before adding the chicken. If the pan isn’t hot enough, you’ll end up steaming the chicken rather than searing it, which can ruin the texture and flavor. On the other hand, if the pan is too hot, you risk burning the outside while leaving the inside undercooked. Finding that sweet spot is key, and it may take a couple of tries to get there. With the right pan and oil, you’re well on your way to mastering the art of searing chicken.
Timing for Perfectly Searing
Once your pan is preheated and ready, timing becomes key to getting that perfect sear on your chicken. You want to achieve a beautifully browned crust while guaranteeing the inside remains juicy and tender. The sear timing is essential here. For boneless, skinless chicken breasts, aim for about 6 to 7 minutes on the first side. This allows the exterior to develop that golden-brown crust you’re after.
Once you flip the chicken, you’ll want to sear the other side for an additional 5 to 6 minutes. If you’re working with bone-in pieces, increase the time to around 10 to 12 minutes on the first side, then another 8 to 10 minutes after flipping. Keep an eye on the chicken texture; you want it to feel firm when pressed but not hard.
Remember, the thickness of your chicken can affect these times, so adjust as necessary. If you find the chicken is browning too quickly, lower the heat slightly to prevent burning while still achieving that sought-after sear.
Using a meat thermometer can also help; aim for an internal temperature of 165°F (75°C) for perfectly cooked chicken. This way, you’ll guarantee that your chicken has that ideal texture and flavor without risking dryness. So, keep your eye on the clock and the chicken, and you’ll master the art of searing in no time!
Tips for Best Results
Getting the best results when searing chicken involves a few key practices that can elevate your cooking game. First, pay close attention to your marinade choices. A well-chosen marinade not only enhances flavor but also helps tenderize the chicken. Aim for marinades with acidity, like lemon juice or vinegar, and incorporate herbs and spices that complement your dish. Marinate the chicken for at least 30 minutes, but longer—up to several hours—can yield even better results.
Next, focus on your seasoning techniques. Before searing, pat the chicken dry with paper towels; moisture on the surface can inhibit browning. Generously season both sides with salt and pepper or your favorite spice blend. This step creates a flavorful crust that locks in juices during cooking. Don’t be afraid to experiment with different seasonings; garlic powder, smoked paprika, or dried herbs can add depth to your dish.
Temperature is vital too. Preheat your pan until it’s hot before adding oil, but make sure the oil isn’t smoking. This guarantees a perfect sear without burning the chicken. When you place the chicken in the pan, resist the urge to move it around; letting it sit for a few minutes allows for that beautiful golden crust to form.
Click Here and Turn Every Masterpiece into a Showstopper!
Common Mistakes to Avoid
When searing chicken, it’s easy to make a few common mistakes that can ruin your dish. You might overcrowd the pan, use the wrong heat levels, or forget to dry the chicken first. Let’s explore how to avoid these pitfalls for perfectly seared chicken every time.
Overcrowding the Pan
Overcrowding the pan is one of the most common mistakes you can make while searing chicken. When you cram too many pieces into your pan, you lower the temperature, preventing that beautiful, golden-brown crust from forming. It’s essential to choose the right pan size based on how much chicken you’re cooking. A larger pan allows for even heat distribution and better airflow around each piece.
Proper chicken placement is also key. Make sure to leave some space between each piece; this guarantees that moisture can escape and that the chicken cooks evenly. If you find you have more chicken than can fit comfortably, cook in batches. It may take a bit longer, but the results will be worth it.
Incorrect Heat Levels
Many home cooks overlook the importance of heat levels when searing chicken, leading to disappointing results. If you’re using incorrect heat, you won’t achieve that golden-brown crust you’re after. One common searing myth is that high heat is always the best option. While you do need a hot pan, too much heat can burn the outside while leaving the inside undercooked.
Instead, aim for medium-high heat to guarantee proper heat distribution. This allows the chicken to cook evenly, giving you a beautifully seared exterior without sacrificing juiciness. If you notice smoke billowing or the chicken sticking to the pan, your heat is likely too high. Adjust accordingly for better results.
On the other hand, using too low a heat can lead to a lackluster sear. You’ll end up with gray, soggy chicken instead of that crisp, caramelized surface you desire. The key is finding that sweet spot where the heat is just right to create a perfect sear and lock in flavors. By understanding and adjusting your heat levels, you’ll elevate your chicken-searing game considerably.
Skipping Drying Chicken
One mistake that often trips up home cooks is skipping the drying step before searing chicken. When you don’t dry the chicken properly, it retains excess moisture, which can lead to steaming rather than that delicious sear you’re after. That moisture not only prevents a crispy exterior but also dilutes the flavors, making your dish less appealing.
By patting the chicken dry with paper towels, you enhance moisture retention during cooking. This step allows the chicken to develop a golden-brown crust, which is essential for flavor enhancement. The Maillard reaction, responsible for that rich, savory taste, won’t occur if the surface is wet.
Additionally, don’t forget to season your chicken after drying. With a dry surface, the seasoning adheres better, providing a more flavorful bite.
Click Here and Turn Every Masterpiece into a Showstopper!
Frequently Asked Questions: How To Get The Best Sear On Chicken
Can I Use Frozen Chicken for Searing?
You can use frozen chicken for searing, but it’s best to thaw it first. Searing techniques work better on thawed meat, ensuring even cooking and a delicious, crispy exterior. Don’t rush the process!
What Type of Oil Is Best for Searing Chicken?
For searing chicken, use oils with high smoke points, like canola or grapeseed. They won’t break down easily, preserving your chicken’s flavor profile. Avoid oils with low smoke, as they can create undesirable flavors.
Should I Cover the Pan While Searing?
When searing chicken, covering the pan can trap steam retention, affecting the crust. You want high pan temperature for a nice sear, so keep it uncovered initially, then cover briefly if needed to finish cooking.
Can I Marinate Chicken Before Searing It?
Absolutely, you can marinate chicken before searing it. The marinade benefits include enhanced flavor and tenderness. Just remember, you’ll want to employ proper searing techniques to lock in those delicious juices during cooking.
How Do I Know When Chicken Is Done Cooking?
To know when chicken’s done cooking, check its internal temperature; it should reach 165°F. Additionally, look for visual cues like golden brown skin and clear juices. Trust your senses for perfectly cooked chicken!

Conclusion
Ultimately, mastering the art of searing chicken takes practice, but you’re well on your way! Remember to reflect on the cut, pan temperature, and timing to achieve that golden-brown crust. With a few tips and an awareness of common mistakes, you’ll elevate your cooking game. So next time you’re in the kitchen, don’t hesitate to sear your chicken to perfection. Enjoy the delicious results and impress your family and friends with your newfound skills!