How To Make Apricot Jam
How To Make Apricot Jam: Making apricot jam is easy and rewarding. Start by choosing ripe apricots; they should be golden-orange and slightly soft. Wash and pit about four cups of apricots, then chop them into small pieces. In a large pot, combine the fruit with sugar, and simmer for 15-20 minutes until it thickens. Sterilize your jars, then fill them with the hot jam, leaving space at the top. Seal the jars and process them in a water bath for long storage. You can even experiment with flavors! There’s plenty more to explore about enhancing your homemade jam and using it creatively.
Choosing the Right Apricots
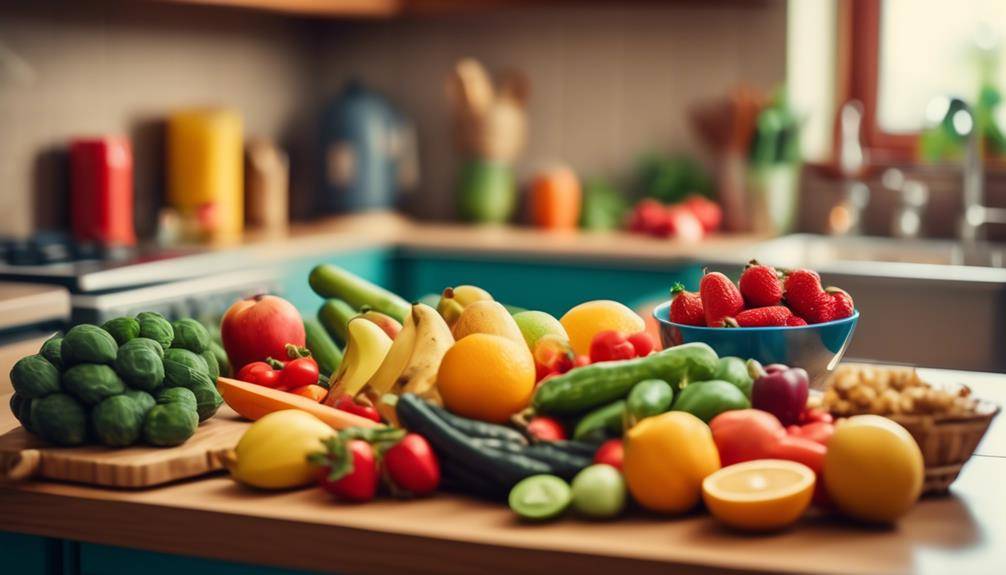
When selecting apricots for jam, how do you ascertain you’re picking the ripest and sweetest fruit? First off, you’ll want to know which apricot varieties are best suited for jam-making. Some popular options include the Moorpark and Tilton varieties, both known for their rich flavor and smooth texture. These varieties tend to produce a jam that’s bursting with sweetness, making them ideal for your project.
Next, consider seasonal availability. Apricots are typically in season from late spring to early summer, depending on your location. If you’re buying from a local market, timing your visit during this peak period ascertains you get the freshest fruits. When you see apricots in season, you’ll want to inspect them carefully. Look for fruits that are slightly soft to the touch, indicating ripeness, and avoid any that are overly mushy or have blemishes.
You should also pay attention to color. A vibrant orange hue usually signifies a ripe apricot, while dull or greenish tones may indicate under-ripeness. If you can, smell the apricots; a sweet, fragrant aroma is a good sign they’re ready for picking.
Essential Ingredients Needed
To make delicious apricot jam, you’ll need the right fresh apricots and a few key preserving ingredients. Selecting ripe apricots is essential for the best flavor and consistency. Let’s explore what you’ll need to gather before you start cooking!
Fresh Apricots Selection Tips
Choosing the right fresh apricots is crucial for making delicious jam, so look for fruits that are slightly soft to the touch and have a vibrant orange color. When selecting apricots, pay attention to the different apricot varieties available. Each variety can offer unique flavors and textures, so do a little research to find which ones work best for your jam. Common varieties include Tilton, Moorpark, and Katy, all of which have their own distinct qualities.
Keep in mind the seasonal availability of fresh apricots. They typically peak in late spring to early summer, so plan your jam-making session during this time for the best flavor. When you’re at the market, don’t hesitate to ask vendors about their fresh apricot stock and what’s currently in season. This way, you can ascertain you’re getting the ripest and most flavorful fruits.
Lastly, avoid any apricots that are overly soft, bruised, or have dark spots, as these may negatively affect your jam’s taste and texture. With these selection tips in mind, you’ll be well on your way to creating a delightful apricot jam!
Necessary Preserving Ingredients
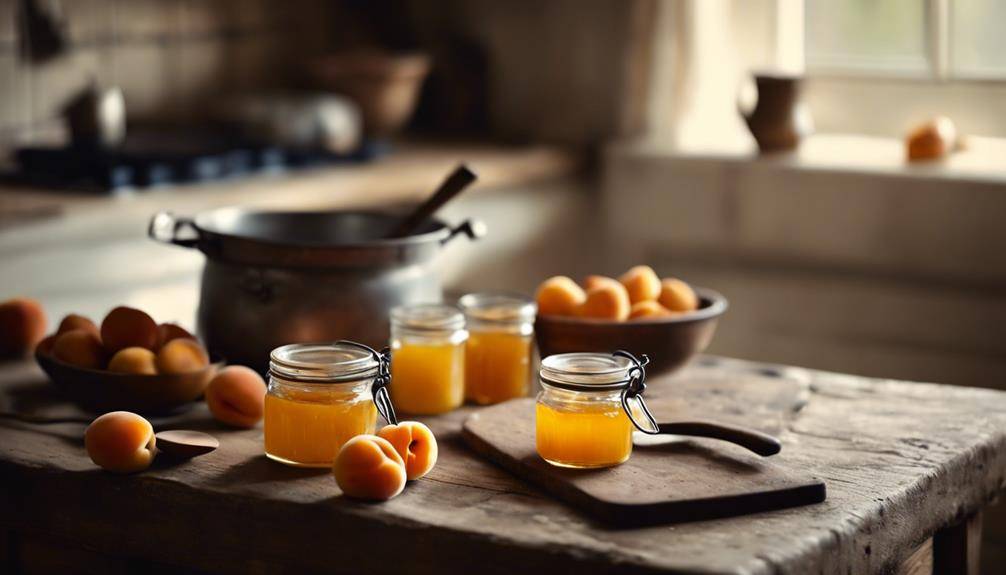
For making apricot jam, you’ll need a few essential preserving ingredients to guarantee a tasty and well-set final product. First off, fresh apricots are the star of your jam, so choose ripe, sweet ones for the best flavor. Next, you’ll need sugar; it not only sweetens your jam but also helps with preservation. If you’re looking to reduce sugar, consider using sugar alternatives like honey or agave syrup, but keep in mind that these may affect the texture and flavor.
You’ll also need pectin, a natural thickening agent that helps your jam achieve that perfect consistency. When using pectin, follow the instructions carefully, as the acid balance is vital for proper gelling. Typically, you’ll add lemon juice to enhance the acidity, which not only helps with the gelling process but also brightens the flavor of the apricots.
Lastly, don’t forget jars and lids for storing your jam. Make sure they’re clean and sterilized to guarantee your apricot jam lasts longer. With these ingredients in hand, you’re ready to create a delightful homemade treat!
Preparing the Apricots
To make delicious apricot jam, you need to start with ripe apricots. You’ll want to wash them thoroughly and remove the pits for the best texture and flavor. Let’s go through the steps to prepare your apricots perfectly.
Selecting Ripe Apricots
When selecting ripe apricots, look for fruits that are slightly soft to the touch and have a vibrant color. The perfect shade is typically a golden orange, indicating that they’ve reached their ideal harvest time. Avoid apricots that are green or overly firm, as they may not be fully ripe and won’t provide the sweetness you desire for your jam.
Check for apricot ripeness indicators such as small blemishes or a pleasant, fruity aroma. A slightly wrinkled skin can also be a sign of ripeness, but be cautious—too many wrinkles might indicate overripeness. You want apricots that feel plump and fresh.
When you’re at the market or picking from a tree, gently squeeze the fruit to verify it gives a little under pressure. Remember that apricots ripen off the tree, so it’s okay if they’re not perfectly ripe when you buy them, as long as they’re not overly hard. Aim to select apricots that are ripe but still firm enough to handle without bruising. This guarantees you’ll have the best flavor and texture for your homemade jam. Happy picking!
Washing and Pitting
Start by rinsing your apricots thoroughly under cool running water to remove any dirt or residue. This step is essential for guaranteeing your jam is clean and delicious. Different apricot varieties may have varying levels of fuzz, so take your time to confirm they’re well-washed.
Next, it’s time to pit your apricots. Use your preferred pitting techniques; you can either slice them in half and remove the pit with your fingers or use a small knife for more precision. If you’re working with firmer apricot varieties, you might find the pit easier to remove with a knife.
Once you’ve pitted all the apricots, you’re ready to move on to the next step in making your jam. Don’t worry if some pieces break apart during the pitting process; they’ll still taste great in the final product.
Make certain to keep your pitted apricots in a bowl to prevent them from browning while you finish washing and pitting the rest. With clean, pitted apricots at hand, you’ll be one step closer to creating that delightful apricot jam!
Tools and Equipment
Gather essential tools and equipment like jars, a pot, and a canning funnel to guarantee a smooth apricot jam-making process. First, you’ll need glass jars with lids, ideally 8-ounce or 12-ounce sizes. Make sure they’re sterilized and ready to hold your delicious jam. A large pot is vital; choose one that’s deep enough to accommodate boiling water for canning.
Next, invest in a canning funnel. This handy tool helps you pour the hot jam into jars without making a mess. You’ll also need a ladle for transferring the jam from the pot to the jars. A pair of jar tongs is essential for safely lifting the hot jars out of boiling water without burning yourself.
To make certain your jam sets properly, have a candy thermometer on hand. This will help you monitor the temperature while cooking your fruit mixture. If you’re using fresh apricots, consider having a food processor or blender ready for pureeing, especially if you prefer a smoother texture.
Lastly, don’t forget about preserving equipment like a water bath canner or a large stockpot with a rack to keep jars off the bottom during processing. With these jam making tools and preserving equipment, you’ll be well-prepared to begin your apricot jam-making adventure. Gather everything before you start, and you’ll set yourself up for success!
Making the Jam Mixture
When you’re ready to make your apricot jam, the first step is selecting the freshest apricots you can find. After that, you’ll prepare your ingredients to guarantee a smooth cooking process. Finally, you’ll cook the mixture to bring out those delicious flavors and achieve the perfect consistency.
Selecting Fresh Apricots
Choosing the right apricots is essential for making a delicious jam, so look for fruits that are ripe, firm, and free of blemishes. You’ll want to inspect the skin; it should have a vibrant color and a slight sheen. There are several apricot varieties to take into account, such as Tilton, Moorpark, and Katy, each offering unique flavors and textures. Research which variety suits your taste and jam-making goals best.
Seasonal availability is another vital factor. Apricots are typically in season during late spring to early summer, so plan your apricot hunt around this time. Visiting local farmers’ markets or orchards not only gives you access to the freshest fruits but also allows you to ask about the ripeness and quality.
When selecting apricots, don’t be afraid to give them a gentle squeeze. They should yield slightly, indicating they’re ripe. Avoid any with brown spots or soft patches, as these may indicate overripeness or spoilage. By choosing the best apricots, you’ll set the foundation for a flavorful and satisfying jam that you can enjoy all year round.
Preparing the Ingredients
To create a delicious apricot jam mixture, start by washing your fresh apricots thoroughly to remove any dirt or residues. After rinsing, cut the apricots in half and remove the pits. Depending on the apricot varieties you’ve chosen, you might want to adjust the quantity based on their sweetness. For instance, sweeter apricots may require less sugar in your jam.
Next, chop the apricots into small pieces to release their juices more effectively. Measure out the fruit, as you’ll need about four cups of chopped apricots for a standard batch of jam. If you’re looking to make ingredient substitutions, consider using a combination of apricot varieties for a more complex flavor. For instance, mixing in some tart apricots can balance the sweetness.
Now, weigh your sugar based on the amount of fruit you have. A common ratio is equal parts sugar to fruit, but this can vary depending on your taste preferences and the sweetness of your apricots. If you’re aiming for a lower-sugar option, you can substitute with a sugar alternative, but be sure to follow the instructions on the packaging for proper ratios.
Cooking the Mixture
Start by combining the chopped apricots and sugar in a large pot over medium heat, stirring until the sugar dissolves and the mixture begins to bubble. Once you see bubbles, reduce the heat to medium-low. This is essential for achieving the right jam consistency without burning the mixture.
Using a wooden spoon, continue stirring occasionally to prevent sticking. After about 10 minutes, you’ll notice the apricots breaking down and releasing their juices. This is where the magic happens. You can use a potato masher if you prefer a smoother texture.
Keep an eye on the mixture, as cooking techniques play a key role here. You want to simmer it until it thickens, which usually takes another 15-20 minutes. To check for the right consistency, drop a spoonful of the jam onto a cold plate. If it holds its shape after a minute, you’re good to go. If not, continue cooking and check every few minutes.
Once it reaches the desired jam consistency, remove the pot from heat and let it cool slightly before transferring it to jars. Enjoy your homemade apricot jam!
Cooking the Jam
Once you’ve prepared the apricots, it’s time to cook them down with sugar and lemon juice to create a delicious jam. Begin by combining the chopped apricots, sugar, and lemon juice in a large pot. Stir the mixture well to guarantee the sugar is evenly distributed. You’ll want to let this sit for about 30 minutes; this allows the apricots to release their juices, which helps in achieving the right jam consistency.
Next, bring the mixture to a boil over medium-high heat. Once boiling, reduce the heat to medium and let it simmer. Keep an eye on the cooking time; typically, it takes about 20 to 30 minutes to reach the desired consistency. You can stir occasionally to prevent sticking, but be careful not to over-stir, as this can break down the fruit too much.
As the jam cooks, you’ll notice it thickening and bubbling. This is a good sign that the sugars are caramelizing and the flavors are melding beautifully. If you like a chunkier jam, you can mash some of the fruit with a potato masher, but don’t overdo it if you prefer a smoother texture. Just remember, the longer you cook, the thicker the jam will get. Keep monitoring, and when you think it’s close, you’ll be ready for the next step!
Testing the Jam Consistency
Testing the jam consistency is essential to confirm you’ve achieved that perfect spreadable texture. Once you’ve cooked your apricot jam, it’s time for jam thickness testing to determine it’s reached the right consistency. The most reliable method is the plate test. Start by placing a small plate in the freezer before you begin cooking. When you think your jam is ready, drop a spoonful onto the chilled plate and return it to the freezer for about a minute.
After a minute, take the plate out and run your finger through the jam. If it holds its shape and you see a clear line, you’ve likely reached the gel stage indicator. If the jam runs back together quickly, it needs more cooking. Repeat this test until you’ve reached your desired consistency.
Another helpful tip is to check the temperature of your mixture. For apricot jam, you’re aiming for about 220°F (104°C) at sea level. Keep in mind that altitude can affect cooking times, so adjust accordingly if you’re at a higher elevation.
As you test, remember that the jam will thicken further upon cooling. So, if you’re close to your target, you might pull it off the heat a little early. Being patient during this process will pay off, confirming you create a jam that’s not too runny and perfect for spreading on your morning toast or using in recipes. Enjoy the satisfaction of perfecting your apricot jam!
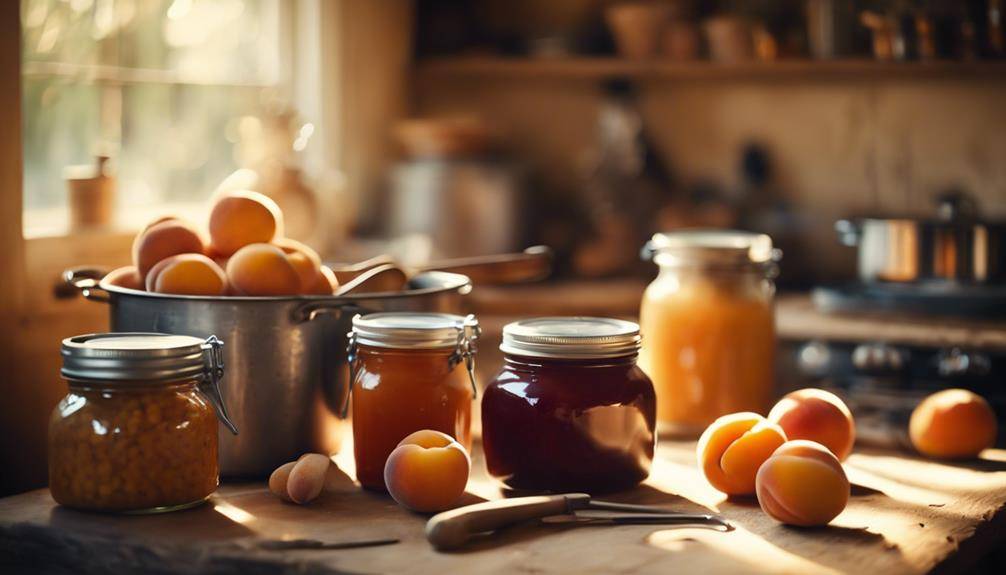
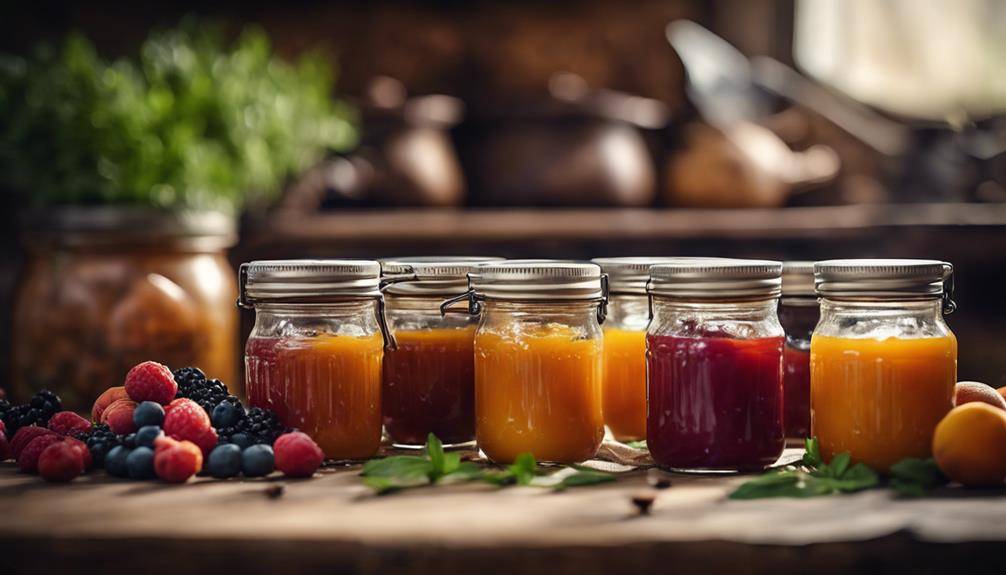
Sterilizing Jars
Sterilizing jars is essential to guaranteeing your apricot jam stays fresh and safe for consumption. To achieve this, you need to select the right jar types. Glass jars with airtight lids are the best choice, as they prevent bacteria from entering. Ascertain they’re free of chips or cracks, which can compromise the seal.
There are several sterilization methods you can choose from. One popular method is boiling. Start by washing your jars and lids in hot, soapy water. Rinse them thoroughly, then place the jars upright in a large pot filled with water. Bring the water to a rolling boil and let them boil for 10 minutes. Afterward, carefully remove the jars with tongs and place them upside down on a clean kitchen towel to dry.
Another effective method is using the oven. Preheat your oven to 225°F (110°C). Place the cleaned jars on a baking sheet, ensuring they don’t touch each other. Heat them in the oven for about 20 minutes. This method is great for sterilizing multiple jars at once, but avoid using this method for metal lids, as they can warp in the heat.
Lastly, you can use a dishwasher if it has a sterilization setting. Just make sure to place the jars on the top rack and run a hot cycle without detergent. Whichever sterilization method you choose, always handle your jars with clean hands to maintain their sterility. Now you’re ready to fill those jars with your delicious apricot jam!
Filling the Jars
Now that your jars are sterilized, it’s time to fill them with that delicious apricot jam. You’ll want to use proper techniques to guarantee each jar is filled correctly and sealed tight for storage. Let’s look at the best methods for jar preparation, filling, and sealing to keep your jam fresh.
Jar Preparation Techniques
Fill the jars with your homemade apricot jam while it’s still hot to guarantee a proper seal. Choose the right jar types and sizes based on how much jam you want to store. For smaller batches, half-pint jars work great, while quart jars are perfect for larger quantities. Make certain the jars are clean and sterilized; this prevents any unwanted bacteria from spoiling your jam.
When you’re ready to fill the jars, use a funnel to avoid spills and keep the rim clean. This is essential for an effective seal. Leave about a quarter-inch headspace at the top of each jar; this space allows for expansion during processing. If you’re using different jar sizes, adjust the headspace accordingly, as larger jars may need a bit more.
After filling the jars, wipe the rims with a clean cloth to remove any residue. This guarantees that the lids fit securely. Once the jars are filled and cleaned, you’re ready to seal them with the appropriate lids. Remember, the sealing process is critical for preserving your delicious apricot jam, so take your time to do it right. Enjoy your canning adventure!
Proper Filling Methods
Using the right technique when filling your jars guarantees a smooth process and preserves the quality of your apricot jam. Start by selecting appropriate jar sizes for your jam; smaller jars are great for gifts, while larger ones are perfect for family use. Before you begin, make sure your jars are clean and warm, as this helps prevent thermal shock when you add the hot jam.
When it comes to filling techniques, use a ladle or a funnel to avoid spills. Hold the funnel in place, and pour the jam slowly, letting it flow down the sides of the jar. This minimizes air bubbles, which can affect the jam’s texture. Fill each jar, leaving about a quarter-inch of headspace at the top. This space is essential for expansion during the cooling process.
If you notice any air bubbles trapped in the jam, gently tap the jar or use a skewer to release them. After filling, wipe the rims of the jars with a clean, damp cloth to make certain of a good seal. Following these steps will help you achieve perfectly filled jars of apricot jam, ready for sealing and storage.
Sealing and Storage Tips
Sealing your jars properly is essential for preserving the freshness and flavor of your apricot jam. Start by ensuring your jars and lids are clean and sterilized. After filling your jars with jam, leave about a quarter-inch of headspace at the top. This space allows for proper sealing and prevents bubbling over. Wipe the rims of each jar with a clean, damp cloth to remove any residue that could compromise the seal.
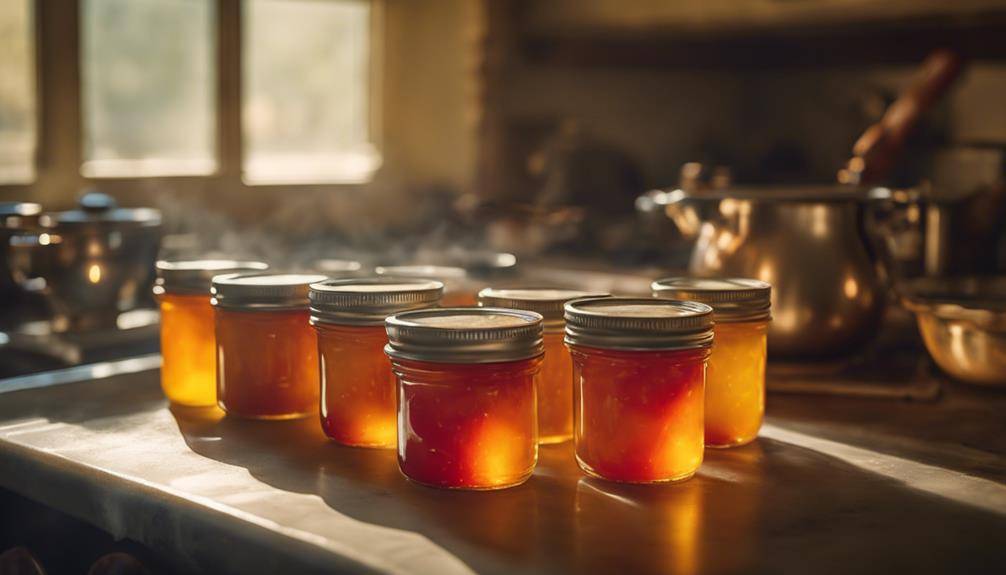
Next, place the lids on the jars, ensuring they’re centered. Screw the metal bands on until they’re fingertip-tight; don’t overtighten, as this can hinder the sealing process. Process your jars in a boiling water bath according to the recommended time for your recipe. This step is vital for jar safety and helps create a vacuum seal.
Once the jars cool, check the seals by pressing down in the center of each lid. If it doesn’t pop back, it’s sealed correctly. For long-term storage, store your sealed jars in a cool, dark place. Properly sealed apricot jam can last up to a year, so you’ll enjoy the fruits of your labor for many months to come!
Sealing the Jars
Once you’ve filled your jars with the delicious apricot jam, it’s essential to confirm they’re properly sealed to maintain freshness. Different jar types can affect how well your jam is preserved, so choose wisely. For instance, glass mason jars are popular for canning due to their durability and airtight seals.
To seal your jars effectively, you’ll want to use proper sealing techniques. Start by wiping the rims of the jars with a clean, damp cloth to remove any residue that could interfere with the seal. Next, place the lid on top of the jar, making sure it’s centered. If you’re using metal lids, remember that they often come with a sealing compound that needs to be in direct contact with the jar’s rim for the best seal.
Once the lid is in place, you can screw on the ring, but don’t over-tighten it. The jar needs some space to allow air to escape during the sealing process. If you’re using alternative jar types, like flip-top jars, confirm the rubber gasket is clean and properly positioned before securing the lid.
After sealing, let the jars sit undisturbed at room temperature. You should hear a satisfying “pop” sound as the jars seal, indicating that they’re ready for storage. Properly sealed jars can last for months, allowing you to enjoy your homemade apricot jam long after the fruit’s season has ended!
Water Bath Processing
After confirming your jars are sealed, the next step is to process them in a water bath to eliminate any bacteria and extend shelf life. This method is vital for preserving your apricot jam safely. Start by filling a large pot with enough water to cover the jars by at least an inch. Bring the water to a simmer, then carefully place your sealed jars into the pot. Make sure they’re standing upright and not touching each other to guarantee even heat distribution.
Once all jars are in the water bath, increase the heat to bring the water to a rolling boil. You’ll want to process the jars for about 10 to 15 minutes. The exact time may vary depending on your altitude, so check a reliable source for any adjustments needed. It’s important to monitor the water level; add more water if it starts to drop too low during processing.
While the jars are boiling, keep some safety tips in mind. Always use jar tongs to avoid burns when handling the hot jars, and be cautious of steam escaping when you remove the lid from the pot. Also, confirm the jars are fully submerged for the entire processing time; this helps maintain consistent heat. Once the time is up, turn off the heat and carefully lift the jars out of the water bath. Place them on a clean towel or cooling rack, allowing them to cool completely before moving on to the next steps.
Cooling and Storing
To guarantee your apricot jam maintains its quality, let the jars cool completely at room temperature before storing them away. This step is essential because it helps to create a proper seal and prevents spoilage. You can use several cooling techniques to speed up this process. For example, placing the jars on a wire rack allows air to circulate around them, promoting even cooling. Avoid stacking the jars, as this can trap heat and moisture, leading to uneven cooling.
Once your jars have cooled to room temperature, it’s time to prepare for storage. Choose appropriate storage containers to make sure your jam stays fresh. If you’ve used mason jars, keep the lids tightly sealed but not overly tightened. This prevents any chance of breakage due to pressure changes. If you prefer alternative containers, opt for glass jars with airtight lids. These will keep your jam safe from air exposure, which can lead to spoilage.
Store your cooled apricot jam in a cool, dark place, like a pantry or cupboard. If you plan to keep it longer, consider refrigerating it. Refrigeration extends the shelf life, allowing you to enjoy your delicious jam for months. Just remember that once opened, it’s best to consume the jam within a few weeks for peak taste and quality. By following these cooling and storing guidelines, you’ll make sure your homemade apricot jam remains a delightful treat.
Tips for Flavor Variations
Experimenting with different flavor variations can elevate your apricot jam and add a unique twist that suits your taste. One simple way to start is by incorporating citrus zest. Adding the zest of lemons, oranges, or limes can brighten the flavor profile and complement the natural sweetness of the apricots. Just a teaspoon or two of zest can go a long way, so start with a small amount and adjust to your preference.
You can also explore spice additions to give your jam an extra kick. Consider adding cinnamon, ginger, or even cardamom for a warm, aromatic touch. A pinch of ground cinnamon can create a cozy, comforting flavor, while fresh ginger can add a zesty bite. When using spices, always start with a small quantity—around a quarter teaspoon—and taste as you go, since it’s easier to add more than to tone down an overpowering flavor.
If you’re feeling adventurous, try incorporating herbs like rosemary or thyme. These can introduce a savory element that beautifully contrasts with the sweetness of the apricots. Simply add a few sprigs while cooking, then remove them before you jar your jam.
Lastly, consider mixing in other fruits. Cherries, peaches, or even berries can create delightful blends. Just remember to adjust the sugar and pectin levels to accommodate the additional fruit. With these tips, you’re well on your way to crafting a personalized apricot jam that’s uniquely yours!
Using and Enjoying Your Jam
Now that you’ve created your unique apricot jam, it’s time to explore the many ways you can use and enjoy it in your daily life. This delightful treat isn’t just for toast; it can elevate a variety of dishes and snacks.
Start your morning by spreading a generous layer of apricot jam on warm, buttery croissants or whole-grain toast. For a heartier breakfast, mix it into Greek yogurt or oatmeal for a sweet twist. When it comes to jam pairings, apricot jam complements savory cheeses like Brie or goat cheese perfectly. Spread it on a cheese board along with some crackers for a delightful appetizer.
You can also use your jam in baking. Swirl it into muffin or cake batters for added flavor, or use it as a filling in pastries. For a revitalizing treat, drizzle apricot jam over vanilla ice cream or mix it into smoothies for a fruity boost.
For serving suggestions, consider creating a glaze by mixing your jam with a bit of vinegar or soy sauce. This can add a sweet and tangy flavor to grilled chicken or pork. Don’t forget about using your jam in salad dressings; just whisk it together with olive oil and vinegar for a delicious vinaigrette.
With so many delicious ways to enjoy apricot jam, you’ll find yourself reaching for that jar time and again!
Frequently Asked Questions: How To Make Apricot Jam
Can I Use Frozen Apricots for Making Jam?
Yes, you can use frozen apricots for jam! Their benefits include vibrant flavor and nutrients. Just thaw them using your preferred techniques, like overnight in the fridge or a quick microwave defrost, and you’re ready to go!
How Long Does Homemade Apricot Jam Last?
Homemade apricot jam typically lasts about one year if stored properly. For best shelf life, keep it in a cool, dark place, and guarantee it’s sealed tightly. Always check for spoilage before using.
Can I Substitute Sugar With Alternatives in Jam?
Yes, you can definitely substitute sugar with alternatives in jam. Natural sweeteners like honey, maple syrup, or agave can work well. Just remember, they may alter the flavor and consistency, so adjust accordingly!
What Should I Do if My Jam Is Too Runny?
If your jam’s too runny, don’t worry! You can add thickening agents like cornstarch or use pectin alternatives. Heat it gently while stirring until it reaches your desired consistency, then let it cool.
Is It Safe to Reuse Old Jam Jars?
Yes, you can safely reuse old jam jars if you sterilize them properly. Make certain you follow correct jar sealing methods to prevent contamination, and always check for any cracks or damage before using them again.

Conclusion
Now that you know how to make apricot jam, it’s time to enjoy the fruits of your labor! Whether you spread it on toast, use it in desserts, or give it as a thoughtful gift, your homemade jam is sure to delight. Remember to experiment with flavors and share your creations with friends and family. With a little practice, you’ll be crafting delicious batches all year long. Happy jamming!