The Best Easy Ethiopian Injera Recipe

The Best Easy Ethiopian Injera Recipe; Are you tired of searching for an authentic Ethiopian injera recipe that is easy to follow? Look no further, because we have got you covered. In this discussion, we will guide you through the process of making delicious injera right in your own kitchen. Get ready to tantalize your taste buds with the perfect combination of tangy and spongy flatbread. But that’s not all, we will also provide you with some tips and variations to elevate your injera game. So, grab your apron and get ready to embark on a culinary adventure that will transport you to the vibrant flavors of Ethiopia.
Ingredients Needed for Ethiopian Injera
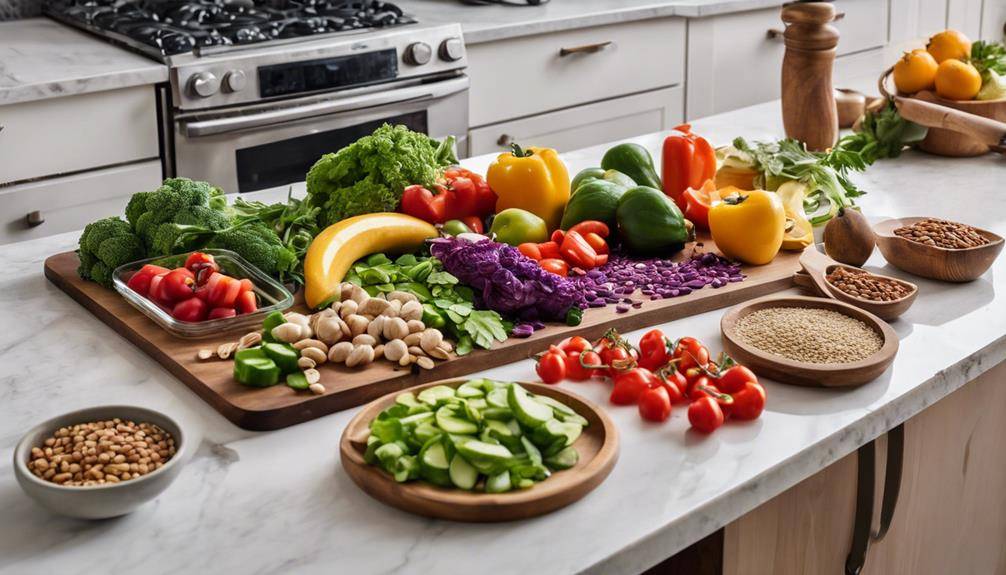
To make authentic Ethiopian injera, you will need a few essential ingredients that bring out the unique flavors and textures of this beloved traditional dish. Ethiopian injera variations offer a range of choices, but the core ingredients remain the same. The main ingredient is teff flour, a gluten-free grain that gives injera its distinct taste and spongy texture. Teff flour is mixed with water to create a batter that ferments for a day or two, resulting in the tangy flavor characteristic of injera.
Other ingredients include salt, which enhances the taste of the injera, and baking soda, which helps the batter rise and creates air pockets in the finished product. You can also add a bit of vinegar for additional sourness, although this is optional.
Now let’s talk about Ethiopian injera toppings. While injera is often served as a side dish or base for stews and curries, it can also be enjoyed on its own with a variety of toppings. Some popular options include doro wat, a spicy chicken stew, or tibs, which are sautéed meat or vegetables. You can also top injera with lentils, chickpeas, or a mixture of vegetables and spices known as atakilt wat.
Preparing the Injera Batter
Now it’s time to roll up your sleeves and start preparing the injera batter. The first step is to mix the ingredients together, which includes teff flour, water, and a pinch of salt. Once everything is well combined, let the batter sit and ferment for at least 24 hours. This fermentation process is essential as it gives the injera its signature tangy flavor and airy texture. So, let’s get started on creating the perfect injera batter!
Mixing the Ingredients
Once you’ve gathered all the necessary ingredients, it’s time to dive into the exciting process of mixing them together to create the perfect Injera batter. To ensure a successful outcome, here are some tips to guide you:
- Choosing the right utensils:
- Opt for a large mixing bowl that allows enough space for the batter to expand.
- A whisk or fork is ideal for blending the ingredients smoothly.
- A non-stick pan with a lid will help you achieve the traditional bubbly texture.
- Tips for achieving the right consistency:
- Gradually add water to the teff flour while whisking to prevent lumps from forming.
- The batter should have a thin consistency, similar to that of pancake batter.
- Adjust the water quantity if needed, as different flours may require varying amounts.
Fermenting the Batter
After blending the ingredients smoothly and achieving the right consistency, it’s time to let the magic happen by fermenting the Injera batter. The fermenting process is crucial as it gives Injera its distinct tangy flavor and spongy texture. To start, cover the batter with a clean towel and let it sit at room temperature for about 24-48 hours.
During this time, the batter will begin to bubble and develop a slightly sour smell. If the fermentation process takes too long, you can place the batter in a warm spot or use a fermentation starter like yeast or sourdough. On the other hand, if the batter smells rotten or moldy, it may be a sign of improper fermentation. Troubleshooting fermentation issues is important to ensure the batter turns out just right.
Fermenting the Injera Batter
To achieve the perfect tangy flavor and soft texture of Ethiopian injera, the batter must undergo a crucial process known as fermentation. This step is essential in developing the distinct taste and airy texture that injera is known for. So, let’s dive into the world of fermenting techniques and troubleshoot common fermentation issues to ensure your injera turns out just right.
Here are three sub-lists to guide you through the process:
- Fermenting Techniques:
- Use a warm environment: Find a warm spot in your kitchen, around 75-85°F, to help expedite the fermentation process.
- Incorporate a starter: Adding a small amount of fermented batter or a sourdough starter to your injera batter can introduce beneficial bacteria and speed up fermentation.
- Allow for ample time: Fermentation typically takes anywhere from 12 to 48 hours, depending on the temperature and desired flavor. Be patient and give the batter enough time to develop its tangy taste.
- Troubleshooting Common Fermentation Issues:
- Slow fermentation: If your batter is taking longer than expected to ferment, check the temperature. It might be too cold, so move it to a warmer spot.
- Sour or overly tangy flavor: This could be a result of overfermentation. Next time, reduce the fermentation time slightly.
- No bubbles or rise: If there are no signs of fermentation activity, your batter might lack enough wild yeasts or beneficial bacteria. Adding a small amount of whole wheat flour can help kickstart the fermentation process.
Preparing the Injera Cooking Surface
Now that your injera batter is fermented and ready to be cooked, it’s important to prepare the cooking surface properly. Choosing the right equipment is crucial – a large, flat skillet or griddle works best. Next, make sure to season the cooking surface by lightly oiling it and heating it up before you start cooking. Lastly, maintaining the temperature is key to achieving that perfect texture. Keep an eye on the heat and adjust as needed to ensure your injera cooks evenly and turns out deliciously fluffy.
Choosing the Right Equipment
Optimizing your injera cooking experience begins with selecting the ideal equipment for preparing the cooking surface. The right equipment will ensure that your injera turns out perfectly every time. Here are some tips to help you choose the right equipment and explore alternative cooking methods:
- Traditional Ethiopian Mitad: This large, round clay griddle is specifically designed for making injera. It provides even heat distribution and helps achieve the distinctive texture and flavor of injera.
- Electric Griddle: If you don’t have access to a traditional Mitad, an electric griddle can be a good alternative. Look for one with a large cooking surface and adjustable temperature settings.
- Cast Iron Pan: A cast iron pan can also be used for making injera. Make sure it is well-seasoned to prevent the injera from sticking.
With the right equipment in hand, you’ll be well on your way to creating delicious injera that will elevate your Ethiopian cuisine to new heights.
Seasoning the Cooking Surface
When it comes to achieving the perfect texture and flavor of injera, one crucial step is seasoning the cooking surface. Choosing the right pan is essential for this process. Look for a pan that is large enough to accommodate the size of the injera you want to make. A non-stick pan with a smooth surface works best, as it prevents the injera from sticking and ensures an even cooking process.
Maintaining the heat is also important. Preheat the pan over medium-high heat and make sure it stays hot throughout the cooking process. This will help the injera cook evenly and develop those signature bubbles on the surface. With a properly seasoned cooking surface, you’ll be well on your way to creating delicious, authentic Ethiopian injera.
Maintaining the Temperature
To ensure the perfect texture and flavor of your injera, it is crucial to maintain the temperature of the cooking surface throughout the entire cooking process. Here are some troubleshooting techniques to help you achieve this:
- Preheat the cooking surface: Before you start cooking the injera, make sure to preheat the cooking surface for at least 10 minutes. This will ensure that the surface is evenly heated and ready for the batter.
- Keep an eye on the temperature: While cooking, it’s important to monitor the temperature of the cooking surface. If it gets too hot, the injera may burn, and if it’s too cold, it won’t cook properly. Adjust the heat as needed to maintain a consistent temperature.
- Use a lid or cover: To trap the heat and maintain a stable temperature, cover the injera while it cooks. This helps to create a steamy environment that promotes even cooking.
Cooking the Injera on a Traditional Clay Pan
For the perfect Ethiopian injera, the traditional clay pan is essential in achieving the unique taste and texture that make this dish so cherished. When it comes to cooking injera on a traditional clay pan, there are two important factors to consider: choosing the right pan and maintaining the right temperature.
Firstly, selecting the right pan is crucial. Look for a clay pan that is specifically designed for cooking injera. The pan should be made from natural clay and have a smooth, flat surface. This will ensure even heat distribution and prevent the injera from sticking to the pan during cooking. Additionally, make sure the pan is properly seasoned before use. Seasoning helps to create a non-stick surface and enhances the flavor of the injera.
Once you have the right pan, maintaining the right temperature is key. Preheat the pan over medium heat for a few minutes before pouring the injera batter onto it. The pan should be hot enough to create bubbles on the surface of the injera but not too hot that it burns. Adjust the heat as necessary to maintain a consistent temperature throughout the cooking process.
As you cook the injera, keep an eye on the pan to ensure it doesn’t get too hot or cool down too much. Adjust the heat as needed to maintain the ideal cooking temperature. This will result in injera that is perfectly cooked, with a soft, spongy texture and a slightly tangy flavor.
Cooking injera on a traditional clay pan requires attention to detail, but the effort is well worth it. The unique taste and texture of the injera, achieved by using the right pan and maintaining the right temperature, will transport you to the vibrant food markets of Ethiopia. So, get your clay pan ready and start cooking up a delicious batch of injera today!
Cooking the Injera on a Non-Stick Pan or Griddle
Now let’s talk about cooking the injera on a non-stick pan or griddle. Using a non-stick pan has its benefits – it prevents the injera from sticking and makes flipping easier. The key is to make sure the pan is properly heated, allowing for even heat distribution and ensuring that your injera cooks perfectly.
Non-Stick Pan Benefits
Improve your cooking experience and achieve perfect results by utilizing the benefits of a non-stick pan or griddle when cooking injera. Cooking injera on a non-stick surface offers several advantages that can make your cooking process easier and more enjoyable. Here are some benefits of using a non-stick pan or griddle:
- Easy flipping: The non-stick coating prevents the injera from sticking to the pan, making it effortless to flip and cook evenly on both sides.
- Less oil usage: With a non-stick pan, you can reduce the amount of oil needed for cooking, promoting a healthier cooking method.
- Quick and hassle-free cleaning: The non-stick surface makes it a breeze to clean up after cooking, as food residues slide off easily, saving you time and effort.
However, it is important to note that non-stick pans also have some disadvantages. Overheating or using metal utensils can damage the non-stick coating, reducing its effectiveness. It’s crucial to use silicone or wooden utensils and avoid high heat to maintain the non-stick properties of the pan. Overall, the benefits of using a non-stick pan or griddle outweigh the disadvantages, providing you with a convenient and efficient cooking experience.
Proper Heat Distribution
When cooking injera on a non-stick pan or griddle, achieving proper heat distribution is essential for a perfectly cooked and delicious outcome. To ensure that your injera cooks evenly, it is important to manage the heat effectively. Traditional cooking techniques can be employed to achieve this. First, preheat your non-stick pan or griddle on medium-high heat. This will allow the surface to evenly distribute the heat.
Next, pour the injera batter onto the hot surface, starting from the center and moving in a circular motion towards the edges. This technique helps to evenly spread the batter and cook it uniformly. As the injera cooks, you can adjust the heat as needed to maintain the ideal temperature. By paying attention to heat management and using traditional cooking techniques, you can achieve that perfect, fluffy injera that is a staple in Ethiopian cuisine.
Flipping and Cooking the Injera on the Other Side
To achieve a perfectly cooked injera, it is essential to master the art of carefully flipping and cooking it on the other side. This crucial step ensures that your injera is evenly cooked, with a slight crispness on the outside and a soft, spongy texture on the inside. Here’s how to flip and cook the injera on the other side:
- Flipping Technique
- Gently slide a spatula underneath the injera to loosen it from the pan.
- With a swift motion, flip the injera over, ensuring that it lands flat in the pan.
- Be careful not to fold or crumple the injera during the flipping process.
- Cooking Time
- After flipping, let the injera cook for an additional 1 to 2 minutes on the other side.
- Keep an eye on the injera to avoid burning or overcooking it.
- The injera should have a golden brown color and small bubbles throughout when it’s done.
- Adjusting Heat
- If you notice that the injera is cooking too quickly or browning too much, reduce the heat slightly.
- On the other hand, if the injera is taking too long to cook or not browning enough, increase the heat slightly.
- Adjusting the heat ensures that the injera cooks evenly and achieves the perfect balance of textures.
Storing and Keeping Injera Fresh
Now that you’ve mastered the art of flipping and cooking injera on the other side, let’s explore the important topic of storing and keeping injera fresh. Proper storage is essential to extend the shelf life of your injera and maintain its delicious taste and texture.
To store injera, start by allowing it to cool completely. Once cooled, stack the injera in airtight containers or wrap them tightly in plastic wrap. It’s important to keep the injera away from moisture, as it can cause the bread to become soggy and lose its unique texture.
For short-term storage, you can keep injera at room temperature for up to two days. However, if you want to extend its shelf life, it’s best to refrigerate or freeze it.
To refrigerate injera, place the wrapped or containerized injera in the refrigerator. It can stay fresh for up to a week when refrigerated. However, keep in mind that refrigeration may cause the injera to become slightly dry. To combat this, you can lightly sprinkle some water on the injera before reheating it.
If you want to store injera for an even longer period, freezing is the way to go. Wrap the injera tightly in plastic wrap, followed by a layer of aluminum foil to prevent freezer burn. Frozen injera can last for up to three months. To thaw, simply leave it at room temperature for a few hours or overnight.
Serving Suggestions for Injera
Looking for creative ways to serve injera? Look no further! Injera, the traditional Ethiopian flatbread, is not only delicious on its own but can also be used in various exciting ways. Here are some serving suggestions to inspire you:
- Injera as a base for pizza: Transform your ordinary pizza night into an exotic Ethiopian experience by using injera as the crust. Spread a layer of tomato sauce, sprinkle your favorite toppings, and finish it off with a generous amount of cheese. The tangy flavor of the injera combined with the rich pizza toppings will create a unique and mouthwatering fusion.
- Injera as a gluten-free alternative to bread: If you’re looking for a gluten-free option, injera is the perfect substitute for traditional bread. Its spongy texture and slightly sour taste make it an ideal accompaniment to soups, stews, or even as a wrap for your favorite sandwich fillings. The versatility of injera allows you to enjoy your favorite dishes without the worry of gluten.
- Injera as a side dish: Injera makes an excellent side dish to complement any meal. Tear off a piece of injera and use it to scoop up the flavors of your main course. Whether you’re enjoying spicy Ethiopian doro wat, savory lentil curry, or grilled meats, the injera will enhance the overall dining experience.
With these serving suggestions, you can explore the incredible versatility of injera. From using it as a pizza base to enjoying it as a gluten-free alternative to bread, injera adds a unique twist to your meals. So, go ahead and get creative with injera, and let your taste buds embark on a delicious Ethiopian journey!
Pairing Injera With Ethiopian Stews and Curries
When it comes to pairing injera with Ethiopian stews and curries, you can expect perfect flavor combinations that will transport your taste buds to the vibrant and rich culinary traditions of Ethiopia. From the spicy and aromatic Doro Wat to the hearty and comforting Misir Wot, injera serves as the perfect vessel to soak up the delicious flavors of these traditional dishes. Its unique spongy texture and tangy taste make injera a versatile option for enjoying a variety of Ethiopian stews and curries.
Perfect Flavor Combinations
To elevate the flavors of your Ethiopian injera, explore the delightful realm of pairing it with a variety of rich and aromatic stews and curries. Here are some flavor pairing suggestions and creative serving ideas to take your injera experience to the next level:
- Spicy Doro Wat: This traditional Ethiopian chicken stew, simmered with onions, garlic, and a blend of aromatic spices, is the perfect match for your injera. The combination of the tender chicken and the tangy injera creates a symphony of flavors that will leave your taste buds dancing.
- Creamy Misir Wat: Made with red lentils and a flavorful blend of spices, this lentil curry is the ideal companion for your injera. The creamy texture of the lentils pairs beautifully with the spongy injera, creating a comforting and satisfying meal.
- Rich Atakilt Wat: This vegetable curry, made with carrots, potatoes, and cabbage, is a wonderful choice for those looking for a vegetarian option. The tender vegetables and the tanginess of the injera complement each other perfectly, creating a harmonious balance of flavors.
Traditional Ethiopian Dishes
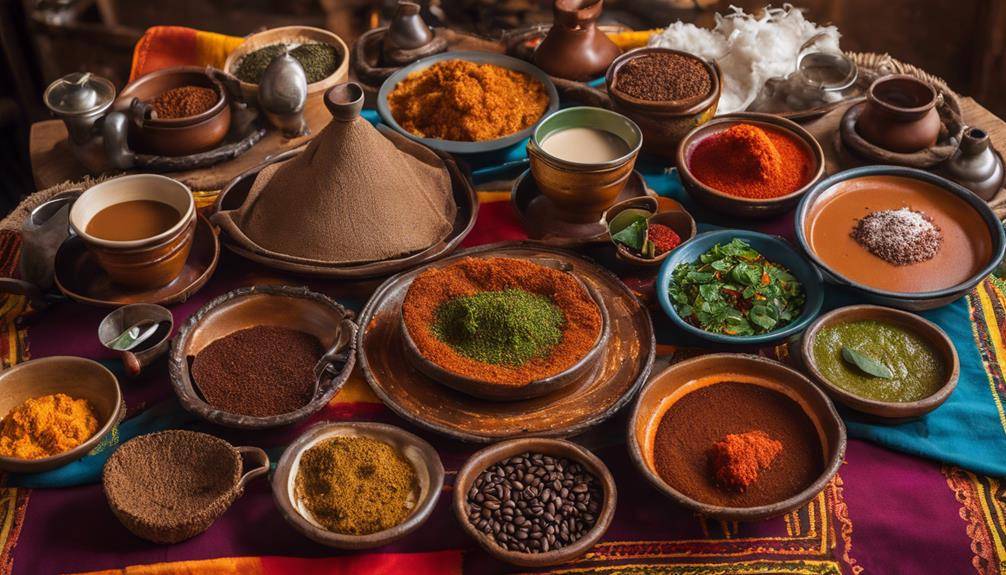
To fully experience the vibrant flavors of Ethiopian cuisine, pairing injera with a selection of traditional stews and curries is a must-try culinary adventure. Ethiopian cuisine is renowned for its rich and aromatic spices, which are used in abundance to create flavorful dishes. Traditional Ethiopian stews, known as wats, are slow-cooked with a variety of spices such as berbere, a fiery blend of chili peppers, garlic, ginger, and a mix of other spices.
The curries, on the other hand, are milder but equally delicious, with flavors derived from a combination of spices like turmeric, cumin, and cardamom. These traditional dishes not only offer a burst of flavors but also come with numerous health benefits. They are often made with fresh ingredients, including vegetables, legumes, and lean meats, providing a good source of vitamins, minerals, and protein. So, don’t miss out on the opportunity to savor these traditional Ethiopian dishes while enjoying the unique experience of eating with injera.
Versatility in Serving Options
For a truly unforgettable culinary experience, explore the versatility of pairing injera, the traditional Ethiopian flatbread, with an array of aromatic stews and curries that will transport your taste buds to the heart of Ethiopia. The versatile serving options for injera are endless, allowing you to get creative with your presentation ideas. Here are three sub-lists to paint a picture for you:
- Classic Pairings:
- Injera with Doro Wat: This spicy chicken stew is the quintessential Ethiopian dish, and when paired with injera, it creates a harmonious balance of flavors.
- Injera with Key Wat: A rich and flavorful beef stew that perfectly complements the tangy and slightly sour taste of injera.
- Vegetarian Delights:
- Injera with Misir Wat: A spicy red lentil stew that adds a burst of flavor to every bite of injera.
- Injera with Atkilt Wat: A delicious vegetable curry that showcases the versatility of injera as a base for various toppings.
- Unique Combinations:
- Injera with Tibs: Bite-sized pieces of seasoned grilled meat, paired with injera, create a delightful contrast of textures and flavors.
- Injera with Kitfo: A traditional Ethiopian dish made from minced raw beef, seasoned with spices, and served with injera for a unique and bold taste experience.
With these versatile serving options and creative presentation ideas, you can truly elevate your Ethiopian dining experience by pairing injera with the aromatic stews and curries of Ethiopia.
Using Injera as a Wrap or Sandwich Bread
Injera’s unique texture and tangy flavor make it a versatile option for wrapping up your favorite fillings, adding an exciting twist to your usual sandwiches or wraps. But did you know that you can take it a step further and use injera as a pizza crust? That’s right, this traditional Ethiopian flatbread can be transformed into a delicious and gluten-free pizza base. Simply top it with your favorite sauce, cheese, and toppings, and bake it in the oven until the cheese is melted and bubbly. The result is a crispy and flavorful pizza that will satisfy your cravings.
In addition to using injera as a pizza crust, you can also incorporate it into salads for a unique and tasty twist. Tear the injera into bite-sized pieces and toss it with your favorite greens, vegetables, and dressing. The tangy flavor of the injera adds a refreshing and zesty element to the salad, elevating it to a whole new level. You can also use injera as a substitute for croutons, adding a delightful crunch to your salad.
When using injera as a wrap or sandwich bread, the possibilities are endless. Fill it with grilled vegetables, hummus, and feta cheese for a Mediterranean-inspired wrap. Or try filling it with shredded chicken, lettuce, tomatoes, and a spicy sauce for a flavorful and satisfying sandwich. The soft and spongy texture of the injera pairs perfectly with the fillings, creating a delightful combination of flavors and textures.
Making Injera Pancakes or Crepes
Now that you’ve explored the various ways to use injera as a wrap or sandwich bread, let’s dive into the exciting realm of making injera pancakes or crepes. If you want to make injera pancakes without teff flour, you can use a combination of wheat flour and rice flour. This alternative method allows you to enjoy the unique taste and texture of injera even if you don’t have access to teff flour. Here’s a step-by-step guide to making delicious injera pancakes:
- Mix equal parts wheat flour and rice flour in a bowl. Add water gradually while whisking until you have a smooth, pourable batter. Let the batter rest for about 30 minutes to allow the flavors to develop.
- Heat a non-stick skillet or a traditional injera pan over medium-high heat. Lightly grease the pan with oil or butter.
- Pour a ladleful of the batter onto the hot pan and quickly swirl it around to spread it into a thin, circular shape. The batter should form a lacy pattern as it cooks.
- Cover the pan and cook the injera pancake for about 2-3 minutes, or until the edges start to lift and the surface is cooked through.
- Carefully remove the injera pancake from the pan and repeat the process with the remaining batter.
Now that you have your freshly made injera pancakes, it’s time to explore the different types of fillings you can use. Injera pancakes make a versatile base for a variety of delicious fillings. Here are a few ideas to get you started:
- Ethiopian spiced lentils: Simmer red lentils with onions, garlic, and a blend of aromatic spices like cumin, turmeric, and paprika. Serve the lentils on top of a folded injera pancake for a satisfying vegetarian meal.
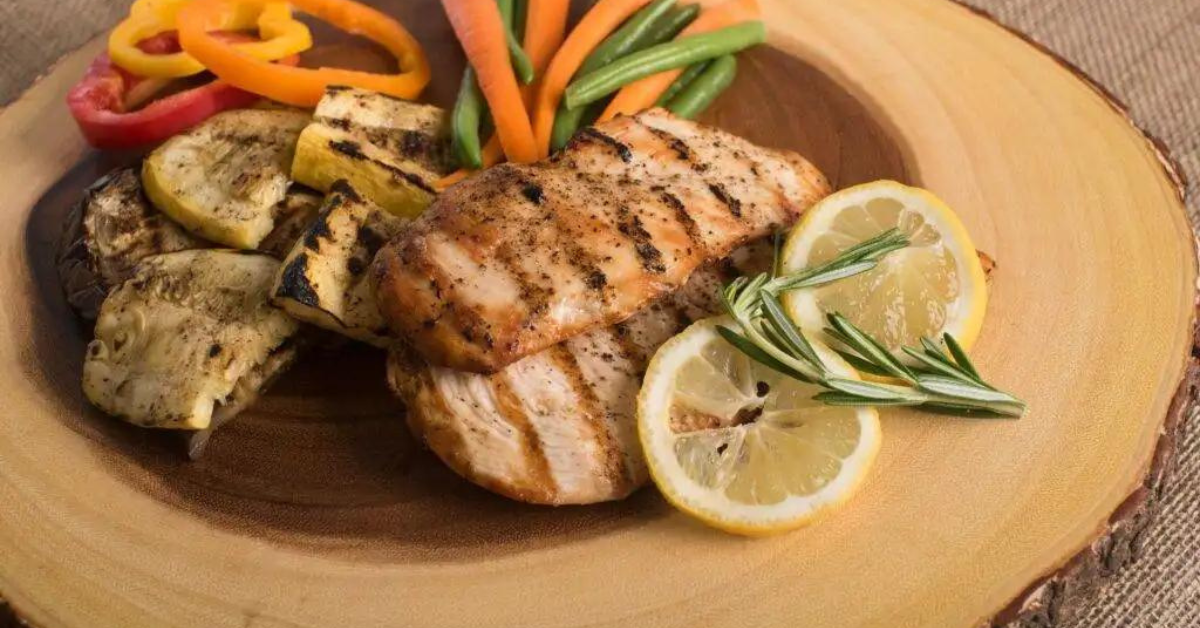
- Chicken and vegetable stir-fry: Sauté chicken strips with colorful vegetables like bell peppers, carrots, and snap peas. Season with soy sauce, ginger, and garlic, then wrap the stir-fry in an injera pancake for a flavorful and nutritious meal.
- Creamy spinach and feta: Sauté fresh spinach with garlic until wilted, then mix in crumbled feta cheese. Spread the spinach and feta mixture onto an injera pancake and roll it up for a tasty vegetarian option.
With these ideas in mind, you can now enjoy the wonderful world of injera pancakes or crepes, whether you’re using teff flour or a teff-free alternative. Get creative with your fillings and savor the unique flavors and textures of Ethiopian cuisine.
Tips for Making Perfect Injera Every Time
To achieve perfect injera every time, follow these expert tips for a delicious and authentic Ethiopian experience. The key to achieving a fluffy texture in your injera is to make sure your batter is the right consistency. It should be thin enough to spread easily across the pan, but not too thin that it becomes translucent. If your injera turns out flat and dense, try adding a little more water to the batter and allowing it to ferment for a longer period of time. This will help create those signature air pockets and give your injera that light and airy texture.
Another common issue when making injera is sticking to the pan. To prevent this, make sure your pan is well seasoned and hot before pouring in the batter. You can also lightly grease the pan with oil or use a non-stick pan. If your injera still sticks, try adjusting the heat. A high heat will help the injera cook quickly and release easily from the pan.
If you find that your injera is not cooking evenly, try rotating the pan while cooking. This will help distribute the heat more evenly and ensure that each injera is cooked to perfection. It’s also important to note that injera is traditionally cooked on one side only, so avoid flipping it like a pancake.
Lastly, if your injera is turning out too sour, you can reduce the fermentation time or add a little bit of sugar to the batter. This will help balance out the flavors and give your injera a milder taste.
Variations and Toppings for Injera
For a unique twist on traditional injera, explore a variety of delicious toppings and flavor combinations. While injera is traditionally served with stews or curries, there are many other ways to enjoy this versatile Ethiopian flatbread. Here are some variations and toppings that will take your injera experience to the next level:
- Injera Pizza: Spread a thin layer of tomato sauce on top of the injera and sprinkle it with your favorite toppings such as cheese, vegetables, or even Ethiopian spiced meat. Place it in the oven until the cheese melts and the edges become crispy. The result is a fusion of Ethiopian and Italian flavors that is absolutely mouthwatering.
- Injera Wraps: Use injera as a wrap for your favorite fillings. Fill it with marinated chicken, beef, or vegetables, and add a dollop of tangy yogurt sauce or spicy chutney for an extra kick. This makes for a quick and satisfying meal on the go.
- Injera Salad: Tear the injera into bite-sized pieces and toss it with a variety of fresh vegetables, such as tomatoes, cucumbers, and lettuce. Drizzle it with a simple vinaigrette made with lemon juice, olive oil, and Ethiopian spices for a refreshing and healthy salad option.
These are just a few ideas to get you started, but feel free to get creative and experiment with different toppings and fillings. Whether you prefer traditional Ethiopian flavors or want to add your own twist, injera is a versatile base that can be customized to suit your taste buds. So go ahead, explore the world of injera variations and toppings, and enjoy the endless possibilities this delicious flatbread has to offer.
Frequently Asked Questions About Making Ethiopian Injera
If you’re new to making Ethiopian injera, you may have some questions about the process. Don’t worry, we’ve got you covered! Here are some frequently asked questions about making Ethiopian injera, along with some helpful answers.
- What are some injera cooking techniques?
There are a few different ways to cook injera. The traditional method involves using a large, round clay plate called a mitad. The mitad is heated over a fire, and the injera batter is poured onto the hot surface. Another option is to use a non-stick frying pan or skillet. Simply heat the pan over medium heat and pour the batter onto the pan, spreading it out into a thin, circular shape. You can also use an electric injera maker, which simplifies the process even further.
- What are some common issues when making injera?
One common issue is that the injera batter doesn’t ferment properly. This could be due to using water that is too hot or not letting the batter sit for long enough. To troubleshoot this, make sure the water is lukewarm and allow the batter to ferment for at least 24 hours. Another issue is that the injera turns out too thick or too thin. Adjust the amount of water in the batter to achieve the desired consistency. Lastly, some people struggle with getting the injera to cook evenly. To solve this, make sure the cooking surface is evenly heated and spread the batter out evenly.
Making Ethiopian injera may seem daunting at first, but with a little practice and these helpful tips, you’ll be able to master the art of injera making in no time. So don’t be afraid to give it a try and enjoy this delicious and versatile Ethiopian staple!
Frequently Asked Questions: The Best Easy Ethiopian Injera Recipe
Can I Use a Different Type of Flour Instead of Teff Flour for Making Injera?
Yes, you can use a different type of flour instead of teff flour for making injera. However, it’s important to note that teff flour is traditionally used due to its unique taste, texture, and health benefits.
How Long Does It Take for the Injera Batter to Ferment?
To speed up the fermentation process for injera batter, you can add a pinch of yeast or use warm water. However, keep in mind that using alternative flours may affect the authenticity of the injera.
Can I Use a Regular Frying Pan Instead of a Traditional Clay Pan to Cook Injera?
Yes, you can use a regular frying pan instead of a traditional clay pan to cook injera. It’s a cooking alternative that many people use, as modern methods adapt to our needs.
How Should I Store Injera to Keep It Fresh for a Longer Time?
To keep injera fresh for longer, store it in an airtight container or wrap it tightly in plastic wrap. You can also freeze it for later use. Alternative flours like teff or wheat can be used to make injera.
Can I Freeze Injera for Later Use?
Yes, you can freeze injera for later use! It’s a great way to preserve it. Just make sure to wrap it tightly in plastic wrap or store it in an airtight container. Also, consider using alternative flours for injera if you have dietary restrictions.

Conclusion
Injera, the traditional Ethiopian flatbread, is a delicious and versatile dish that can be enjoyed in many ways. With just a few simple ingredients and some patience for the batter to ferment, you can easily make your own injera at home. Whether you prefer it as a pancake or a crepe, injera is a perfect addition to any meal. So why not give it a try and experience the unique flavors of Ethiopian cuisine right in your own kitchen?