Creating Homemade Yogurt Using An Instant Pot
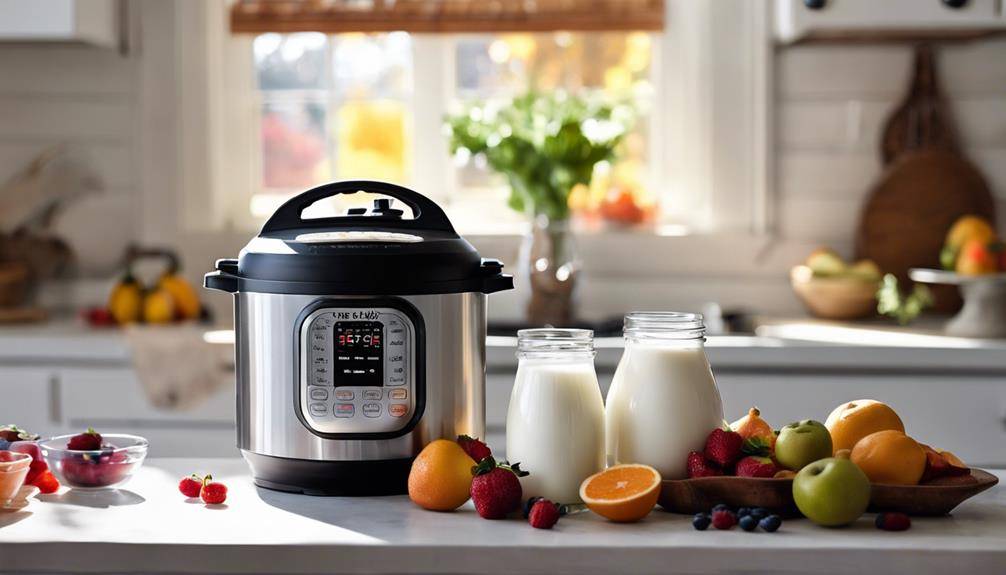
Creating Homemade Yogurt Using An Instant Pot: Creating homemade yogurt using an Instant Pot is easy and rewarding. Start by selecting your milk—whole milk gives creaminess, while low-fat offers a lighter option. Heat the milk to 180°F, then let it cool to about 110°F. Mix in a yogurt starter with live cultures, and set your Instant Pot to the yogurt function for 8 to 12 hours. Longer fermentation makes tangier yogurt. After fermentation, check the consistency by stirring. Once you're satisfied, flavor it with fruits, honey, or spices. Store your yogurt in the fridge for fresh, probiotic goodness. There's even more to explore about perfecting your homemade yogurt!
Understanding Yogurt Basics
Click Here and Turn Every Masterpiece into a Showstopper!
Yogurt is a delicious and nutritious dairy product that's made through a fermentation process. This process involves the transformation of milk into yogurt by adding specific bacteria cultures. These cultures, primarily Lactobacillus bulgaricus and Streptococcus thermophilus, work together to ferment the lactose in milk, producing lactic acid. This acid thickens the milk and gives yogurt its characteristic tangy flavor.
Understanding yogurt fermentation is key to making your own at home. During fermentation, the bacteria multiply, creating a diverse environment that fosters beneficial microorganisms. As a result, homemade yogurt is not just tasty but also packed with health benefits. One of the most significant advantages is that it contains probiotics—live bacteria that are good for your gut health. Probiotics can help balance your intestinal flora, boost your immune system, and improve digestion. When you consume yogurt rich in these beneficial bacteria, you're giving your body a natural way to enhance its overall well-being.
Making yogurt at home allows you to control the ingredients, ensuring you get the highest probiotic benefits without any preservatives or additives. Plus, the satisfaction of crafting your own yogurt adds to the enjoyment of consuming it. By grasping the basics of yogurt fermentation and its health benefits, you're well on your way to creating a delicious and nutritious treat that can be enjoyed in various ways. So, get ready to explore the world of homemade yogurt!
Choosing the Right Milk
When you're making yogurt, the type of milk you choose can really impact the flavor and texture. Whole milk gives you a creamier yogurt, while low-fat options can result in a lighter consistency. Let's explore the differences between these milk types and how they affect your homemade yogurt.
Milk Types Explained
Choosing the right milk is essential for making delicious homemade yogurt. You'll want to take into account the type of milk you use, as its characteristics directly impact the final product. Whole milk offers a rich, creamy texture due to its higher milk fat content, while skim or low-fat options yield a tangier yogurt.
If you prefer milk alternatives, options like almond, soy, or coconut milk can work, but keep in mind they may have different lactose content and might require additional thickeners. For the best flavor and health benefits, look for organic options that come from cows not treated with antibiotics or hormones.
Understanding milk processing is also important, as pasteurization methods vary. Ultra-pasteurized milk may yield different results than pasteurized milk, affecting yogurt texture and taste.
When storing your milk, make sure it's kept in an airtight container to maintain freshness. Proper storage is key to preserving its nutritional benefits. Choose wisely, and you'll set the foundation for a creamy, satisfying homemade yogurt that you can enjoy for weeks!
Whole Vs. Low-Fat
Considering your preferences and dietary needs, the choice between whole and low-fat milk can greatly influence your homemade yogurt's taste and texture. Whole milk provides a creamier, richer flavor due to its higher fat content, which contributes to a smooth and velvety texture. If you're aiming for a luxurious yogurt experience, whole milk is your best bet.
On the other hand, low-fat milk offers a lighter alternative with fewer calories and less saturated fat. While it may not deliver the same creaminess as whole milk, low-fat yogurt can still be delicious and satisfying, especially when you add fruits or sweeteners.
When you weigh the nutritional differences, low-fat milk typically has fewer calories and more protein per serving, making it a suitable option if you're watching your weight or trying to increase your protein intake.
Ultimately, the taste comparison boils down to your personal preference. If you love indulgence, go for whole milk; if you're health-conscious, low-fat might be the way to go. Experimenting with both can help you find the perfect balance for your homemade yogurt!
Essential Ingredients Needed
To make delicious homemade yogurt in your Instant Pot, you'll need just a few essential ingredients. First and foremost, you'll need milk—whether you choose whole, low-fat, or even non-dairy options depends on your preference. The type of milk you use will affect the creaminess and flavor of your yogurt.
Next, you'll need starter cultures. These are vital because they contain the live bacteria necessary for fermentation. You can use store-bought yogurt that lists live cultures on the label or purchase powdered starter cultures specifically designed for yogurt making. Just make certain whatever you choose has active cultures to guarantee proper fermentation.
If you want your yogurt to have a thicker consistency, consider adding thickening agents. Common options include gelatin or powdered milk, which can enhance the texture without altering the taste. If you opt for gelatin, dissolve it in a small amount of warm water before mixing it into your milk. On the other hand, adding powdered milk can help achieve that creamy, rich texture you might be craving.
Lastly, while not mandatory, a pinch of salt can enhance the flavor of your yogurt. Remember, these ingredients are the building blocks of your homemade yogurt, so choose high-quality options for the best results. With these essentials in hand, you're well on your way to creating a tasty and satisfying homemade yogurt experience.
Preparing Your Instant Pot
Before you start making yogurt, you need to gather all the necessary equipment. Make sure your Instant Pot is clean and ready to use, as a good setup is essential for a successful batch. Once everything's in place, you'll be ready to start the yogurt-making process.
Gather Necessary Equipment
As you prepare to make homemade yogurt in your Instant Pot, gathering the right equipment is crucial for a smooth process. First, you'll need your Instant Pot, of course. This versatile kitchen gadget will not only heat the milk but also maintain the ideal temperature for the fermentation process.
Next, grab a measuring cup to guarantee you get the right amount of milk. Whole milk works best, but feel free to experiment with low-fat options if you prefer. You'll also need a thermometer to monitor the milk's temperature; it should reach about 180°F before cooling down to around 110°F for adding the yogurt cultures.
Don't forget a whisk or spoon for mixing everything together. A clean glass jar or container is necessary to hold your yogurt while it ferments. Finally, consider a kitchen towel or lid to keep the warmth in during the fermentation process.
With these items ready to go, you'll set yourself up for success in creating creamy, delicious homemade yogurt. Now that you've gathered your equipment, you're one step closer to enjoying your own yogurt.
Set Up Instant Pot
Setting up your Instant Pot is a straightforward process that guarantees ideal conditions for yogurt-making. Start by placing your Instant Pot on a stable, flat surface and confirm it's plugged in. Familiarize yourself with the Instant Pot features, particularly the yogurt setting, which allows for precise temperature control—vital for successful fermentation.
Next, you'll want to prepare the inner pot. Make certain it's clean and dry, as any residue can affect yogurt safety. If you're using a glass lid, verify it fits correctly. After that, add your milk to the inner pot. The amount can vary, but typically, one quart is a great starting point.
Once you've added the milk, select the "Saute" function to heat it up, stirring occasionally to prevent scorching. After reaching the right temperature, cool it down quickly. You can then add your yogurt starter.
Step-by-Step Yogurt Making
Making yogurt at home with your Instant Pot is easier than you might think. You'll be tapping into a rich yogurt history that spans thousands of years, as people have enjoyed this creamy delight for its taste and health benefits. Start by gathering your ingredients: milk and a few tablespoons of plain yogurt containing live cultures. These cultures are vital, as they'll kickstart the fermentation process, transforming the milk into yogurt.
First, pour your milk into the Instant Pot and heat it until it reaches about 180°F. This step is important, as it helps pasteurize the milk and guarantees a smooth texture. Once heated, let the milk cool down to around 110°F. This is where fermentation science comes into play; the ideal temperature encourages the beneficial bacteria to thrive.
Next, mix in your yogurt starter. Stir gently to guarantee even distribution of the cultures. You'll notice that different yogurt varieties can result from the type of starter you use, whether it's Greek, regular, or a dairy-free option.
After mixing, cover the pot, and set it aside for several hours to ferment. The longer you let it sit, the tangier it'll become. You'll also be reaping the probiotic benefits, which can enhance gut health and boost your immune system. Finally, once fermentation is complete, refrigerate your homemade yogurt. Enjoy it plain, or add fruits and honey to savor its delicious health benefits!
Setting the Yogurt Function
When you set the yogurt function on your Instant Pot, understanding its settings is essential for achieving the best results. Temperature control plays a key role in the fermentation process, so you'll want to pay attention to that. Timing also matters, as it can make the difference between runny and perfectly creamy yogurt.
Understanding Yogurt Function Settings
Understanding the yogurt function settings on your Instant Pot is vital for achieving that perfect homemade yogurt. This setting creates the ideal environment for yogurt cultures to thrive, ensuring a successful fermentation process. When you select the yogurt function, the Instant Pot maintains a consistent temperature, allowing the good bacteria in your yogurt cultures to ferment the milk properly.
You'll notice two options: "Normal" and "More." The "Normal" setting typically runs for about 8 hours, which is perfect for traditional yogurt. If you prefer a tangier flavor or thicker consistency, use the "More" option, which extends fermentation time to around 10 hours.
It's important to remember that the fermentation process depends on both the temperature and time. By adjusting these settings, you can influence the final taste and texture of your yogurt. Always check the yogurt after the cycle ends; if it's not thick enough, you can let it sit for an additional hour or two. This flexibility allows you to customize your yogurt to your liking, making it a fun and rewarding experience.
Temperature Control Importance
The temperature you set on your Instant Pot plays an essential role in the yogurt-making process. When you activate the yogurt function, you're ensuring a stable environment for the fermentation of your milk. If the temperature fluctuates too much, it can negatively impact the fermentation effects, leading to yogurt that's either too runny or overly tangy.
Maintaining a consistent temperature helps the beneficial bacteria thrive, which is vital for achieving that creamy texture and rich flavor you desire. Aiming for around 110°F is ideal for most yogurt cultures. If your Instant Pot has settings to adjust the temperature, take advantage of them to keep it steady.
Timing for Perfect Yogurt
To achieve perfect yogurt, timing is essential once you set your Instant Pot to the yogurt function. You'll want to pay close attention to the fermentation duration to guarantee your yogurt develops the right flavor and texture. Typically, the ideal incubation time ranges from 8 to 12 hours, depending on your taste preferences.
If you prefer a tangier yogurt, aim for the longer end of that spectrum. Conversely, if you like it milder, consider sticking to the shorter duration. During this time, the beneficial bacteria will work their magic, fermenting the milk and transforming it into creamy yogurt.
To set the yogurt function, simply adjust the time using the +/- buttons. Once you've selected your desired fermentation duration, the Instant Pot will maintain a steady temperature, assuring consistent results. Keep in mind that external factors, like the room temperature, can influence the fermentation process.
After the incubation period, check the yogurt's consistency. If it's to your liking, transfer it to the fridge to stop the fermentation. Remember, timing is key to getting that perfect homemade yogurt every time!
Click Here and Turn Every Masterpiece into a Showstopper!
Monitoring Fermentation Time
When making yogurt in your Instant Pot, keeping an eye on fermentation time is vital for achieving that perfect tangy flavor and creamy texture. The key lies in understanding both fermentation temperature and fermentation duration. You want to maintain an ideal temperature of around 110°F to 115°F during the fermentation process. This stable environment allows the beneficial bacteria to thrive, creating the yogurt you love.
Typically, fermentation duration can range from 6 to 12 hours, depending on your taste preferences. If you prefer a milder yogurt, aim for the lower end of this range. On the other hand, if you enjoy a more pronounced tang, let it ferment for closer to 12 hours. It's essential to monitor the process closely, especially if you're new to making yogurt. Use a thermometer to check the temperature inside the Instant Pot, ensuring it stays within the desired range.
Every yogurt culture is unique, so you might find that your ideal fermentation duration varies from batch to batch. Start with a time that aligns with your taste, and take notes on the results. This way, you can fine-tune your method for future batches. Remember, patience is key! Resist the urge to open the lid frequently, as this can disrupt the fermentation environment. Instead, set a timer and let the magic happen. Once your yogurt reaches the desired tanginess, you'll be ready to move on to the next step in your yogurt-making journey!
Checking Yogurt Consistency
Checking the consistency of your yogurt is an essential step in ensuring it meets your expectations. After fermentation, you'll want to assess both the yogurt texture and thickness to determine if it's just right. First, gently stir the yogurt with a clean spoon. This action helps you gauge how well it set. If it's too runny, it might need more time to ferment. You're aiming for a creamy, thick consistency that holds its shape when scooped.
Next, take a closer look at the yogurt's surface. A good yogurt will have a smooth, uniform texture without any watery separation. If you notice excess whey, don't worry too much—it's common, and you can simply drain it off or mix it back in, depending on your preference.
To test yogurt thickness, tilt the container slightly. The yogurt should slide slowly rather than quickly pour out. If it runs off too fast, it likely needs additional fermentation. On the other hand, if it clumps or holds its shape too firmly, it might be on the thicker side, which can also be adjusted by mixing in a little milk after fermentation.
Flavoring Your Yogurt
Flavoring your yogurt opens up a world of delicious possibilities. You can easily create a variety of flavors to suit your taste by incorporating different ingredients. Start with fruit additions like fresh berries, chopped bananas, or seasonal fruits for a natural sweetness and vibrant color. If you prefer something sweeter, explore sweetener options such as honey, maple syrup, or agave nectar to enhance the flavor profile.
For a unique twist, consider adding spice blends like cinnamon or nutmeg. These spices can elevate your yogurt, making it perfect for breakfast or a snack. You can also experiment with extract flavors such as vanilla, almond, or coconut, which can impart a rich, aromatic essence to your yogurt.
If you're a fan of textures, try adding nut toppings like chopped almonds or walnuts for crunch. For a decadent treat, swirl in some chocolate for delightful chocolate swirls. Don't forget about herb infusions; fresh mint or basil can create an unexpected yet invigorating flavor.
For a zesty kick, incorporate citrus zest from lemons or limes, which can brighten the yogurt considerably. Granola mix-ins add both flavor and crunch, making your yogurt a satisfying meal. Remember to tailor your yogurt to your preferences—mix and match these ingredients until you find your perfect combination. Enjoy your homemade yogurt creation, knowing it's deliciously customized just for you!
Storing Your Homemade Yogurt
Properly storing your homemade yogurt is essential for maintaining its freshness and flavor. Start by choosing appropriate storage containers; glass jars or BPA-free plastic containers work well. Make sure they're clean and dry before filling them with yogurt. If you're planning to eat your yogurt within a week, you can store it in the fridge, where it typically has a yogurt shelf life of about 1-3 weeks.
For longer storage, consider freezing yogurt. While freezing may alter the texture slightly, it's still a great way to preserve your yogurt. Portion control is key here—freeze smaller servings in ice cube trays or muffin tins, then transfer them to airtight freezer bags for easier thawing later.
When you're ready to enjoy your yogurt, think about yogurt serving suggestions that can enhance your meals. Top your yogurt with fresh fruits, granola, or honey for a delicious breakfast or snack. You can also use it in yogurt recipe ideas like smoothies or salad dressings, adding a creamy texture and tangy flavor.
If you've flavored your yogurt, it's best to consume it within a week for ideal taste. Keep an eye on the expiration dates of any toppings you use, as they can affect the overall quality of your yogurt. With proper storage and creative serving suggestions, you'll enjoy your homemade yogurt at its best!
Tips for Perfect Yogurt
Achieving perfect yogurt requires attention to a few key details that can make all the difference. First, choose high-quality yogurt cultures. Look for live and active cultures on the label, as these are essential for a successful fermentation process. If you're using a store-bought yogurt as your starter, make sure it contains a variety of beneficial bacteria.
Temperature control is critical. When heating your milk, aim for about 180°F (82°C) to denature the proteins, which helps create a creamy texture. After cooling the milk to around 110°F (43°C), add your yogurt cultures. This temperature is ideal for the bacteria to thrive during fermentation.
Don't rush the fermentation process. Depending on your desired thickness and tanginess, let your yogurt ferment for anywhere from 6 to 12 hours. The longer the fermentation, the tangier the yogurt will be. Keep the Instant Pot in a warm environment, as consistency in temperature encourages the cultures to multiply effectively.
Once fermentation is complete, check the yogurt's consistency. If it's still too runny for your liking, you can strain it using a cheesecloth or fine mesh strainer for a thicker texture. Finally, remember to save a portion of your homemade yogurt to use as a starter for your next batch. This way, you'll always have fresh yogurt cultures on hand, ensuring each batch turns out perfectly. Enjoy your delicious creations!
Click Here and Turn Every Masterpiece into a Showstopper!
Frequently Asked Questions: Creating Homemade Yogurt Using An Instant Pot
Can I Use Non-Dairy Milk for Yogurt-Making?
Yes, you can use non-dairy alternatives for yogurt-making. However, achieving the desired yogurt consistency may require additives like thickeners or stabilizers, as non-dairy milks often lack the same proteins found in traditional dairy products.
How Can I Tell if My Yogurt Has Gone Bad?
To tell if your yogurt's gone bad, check its texture and smell. If it's overly runny, has a strange odor, or shows signs of mold, it's best to discard it immediately for safety.
Is It Possible to Reuse Yogurt as a Starter?
Yes, you can reuse yogurt as a starter! It contains live cultures that kickstart yogurt fermentation. Just make certain your yogurt's fresh and contains active cultures to guarantee successful fermentation for your next batch.
Can I Add Probiotics to My Homemade Yogurt?
Yes, you can add probiotics to your homemade yogurt. They enhance probiotic benefits and improve the yogurt's flavor. Just make sure you mix them well with starter cultures for ideal fermentation and a creamy texture.
How Long Does Homemade Yogurt Last in the Fridge?
Homemade yogurt lasts about one to three weeks in the fridge. To maximize freshness, store it in airtight yogurt containers. Keep an eye on it for any signs of spoilage, like off smells or mold.

Conclusion
Making homemade yogurt in your Instant Pot is not only simple but also rewarding. You've learned the basics, chosen the right milk, and followed the steps to create creamy yogurt just the way you like it. Don't forget to experiment with flavors and store your delicious creation properly. With a few tips and practice, you'll master yogurt-making in no time. Enjoy your tasty, homemade treat that's healthier and more satisfying than store-bought options!