How To Sear Meat Properly
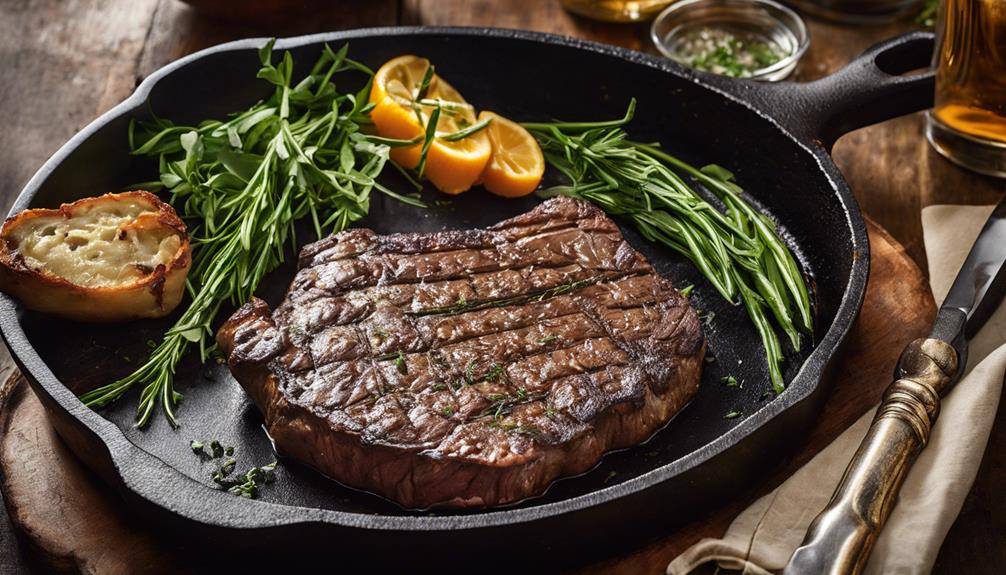
How To Sear Meat Properly; To sear meat properly, start with a hot pan—aim for 400°F to 450°F. Choose quality cuts like ribeye or pork chops and pat them dry to enhance the crust. Season generously with salt and other spices about 30 minutes before cooking. Don’t overcrowd the pan; this prevents steaming. Sear for 3-5 minutes on each side without flipping too soon. After achieving a golden-brown crust, let the meat rest for a few minutes to lock in juices. Follow these steps, and you’ll be well on your way to mastering the perfect sear while discovering even more tips along the way.
Click Here and Turn Every Masterpiece into a Showstopper!
Understanding the Searing Process
Searing meat is all about creating that perfect crust, which locks in flavor and moisture. It’s an essential step in cooking that many home chefs often misunderstand due to common searing myths. One prevalent myth is that you should always sear meat at high temperatures. While it’s true that high cooking temperatures are important, the key is to find the right balance. You don’t want to scorch your meat before it has a chance to cook through.
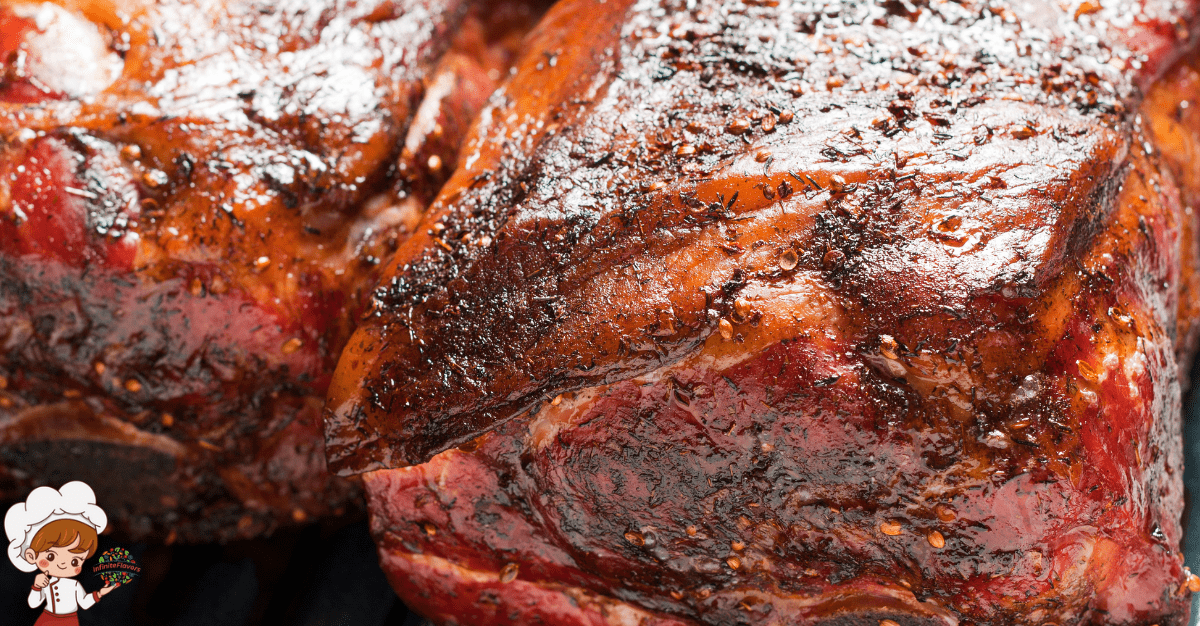
To achieve that ideal sear, start with a hot pan. Preheat your skillet or grill until it’s scorching. This helps create that Maillard reaction, which is responsible for the rich flavors and appealing color you’re after. However, be mindful of the cooking temperatures; too hot can lead to burnt exteriors and raw interiors. Aim for a temperature around 400°F to 450°F for best results.
Another myth you might encounter is that you should constantly flip your meat to guarantee even cooking. In reality, letting it sit undisturbed allows for better crust formation. Patience is key here—give it a few minutes before turning it.
Lastly, remember that searing isn’t just for beef. It works wonders on pork, chicken, and even some vegetables. Understanding the searing process will elevate your cooking, transforming simple ingredients into mouthwatering dishes. So next time you sear, keep these principles in mind for delicious results.
Choosing the Right Meat
When it comes to searing meat, picking the right cut is essential for achieving that perfect crust. You’ll want to take into account factors like freshness and thickness, as they can greatly impact your results. Let’s explore the best cuts for searing and how to guarantee you’re choosing quality meat.
Best Cuts for Searing
Choosing the right cuts of meat is essential for achieving that perfect sear. You’ll want to focus on cuts with a good amount of marbling and thickness, as these attributes promote a flavorful crust. Ribeye steak is a top choice, known for its rich flavor and tenderness. If you’re after something more premium, filet mignon delivers a buttery texture that sears beautifully.
Don’t overlook sirloin tips and flank steak, which can also provide a hearty sear when cooked right. For those who enjoy pork, pork chops are fantastic for a crispy exterior and juicy interior. If you’re feeling adventurous, lamb shoulder offers a unique flavor profile that responds well to high heat.
Chicken thighs are another excellent option; they’re forgiving and can develop a wonderful char. Venison steaks are lean and flavorful, perfect for a quick, high-heat cook. Finally, consider seafood options like scallops or shrimp, which can achieve a lovely sear while remaining tender. Game meats, too, can yield impressive results when seared properly. Choose wisely, and you’ll be on your way to mastering the art of searing!
Freshness and Quality Factors
Fresh, high-quality meat is vital for achieving the best sear possible. When you’re sourcing meat, consider local farms or reputable butchers who prioritize quality. Look for freshness indicators like a bright color, firm texture, and a clean smell. These signs suggest that the meat hasn’t been sitting around too long.
Storage techniques also play an important role in maintaining meat quality. Always refrigerate your meat promptly and keep it sealed to prevent exposure to air, which can lead to spoilage. If you’re not using it within a couple of days, freezing is a good option—just remember to wrap it tightly to avoid freezer burn.
Conduct a quality assessment before you buy. Check for marbling, as intramuscular fat contributes to flavor and tenderness. You should also inquire about the meat’s origin, as pasture-raised or grass-fed options often offer superior taste and texture. By paying attention to these factors, you’ll make certain you’re cooking with the best ingredients possible, setting the stage for a perfect sear. Investing time in selecting quality meat pays off in flavor and texture, making your searing efforts truly shine.
Thickness for Optimal Results
For the best sear, the thickness of your meat plays an essential role. Choosing the right meat thickness can make a significant difference in achieving that perfect crust while keeping the inside juicy. Generally, a thickness of about 1 to 1.5 inches is ideal for most cuts. This thickness allows for the Maillard reaction to occur effectively, which creates that desirable flavor and color.
When selecting your meat, consider how cooking times will vary based on thickness. Thicker cuts take longer to cook, which means you need to monitor the heat to avoid burning the outside before the inside reaches the desired doneness. Conversely, thinner cuts can easily overcook if you’re not careful.
If you prefer a rare or medium-rare finish, stick with medium-thick cuts. For well-done, you might opt for thicker pieces, allowing for a longer cooking time without compromising the sear. Remember, a good sear requires patience and attention to detail, so adjust your cooking times accordingly based on the thickness of your meat. By paying attention to these factors, you’ll achieve excellent results every time.
Preparing Your Meat
When you’re preparing your meat, the right cut makes all the difference. Make sure to dry the surface to achieve that perfect sear, and don’t forget to season it well for added flavor. With these steps, you’re setting yourself up for a delicious result.
Choosing the Right Cut
Choosing the right cut of meat is essential for achieving a perfect sear. Different cuts have unique characteristics that can affect how well they sear and how they taste. For instance, ribeye and sirloin are great choices due to their marbling importance. The fat found within these cuts helps to keep the meat juicy while creating a rich flavor during the searing process.
When selecting your meat, consider the thickness as well. Thicker cuts, like a bone-in ribeye, provide a nice crust on the outside while staying tender and juicy inside. On the other hand, thinner cuts, such as flank steak, can sear quickly but may require precise timing to avoid overcooking.
You should also pay attention to the meat’s color and texture. Look for cuts that have a bright color and a firm texture, which typically indicates freshness. Remember, the right cut not only impacts the sear but also influences the overall dining experience. By choosing wisely, you’ll set yourself up for a delicious meal that showcases the art of searing.
Click Here and Turn Every Masterpiece into a Showstopper!
Drying the Surface
To achieve a perfect sear, you should always dry the surface of the meat thoroughly. Excess surface moisture can hinder the browning process, preventing that delicious crust from forming. Start your meat preparation by employing effective drying methods. One popular technique is the towel technique, where you pat the meat dry with paper towels. This simple step removes any unwanted moisture.
If you have the time, consider air drying your meat in the refrigerator for a few hours or overnight. This method not only dries the surface but also enhances flavor and texture. For an added boost, you can use salt application. Applying a light coat of salt can draw out moisture and help create that coveted sear.
Keep in mind the drying time; a few minutes can make a difference. Ascertain you’re not rushing through this important step. Remember, a dry surface is key to achieving that beautiful, caramelized crust. Following these kitchen tips will set you up for success, allowing the natural flavors of the meat to shine through during cooking.
Seasoning for Flavor
Seasoning your meat is essential for enhancing its flavor and ensuring a delicious outcome. Start by considering your seasoning ratios, which are vital for achieving the right balance. For dry applications, use spice rubs or herb blends that complement your meat’s natural flavors. When using salt, apply it generously but evenly; this helps draw out moisture and enhances taste. Experiment with different pepper varieties to add depth—freshly cracked black pepper can elevate your dish greatly.
If you prefer wet seasonings, explore various marinade options. A good marinade not only infuses flavor but also tenderizes the meat. Just remember to keep seasoning timing in mind; marinating for too long can result in an overly salty flavor profile.
For best results, season your meat about 30 minutes before cooking. This allows the flavors to penetrate without drawing out too much moisture. Whether you stick to simple salt and pepper or get creative with complex herb blends, the right seasoning can make all the difference in your searing process. So, take your time and enjoy the art of seasoning; your taste buds will thank you!
Selecting the Ideal Pan
Your choice of pan can make all the difference when it comes to searing meat effectively. For the best results, consider using a cast iron or stainless steel pan. Both materials excel in heat retention, which is essential for achieving that perfect crust on your meat. Cast iron pans are particularly excellent due to their weight distribution and ability to maintain high temperatures, making them a popular choice among chefs.
When selecting the right pan size, make sure it’s large enough to accommodate the meat without crowding. Crowding can lead to uneven cooking and steaming instead of searing. A larger cooking surface allows for better airflow and promotes even browning. If you’re cooking multiple pieces of meat, opt for a pan that provides ample surface area.
While nonstick surfaces may seem appealing, they generally don’t handle high heat as well as cast iron or stainless steel, which can hinder your searing efforts. Nonstick pans can also limit the development of fond—the delicious browned bits that enhance flavor in your dishes.
The Importance of High Heat
When you sear meat, using high heat is essential for achieving that perfect crust. This intense temperature triggers the Maillard reaction, enhancing flavor and texture in ways that lower heat simply can’t match. You’ll notice how a good sear can elevate your dish, making every bite more delicious.
Maillard Reaction Explained
One of the most vital aspects of searing meat is the Maillard reaction, which occurs when high heat causes sugars and amino acids to interact, creating those delicious brown crusts we all love. This complex process, rooted in Maillard chemistry, is fundamental for achieving that rich, savory flavor profile that elevates your dishes. When you heat your pan to the right temperature, you’re setting the stage for these chemical interactions to take place.
As the meat cooks, the heat breaks down proteins and sugars, resulting in a range of flavorful compounds. If you don’t hit that high heat, you risk missing out on the Maillard reaction entirely, leading to a less appealing appearance and taste. The ideal temperature promotes rapid browning and caramelization, which are key to revealing those enticing flavors.
To harness the power of the Maillard reaction, make certain your pan is preheated and dry before adding the meat. This guarantees peak contact and heat transfer, so you can achieve that perfect crust. Embrace the Maillard chemistry in your cooking, and you’ll transform your meat dishes into mouthwatering masterpieces.
Flavor Development Benefits
Achieving the perfect sear not only enhances the visual appeal of your meat but also considerably boosts flavor development. When you apply high heat, you trigger the Maillard reaction, leading to a remarkable umami boost that intensifies the overall flavor. This process creates a rich crust formation, enhancing both aroma and taste complexity.
With the right sear, you’ll experience savory richness that hits the palate with satisfaction. The caramelization effects produce a delightful sweetness, balancing out the seasoning and elevating your dish to new heights. This depth perception in flavors guarantees that each bite delivers a satisfying experience.
High heat also allows the meat to develop a robust flavor intensity, making it unforgettable. You’ll notice how the aroma enhancement during searing invites everyone to the table, amplifying anticipation before the first bite. By mastering the art of searing, you can create a dish that not only looks appealing but also offers a complex layer of flavors that leave a lasting impression. So, don’t underestimate the importance of that initial high-heat sear; it’s the key to revealing a world of flavor potential in your cooking.
Texture Enhancement Techniques
Searing meat at high heat is essential for enhancing texture, as it creates a tantalizing crust while locking in moisture. To achieve this, focus on your oil choices; oils with high smoke points, like avocado or grapeseed oil, work best. You’ll also want to control the temperature carefully, ensuring your pan is hot enough to promote surface caramelization.
Incorporate marinade techniques that complement your cooking methods; acidic marinades can enhance tenderness, while spice blends can add depth to crust variations. Experiment with ingredient combinations that suit your flavor pairings, elevating the overall dish.
When you sear, the intense heat promotes the Maillard reaction, resulting in a beautifully browned crust that contrasts with the tender meat inside. Pay attention to timing—overcooking can compromise meat tenderness.
Timing Your Sear
When it comes to timing your sear, patience is key. You can’t rush the process if you want that perfect crust. First, consider the ideal temperatures for your cooking surface. Preheat your pan until it’s hot enough to create those satisfying sizzling sounds. The right temperature will vary based on the thickness of the meat you’re working with; thicker cuts generally require more time to sear effectively.
Using timing techniques can help you navigate the cooking stages. For instance, a general rule is to sear for about 3-5 minutes on one side, depending on the meat’s thickness. Keep an eye on visual cues, such as a golden-brown crust forming around the edges. If you see this, it’s likely time to flip.
Aroma indicators can also guide you. When the meat starts releasing a rich, savory scent, that’s your signal to check for doneness. Don’t be afraid to lift a corner of the meat to peek underneath. If it’s not ready, give it another minute or two. Remember, the patience needed here means allowing the meat to develop flavor without prematurely moving it around the pan.
Click Here and Turn Every Masterpiece into a Showstopper!
Techniques for Optimal Crust
To create the perfect crust on your meat, it is vital to focus on a few key techniques. First, make sure your meat is completely dry before you start. Patting it down with paper towels removes moisture that can hinder crust formation. Next, preheat your pan or grill until it’s screaming hot. This high temperature is essential for achieving a great sear and locking in those juices.
When it comes to sear timing, resist the urge to move your meat too soon. Let it sit undisturbed for the first few minutes. This allows a golden-brown crust to form. Depending on the thickness of the meat and your desired doneness, you’ll want to monitor the timing closely. Thin cuts may only need a couple of minutes per side, while thicker cuts require longer.
Once you’ve achieved that beautiful crust, flip your meat gently with tongs to maintain the integrity of the crust. If you’re searing a thicker cut, consider finishing it in the oven after your initial sear. This technique helps cook the inside while preserving that perfect outer layer.
Flavor Enhancements and Seasoning
Enhancing the flavor of your meat starts with proper seasoning. You’ll want to create a harmonious balance that brings out the best in your dish. Begin by experimenting with herb infusions, which can add depth and aroma. Fresh herbs like rosemary, thyme, or basil work wonders when infused into marinades or oils.
Next, consider using spice blends tailored to your meat type. A robust mix of spices can elevate your dish, so explore combinations that include paprika, cumin, or chili powder. Flavor marinades are another fantastic way to infuse your meat with taste. They allow the flavors to penetrate deeply, especially if you let them sit for a few hours or overnight.
Don’t forget about citrus zests; they add a bright, fresh flavor that can lighten richer meats. A sprinkle of lemon or lime zest can be a game-changer. For that extra punch, focus on umami boosts. Ingredients like soy sauce, miso, or even mushrooms can intensify savory notes.
When it comes to seasoning ratios, remember that balance is key. Too much salt can overpower your meat, so use salt techniques like salting early to draw out moisture and enhance flavor. Finally, finish your dish with aromatic oils, such as garlic or chili oil, to give it that final burst of flavor. By thoughtfully combining these elements, you’ll create a beautifully seasoned piece of meat that’s sure to impress.
Resting the Meat
After searing your meat to perfection, giving it time to rest is vital. This simple step allows the juices to redistribute throughout the meat, enhancing both flavor and tenderness. When you cut into meat that hasn’t rested, you’ll likely notice it’s drier and less flavorful due to the loss of those precious juices.
The ideal resting duration varies depending on the size of your cut. For smaller pieces, like steaks, aim for about 5 to 10 minutes. Larger cuts, such as roasts, require more time—up to 20 minutes or even longer. During this time, the internal temperature continues to rise slightly, further cooking the meat without overdoing it.
Resting not only helps with juice retention but also improves overall texture. As the meat rests, it becomes more tender, making every bite delightful. Plus, it gives the flavors a chance to meld, resulting in better flavor absorption.
When you’re ready to serve, consider slicing against the grain to maximize tenderness. Pair your perfectly rested meat with sides that complement its flavor, like roasted vegetables or a fresh salad. This thoughtful approach guarantees each meal is satisfying and delicious. Remember, patience pays off; giving your meat the proper resting time is a small but significant step that elevates your culinary experience. So, next time you sear, don’t rush to the plate—let your meat rest and enjoy the rewards.
Common Mistakes to Avoid
What mistakes should you steer clear of when searing meat? First, don’t rush the process. Preheating your pan is essential; if it’s not hot enough, your meat won’t develop that beautiful crust. Use a heavy skillet or cast iron pan to guarantee even heat distribution. Another common pitfall is overcrowding the pan. When too much meat is in the skillet, it lowers the temperature, causing steaming instead of searing. Always leave enough space for each piece to breathe.
Next, avoid the temptation to constantly flip your meat. Let it sit for a few minutes on each side to form that desired crust. If you keep moving it around, you’ll miss out on that rich flavor. Also, don’t forget to pat your meat dry before seasoning; moisture on the surface will hinder the searing process.
Lastly, be cautious with your sauce pairings. Adding a sauce too early can create steam and interfere with the sear. Instead, save your sauce for after the meat has properly cooked. When it comes to serving, consider your garnish options. Fresh herbs, a sprinkle of sea salt, or a drizzle of olive oil can elevate your dish, but make sure not to overpower the meat’s natural flavor.
Click Here and Turn Every Masterpiece into a Showstopper!
Frequently Asked Questions: How To Sear Meat Properly
Can I Sear Frozen Meat, or Should It Be Thawed First?
You shouldn’t sear frozen meat due to safety concerns. Thawing guarantees even cooking and proper temperatures. Cooking times will vary considerably, so it’s best to thaw first for a better and safer result.
How Does Altitude Affect the Searing Process?
High altitude affects your searing process by altering cooking times and moisture retention. You’ll notice that reduced pressure impacts flavor development, making it essential to adjust your techniques for ideal results.
What Type of Oil Is Best for Searing?
When searing, you’ll want an oil with a high smoke point, like canola or grapeseed. These oils won’t burn quickly, and their neutral flavor profile won’t overpower the delicious taste of your meat.
Is It Necessary to Cover the Meat While Searing?
You don’t need to cover the meat while searing. Exposing it to high heat helps achieve the desired meat temperature. Focus on your searing technique for that perfect crust without trapping moisture.
Can I Sear Meat in a Non-Stick Pan?
You can sear meat in a non-stick pan, but it has disadvantages. The high heat required for searing can damage the coating. Consider using traditional pans for better heat retention and effective searing techniques.

Conclusion
Searing meat properly can elevate your dishes to new heights, bringing out rich flavors and a delightful crust. By understanding the process, choosing the right meat, and using high heat, you’ll achieve mouthwatering results every time. Don’t forget to let your meat rest for maximum juiciness. Avoid common pitfalls, and you’ll master the art of searing in no time. So grab your pan and get started—your taste buds will thank you!